22 Living Room Wall Decor Ideas That Transform a Blank Wall
A blank living room wall can make a well-furnished room feel unfinished, with nowhere for the eye to rest. The fix is choosing decor sized to the wall and furniture below it, hung at a natural height. Art too small floats awkwardly; art too large crowds the sofa. Scale, spacing, and fixing matter as much as beauty, and most disappointing walls fail on measurement.
Looking for more inspiration? Our Nest Decorz homepage gathers the latest home decor ideas, seasonal decorating guides and room-by-room styling tips in one place — start there and explore.
These 22 ideas cover walls above a sofa, beside a fireplace, around a television, and in rentals where drilling is not allowed. Each gives hanging height, spacing, materials, hardware, cost, and the mistake to avoid. Measure first, note studs, outlets, and switches, and photograph the wall in daylight, because a paper plan prevents unnecessary holes.
1. Oversized Single Artwork

Choose one oversized artwork spanning roughly two-thirds to three-quarters of the sofa width below it, with its centre at 57 to 60 inches from the floor, the height most people naturally look at. A 48 by 36 inch piece suits a standard sofa; a larger wall can take 60 by 40 inches. Hang it 6 to 8 inches above the sofa back, in a wood or slim black metal frame, or as a gallery-wrapped canvas, tied to cushion colours. Budget about 120 to 450 dollars for a ready-made large print and frame, or 500 to 900 dollars for an original or custom-framed piece. On drywall use two hooks or a French cleat rated above the weight; on plaster use a masonry bit and wall plugs. The mistake to avoid is hanging a small print high and alone, which makes the wall feel emptier than leaving it bare.
2. Salon-Style Gallery Wall
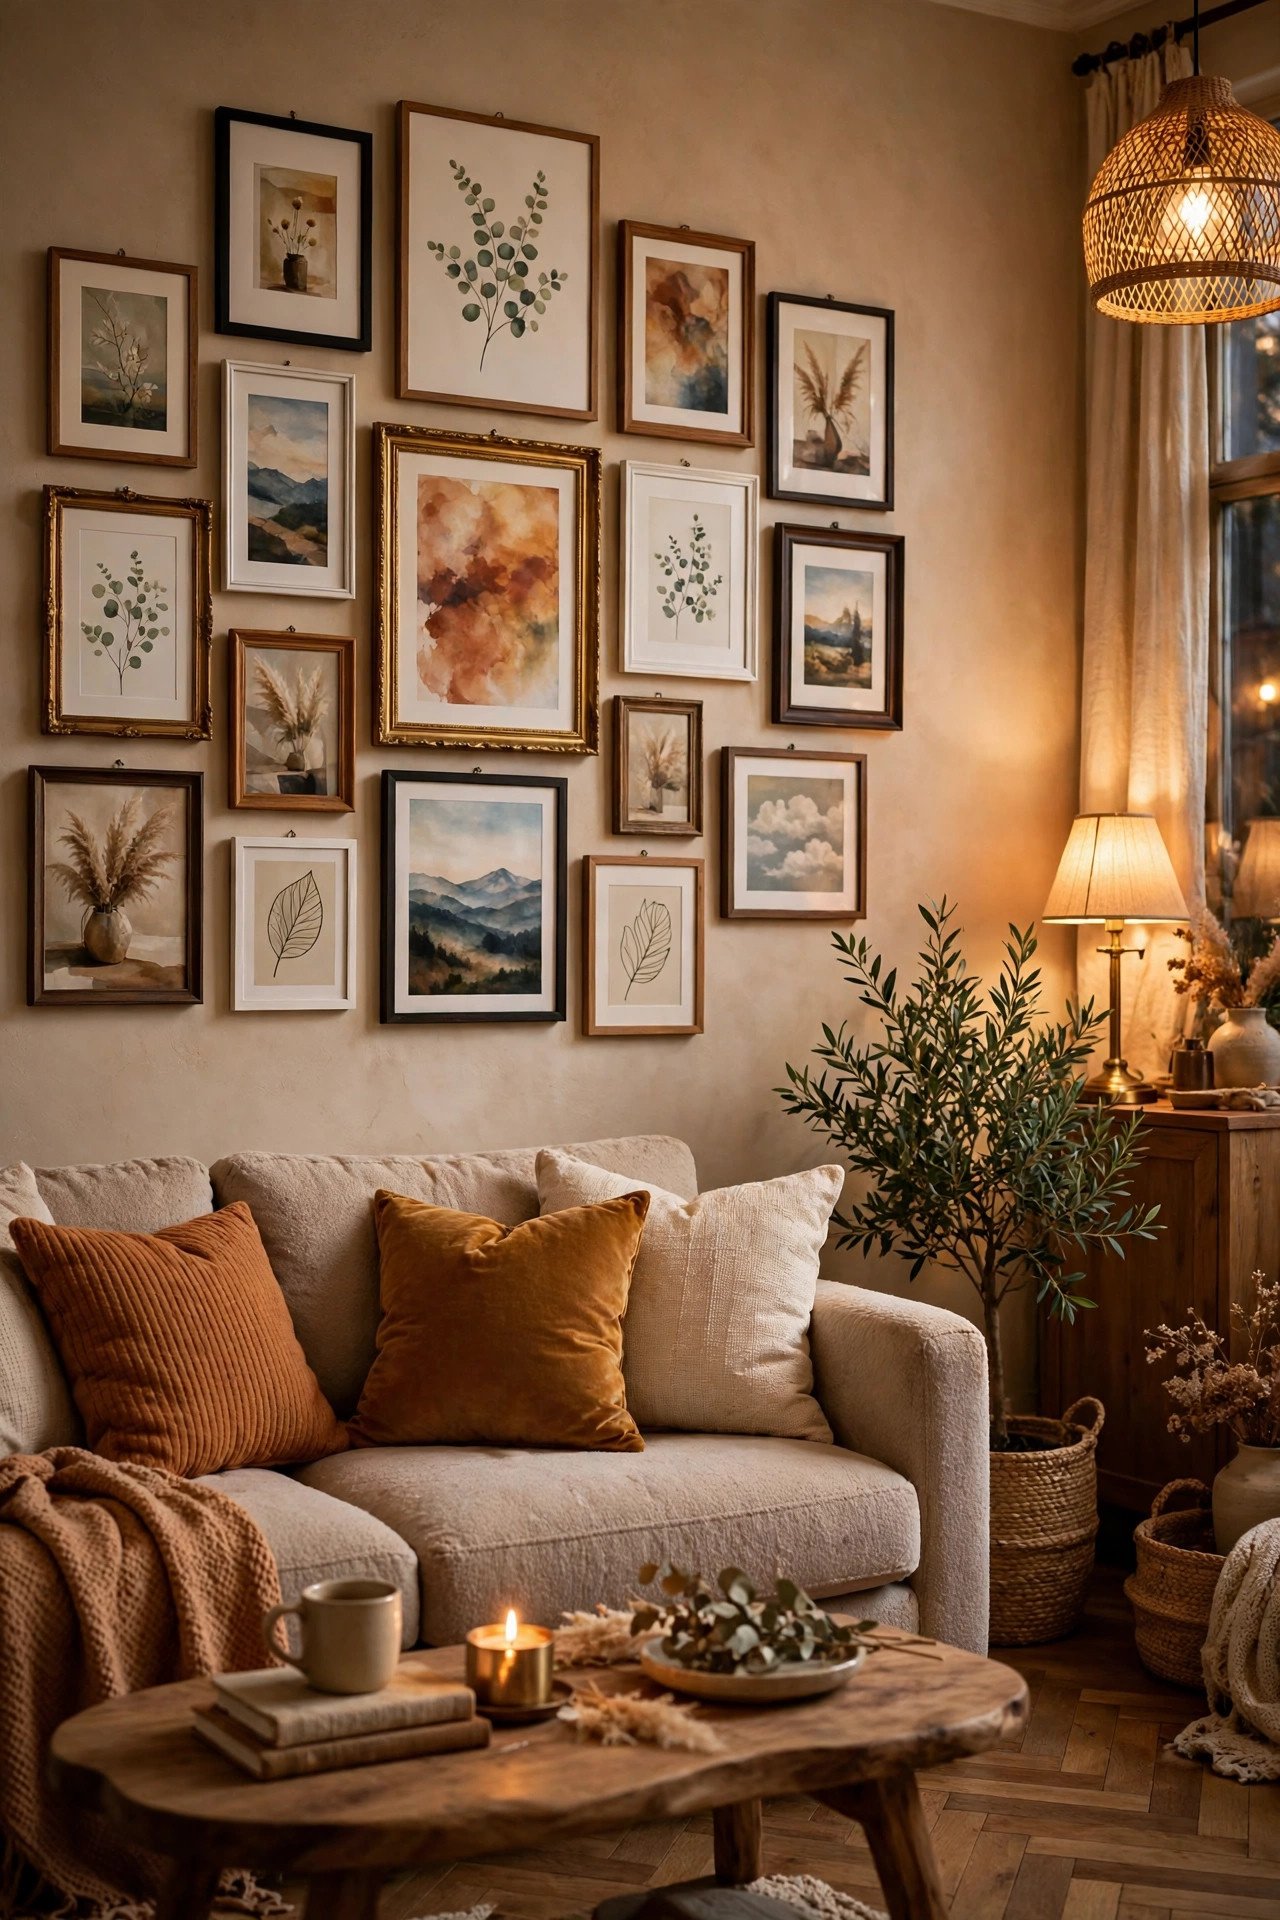
A salon-style gallery wall groups many frames of different sizes in an organic cluster, suiting a collected, lived-in room and filling a wide wall without one dominant piece. Start with a large anchor frame, build outward with 2 to 3 inches between frames, keep the shape roughly rectangular, centre it at 57 to 60 inches, and lay it out on the floor first. Mix photographs, prints, and one mirror for texture, using frames in two finishes at most, such as black and natural wood. Expect to spend 150 to 400 dollars on frames and prints, plus hooks. Use individual hooks for each frame on drywall, or picture-rail hooks on plaster, checking each piece with a level. The mistake to avoid is spacing frames too widely, which breaks the cluster into isolated pictures and loses the salon effect.
3. Grid Gallery Wall
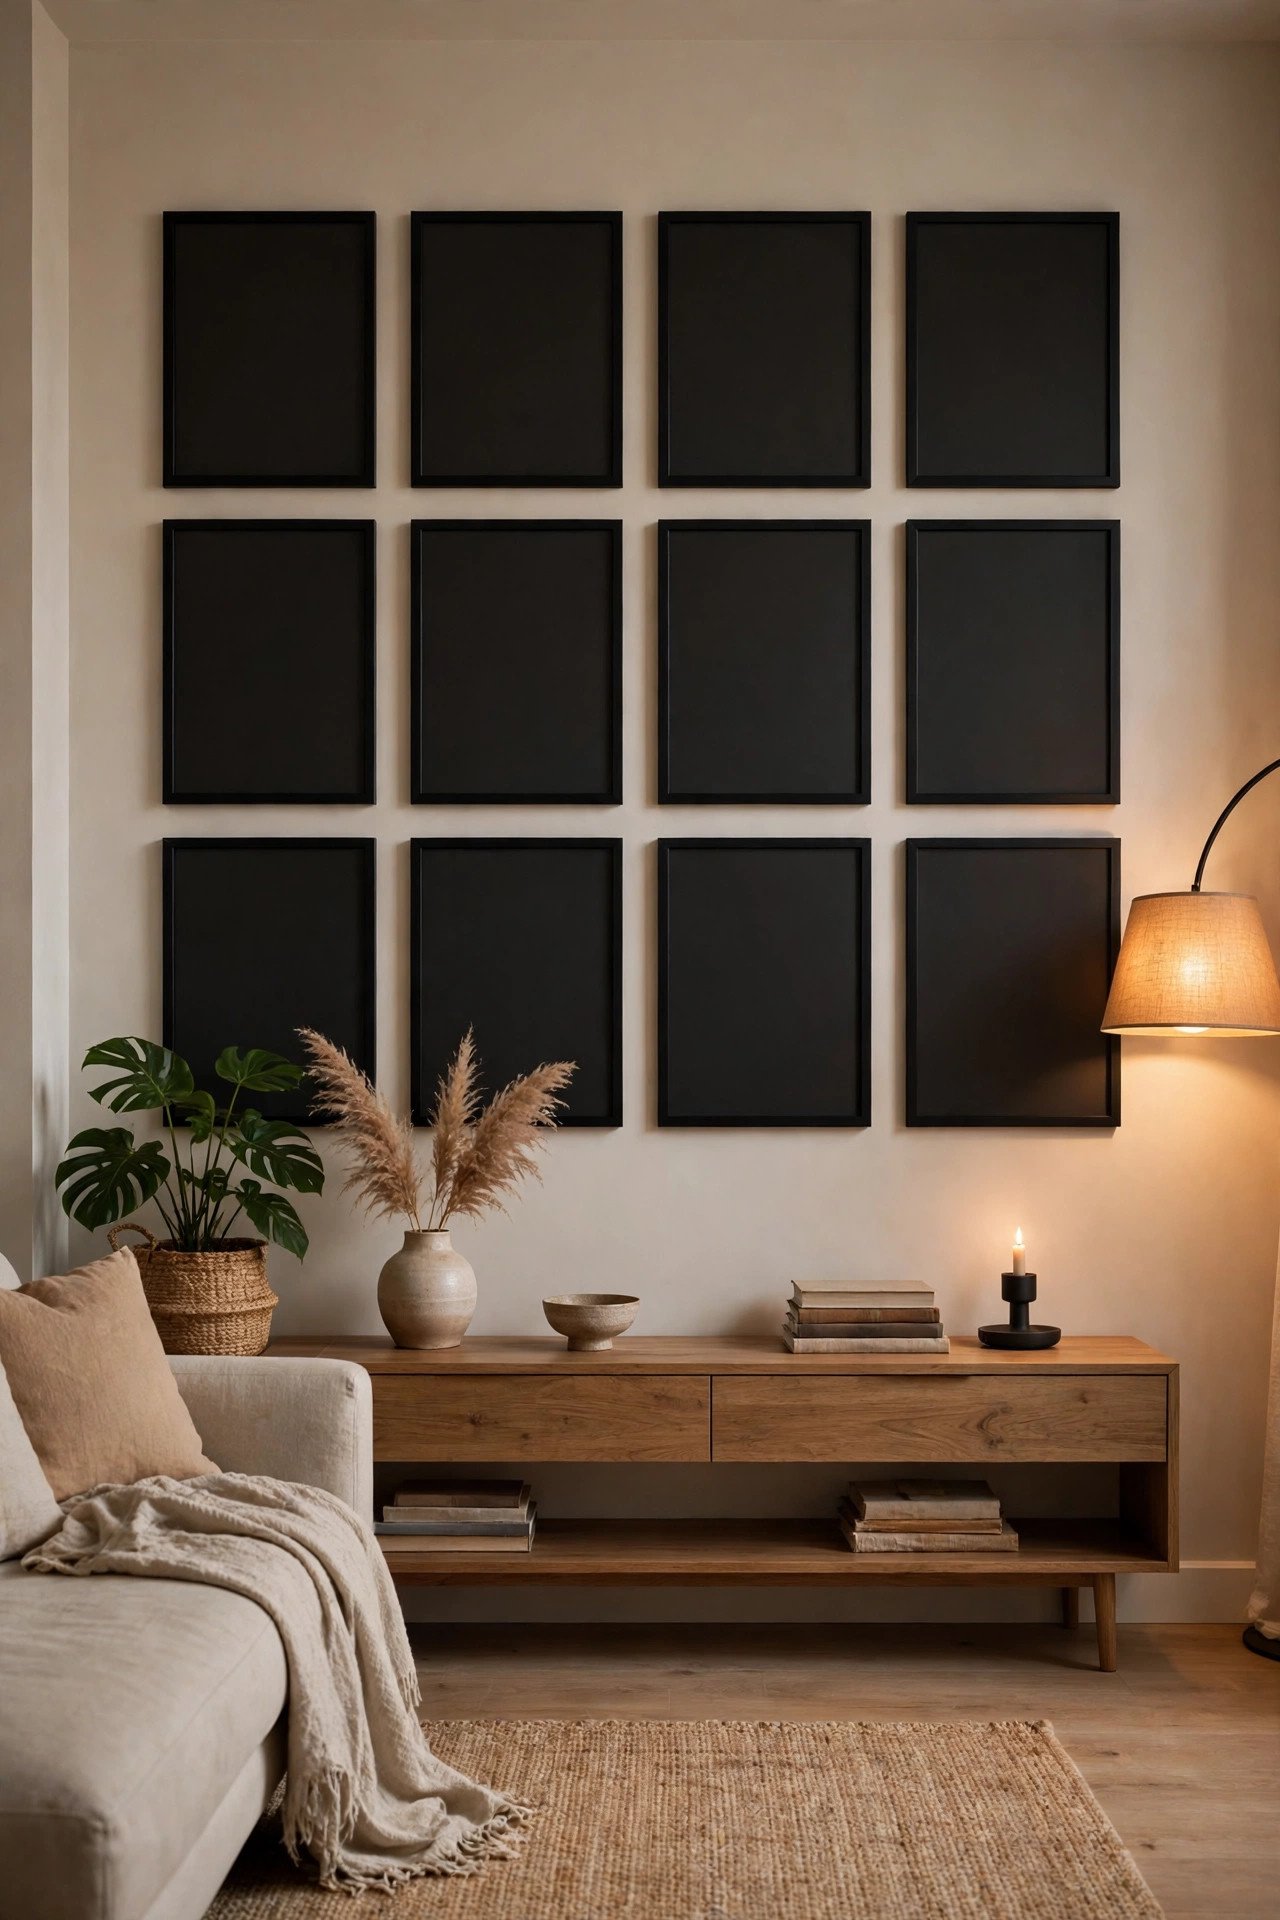
A grid gallery wall uses identical frames in neat rows and columns, giving a calm, tailored look that works in modern and traditional rooms and is easy to keep balanced. Choose identical frames and mats, spaced 2 to 3 inches apart, so the grid reads as one panel. A four-frame grid of 16 by 20 inch frames suits a console wall; a nine-frame grid of 12 by 12 inch frames fills a wider wall. Centre it at 57 to 60 inches, or 6 to 8 inches above furniture. Black frames with white mats suit most art; oak warms pale walls; keep one theme, such as landscapes. Budget 120 to 300 dollars, using a laser level and paper templates. The mistake to avoid is mixing frame sizes or finishes, which turns a crisp grid into a messy cluster. Consider living room flooring ideas too, because floor tone affects how dark the frames read against the wall.
4. Statement Mirror

A large statement mirror makes a living room feel brighter and larger, reflects window light, and fills a blank wall with a single confident object. Choose a mirror at least two-thirds the width of the furniture below it; above a sofa, aim for 36 to 48 inches wide, hung with its centre at 57 to 60 inches from the floor and 6 to 8 inches above the sofa back. Round mirrors soften straight lines; arched mirrors add height; slim brass, black, or wood frames suit most styles. Check the reflection first: facing clutter doubles the wrong view, facing a window doubles light. Budget 150 to 500 dollars, and never hang a heavy mirror from a single nail. Use two D-rings and anchors rated for the full weight on drywall, or screws into studs or masonry fixings on plaster, with a second person helping. The mistake to avoid is hanging a mirror too high, which reflects the ceiling and wastes its light-bouncing benefit.
5. Mirror Grouping
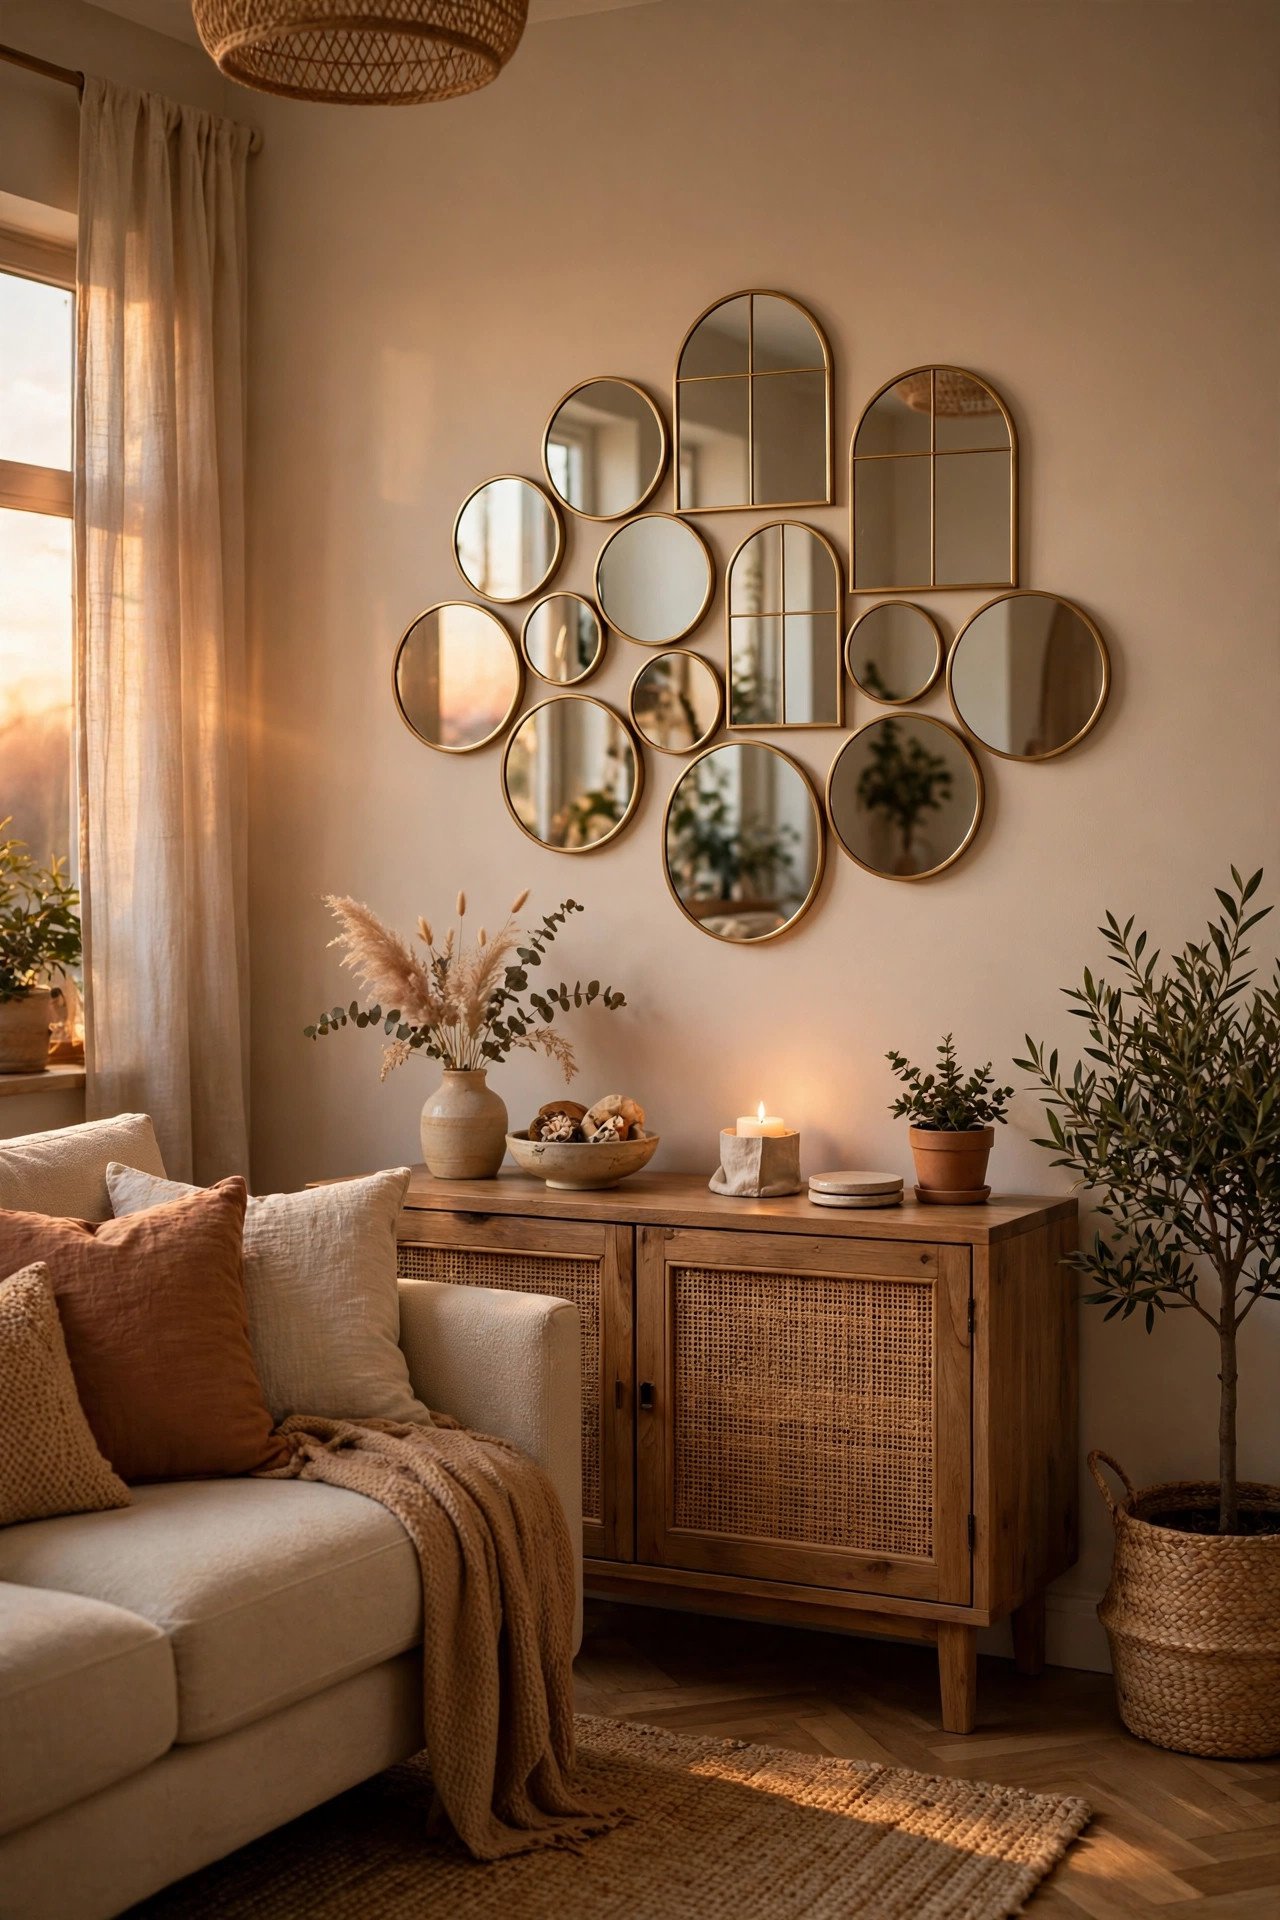
A grouping of several smaller mirrors creates sparkle and movement where one large mirror would feel too heavy, and it fills an awkward narrow or tall space flexibly. Combine three to five mirrors in varied shapes, such as round, oval, and arched, keeping 2 to 3 inches between them and a shared finish, such as brass or black, so the group feels intentional. Plan it on the floor first, centre it at 57 to 60 inches, and place the largest mirror slightly off-centre. Beveled, starburst, and round mirrors work, but avoid too many ornate frames. Budget 80 to 250 dollars for a ready-made set, or more for vintage glass. Hang each mirror on its own rated hook or anchor, checking each weight separately. The mistake to avoid is placing mirrors where they reflect a television screen, creating glare in the seating area. Good interior design treats mirrors as light and view management, not just decoration, so test the reflection from your usual seat before fixing anything.
6. Floating Shelves Vignette

Floating shelves turn a blank wall into a flexible display you can restyle in minutes, working well above a sofa, beside a fireplace, or in a small room where a deep bookcase would crowd the floor. Install two or three shelves, spaced 12 to 18 inches apart, lowest 6 to 8 inches above the sofa back or 48 to 54 inches over a console. Choose solid wood shelves 8 to 10 inches deep, or 6-inch shelves for prints, totalling two-thirds of the furniture below. Style with mixed heights, a plant, books, a print, and a vase, leaving breathing space. Budget 60 to 200 dollars for shelves and brackets. Fix into studs, or use toggle bolts on drywall and masonry anchors on plaster, rated for the loaded weight. The mistake to avoid is overloading shelves with too many small items, which makes the wall look like a shop display.
7. Picture Ledges
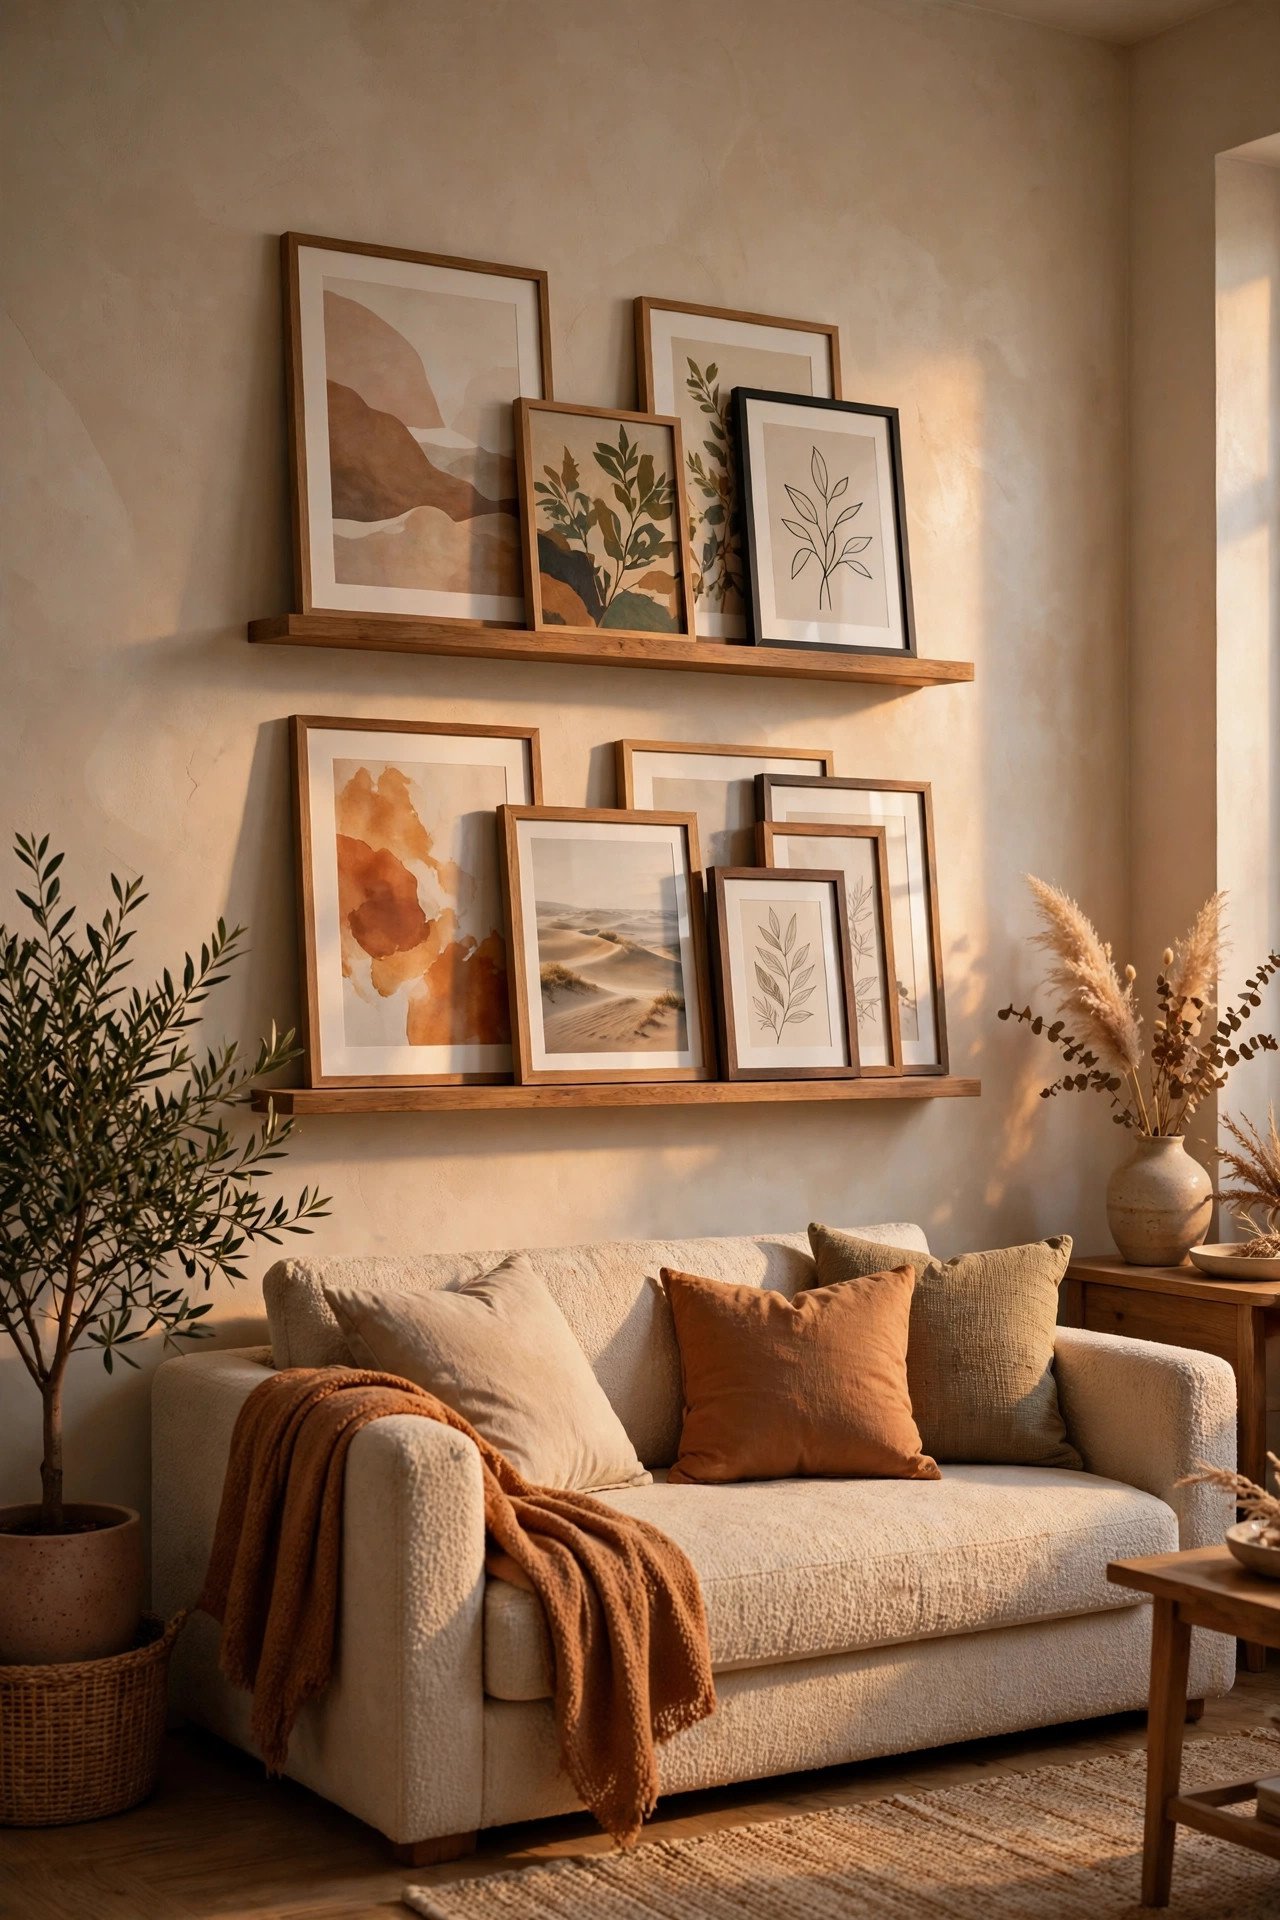
Picture ledges are shallow shelves with a lip that let framed art lean against the wall, so you can layer frames and swap pictures without hanging every frame individually. Install one ledge centred at 57 to 60 inches, or two spaced 14 to 18 inches apart, lower 6 to 8 inches above a sofa, 36 to 60 inches long. Lean large frames behind smaller ones, overlapping slightly, with a small plant at one end. Use oak, walnut, or painted-white ledges, keeping frame finishes to two. Budget 40 to 120 dollars per ledge, plus frames, and fix ledges into studs or with toggle bolts on drywall, because a loaded ledge carries more weight than a single picture. Check the lip holds frames securely, adding a small adhesive bumper for tall frames. The mistake to avoid is lining frames up in a rigid row with equal spacing, which wastes the layered, casual charm of ledges.
8. Board-and-Batten Paneling
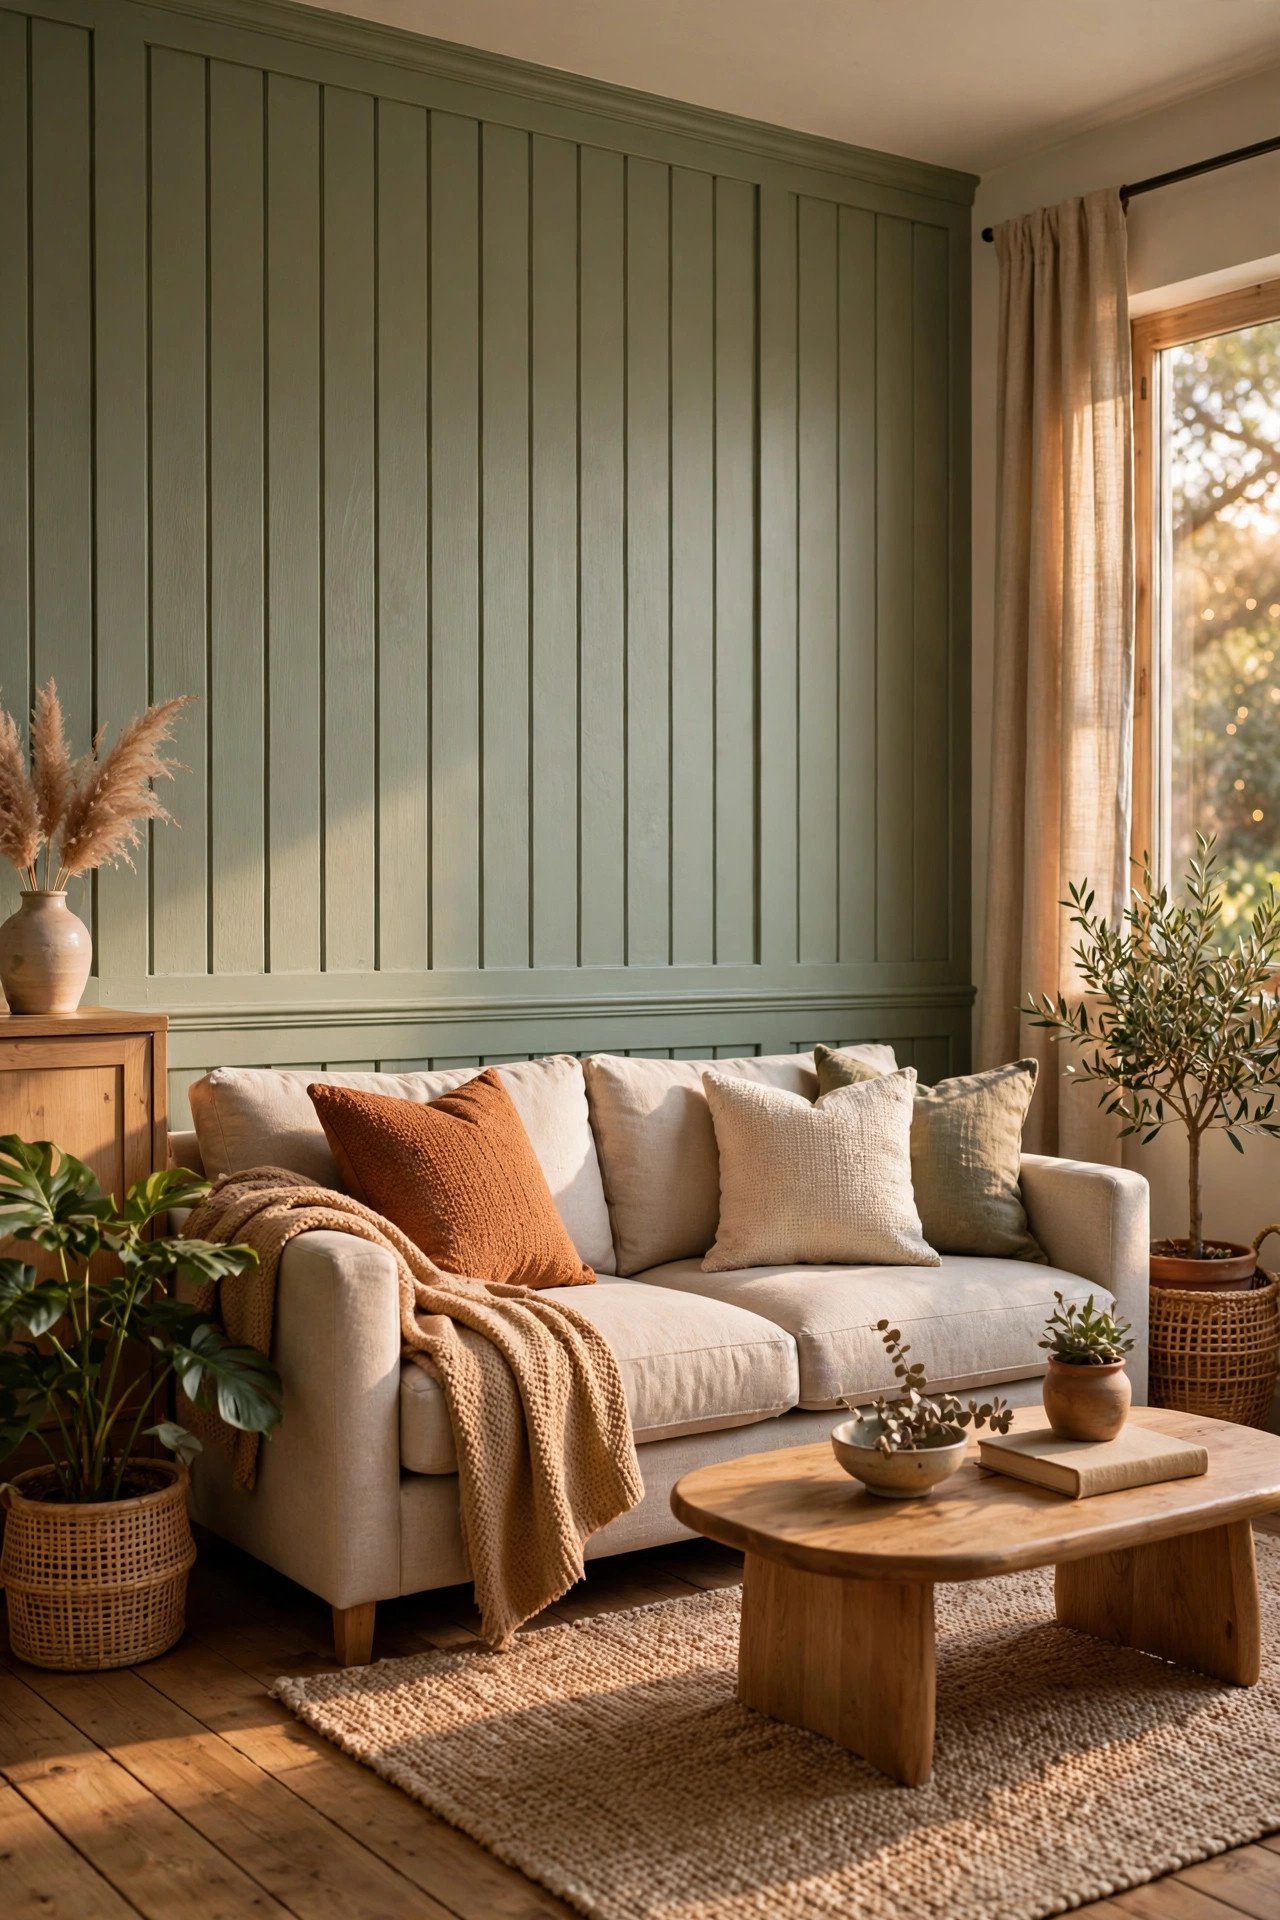
Board-and-batten paneling adds architectural character to a flat wall, giving it shadow, rhythm, and a crafted finish that makes simple furniture look intentional. Install vertical battens 16 to 24 inches apart, with a rail at chair height or two-thirds up, painting the wall one colour, such as warm white or sage. Run full-height to the ceiling, or cap half-height at 36 to 42 inches with a ledge. Use MDF or primed pine battens, 2 to 3 inches wide, fixed with adhesive and pins, filling joints before painting. Budget 200 to 600 dollars for materials on one wall, or 800 to 1,500 dollars installed. Hang art with hooks that clear the battens, keeping its centre at 57 to 60 inches from the floor. The mistake to avoid is painting battens a different colour from the wall behind them without a clear reason, which can make the paneling look like stripes.
9. Shiplap Accent Wall
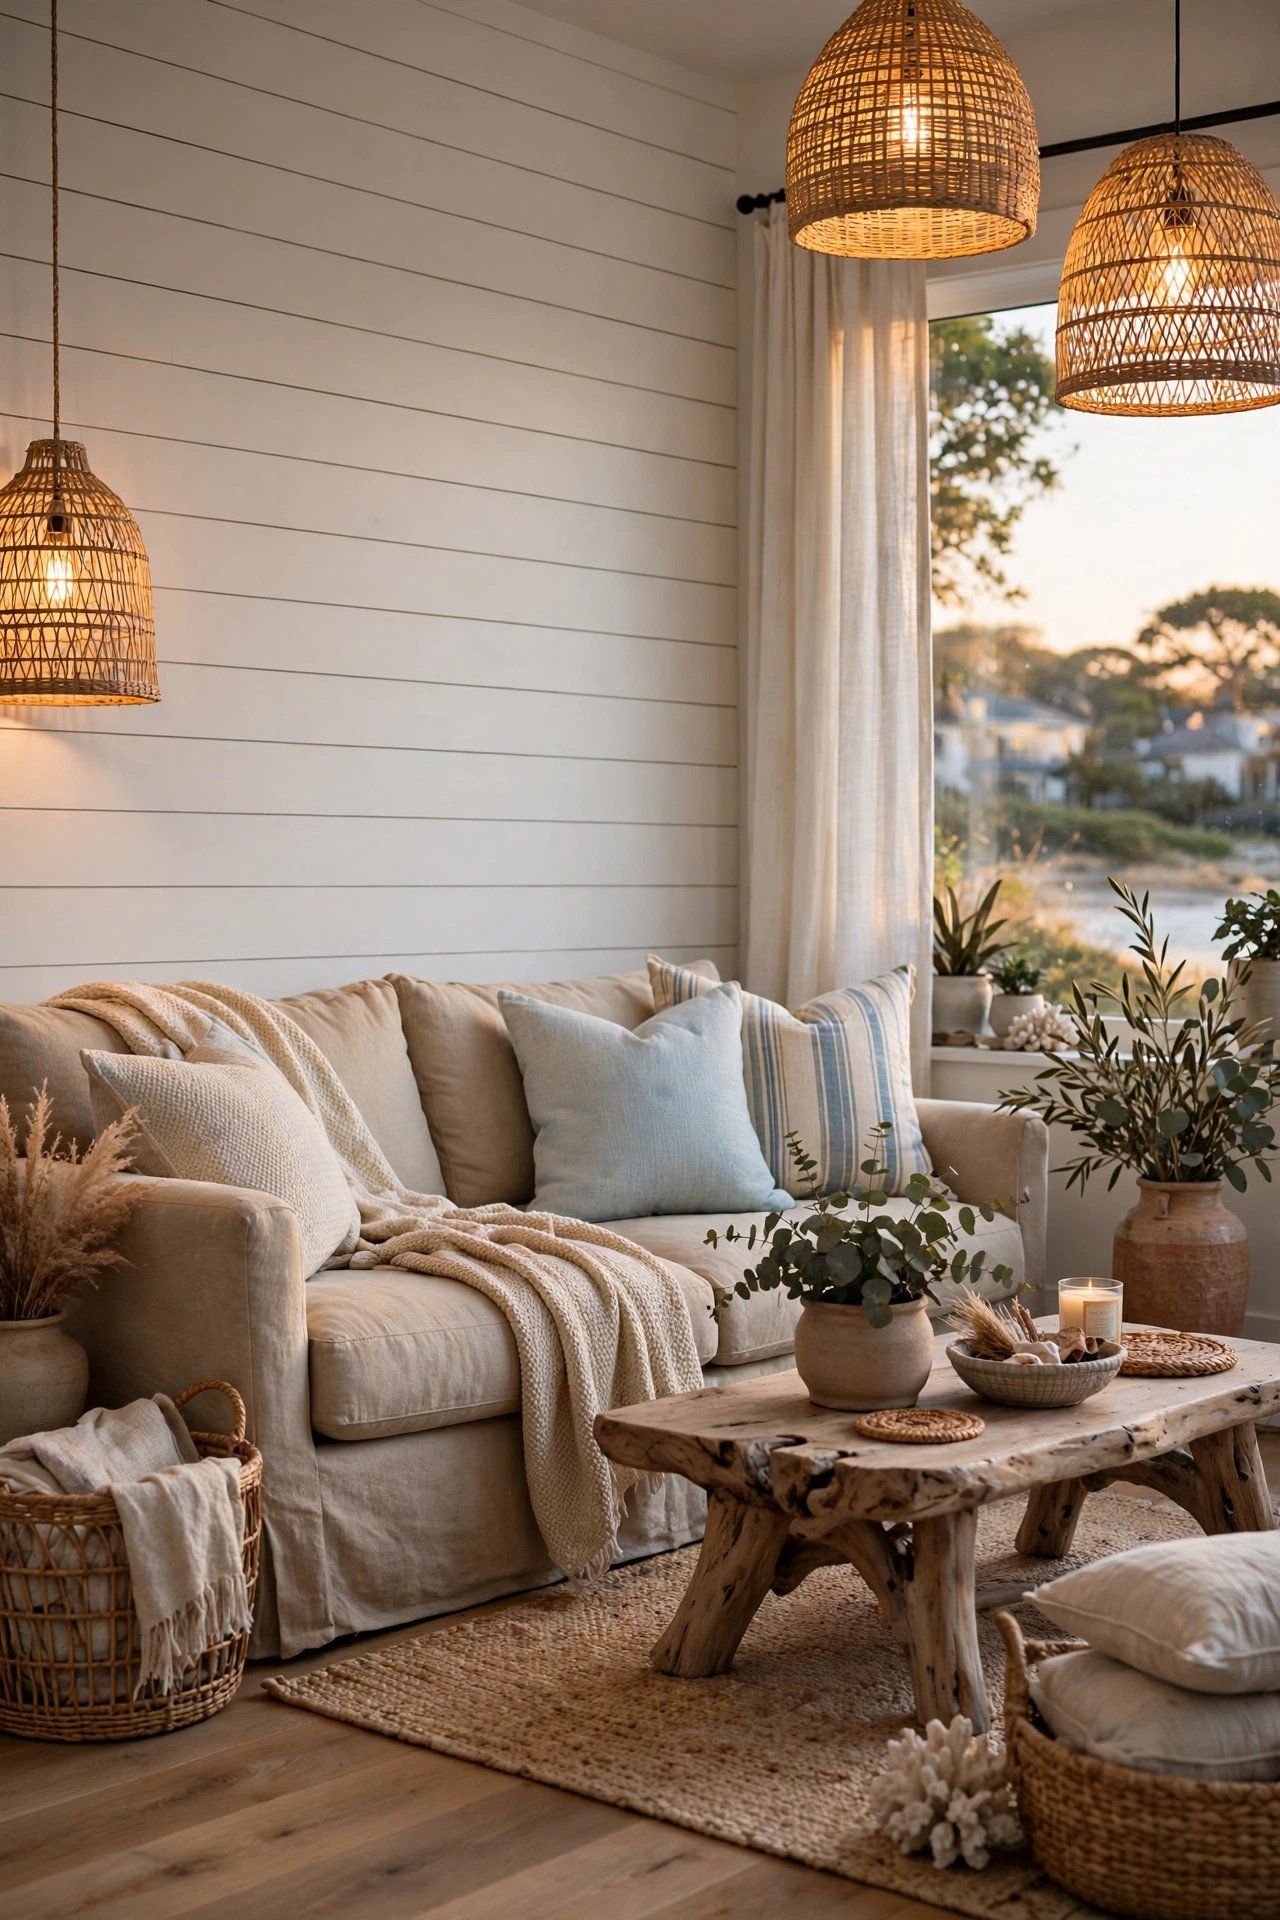
A shiplap accent wall brings texture and a relaxed coastal or farmhouse feel, giving a blank wall depth even before you hang anything on it. Install horizontal boards, or vertical boards to lift a low ceiling, keeping a one-eighth-inch shadow gap. Paint it the room colour for subtle texture, or soft white or pale blue for gentle contrast. Use primed MDF or pine shiplap, fixed to studs with nails and adhesive, finishing edges with trim at corners, skirting, and ceiling. Budget 300 to 800 dollars for materials on one wall, or 900 to 1,800 dollars installed, then add one large artwork or mirror rather than covering the texture with many small frames. Hang art with fixings through the shiplap into studs, or rated anchors behind it, keeping the centre at 57 to 60 inches. The mistake to avoid is shiplapping every wall, which overwhelms the room and removes the accent effect.
10. Limewash and Painted Accent Wall
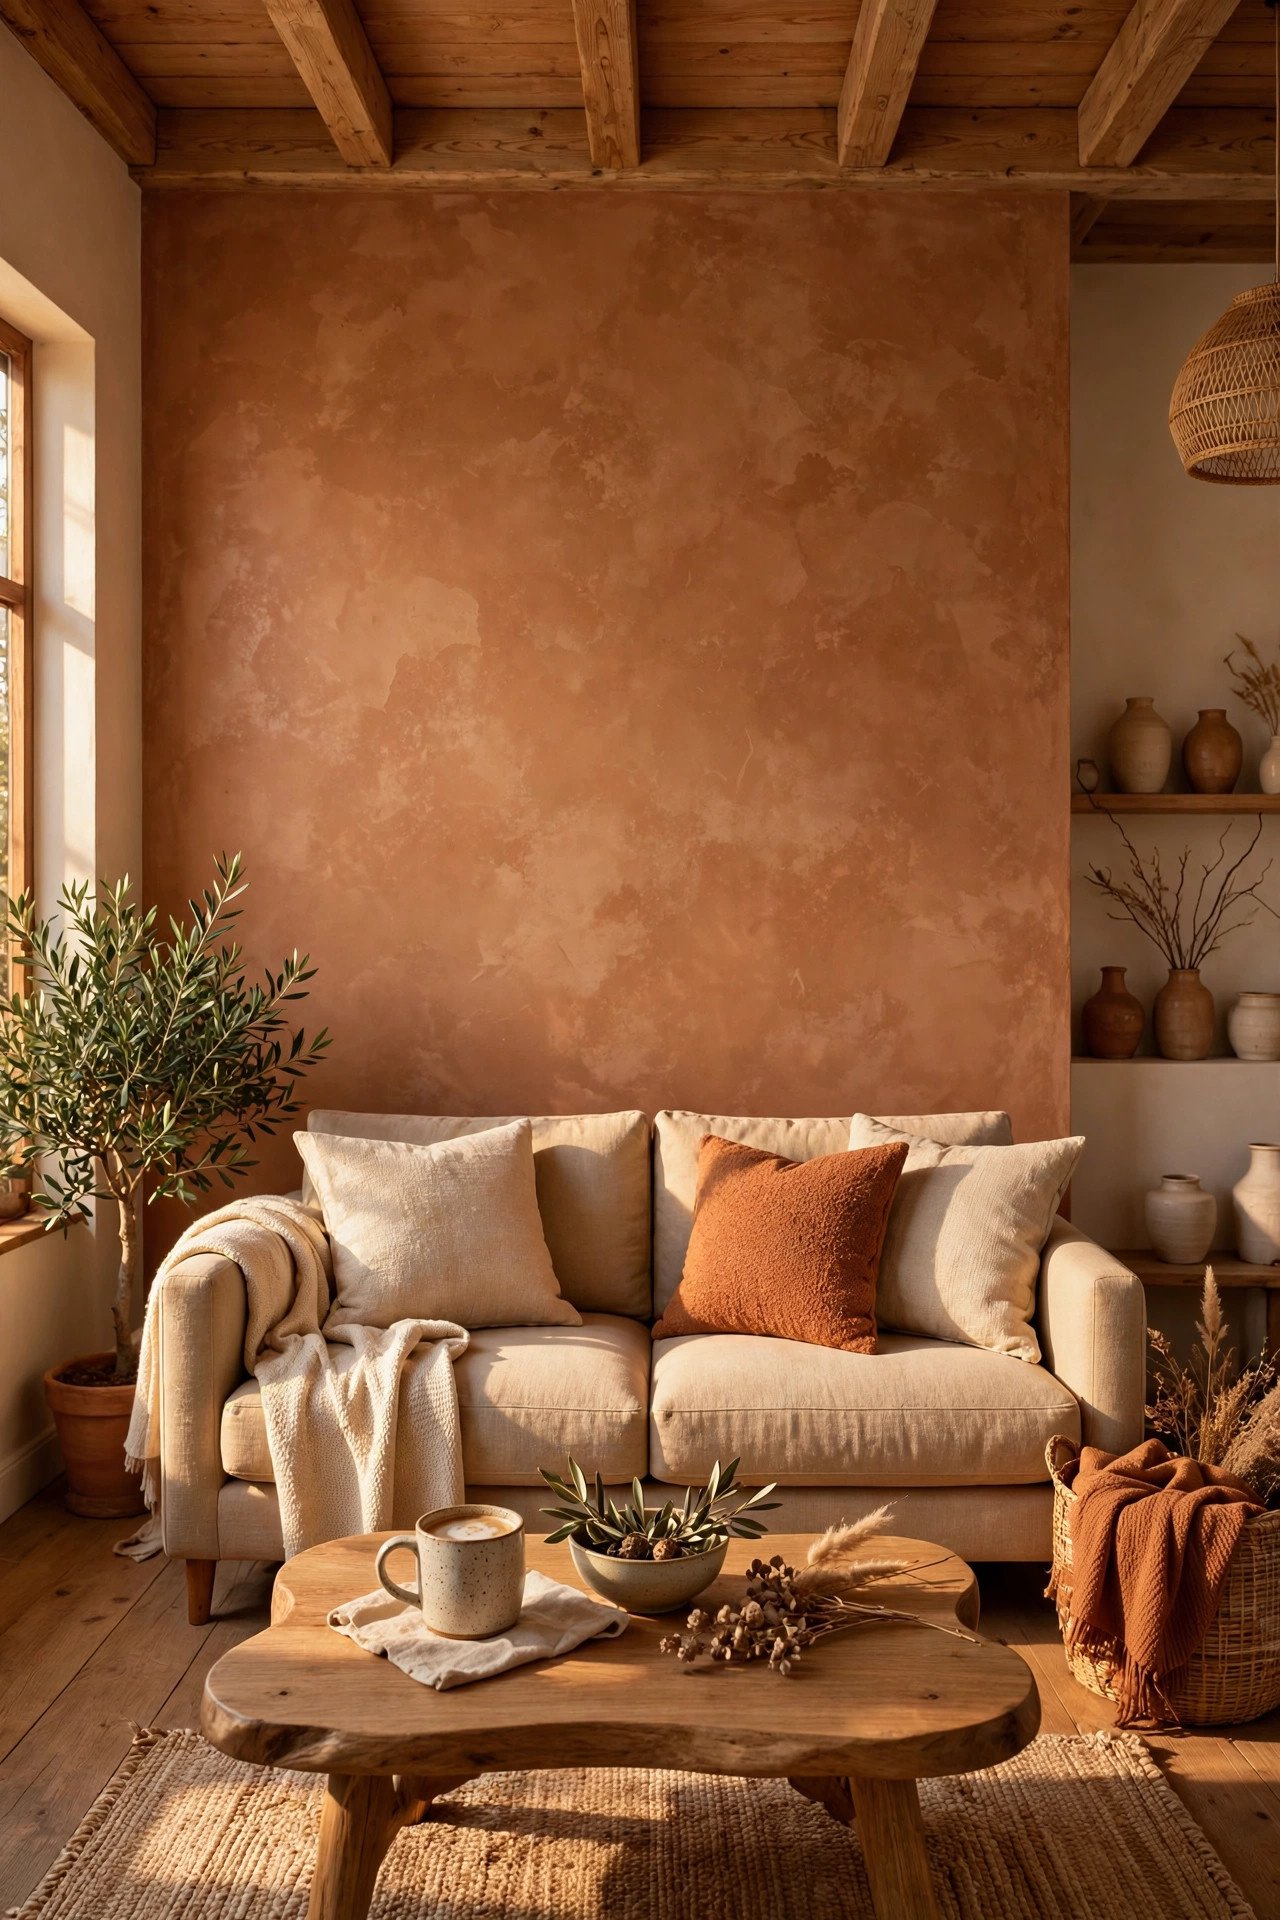
A limewash finish or bold painted accent wall changes the mood of a room for the cost of paint, making the wall itself the decoration, so you need far fewer objects. Limewash gives a soft, cloudy texture suited to neutrals, clay, and sage; matte paint in ink blue or charcoal creates drama. Paint edge to edge, testing a large sample in daylight and lamplight first, as deep colours shift with light. Use mineral limewash in two coats with a block brush, or high-quality matte emulsion, allowing proper drying time between coats. Budget 80 to 250 dollars for paint and supplies if you do it yourself, or 400 to 900 dollars professionally. Once painted, hang one large artwork or mirror with its centre at 57 to 60 inches, keeping frames simple so the colour stays the star. The mistake to avoid is choosing a colour from a tiny swatch, which almost always reads darker and stronger on a full wall.
11. Peel-and-Stick Wallpaper
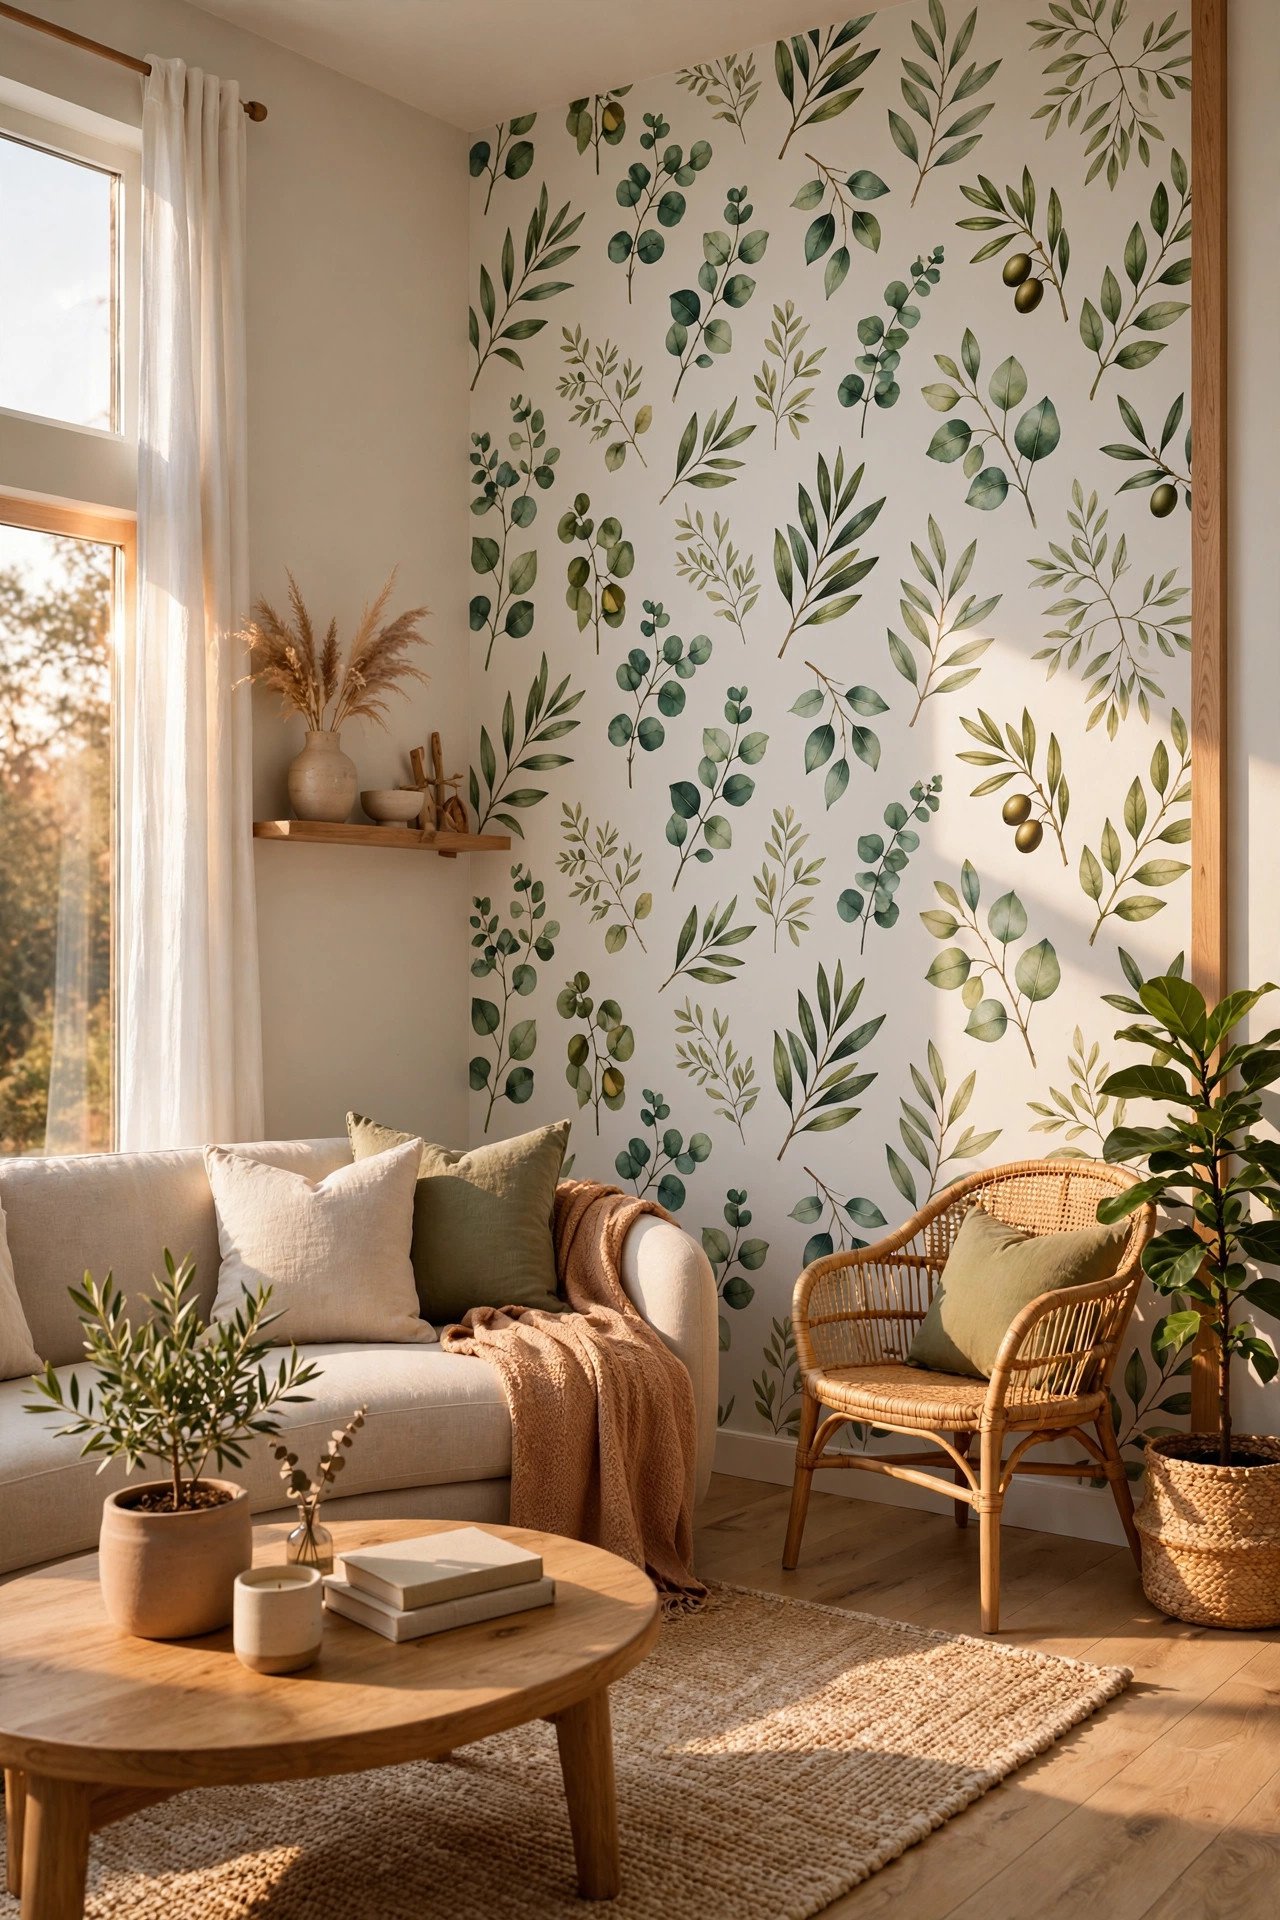
Peel-and-stick wallpaper is the renter-friendly way to give a blank wall pattern and personality without paste, damage, or long-term commitment, and it removes cleanly when you move. Choose a large-scale pattern, such as oversized botanicals or arches; small busy patterns look restless at full scale. Measure carefully, order 10 percent extra, and start from a plumb line so the first drop is straight. Smooth each panel with a plastic smoother, working from the centre outward to push out air, and trim at skirting and ceiling with a sharp craft knife. Budget 80 to 250 dollars for one feature wall, depending on quality and size, choosing washable vinyl or fabric-backed paper that peels cleanly. Test a sample on your paint first, and avoid freshly painted or textured walls, where adhesion can fail. The mistake to avoid is leaving visible seams or mismatched repeats, which draws the eye to the joins instead of the design.
12. Woven Basket Wall

A woven basket wall adds warmth, texture, and a handcrafted feel, suiting bohemian, coastal, and relaxed modern rooms where framed art alone would feel too formal. Collect five to nine baskets, 10 to 20 inches across, in seagrass, rattan, and wicker, mixing flat discs, shallow bowls, and one deeper basket. Arrange them on the floor first, 2 to 3 inches apart, centre at 57 to 60 inches, largest slightly off-centre. Hang each basket on a sturdy nail or hook, using wire or twine through the back weave, fixing heavier baskets into a stud or with a rated anchor. Budget 60 to 180 dollars, mixing thrifted and new pieces in warm naturals with at most one painted accent. Pair the baskets with soft textures below, such as grey carpet living room ideas that echo the natural tones and ground the seating area. The mistake to avoid is hanging baskets in a rigid symmetrical grid, which removes the organic, collected character.
13. Decorative Plates Collection

A collection of decorative plates turns a blank wall into a personal gallery with colour and pattern, working well in traditional, eclectic, and collected rooms. Gather six to twelve plates, 7 to 12 inches across, mixing solids, blue-and-white, and botanicals, with a shared colour thread. Arrange them on the floor first, 2 to 3 inches apart, centre at 57 to 60 inches, with one oval platter. Use plate hangers sized to each plate, on rated hooks, never adhesive discs alone for valuable plates. Budget 80 to 250 dollars for plates and hangers if bought new, or far less thrifted, checking each plate for a secure hanging point. Place it where traffic will not bump it, not above a sofa where a fall could injure. The mistake to avoid is spacing plates evenly in a perfect circle, which looks like a shop display, so vary spacing slightly for a collected feel.
14. Textile Wall Hanging and Macrame

A large textile wall hanging or macrame piece softens a wall, absorbs sound, and adds layered texture that hard surfaces and framed glass cannot provide. Choose a hanging at least 36 inches wide above a sofa, centre at 57 to 60 inches, with 6 to 8 inches clearance above furniture. Cotton, wool, and linen in cream and taupe suit most rooms; subtle terracotta or sage threads tie into cushions. Hang it from a dowel on two hooks, or one sturdy hook, with an anchor rated for its weight. Budget 60 to 250 dollars for a handmade macrame or woven hanging, or 30 to 90 dollars for a smaller ready-made piece. Keep it away from direct sunlight and heat to prevent fading, vacuuming gently with a brush attachment. The mistake to avoid is hanging a small textile alone on a large wall, where it looks lost, so size it generously or pair it with a shelf.
15. Sculptural Wall Sconces

Sculptural wall sconces combine lighting and wall decor, washing the wall with warm light and creating shadows that make a blank wall feel alive in the evening. Choose a pair flanking a mirror or fireplace, 60 to 72 inches apart, centred at 60 to 66 inches, so light falls at eye level. Plug-in sconces suit renters; hardwired brass, black, or plaster sconces look cleaner but need an electrician. Use warm bulbs at 2700K for a cosy glow, choosing dimmable fittings where possible for film nights and reading. Budget 80 to 300 dollars per plug-in sconce, or 150 to 450 dollars per hardwired sconce plus electrician costs, fixing sconces into studs or rated anchors. The mistake to avoid is installing sconces too close to a television, where light creates glare and distracts from viewing. Sculptural lighting in House Beautiful room tours shows how a pair of sconces can balance a large wall without adding clutter.
16. Leaning Oversized Art
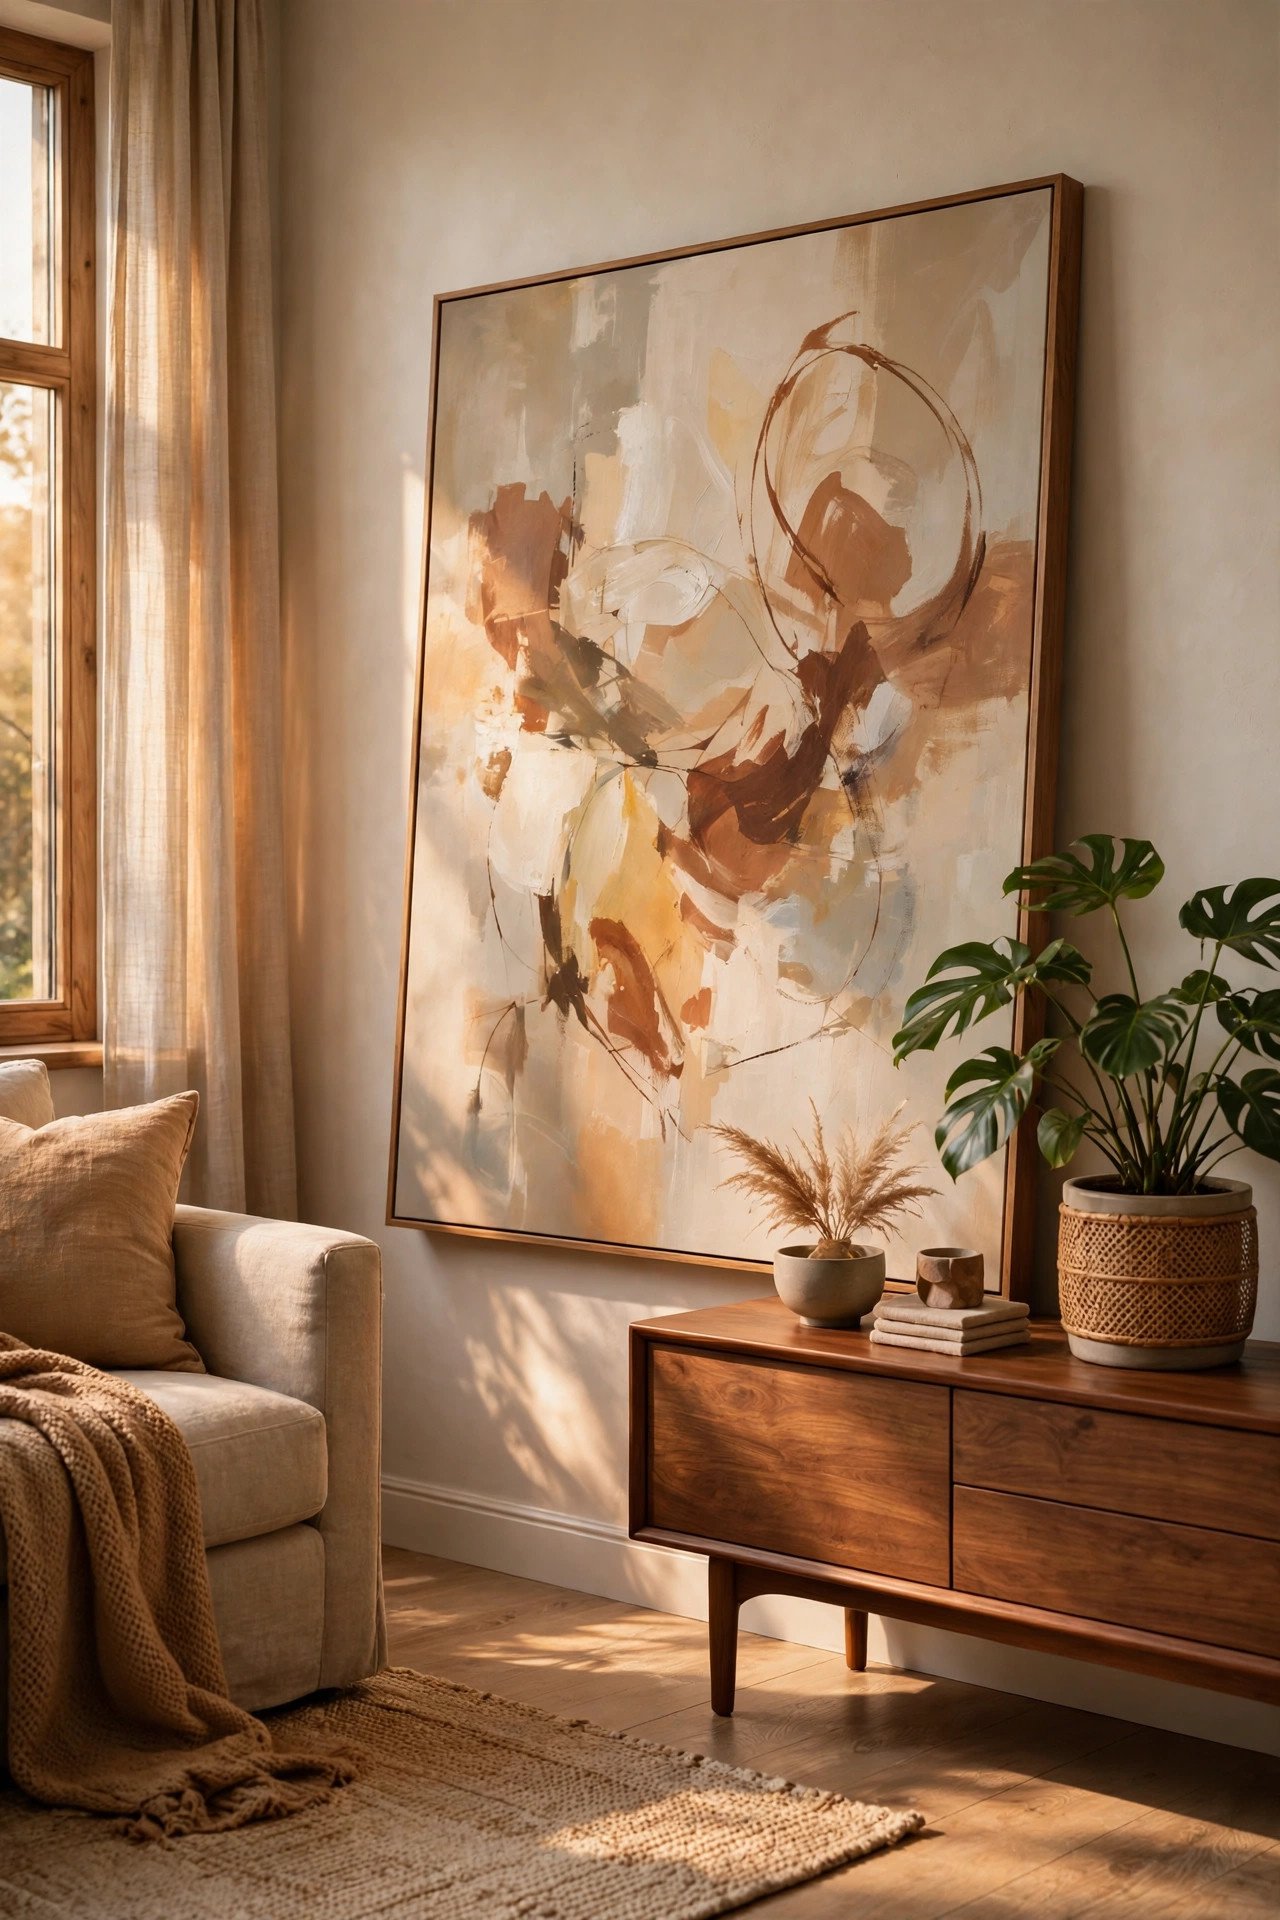
Leaning oversized art against the wall gives a relaxed, gallery-like feel and avoids drilling altogether, ideal for renters, plaster walls, and anyone who restyles often. Choose a piece at least 48 inches tall, base 4 to 6 inches from the wall, top resting against it, beside a sofa or fireplace, not behind seating. A canvas, framed print, or mirror works, on a flat floor with a felt pad underneath. Anchor the top with a discreet anti-tip strap or adhesive hook where children or pets are present, because a tall leaning piece can topple if knocked. Budget 150 to 500 dollars for a large ready-made canvas or framed print, keeping the frame finish tied to nearby furniture. Layer a smaller frame or plant in front of the base to ground the composition. The mistake to avoid is leaning a piece that is too small or light, which looks temporary and unstable, so go large, heavy, and confident.
17. TV Gallery Wall

A television wall does not have to be a black rectangle on a bare wall, because a gallery around the screen softens the technology and makes the wall feel decorated even when the television is off. Mount the television centre at seated eye level, usually 42 to 48 inches, building the gallery around it with frames 2 to 3 inches from its edge. Use one or two frame finishes, mixing art and photographs, centred on the television for balance from the sofa. Hide cables in trunking painted to match the wall; visible cables undo the polished effect. Budget 100 to 300 dollars for frames and prints, plus a mount and cable management, fixing heavy frames with rated anchors clear of vents and heat. Choose muted art, avoiding reflective glass. The mistake to avoid is crowding frames too close to the screen, which makes the wall feel busy and the television harder to watch.
18. Fireplace Mantel Wall

The wall above a fireplace is a natural focal point, and treating it as a composed vignette rather than a single picture makes the whole room feel finished. Hang one large artwork or mirror centred above the mantel, bottom 6 to 8 inches above the shelf, centre roughly 57 to 60 inches, slightly higher for a tall fireplace. Layer smaller frames, a vase, candles, and greenery on the mantel, heights varied, centre tallest, with breathing space. Keep paper, textiles, and candles safely from the firebox; use a mirror to reflect light if the wall is dark. Budget 120 to 400 dollars for a large mirror or artwork, plus objects you already own, fixing the main piece into studs or masonry anchors on a brick or plaster chimney breast. Check the shelf is level and sturdy before placing heavy objects. The mistake to avoid is hanging art so high above the mantel that it disconnects from the fireplace, leaving a gap that strands both elements.
19. Bookshelf Wall

A wall of bookshelves, built-in or freestanding, fills a blank wall with colour, texture, and personality, giving the room a library feel framed art alone cannot match. Install tall shelves near the ceiling, or a long low bookcase topped with art, grouping books with some stacked horizontally. Leave one-third of each shelf empty or with a vase, photograph, or plant, so shelves breathe. Sort books loosely by colour or size for a calm look, or keep a personal order you actually use, placing heavier books low for stability. Budget 200 to 800 dollars for ready-made bookcases, or 1,200 to 3,000 dollars for built-in joinery, depending on size and finish. Fix tall bookcases with anti-tip straps into studs, especially with children at home. The mistake to avoid is packing every shelf edge to edge with books, which makes the wall feel heavy and closed in, so edit ruthlessly and leave air.
20. Oversized Clock Feature

An oversized wall clock is a functional feature that fills a blank wall with a single bold circle, suiting rooms where you want impact without a gallery wall. Choose a clock 24 to 36 inches across above a console or beside a fireplace, hanging it with its centre at 57 to 60 inches, so it reads as art rather than a small utility object. Metal clocks suit industrial rooms, wooden clocks warm traditional rooms, minimalist clocks suit contemporary spaces. Check for a quiet mechanism near seating, and a face readable across the room. Budget 60 to 200 dollars, hanging it on a rated hook and checking it stays level. Pair it with one object below, such as a plant on a console, rather than competing frames. The mistake to avoid is hanging a clock too small for the wall, which looks like an afterthought and fails to anchor the space.
21. Black-and-White Photo Wall

A black-and-white photo wall brings a timeless, gallery feel, and limiting the palette to monochrome keeps personal photographs cohesive and intentional. Print in black and white at one size, such as 8 by 10 or 11 by 14 inches, with matching mats and identical frames, 2 to 3 inches apart, centred at 57 to 60 inches. Mix portraits and landscapes, keeping tones and contrast consistent. Use high-resolution files and professional printing for large sizes, because phone photographs enlarged too far become soft, choosing archival mats and UV-filter glass in sunlight. Budget 100 to 300 dollars for printing, mats, and frames for eight to twelve photographs, hanging each frame on its own hook with a paper template planned first. The mistake to avoid is mixing colour and black-and-white photographs in the same group, which breaks the monochrome discipline and makes the wall look accidental.
22. Mixed-Media Shelf and Art Combo

A mixed-media combination of a shelf and art creates depth on a flat wall, because objects sit forward of the surface and cast soft shadows framed pictures alone cannot achieve. Mount a shelf or ledge at 48 to 54 inches, hang art above it centred at 57 to 60 inches, overlapping its bottom slightly with shelf objects. Style with a trailing plant, vase, two books, and a leaning photograph, tallest at one end, space at the other. Use wood matching the frame, or black metal, keeping three tones at most. Budget 80 to 250 dollars for shelf, art, and objects, fixing the shelf into studs or toggle bolts rated for the loaded weight, because leaning objects add forward pressure. The mistake to avoid is aligning shelf and art edges perfectly, which looks rigid, so offset them slightly for a natural, lived-in composition.
Practical Tips
Measure first, making paper templates for every frame, mirror, and shelf from wrapping paper, taped with painter tape. Live with them for a day, checking morning and evening light from your usual seat, adjusting height and spacing until balanced. Mark each centre at 57 to 60 inches, note studs, outlets, and switches, photograph the layout straight on, then drill.
Choose fixings by wall type and weight. On drywall, use picture hooks up to about 20 pounds, toggle bolts for heavy mirrors and shelves, and hit a stud over 30 pounds. On plaster, drill slowly, use plugs or masonry anchors, and avoid hammering nails, which crack plaster. On brick, use a masonry bit and plugs. Weigh pieces if unsure, check ratings, and use two hooks for wide pieces.
Renters should use damage-free options, and everyone should light the wall well. Adhesive strips and hooks suit light frames, leaning art avoids holes, and peel-and-stick wallpaper transforms a wall without paint. Follow weight ratings, clean surfaces first, and remove strips slowly. Light with a picture light, plug-in sconces, or an angled floor lamp, using 2700K bulbs. Budget tiers: under 100 dollars for a lean or clock; 100 to 300 for a gallery or mirror; 300 to 800 for paneling or a large custom piece.
Final Thoughts
A transformed wall rarely comes from one expensive purchase, but from the right size, height, and secure fixing, in a style that reflects how you live. Start with the wall you see most from the sofa, complete one idea properly, and repeat the process wherever a blank wall remains.
You May Also Like: – 22 Stunning Symmetrical Living Room Ideas That Feel Calm, Cozy, and Perfectly Balanced – 25 Charming Vintage Living Room Ideas That Feel Cozy, Elegant, and Collected
Frequently Asked Questions
How high should I hang art in the living room?
Hang art with its centre 57 to 60 inches from the floor, which matches average eye level and keeps the piece connected to the furniture below. If the art hangs above a sofa, leave 6 to 8 inches between the sofa back and the bottom of the frame.
What size art should go above a sofa?
Choose art that spans two-thirds to three-quarters of the sofa width, so the art and sofa read as one grouping. For a standard three-seat sofa, a piece around 48 by 36 inches usually works well, while wider sofas need larger art or a gallery arrangement.
How do I hang heavy art on drywall safely?
Use two hooks or a French cleat rated above the total weight, and fix into studs wherever possible for pieces over 30 pounds. For heavy mirrors and shelves where no stud is available, use toggle bolts rated for the loaded weight and check the rating before hanging.
What wall decor works best in a small living room?
Choose a large mirror to reflect light, a single oversized artwork, or a small grid gallery that fills the wall without crowding the floor. Keep spacing tight, use light frames, and avoid deep shelves or many small objects that make a small room feel cluttered.
Can I decorate a living room wall without drilling holes?
Yes, use leaning oversized art, picture ledges fixed with adhesive where suitable, peel-and-stick wallpaper, and adhesive hooks rated for the weight of light frames. Check weight ratings carefully, clean the wall first, and remove adhesive strips slowly to protect the paint.
How do I decorate the wall around a TV without it looking cluttered?
Mount the TV with its centre at seated eye level, keep frames 2 to 3 inches from the screen edge, and use one or two frame finishes with muted art. Hide cables in trunking painted to match the wall, and avoid reflective glass that creates glare while watching.