22 Painting Pumpkins Ideas DIY for a Creative Fall Display
Painting pumpkins is the most forgiving fall craft there is: no carving knife, no scooping, no rotting jack-o'-lantern in three days, and every mistake can be covered with one more coat of paint. A painted pumpkin can be soft and elegant, bold and funny, or as simple as a single colour with a gold stem, and the same basic supplies — acrylic paint, a few brushes, and a clear sealer — cover almost every design in this guide. The difference between a pumpkin that looks homemade in the best sense and one that looks messy is rarely talent; it is preparation, thin coats, and letting each layer dry before adding the next.
Looking for more inspiration? Our Nest Decorz homepage gathers the latest home decor ideas, seasonal decorating guides and room-by-room styling tips in one place — start there and explore.
Below are 22 painting pumpkins ideas DIY style, arranged from the easiest beginner designs to more detailed techniques, each with the paints, materials, and approximate US costs you need, plus one mistake to avoid. Every idea works on real or foam pumpkins, most can be finished in under an hour of active painting time, and all of them can be adapted for kids, for a porch, or for a quieter indoor display, so start with the design that suits your time and build from there.
1. Solid Matte Pumpkins in One Colour
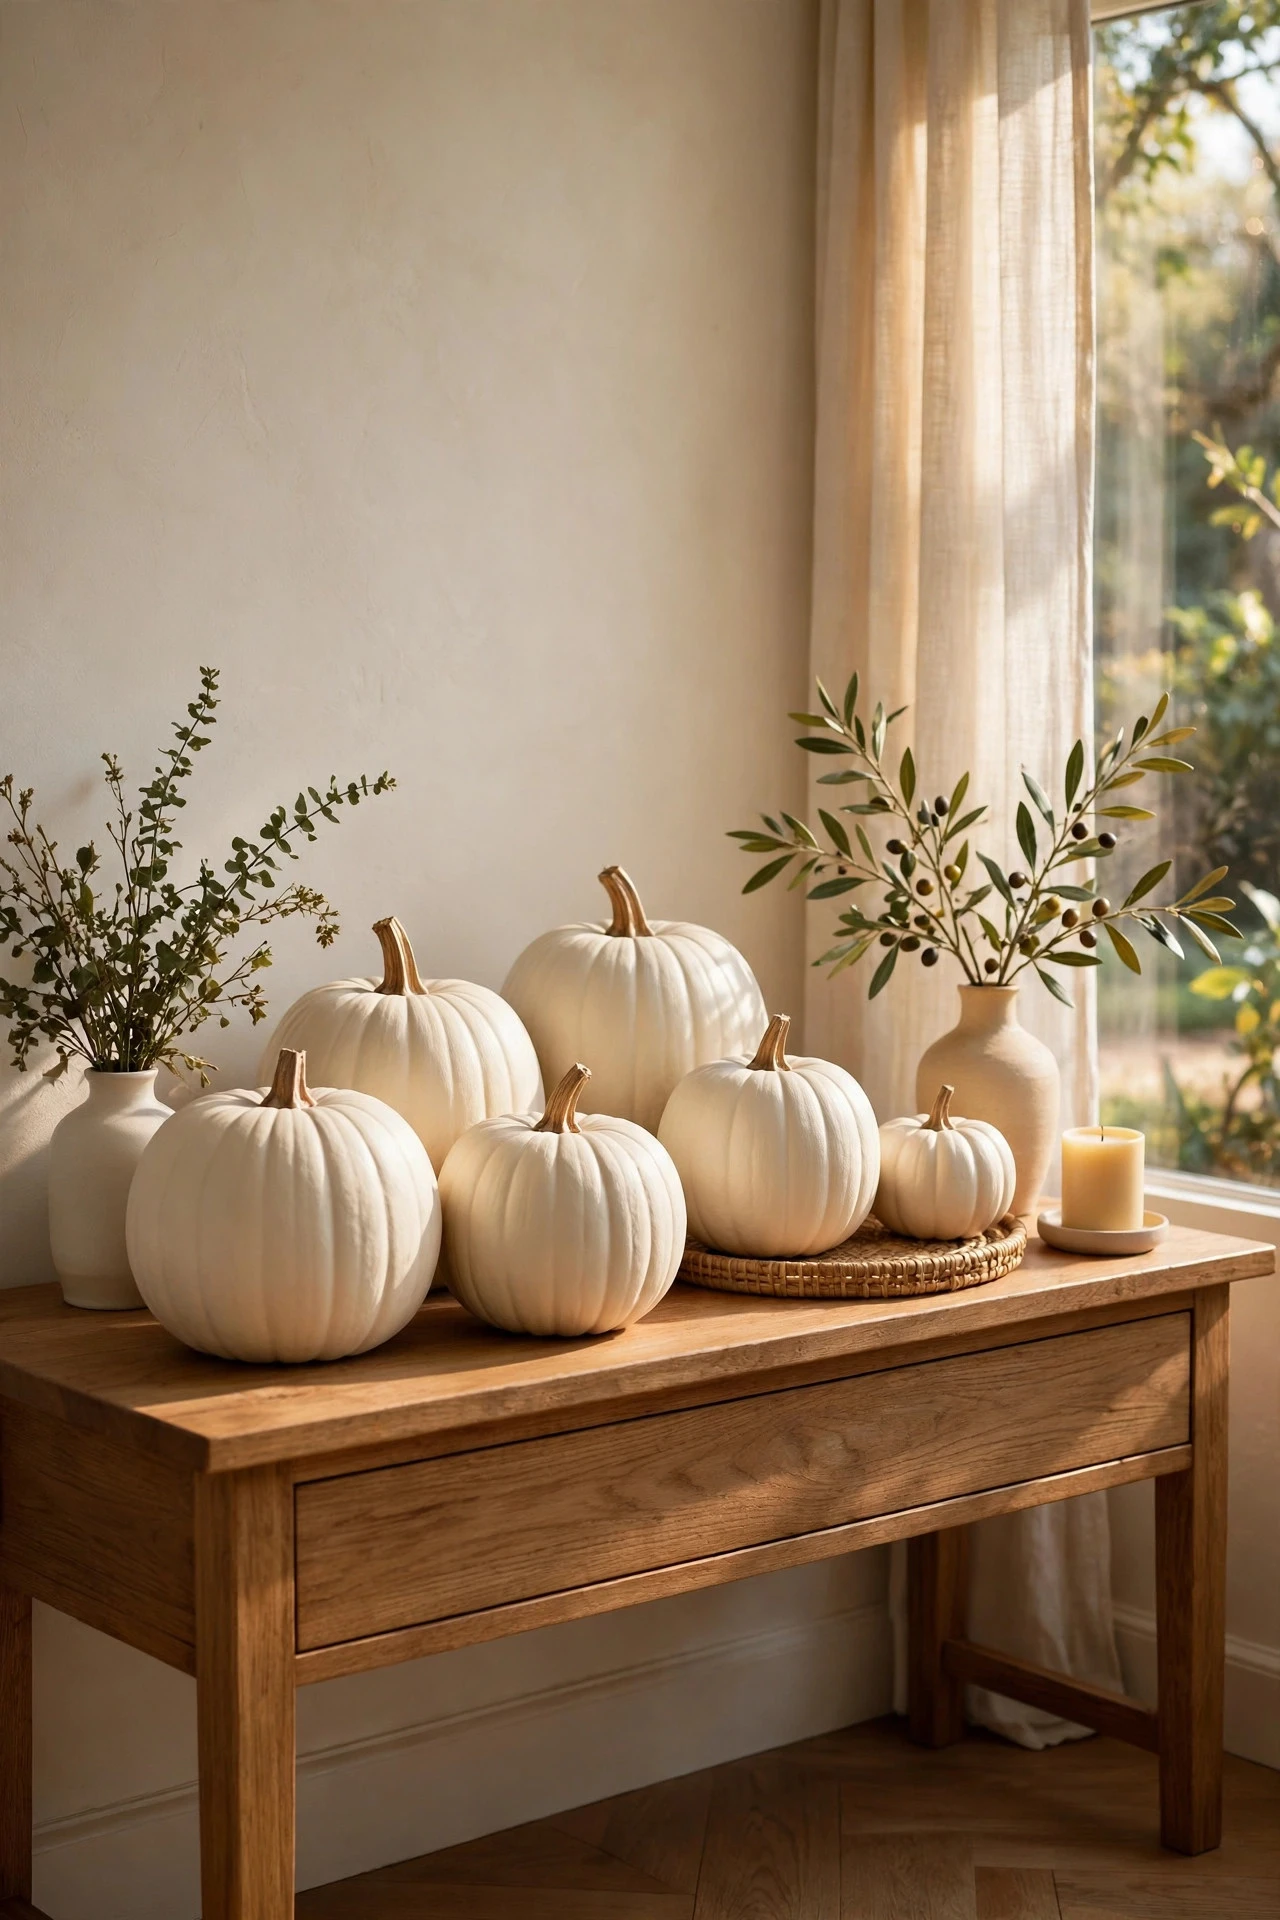
A single matte colour is the fastest way to make a mixed group of pumpkins look deliberate, because one finish ties different shapes and sizes together. Choose a colour that suits your room — cream, sage, terracotta, dusty blue, or charcoal — and paint two thin coats of matte acrylic or chalk paint, letting the first coat dry for at least an hour. Foam pumpkins give the smoothest finish, while real pumpkins need a wash and a thorough dry first so the paint grips. A bottle of paint and a brush costs $6 to $12 and covers three or four medium pumpkins. The mistake to avoid is painting one thick coat, which pools in the ribs, dries unevenly, and peels when the pumpkin is moved.
2. Ombre Pumpkins That Fade From Dark to Light

Ombre pumpkins look far more skilled than they are, because the blend does the visual work. Paint the whole pumpkin your lightest shade first, then sponge the darkest shade onto the bottom third and blend upward with a dry sponge while the paint is still slightly damp, working in small sections around the ribs. Choose colours in one family — plum to blush, navy to pale blue, or rust to cream — so the fade stays calm rather than stripey. Paint, sponges, and sealer cost $12 to $20 for a group of three. The mistake to avoid is blending after the paint has dried, which leaves a hard line instead of a soft gradient and cannot be fixed without repainting the whole pumpkin.
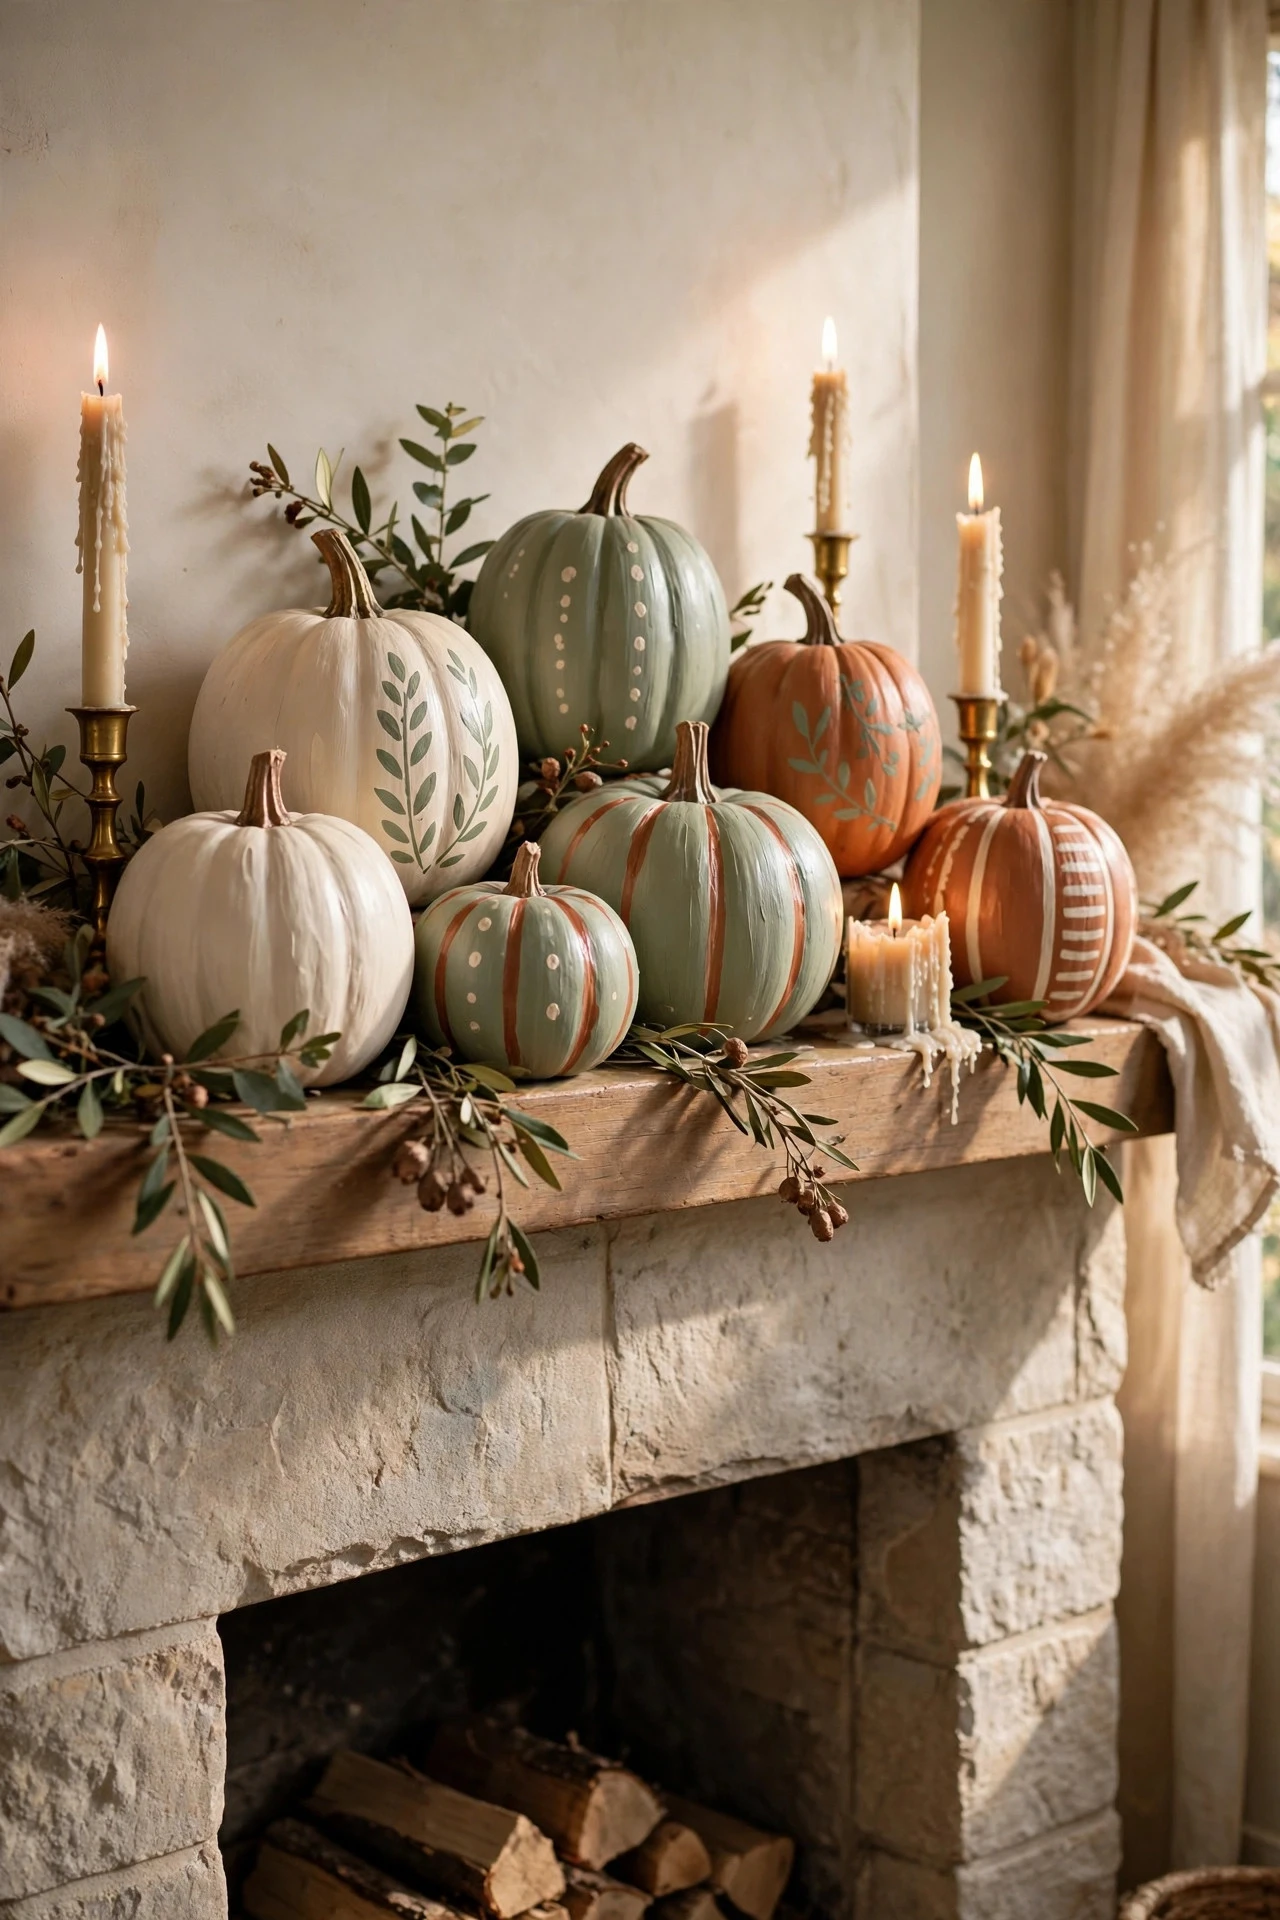
3. Striped Pumpkins Using the Natural Ribs
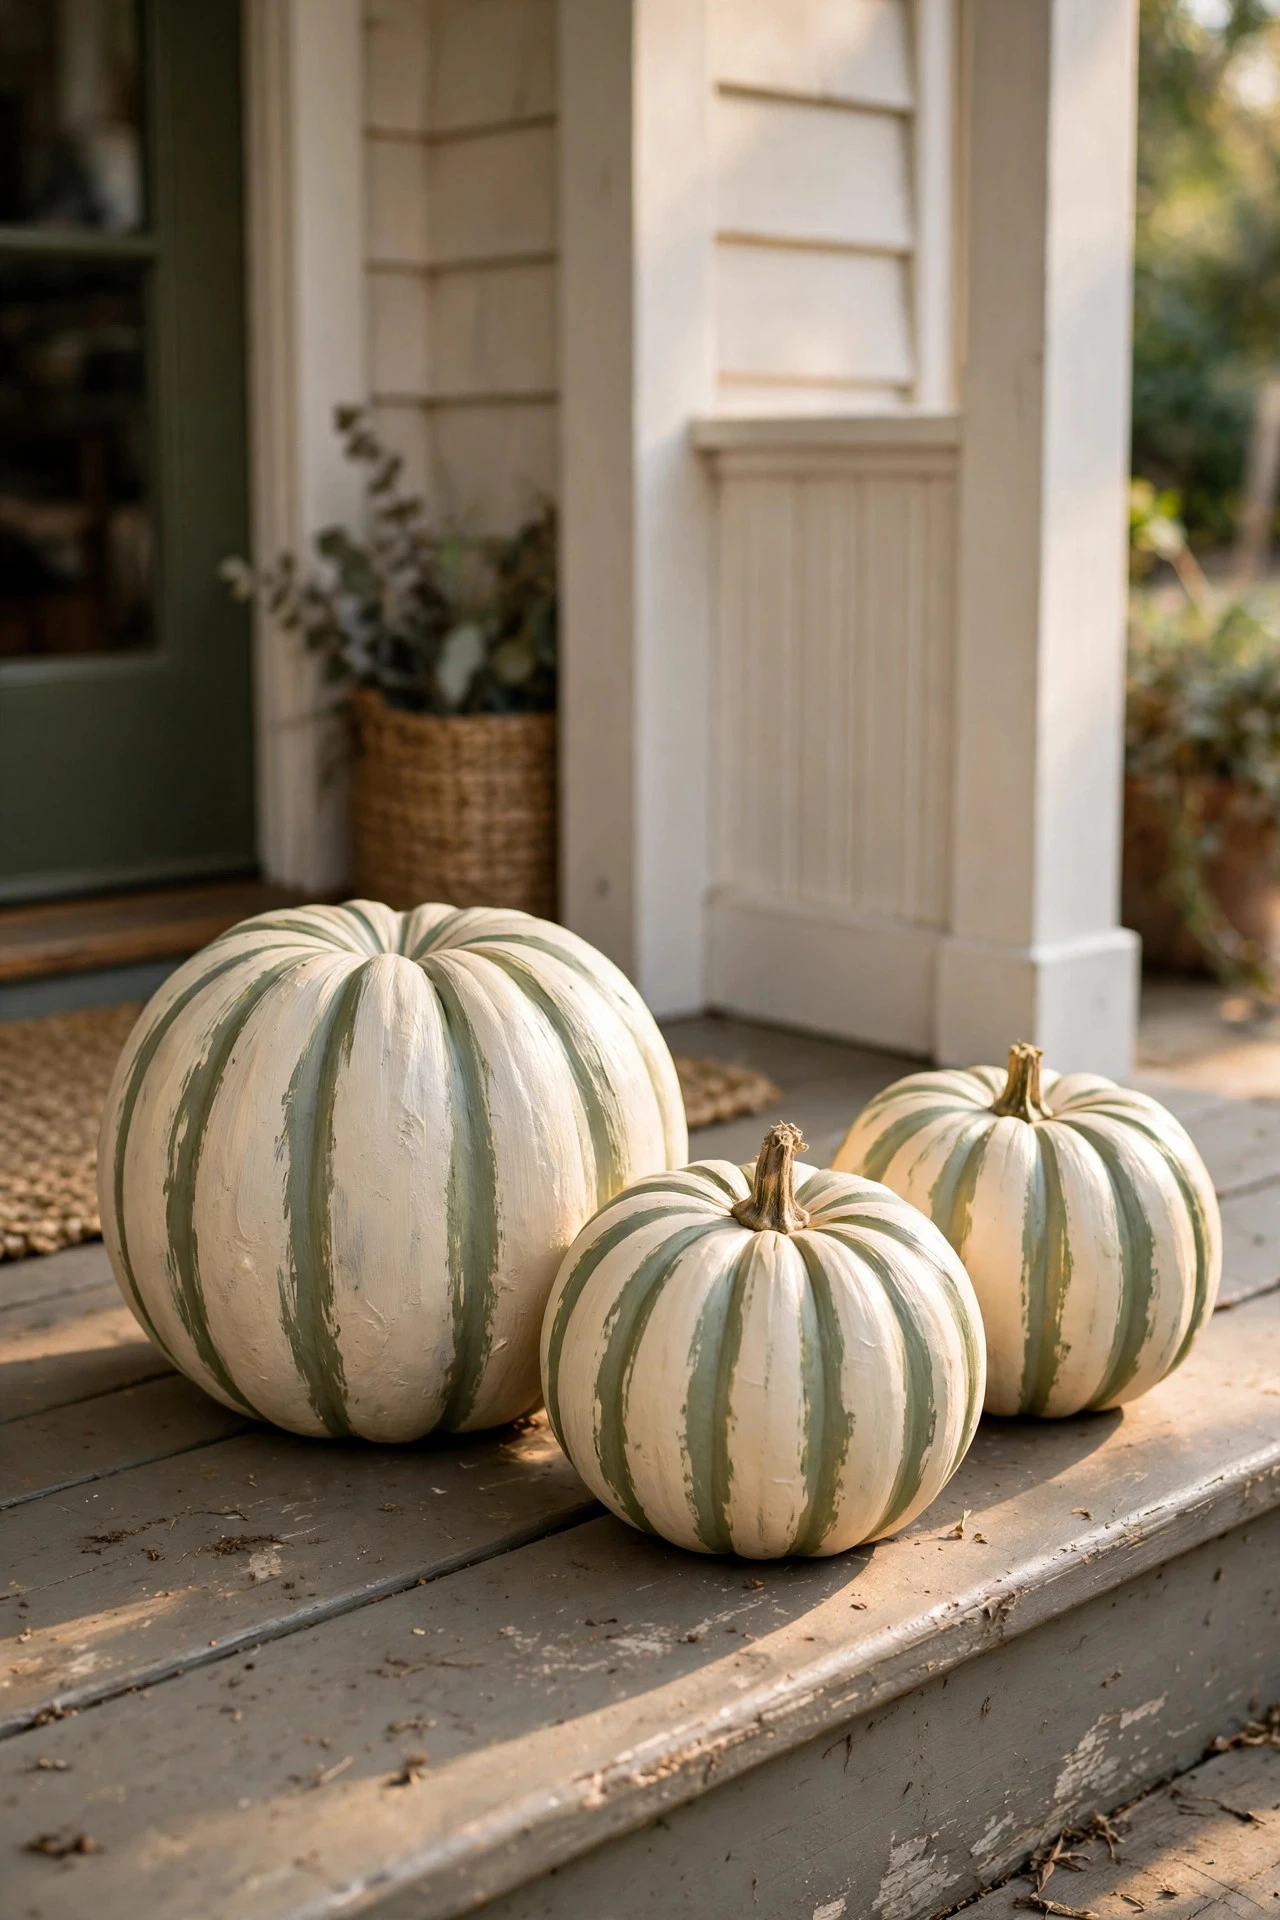
The ribs of a pumpkin are ready-made guides for stripes, so this design suits anyone who worries about painting a straight line freehand. Paint the base colour first, let it dry completely, then paint every second rib in a contrasting colour with a flat brush, following the curve from stem to base. Cream with sage stripes, white with black stripes, and terracotta with cream stripes all read cleanly from across a room. Supplies cost $10 to $18 for two or three paint colours and brushes. The mistake to avoid is painting stripes over a wet base coat, because the colours bleed at the edges and the crisp rib lines that make this design work disappear.
4. Polka Dot Pumpkins for Beginners
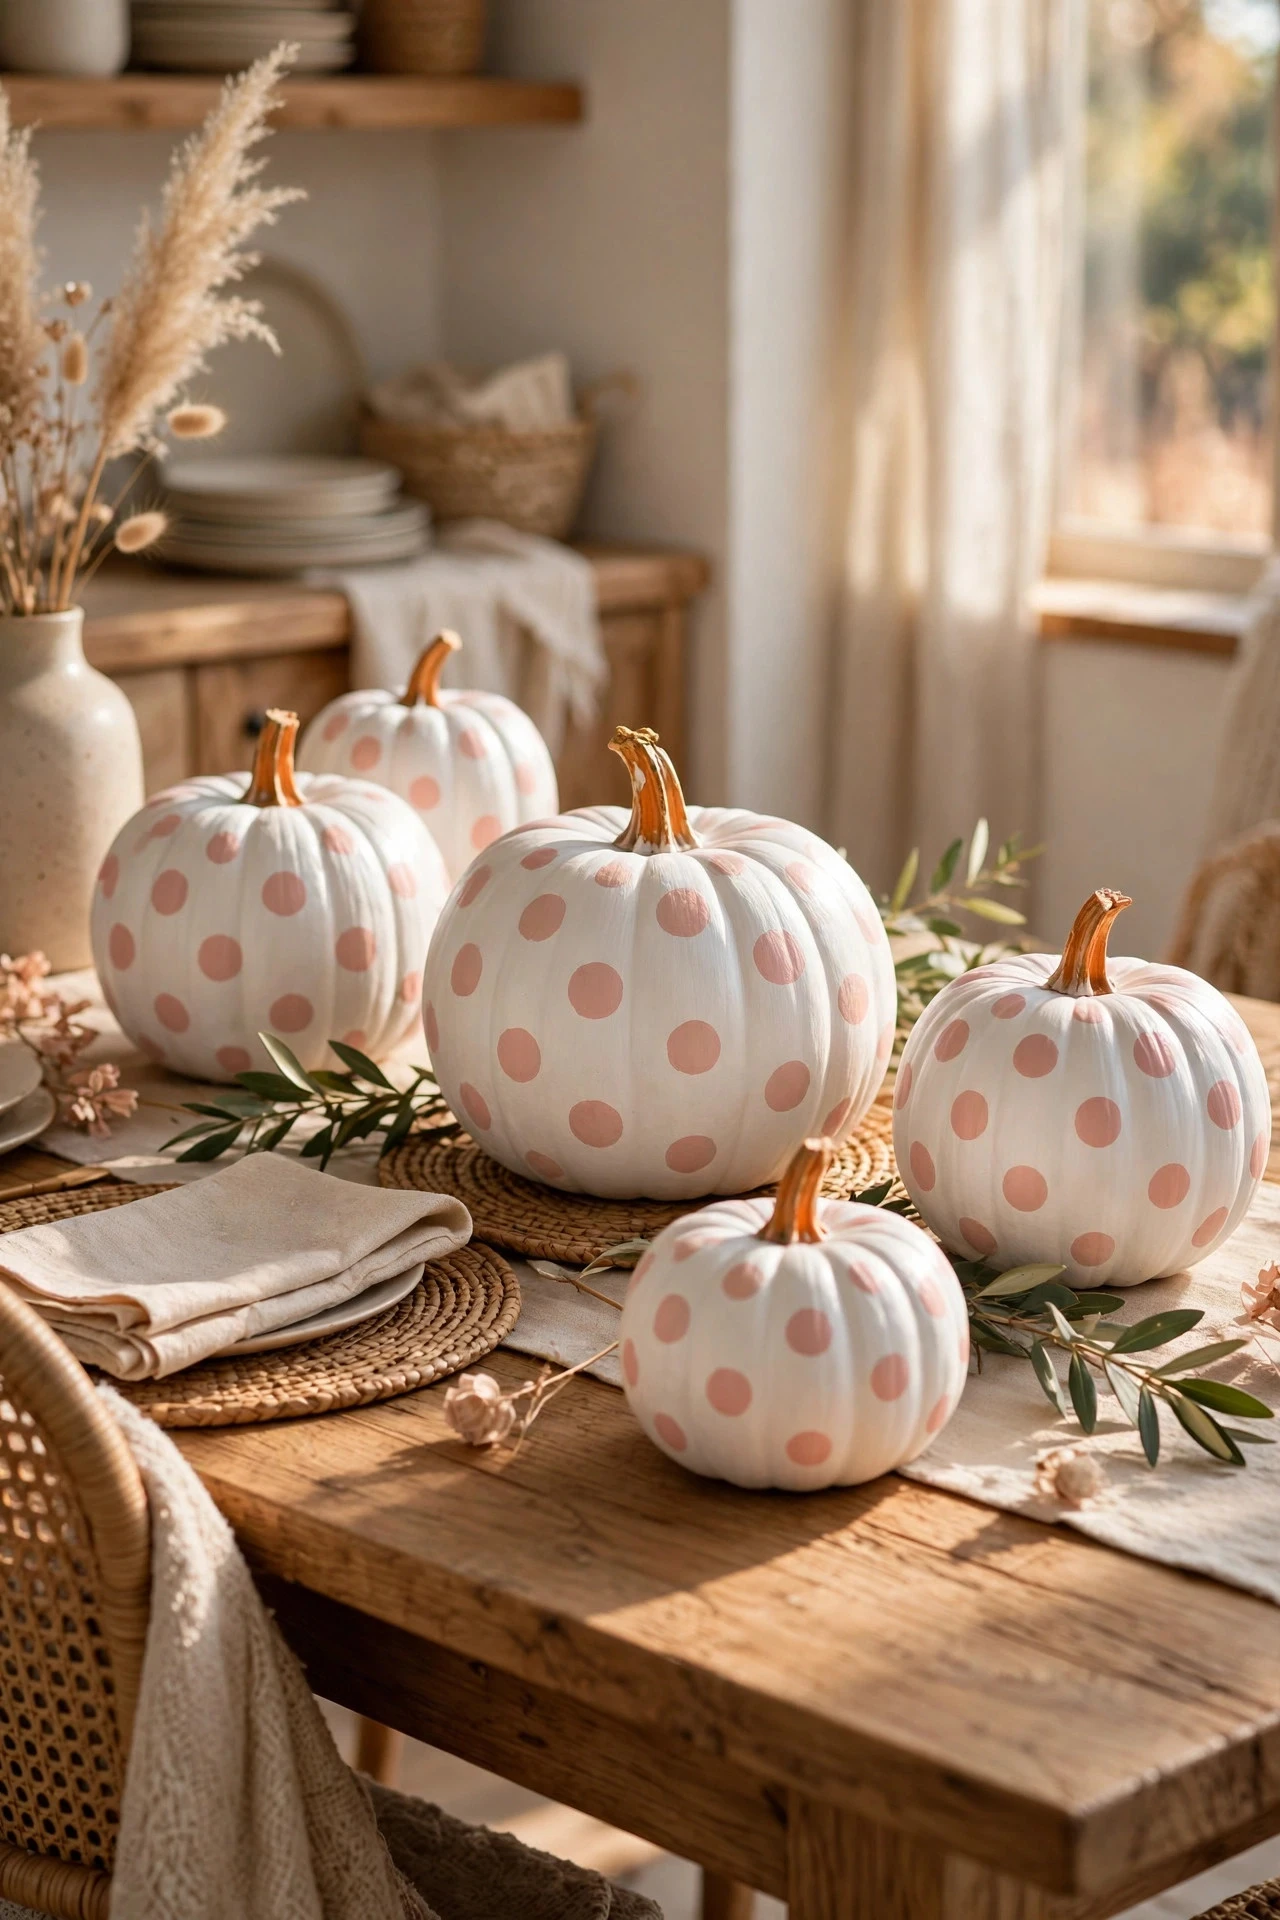
Polka dots are the classic beginner pumpkin design because a round sponge, a cork, or the end of a pencil eraser makes a perfect dot every time. Paint a solid base — white, navy, or blush — and let it dry, then stamp dots in a second colour, spacing them evenly and turning the pumpkin slowly so your hand never drags across wet paint. Vary the dot size slightly for a hand-painted feel, and keep dots away from the very top and bottom where they crowd together. Paint and stamping tools cost $8 to $15. The mistake to avoid is stamping dots with a brush, which produces uneven blobs instead of the clean circles that make this design cheerful rather than messy.
5. Colour-Blocked Pumpkins in Two Tones
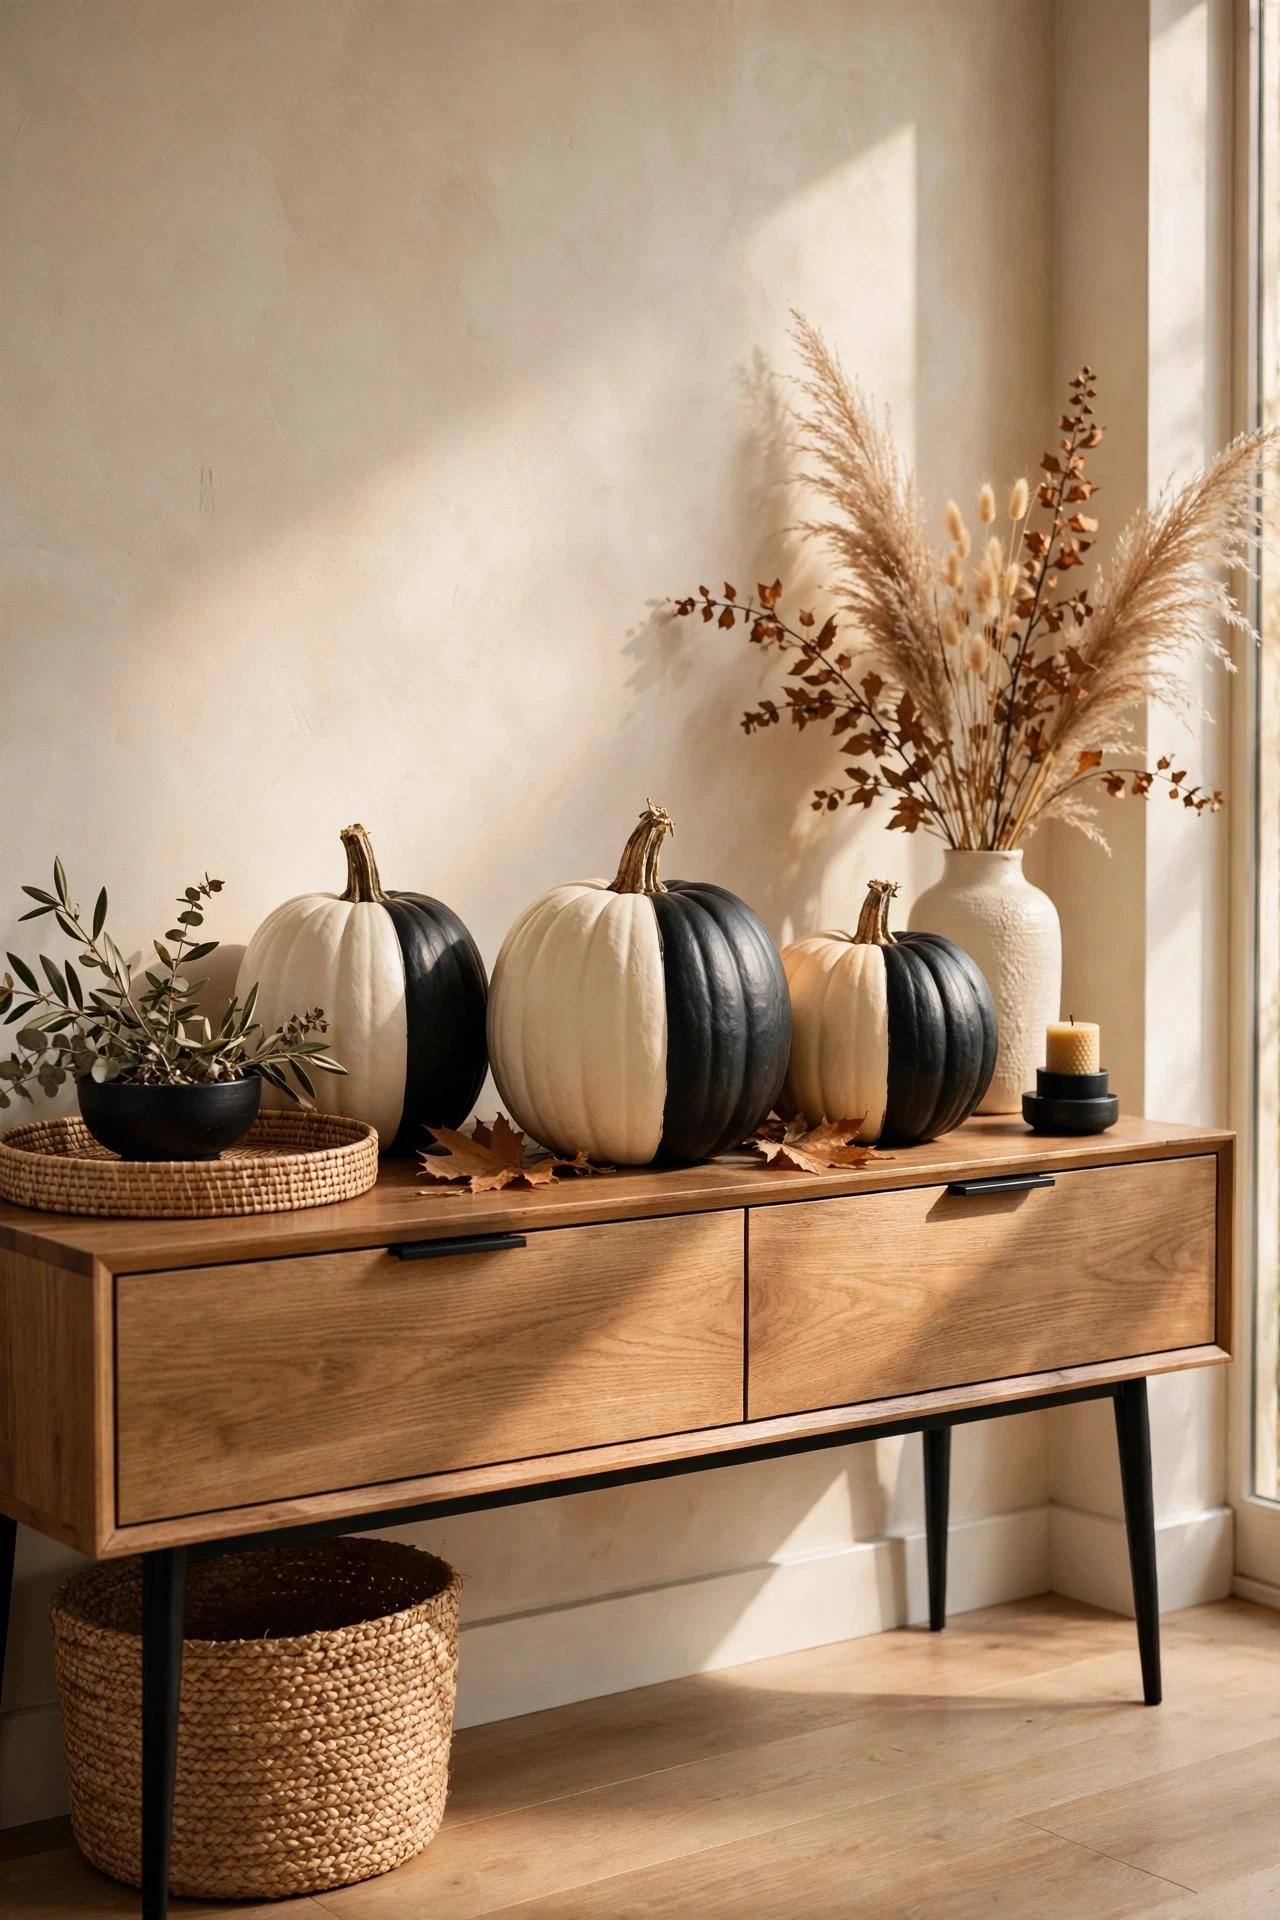
Colour-blocking means painting the pumpkin in two large, confident sections, and it suits modern rooms better than fussy detail. Wrap masking tape around the middle of a dry, base-painted pumpkin, press the tape firmly into the ribs, and paint the exposed half in a contrasting colour — half cream and half black, half sage and half white, or half blush and half terracotta. Remove the tape while the second colour is still slightly tacky for the cleanest edge, then seal. Tape, paint, and sealer cost $12 to $20. The mistake to avoid is using loose tape on a ribbed pumpkin, because paint seeps under the gaps and the block edge comes out wavy and blurred.
6. Hand-Painted Florals on a Cream Base
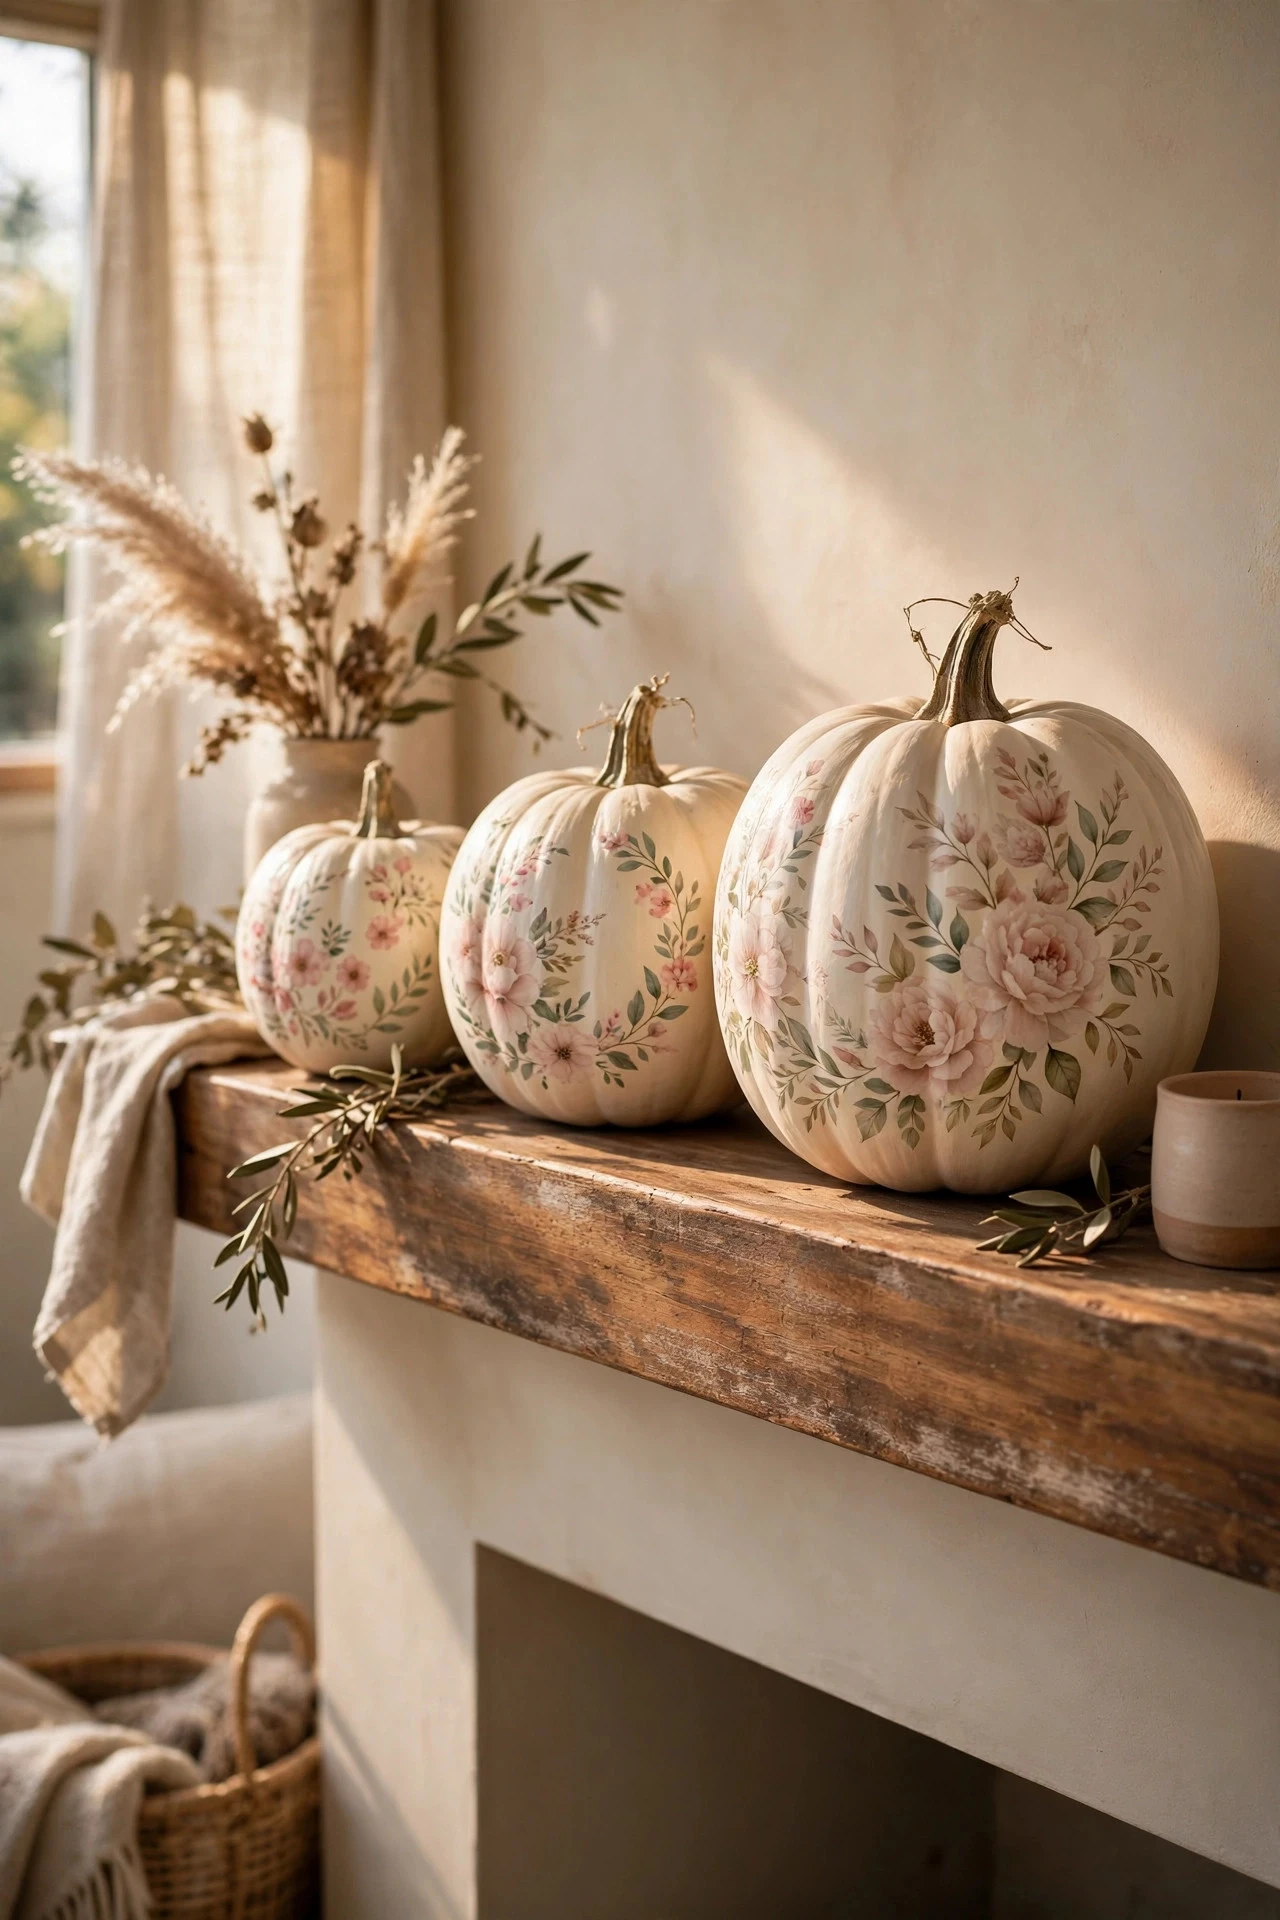
Hand-painted florals turn a pumpkin into a garden piece, and simple five-petal flowers are enough — no botanical skill required. Paint the pumpkin cream, sage, or pale pink and let it dry, then use a round brush to paint loose flowers in blush, white, and lilac, adding a darker centre dot and small green leaves between the blooms, and leave plain pumpkin showing so the design breathes. Practice the flower once on paper, work from the top down so you do not smudge wet petals, and seal with a clear coat. Paint, brushes, and sealer cost $14 to $24. The mistake to avoid is outlining every petal in dark paint first, which makes the flowers look like a colouring page instead of soft, painted blooms.
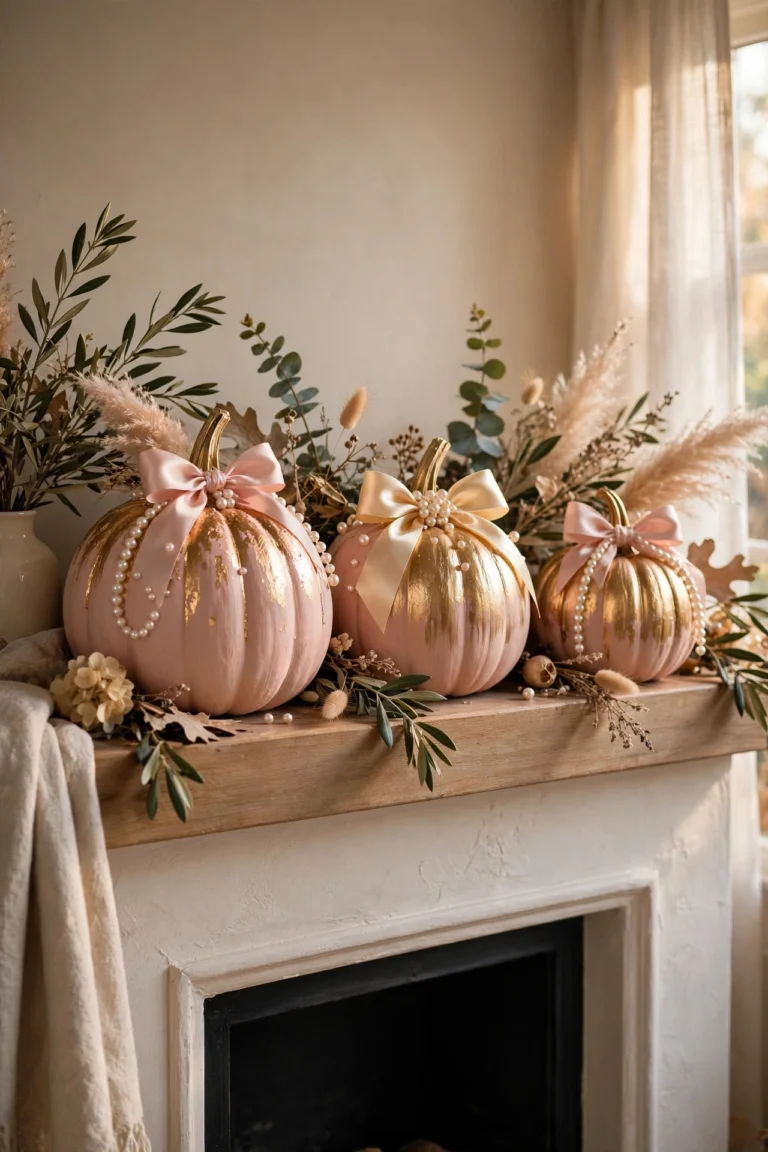
7. Gold Leaf Pumpkins With a Metallic Glow

Gold leaf gives a pumpkin a jewellery-box finish for very little money, because imitation leaf is inexpensive and a little goes a long way. Paint the pumpkin a solid colour — ivory, black, or deep green — and let it dry, then brush gold-leaf adhesive size over the top third or along the ribs, wait until it turns tacky, and press small sheets of imitation leaf on with a soft brush. Seal with two coats of clear sealer so the leaf does not flake off when handled. Leaf, adhesive, paint, and sealer cost $16 to $28 for three pumpkins. The mistake to avoid is applying leaf over wet paint, which tears the leaf, dulls the shine, and leaves patchy metal that cannot be smoothed out.
8. Chalk Paint Pumpkins With a Soft Matte Finish
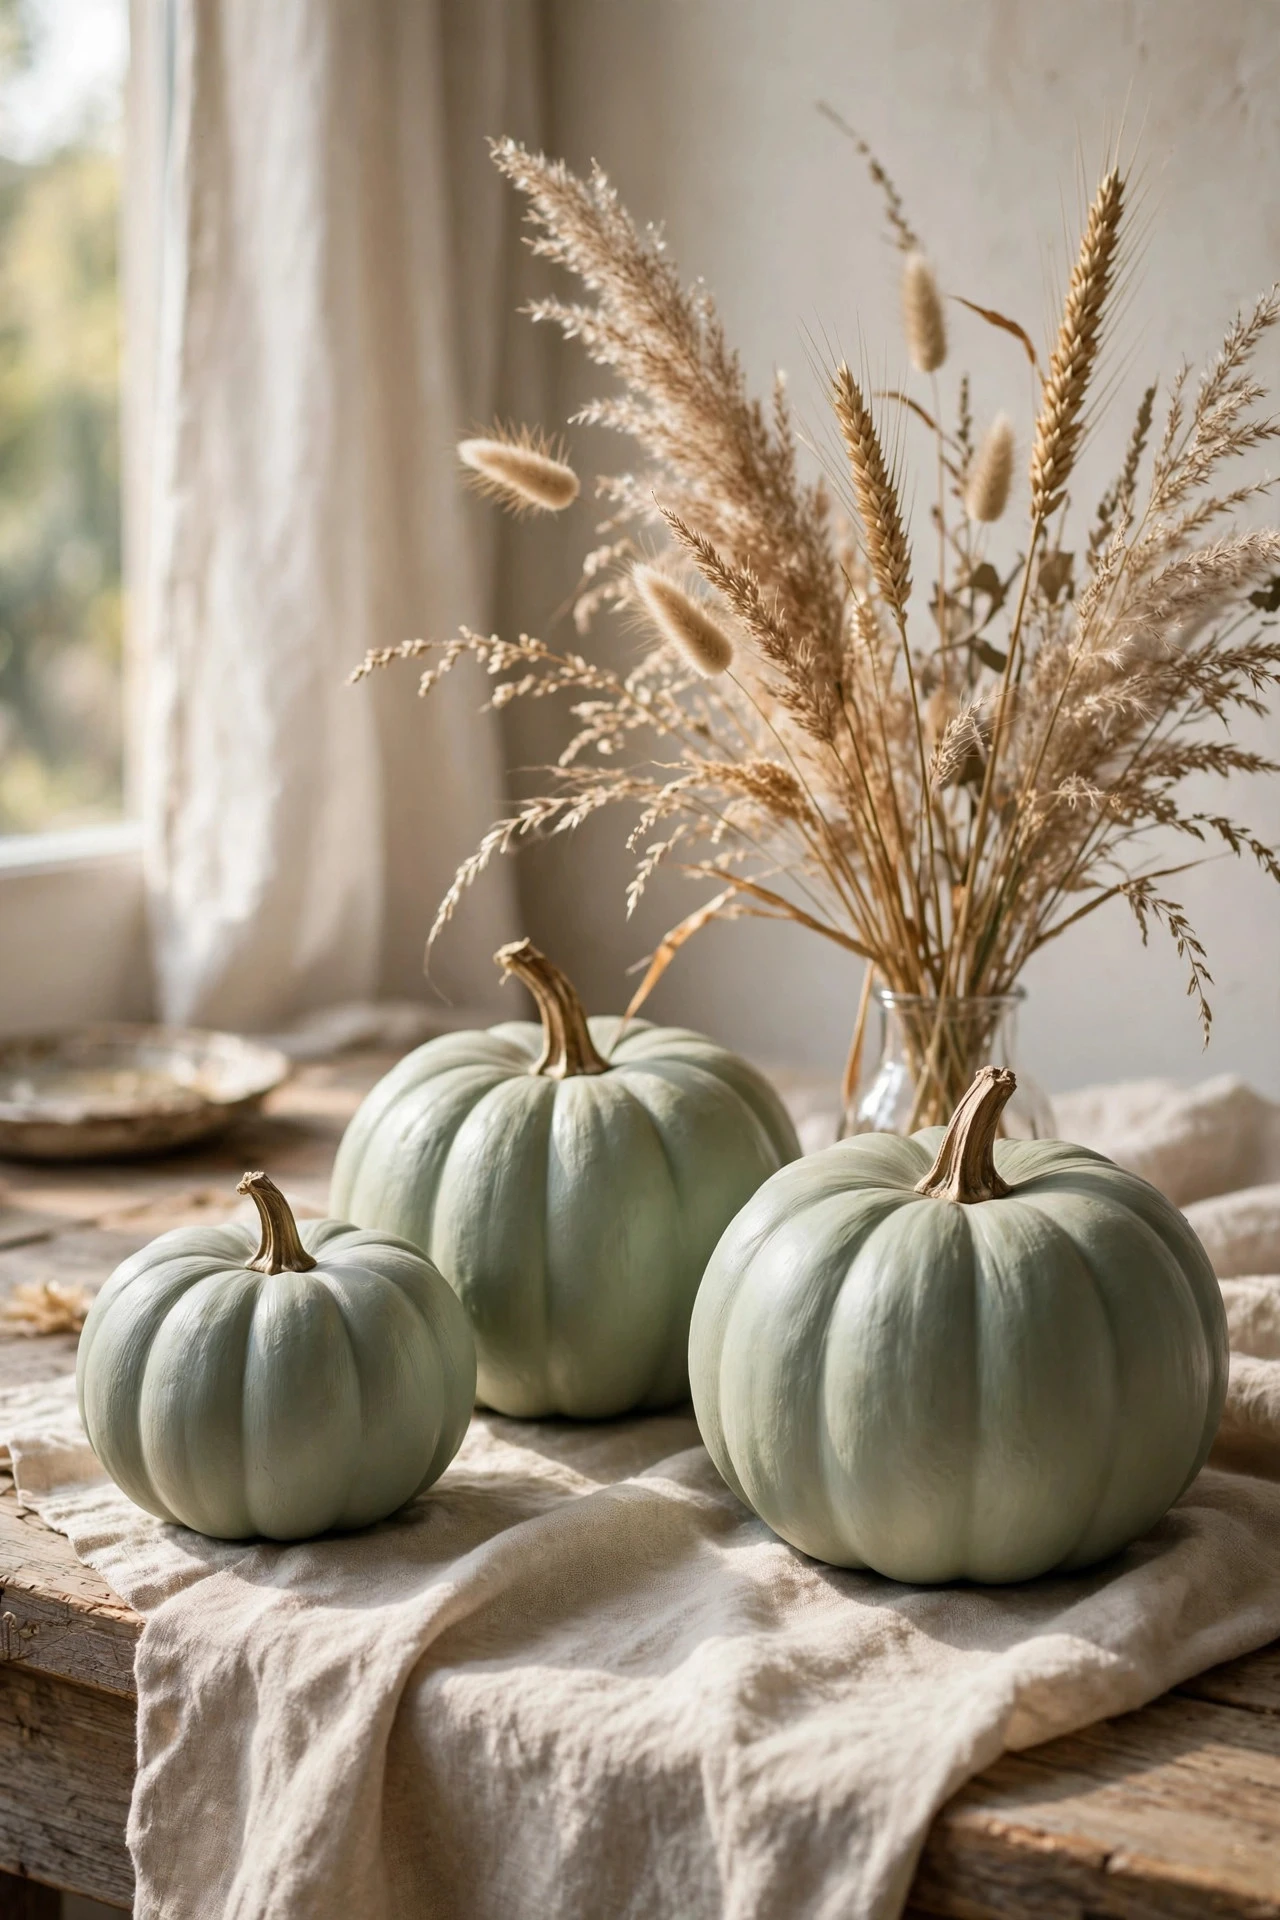
Chalk paint is the easiest paint for pumpkins because it grips almost any surface, dries matte, and needs little preparation. Wipe the pumpkin clean, paint two thin coats of chalk paint in a soft colour such as linen white, sage, or dusty rose, and distress the raised ribs very lightly with fine sandpaper once dry if you want a vintage, time-worn look. The finish suits farmhouse and cottage rooms and pairs well with linen, wood, and dried grasses. A small pot of chalk paint and a brush costs $10 to $18. The mistake to avoid is skipping the sealer on a chalk-painted pumpkin that will sit on a porch, because chalk paint is porous and rain or damp air will stain and soften the finish quickly.
9. Buffalo Plaid Pumpkins in Red and Black

Buffalo plaid looks complicated but is only a grid of overlapping stripes, and a pumpkin's ribs help keep the lines even. Paint the pumpkin white, then paint wide vertical stripes in red, let them dry, and paint wide horizontal stripes in the same red, so the overlaps read as a darker check. Add a thin black line through the centre of every second stripe if you want a sharper plaid, and keep the pattern large — small checks get lost on a curved surface. Paint, tape, and brushes cost $12 to $20. The mistake to avoid is painting the horizontal stripes before the vertical ones are dry, because the red smears, the checks blur, and the whole pattern loses its crisp, woven look.
10. Galaxy Pumpkins With Stars and Nebula Swirls
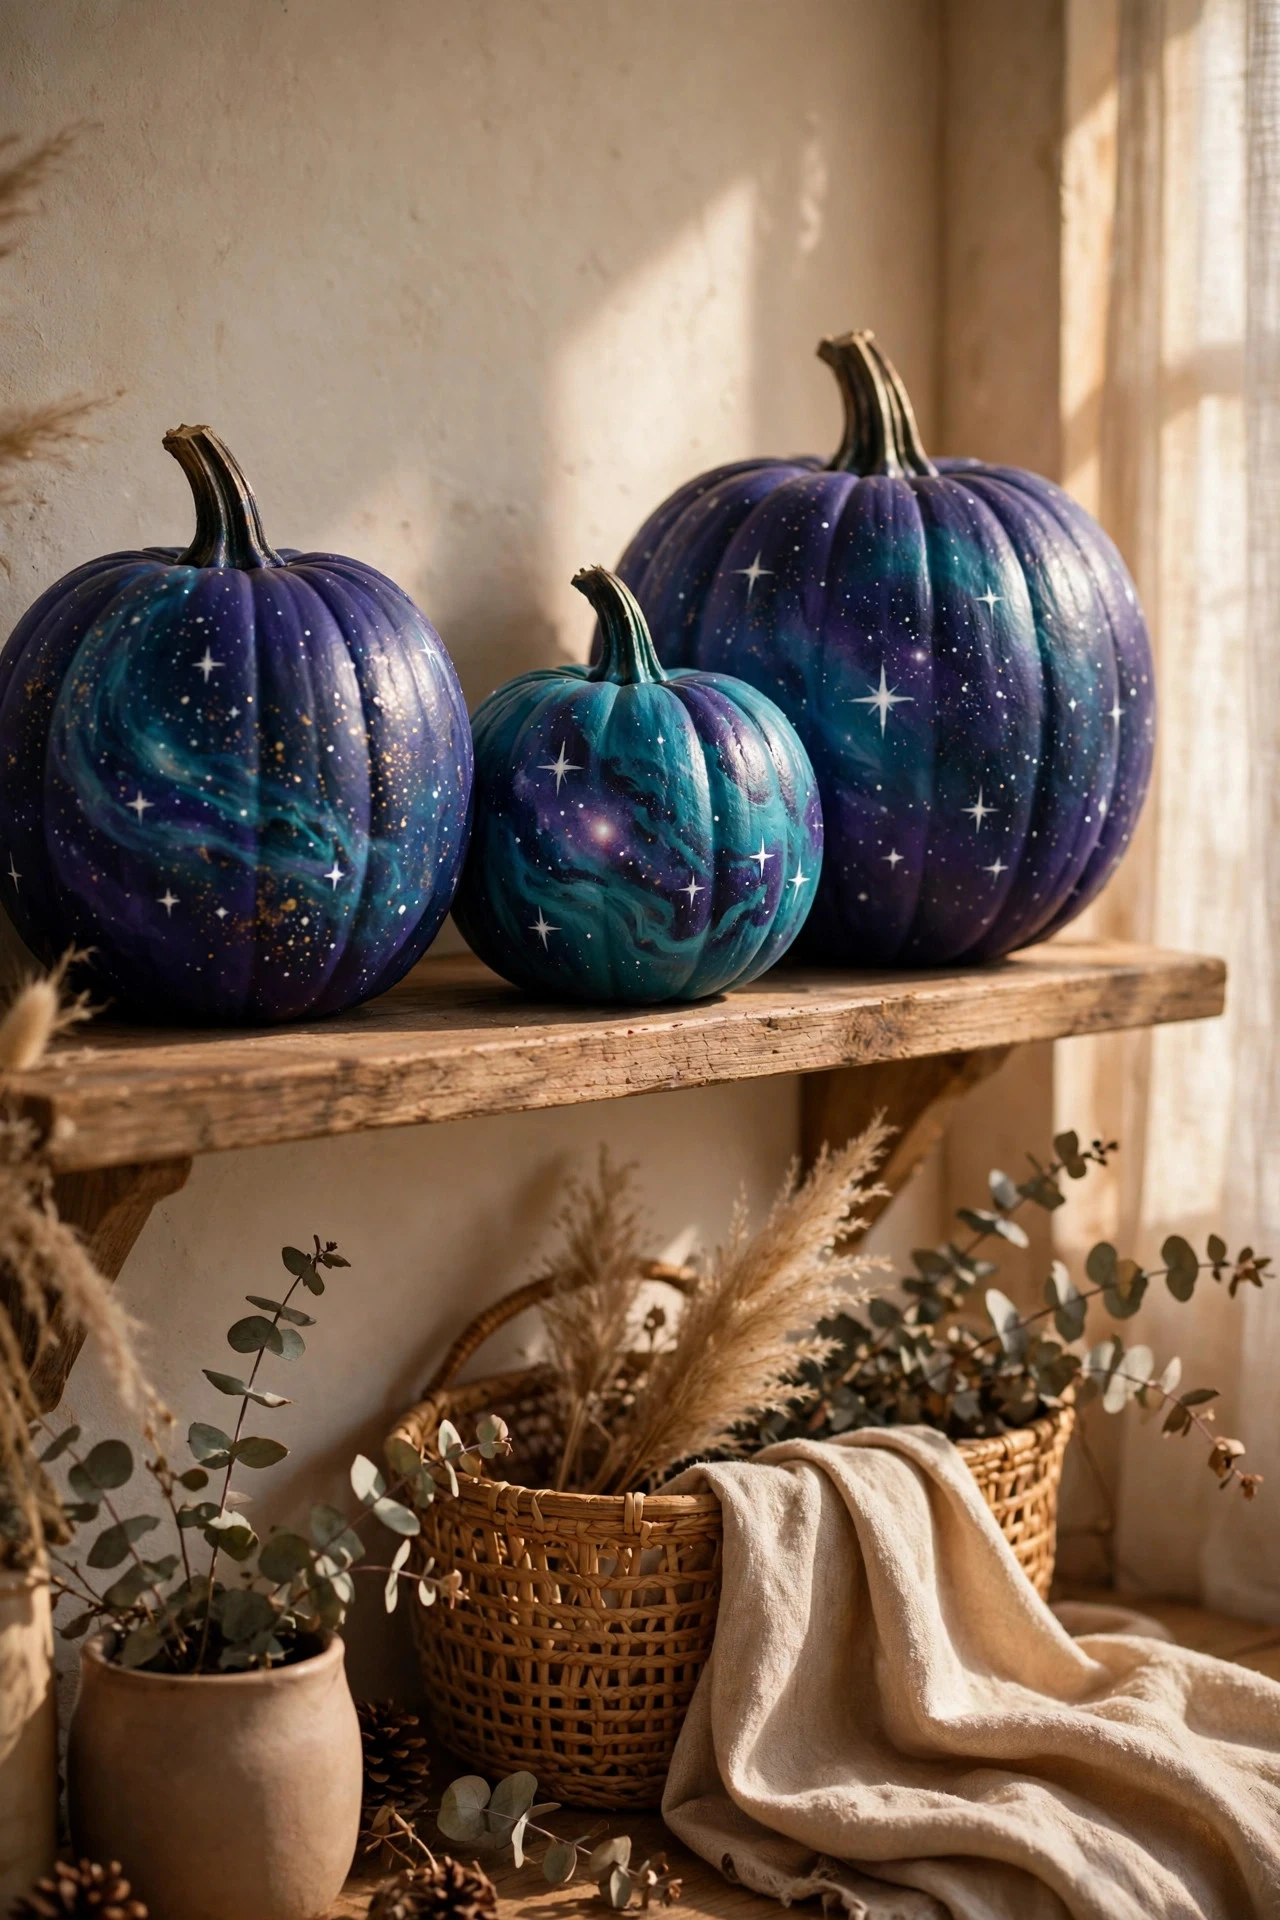
Galaxy pumpkins are a favourite with children and teenagers because the design rewards messiness — splatters and swirls are the point. Paint the pumpkin deep navy or black, sponge on patches of purple, teal, and magenta while the base is still tacky, then flick white paint from a toothbrush for stars and add a few larger dots with the end of a brush. A coat of gloss sealer deepens the colours and makes the stars stand out. Paint, brushes, and sealer cost $12 to $20. For a display that keeps the same playful, no-carve spirit after Halloween, these no-carve pumpkin decorating ideas pair beautifully with galaxy pumpkins. The mistake to avoid is using glitter paint for the stars, which reads grey and dull in daylight, when plain white flicked paint gives a much brighter, starrier finish.
11. White Pumpkins With Black Line Doodles
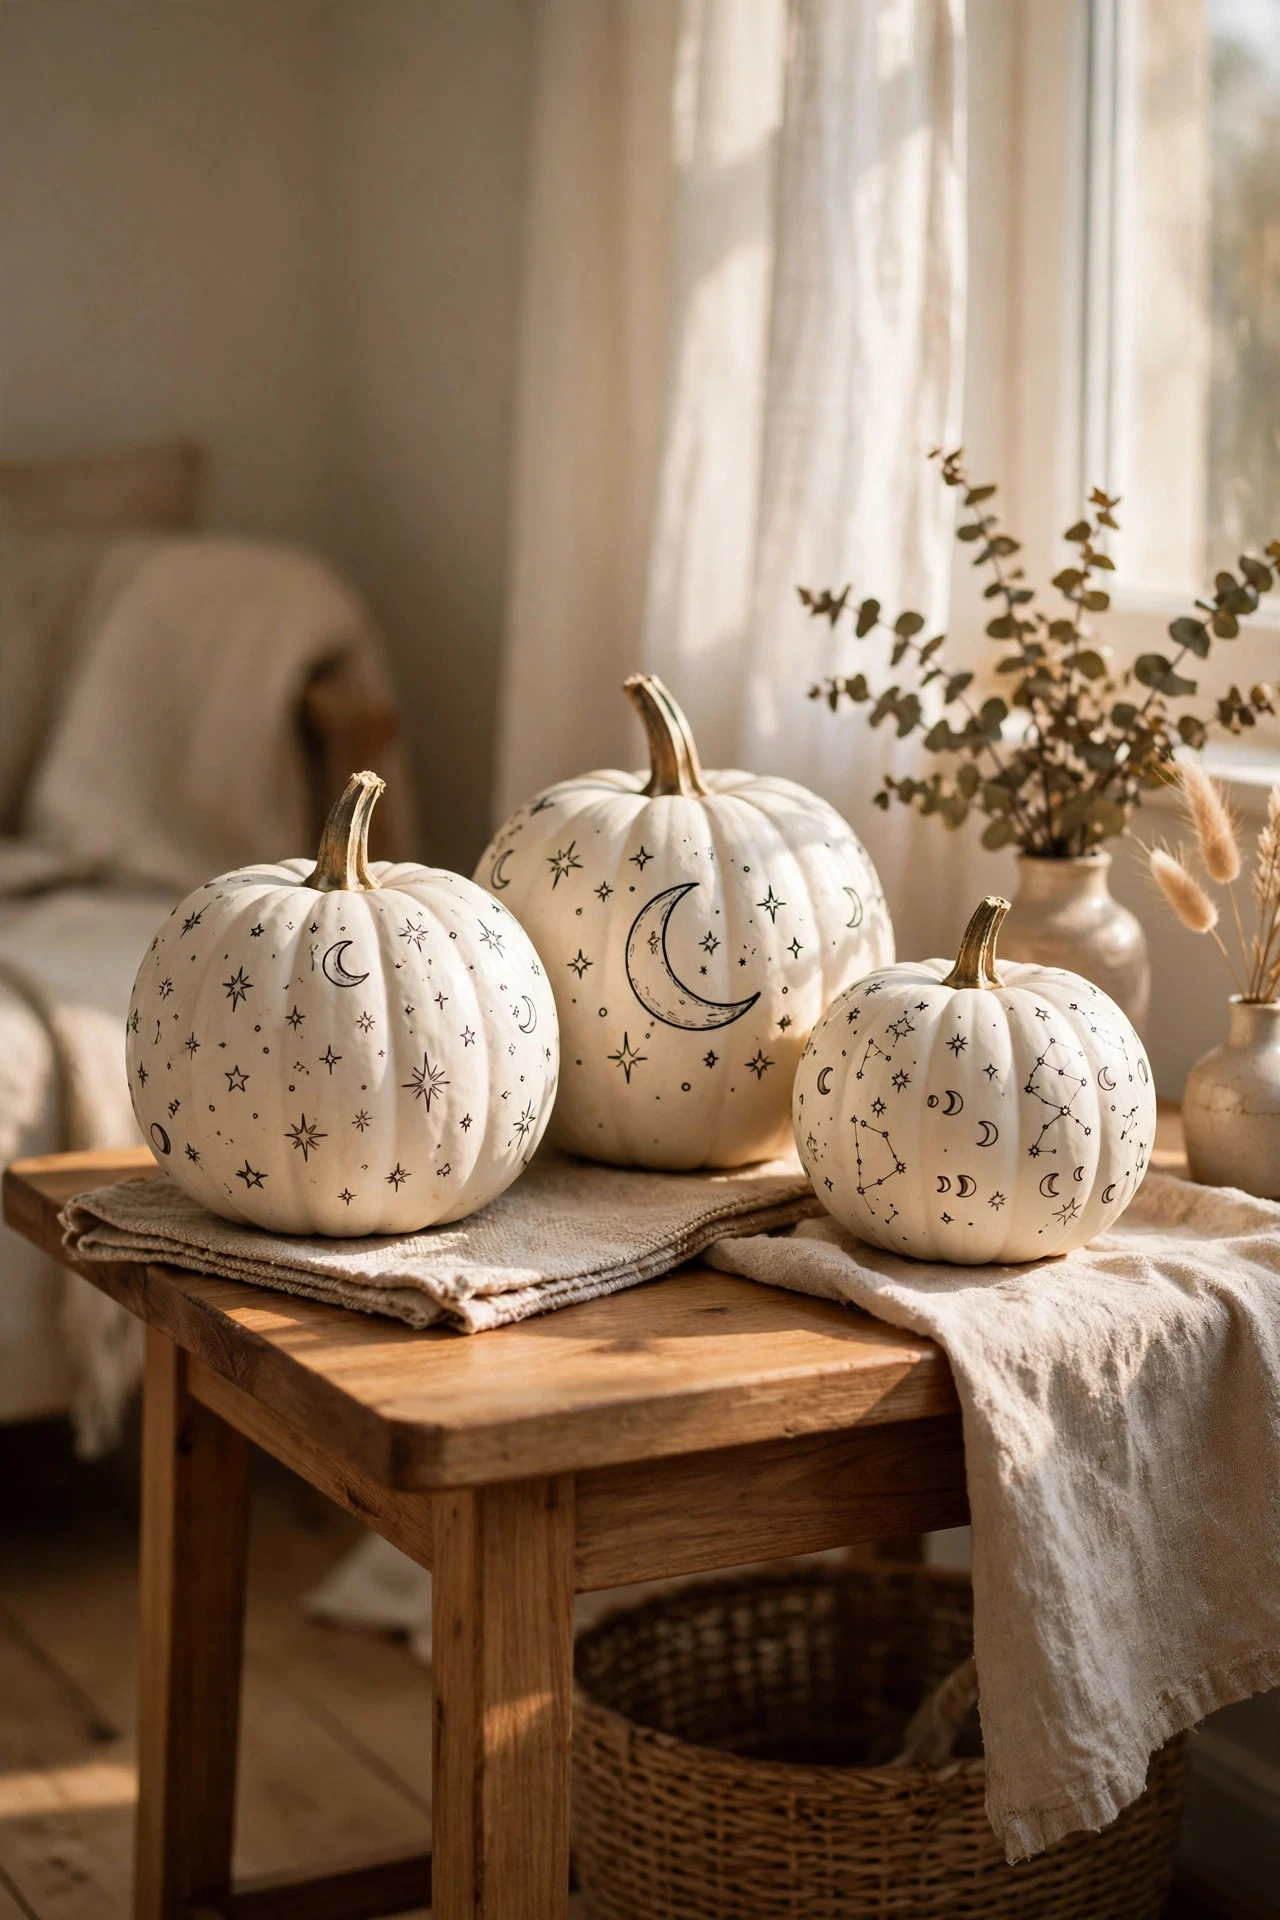
Black line doodles on a white pumpkin suit minimalist and Scandinavian rooms, and they need nothing more than a paint pen and a steady hand. Paint the pumpkin matte white, let it dry fully, then draw simple motifs — stars, moons, leaves, faces, or repeating scallops — with a black acrylic paint pen, keeping the marks small and spaced so the white still dominates. Test the pen on paper first, draw lightly in pencil if you are nervous, and seal with a matte spray so the lines do not smudge. A paint pen, paint, and sealer cost $10 to $16. The mistake to avoid is drawing with a permanent marker instead of an acrylic paint pen, because marker ink bleeds into pumpkin skin and fades to purple-brown within days.
12. Terracotta and Clay-Tone Painted Pumpkins
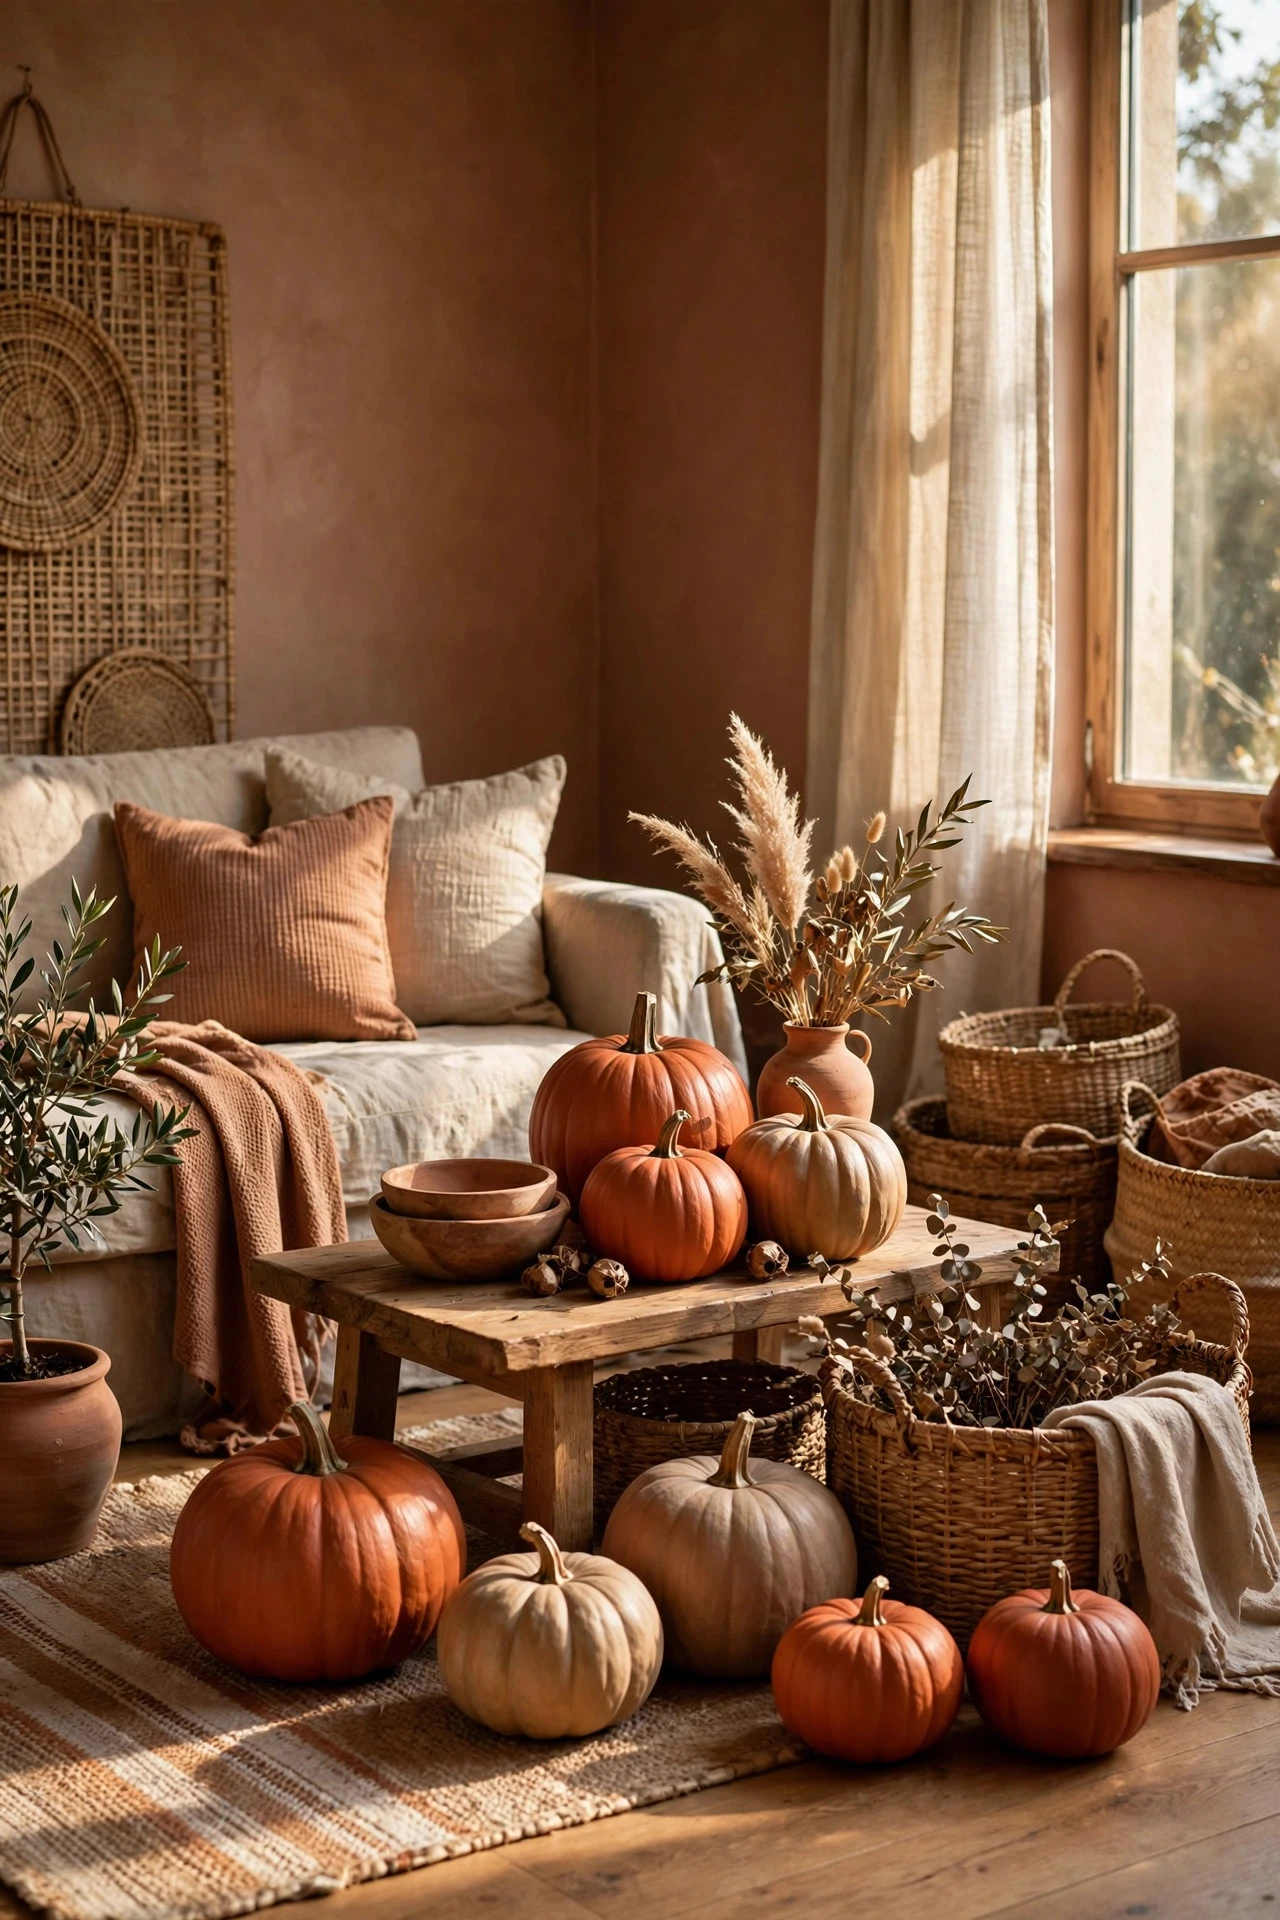
Terracotta, clay, and warm sand tones make painted pumpkins look like pottery, which suits rooms with wood, woven baskets, and warm neutrals. Paint foam or real pumpkins in two or three related earth tones — terracotta, oatmeal, and warm brown — keeping the finish matte and the stems natural or painted a soft gold. Group odd numbers together, vary the heights, and add dried grasses or a linen runner underneath so the group reads as a styled shelf rather than a pile of pumpkins. Paint and sealer cost $12 to $20 for a group. The mistake to avoid is adding a gloss sealer, which makes the clay tones look plastic and shiny and destroys the soft, earthen finish that makes this idea work.
13. Painted Pumpkins With Lettering and Words
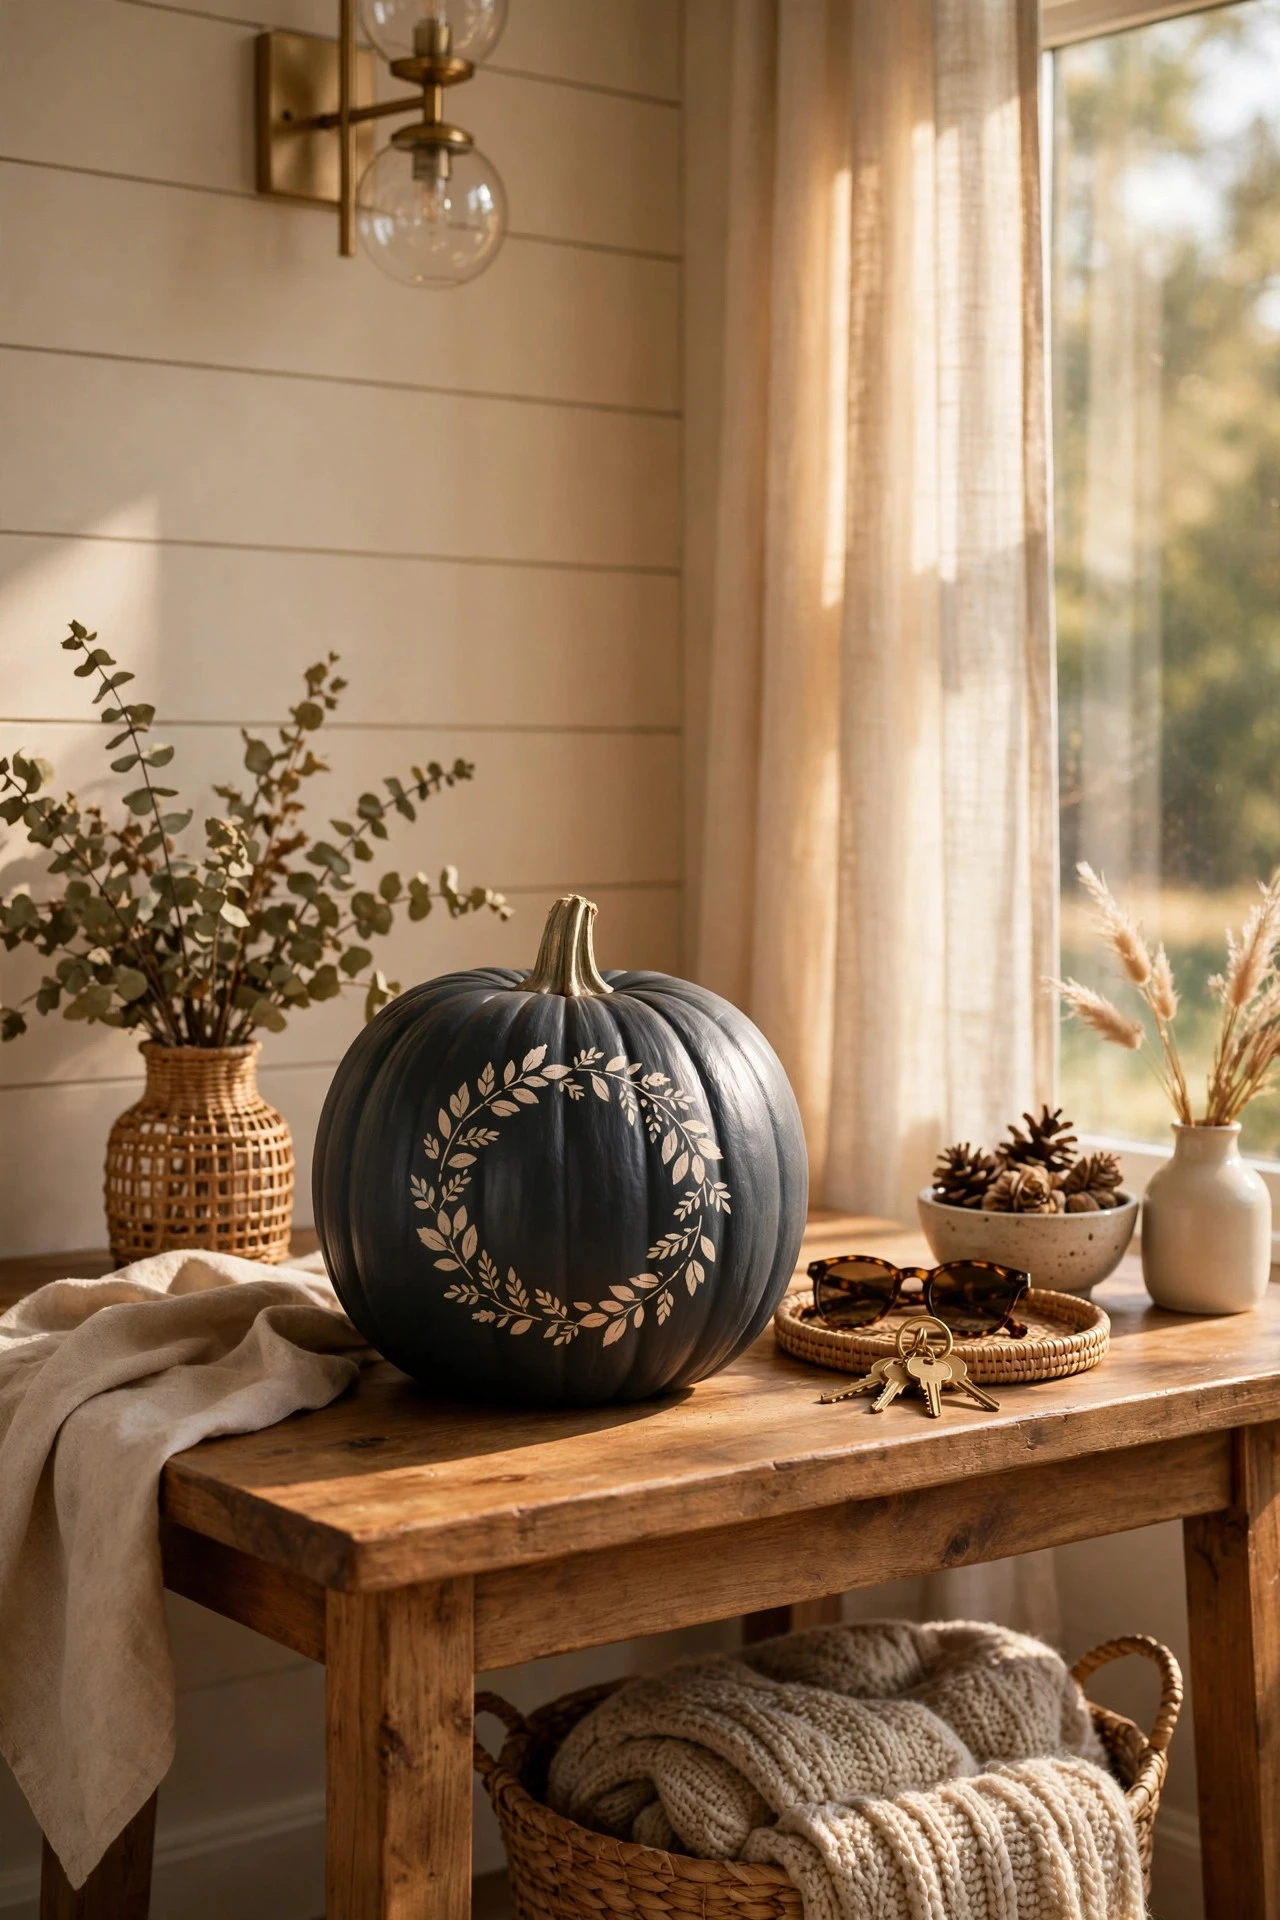
A single word — harvest, grateful, boo, or a family name — turns a pumpkin into a personalised sign, and stencils make the lettering easy. Paint the pumpkin a solid, quiet colour, let it dry, then position adhesive vinyl letters or a reusable stencil on the flattest face, paint over it in a contrasting colour, and peel the stencil away while the paint is still slightly damp. Keep the word short and the letters large enough to read from across a room. Stencils or vinyl letters, paint, and sealer cost $10 to $20. The mistake to avoid is choosing a thin, fussy script at a small size, which becomes unreadable across a room and looks like a smudge rather than a word.
14. Drip Paint Pumpkins in Rainbow Colours
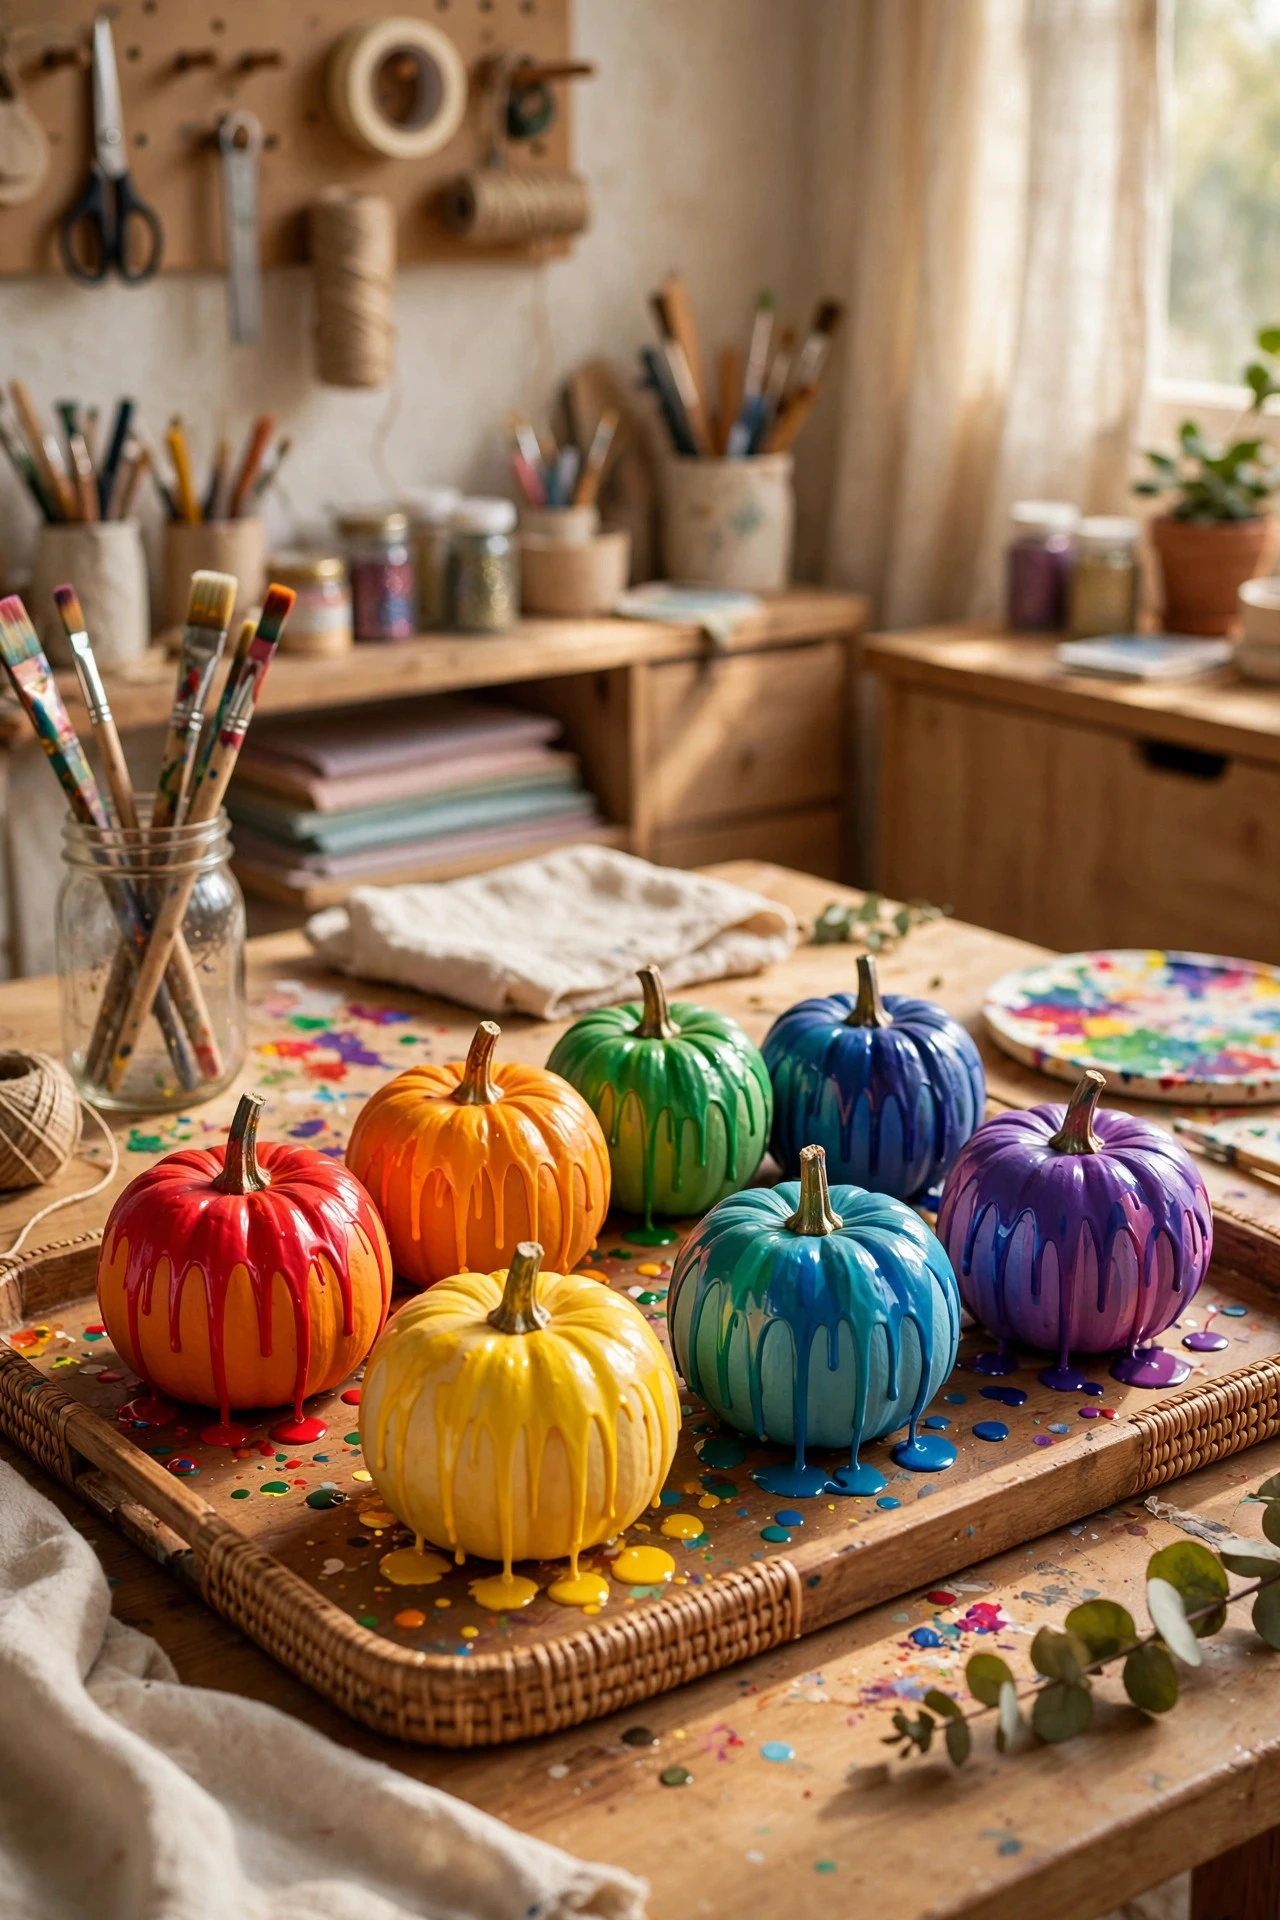
Drip pumpkins are gloriously messy and perfect for a craft afternoon, because gravity does the designing. Paint the pumpkin white, stand it on a tray, and pour or spoon small amounts of thinned acrylic paint around the top edge, tilting the pumpkin gently so the paint runs down the ribs in long drips. Use three or four colours, let each colour drip before adding the next, and catch the tray drips on paper for a matching art print. Paint and a tray cost $10 to $18. The mistake to avoid is using paint straight from a thick bottle, which sits in blobs on top of the pumpkin instead of running, so thin it with a little water until it flows like cream.
15. Marble-Effect Pumpkins in Grey and White
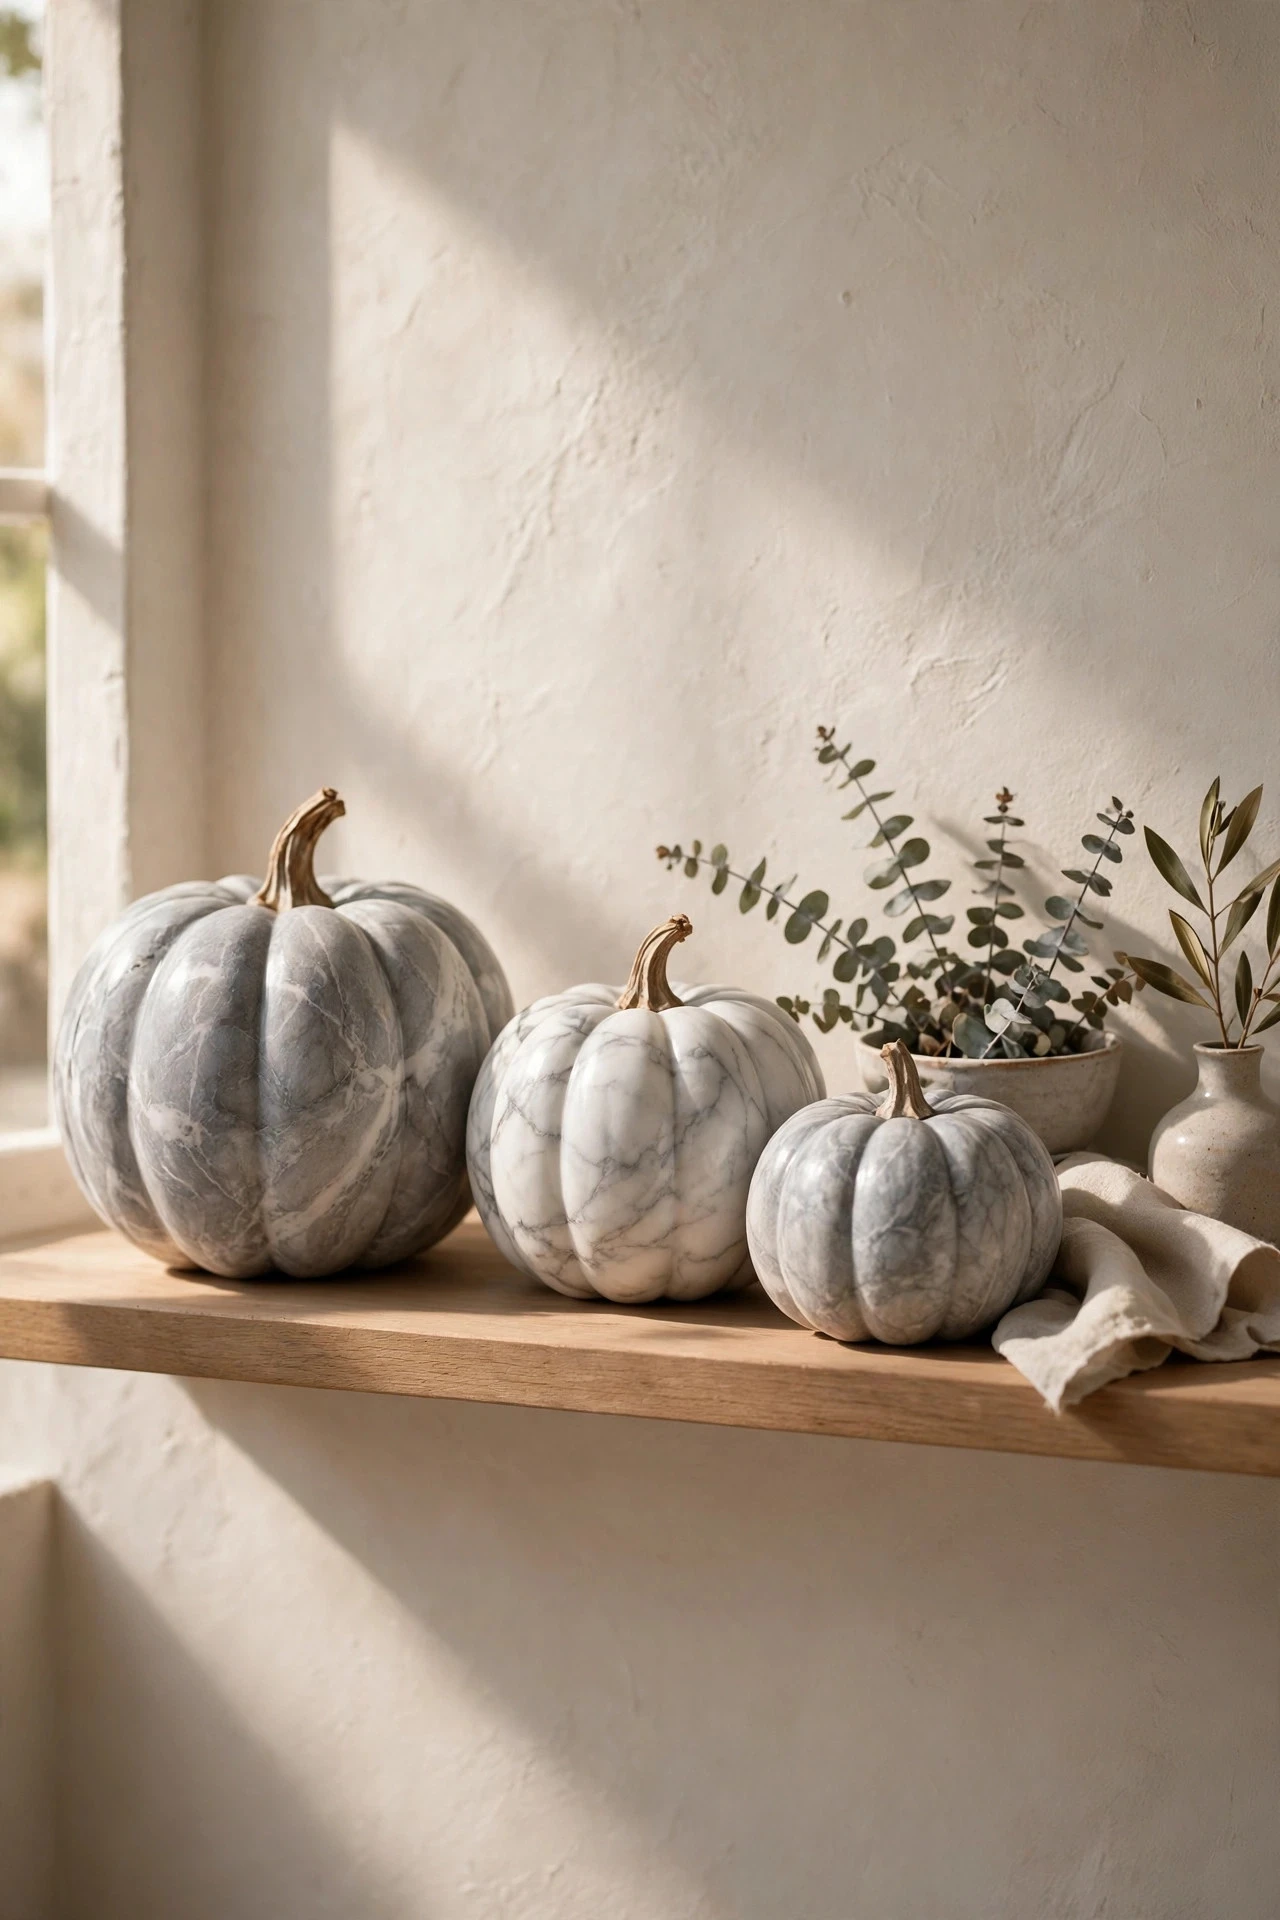
Marble effect sounds advanced, but it is mostly swirling two colours together while they are wet. Paint the pumpkin white, then while the base is still slightly damp, drag thin veins of grey and soft gold paint across the surface with a fine brush or a feather, following the ribs, and soften the lines with a dry brush. Keep the veins sparse — real marble has plenty of white space — and seal with a gloss coat to mimic polished stone. Paint, brushes, and sealer cost $12 to $20. The mistake to avoid is overworking the veins, because too many grey lines turn the pumpkin muddy and grey instead of fresh and marbled.
16. Painted Pumpkin Animals: Cats, Owls and Foxes
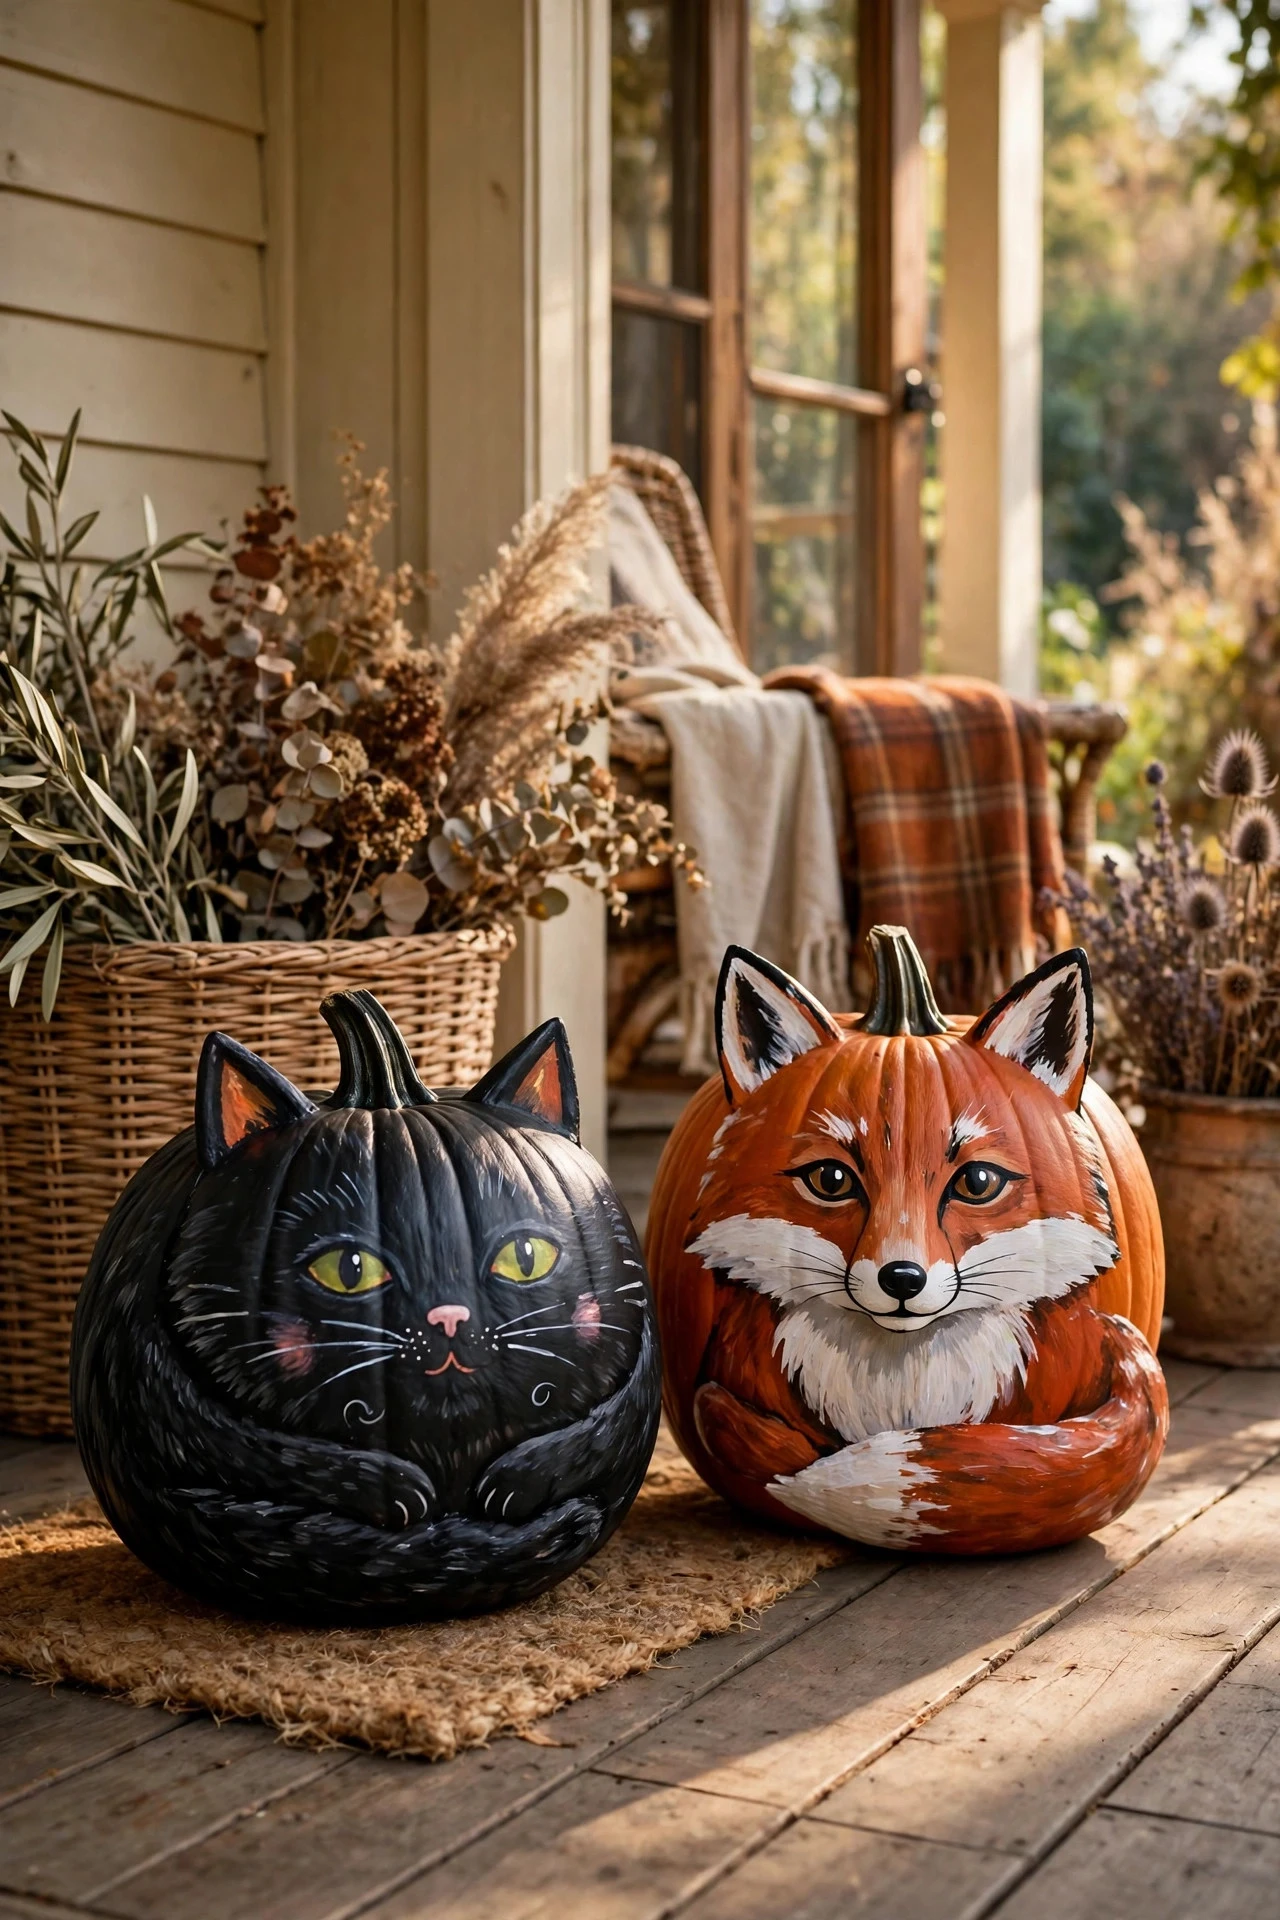
Animal pumpkins are the designs children ask for first, and they need only paint, felt, and glue. Paint a pumpkin black for a cat, adding felt ears, a painted face, and a pipe-cleaner tail; paint one rust-orange for a fox with a white painted chest and felt ears; or paint one cream for an owl with large painted eyes and felt wings. Keep the face simple — two eyes, a nose, and a mouth — because small details get lost on a curved surface. Paint, felt, and glue cost $10 to $18 per pumpkin. For more cute, character-led pumpkin projects, these easy pumpkin carving ideas offer faces and figures that translate well into paint. The mistake to avoid is gluing heavy felt pieces to a wet, freshly painted pumpkin, because they slide, smear the paint, and fall off before the glue sets.
17. Metallic Pumpkins in Gold, Copper and Silver
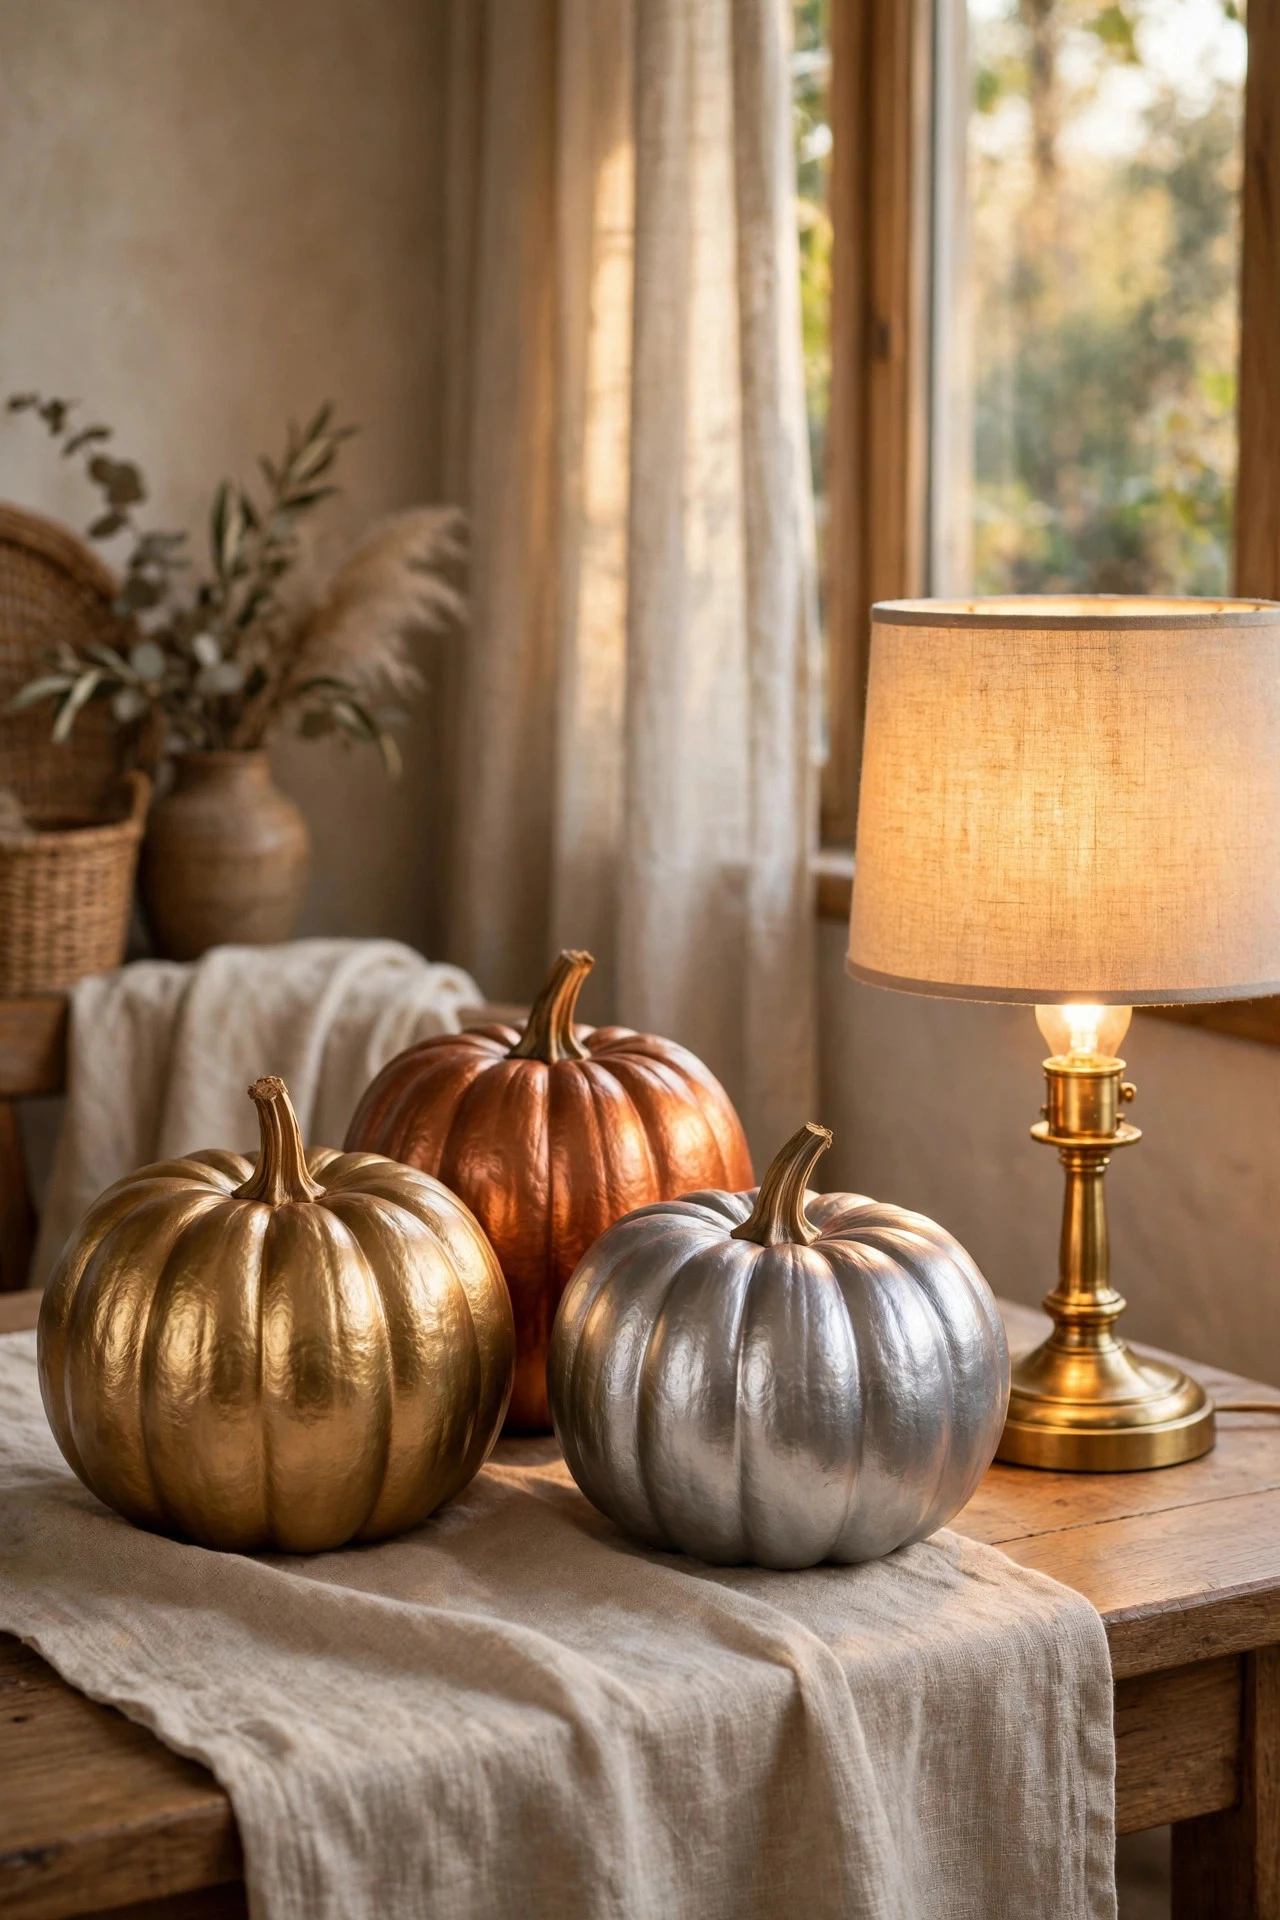
Metallic pumpkins bring warmth and light to a fall display, especially beside candles and warm lamplight. Prime real orange pumpkins with pale pink or warm white first so the metallic paint does not turn muddy, then apply two thin coats of metallic acrylic or a craft spray paint, holding the can 10 to 12 inches away in light, even passes. Mix metals deliberately — gold, copper, and champagne together — rather than scattering every metallic you own. Paint, primer, and sealer cost $14 to $26. The mistake to avoid is painting metallics over a dark orange base without primer, because the orange shows through and turns gold into a dull, brownish bronze.
18. Gingham and Gingham-Check Pumpkins
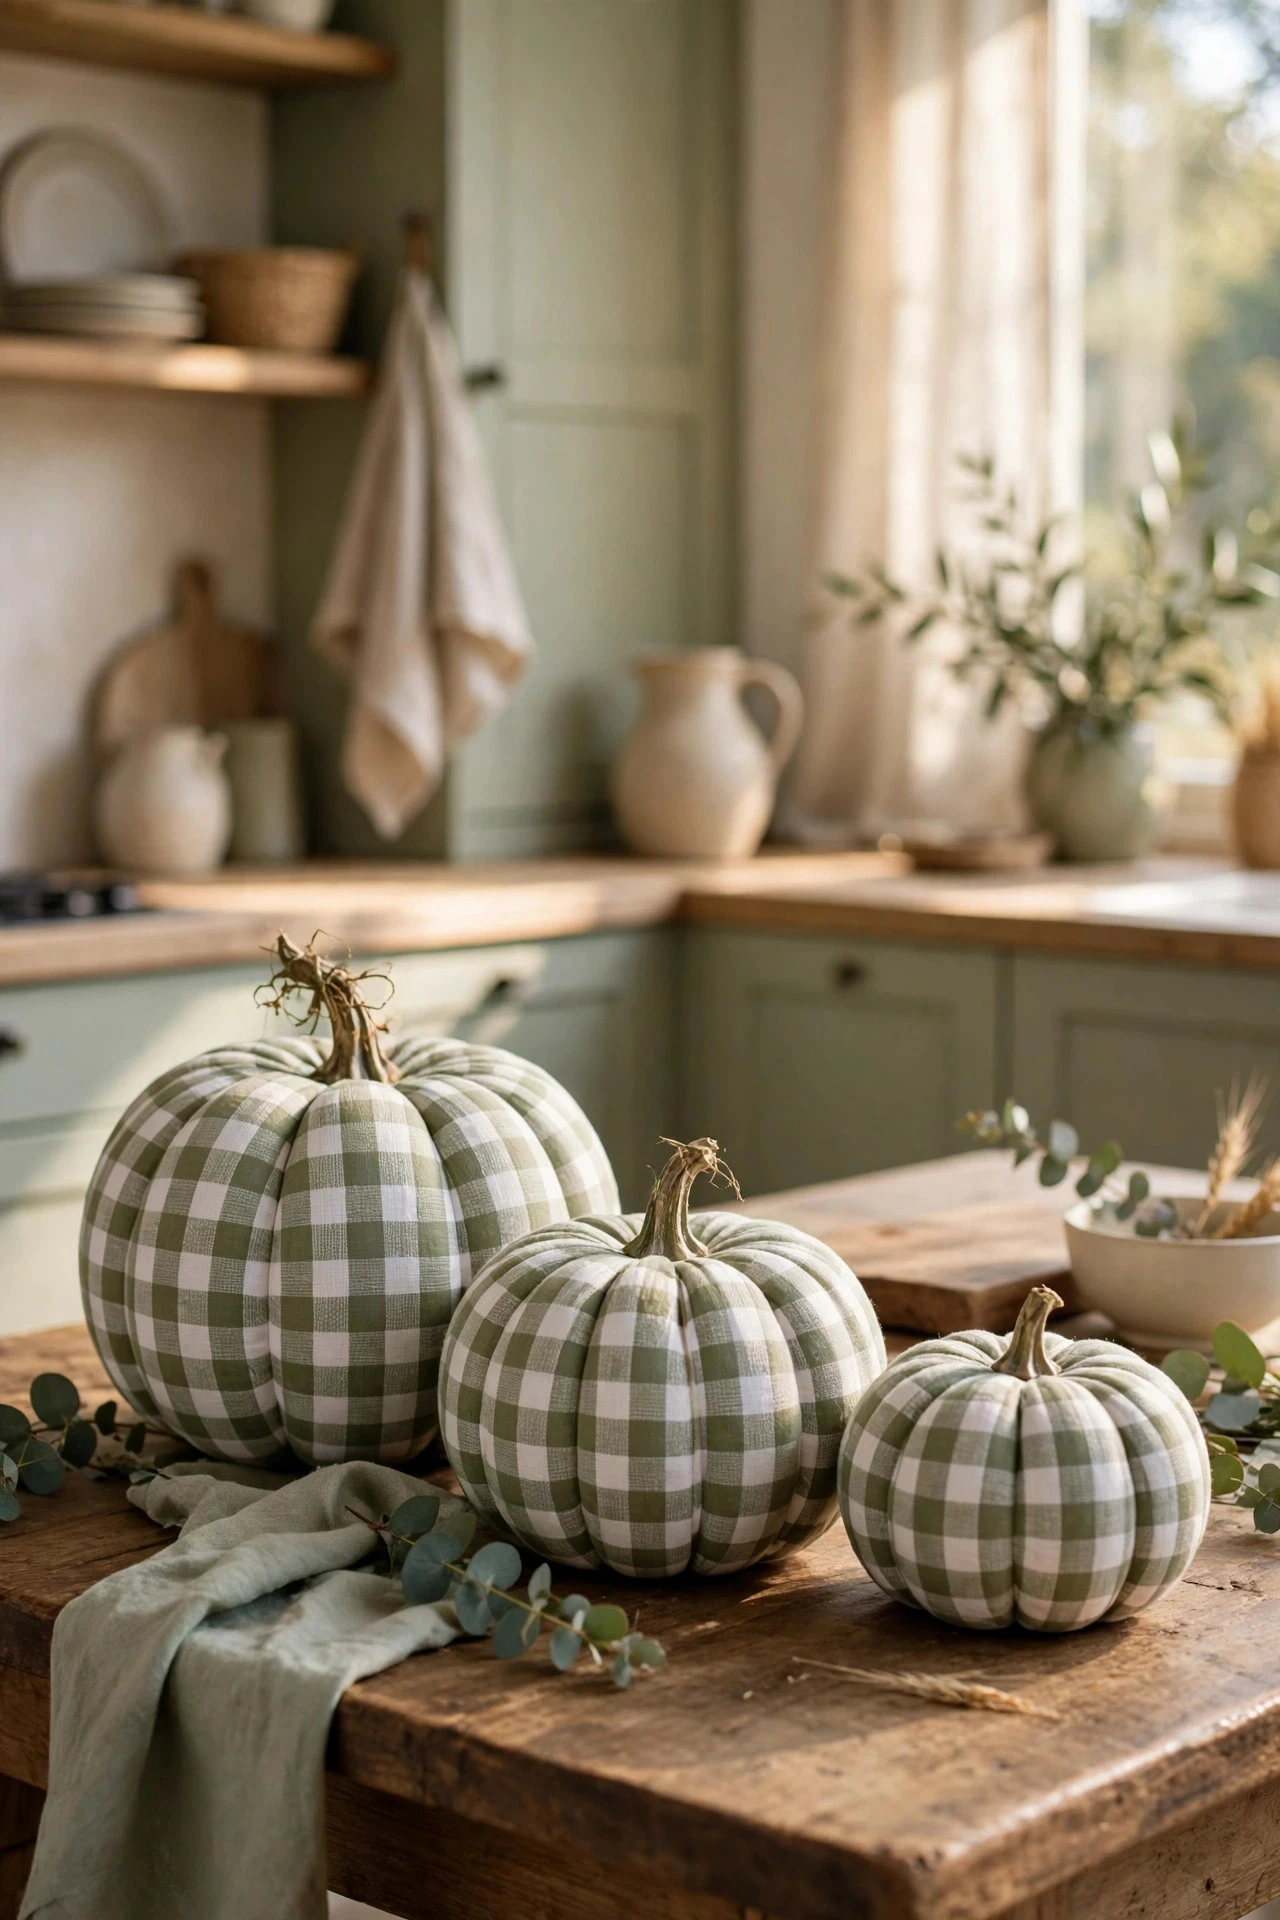
Gingham is buffalo plaid's softer cousin: a small check in one colour on white, and it suits kitchens, dining tables, and cottage rooms. Paint the pumpkin white, then paint thin vertical stripes in a soft colour such as sage, dusty blue, or blush, let them dry, and paint thin horizontal stripes in the same colour so the overlaps form the classic gingham squares. Keep the checks small and even, and use painter's tape for the first few stripes until your eye learns the spacing. Paint and tape cost $10 to $16. The mistake to avoid is using two different shades for the vertical and horizontal stripes, which breaks the gingham illusion and makes the pattern look like random crossing lines.
19. Painted Pumpkins for a Porch in Weatherproof Paint
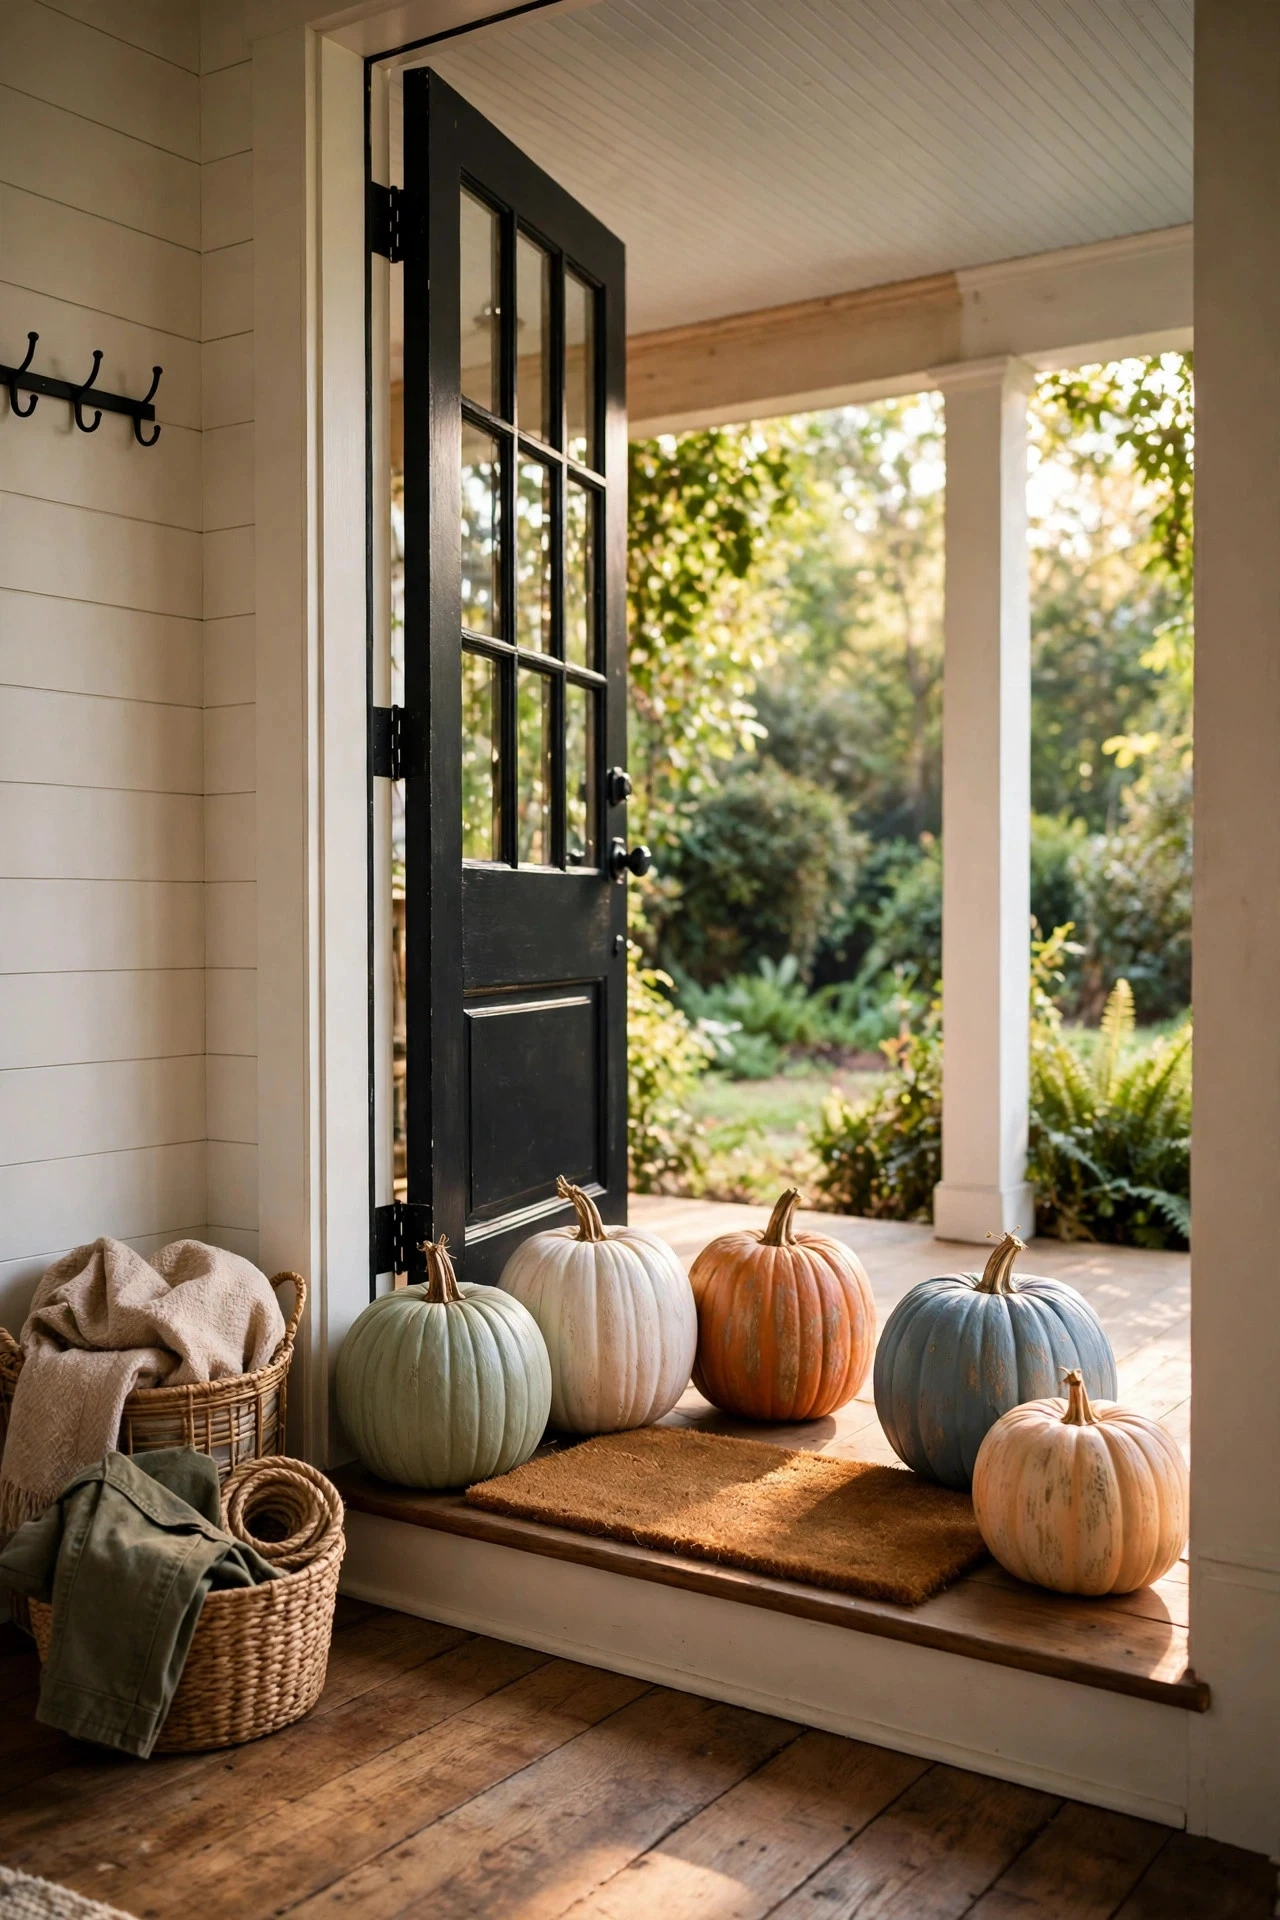
Porch pumpkins need paint that can cope with damp air, sun, and temperature changes, so the sealer matters as much as the colour. Paint real pumpkins with exterior-grade acrylic or multi-surface paint, apply two thin coats, and finish with two coats of an outdoor clear sealer, paying attention to the base where the pumpkin meets a damp step. Foam pumpkins are the safer porch choice in wet climates because they cannot rot, and they hold paint beautifully through a whole season. Paint and outdoor sealer cost $14 to $24. The mistake to avoid is bringing a real painted pumpkin indoors and outdoors repeatedly, because condensation forms under the paint, the skin softens, and the design peels within days.
20. Mini Pumpkins Painted as a Matching Set
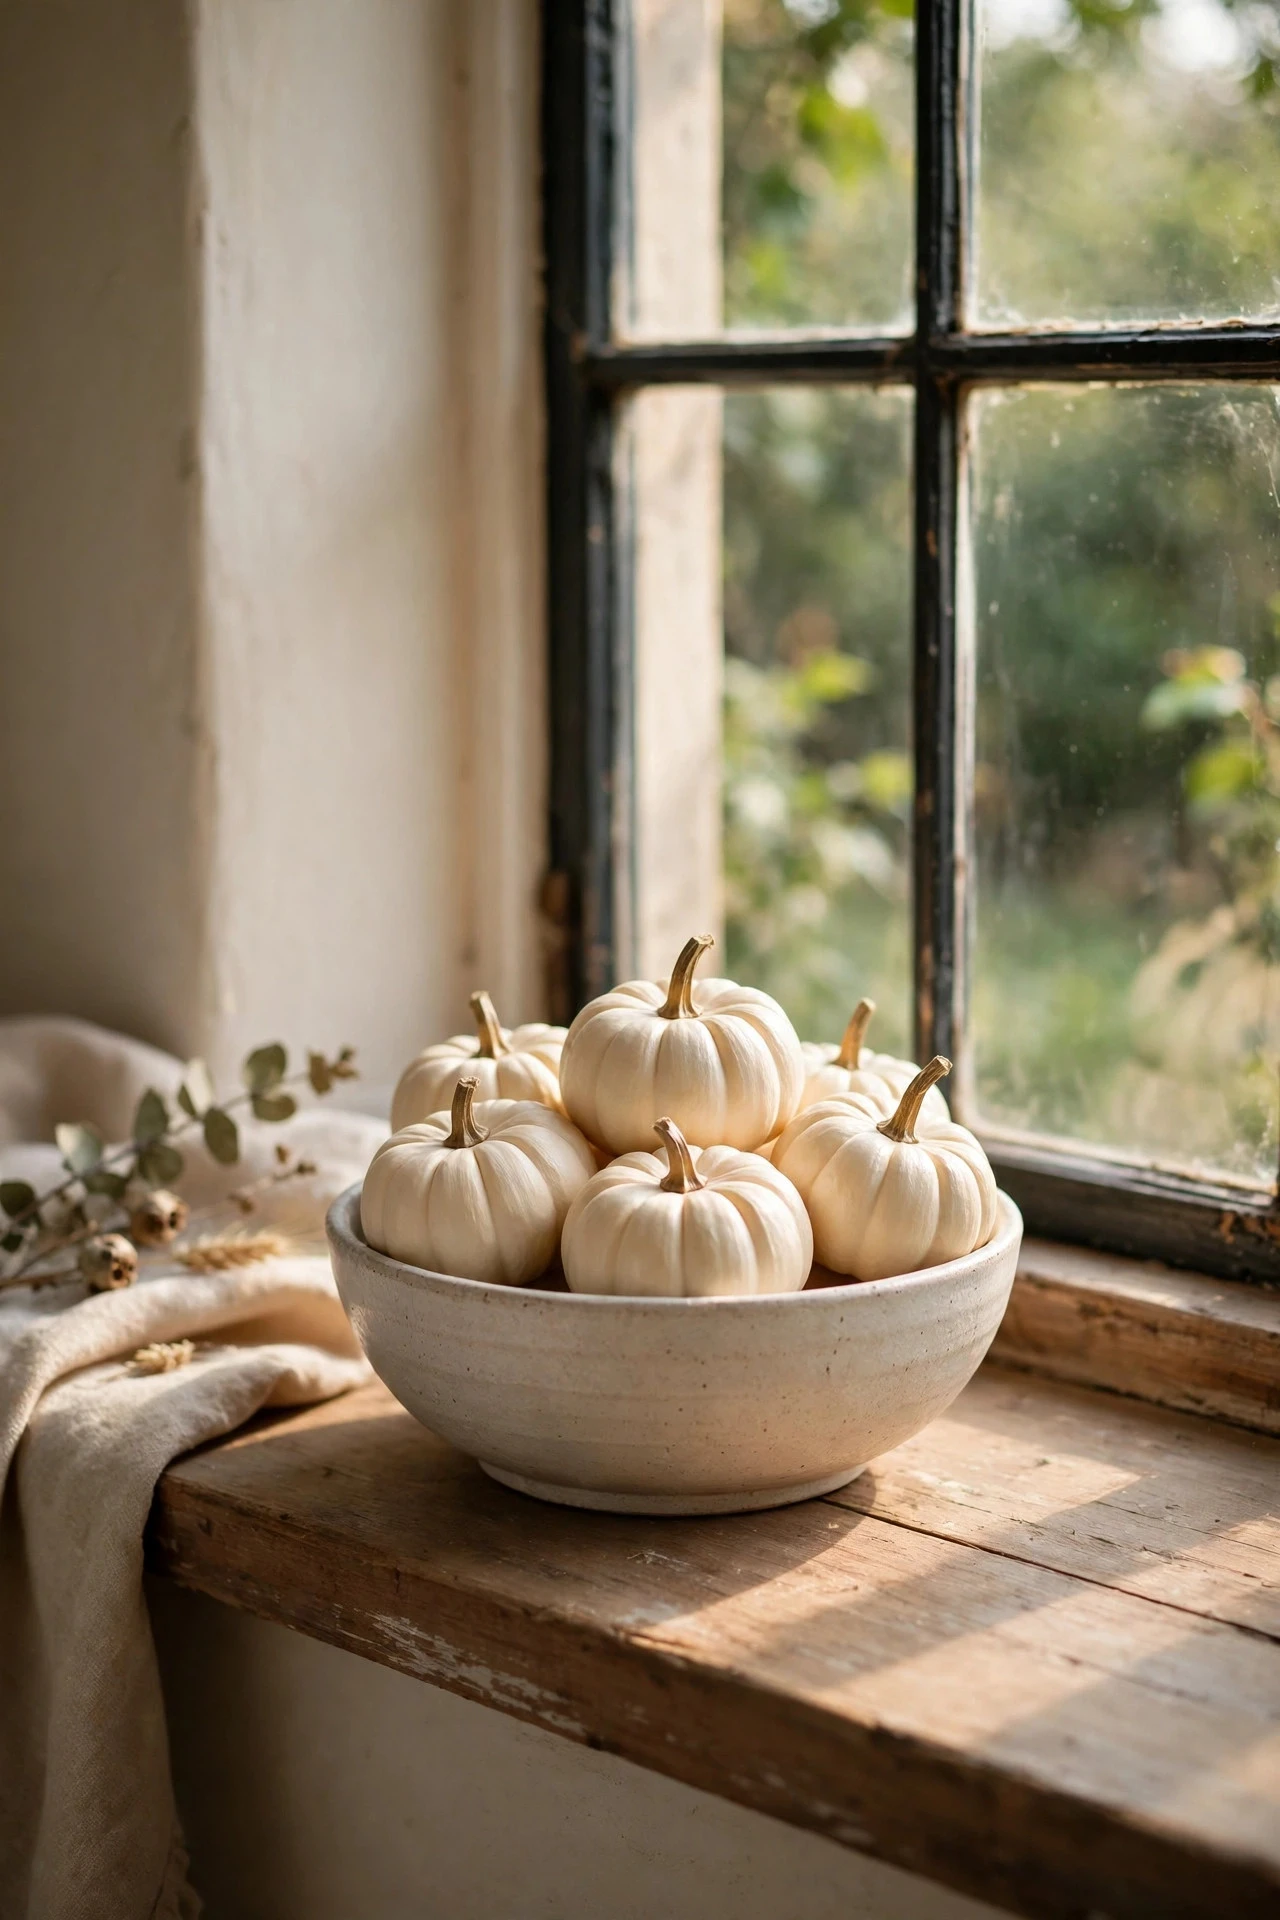
Mini pumpkins are the lowest-risk way to try a new technique, because each one takes minutes and a mistake costs almost nothing. Paint five or seven minis in one colour story — all white with different gold details, all pastels, or all black with white doodles — and display them in a bowl, on a tiered tray, or along a windowsill. Odd numbers look collected, and repeating one detail, such as a gold stem or a single dot, ties the set together. A few small bottles of paint and a sealer cost $8 to $14. The mistake to avoid is painting every mini in a completely different style, which makes the set look like leftovers rather than a deliberate, matching collection.
21. Watercolour Wash Pumpkins in Soft Pastels

A watercolour wash gives a pumpkin a soft, dreamy finish that suits bedrooms, nurseries, and light, airy rooms. Thin acrylic paint with water until it is translucent, brush it over a white-painted pumpkin in loose washes of blush, peach, lilac, and sage, and let the colours bleed gently into each other while damp. Leave some white showing, add a few deeper dots of colour once the wash is dry, and seal with a matte coat to keep the watercolour softness. Paint, brushes, and sealer cost $10 to $18. The mistake to avoid is using full-strength paint for the wash, which covers the pumpkin opaquely and loses the translucent, watercolour quality entirely.
22. Painted Pumpkins Sealed, Stored and Reused
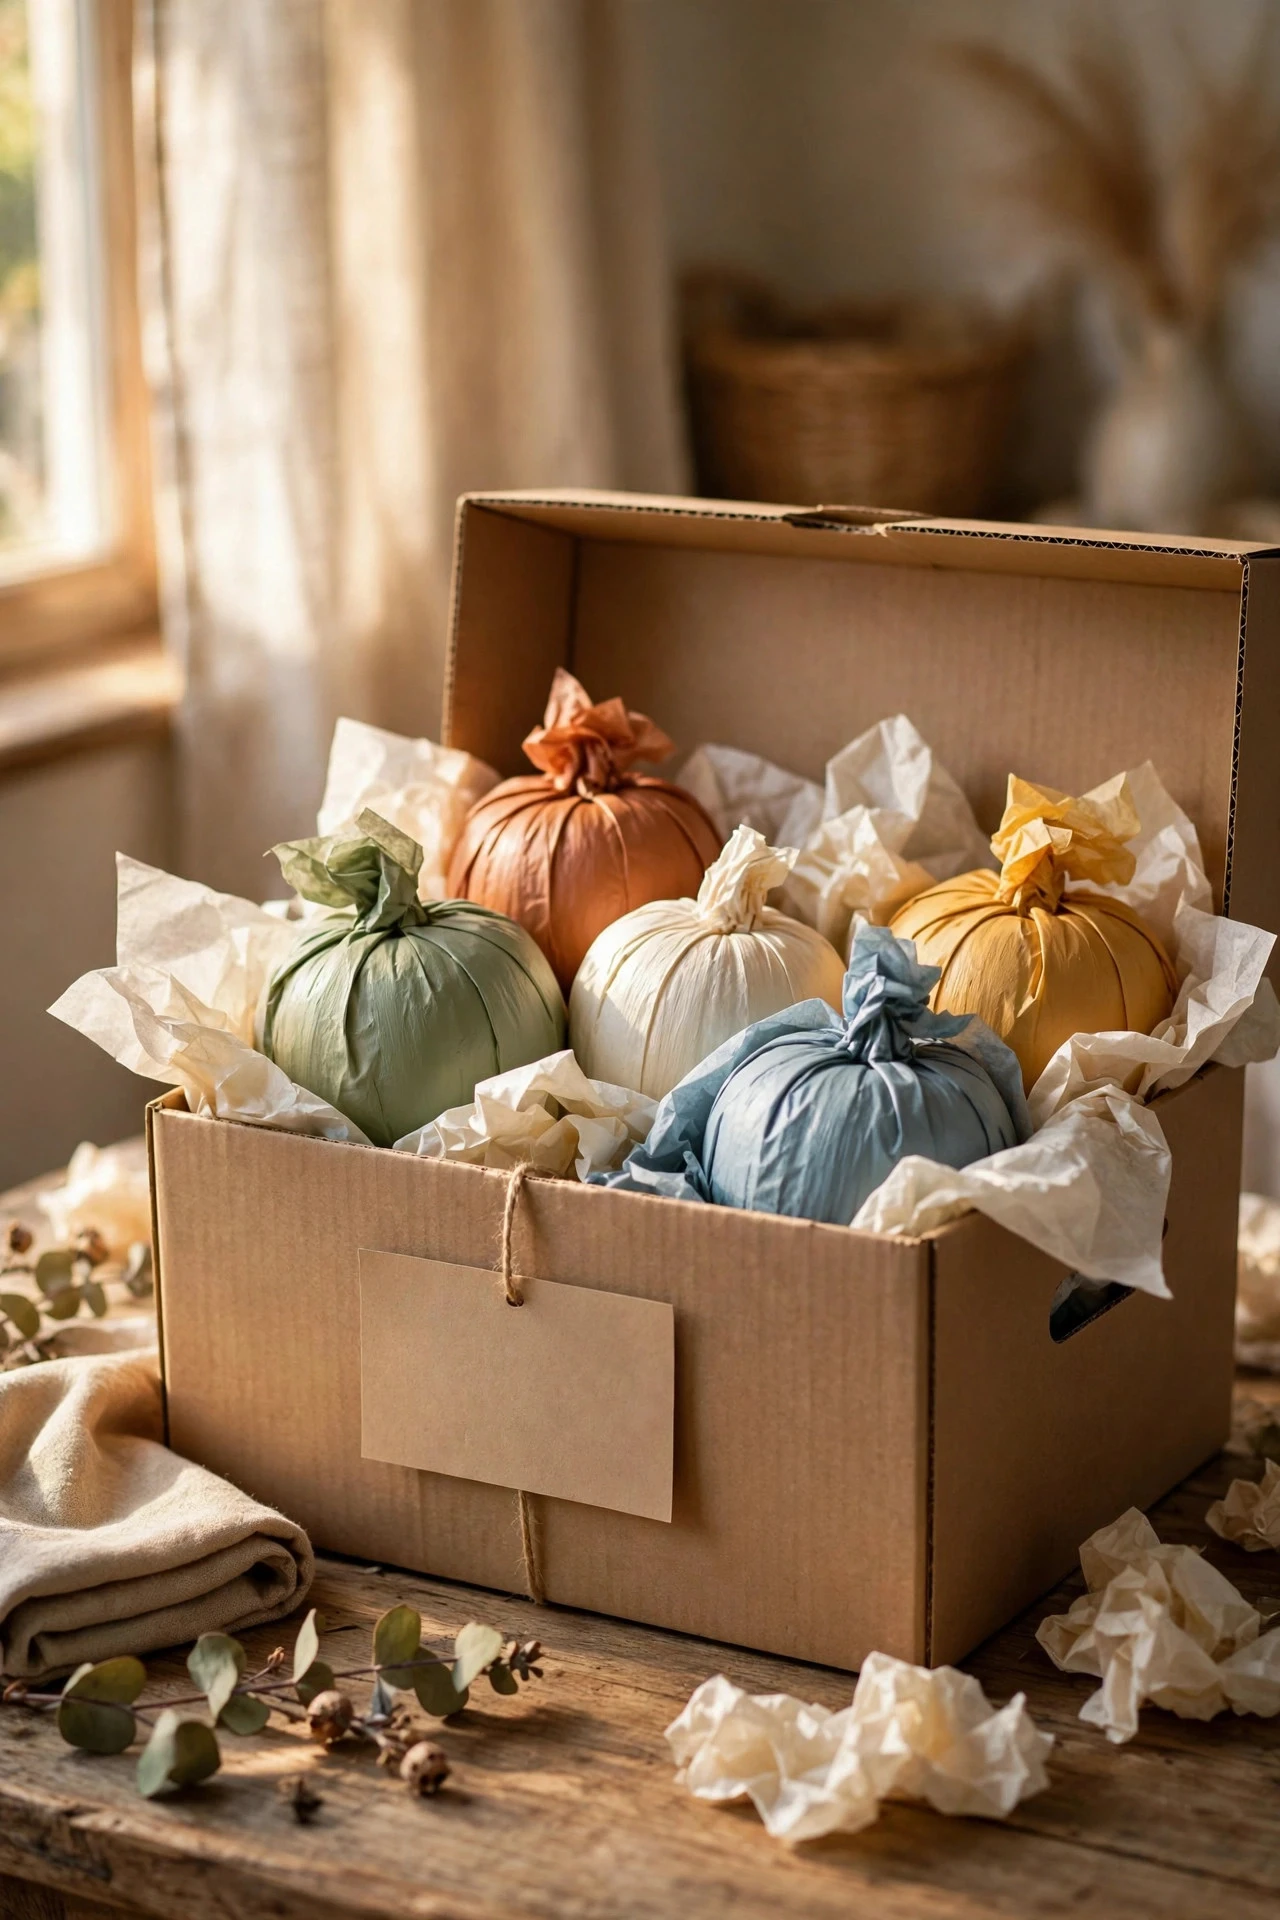
The final idea is not a design but a habit: seal every painted pumpkin, store foam pumpkins well, and your work lasts for years. Apply two thin coats of clear sealer — matte for chalk and clay finishes, gloss for metallics and galaxy designs — let each coat dry fully, and keep real pumpkins indoors, cool and dry, checking for soft spots every few days. Wrap foam pumpkins individually in tissue paper, store them in a labelled box away from heat, and touch up any scuffs with the original paint next season. Sealer and tissue paper cost $6 to $12. The mistake to avoid is stacking unsealed painted pumpkins together in a box, because the paint sticks, peels, and transfers colour from one pumpkin to another over the winter.
Practical Tips
Choose the right pumpkin and paint before you start, because the surface decides how pretty the finish will be. Smooth, unblemished real pumpkins and foam craft pumpkins take paint most evenly, while deeply ribbed or bruised pumpkins need extra coats and still show uneven colour. Always wash real pumpkins with mild soapy water, dry them thoroughly, and apply a primer or a first coat of white paint when you are painting a light colour over orange skin. Acrylic craft paint is the most forgiving choice for beginners, chalk paint gives a soft matte finish, and spray paint gives the smoothest metallic finish, so match the paint to the look you want. For broader guidance on paint types and how finishes behave on porous surfaces, the craft and paint guides at The Spruce explain the differences clearly.
Budget wisely by starting with one hero pumpkin and a small group, rather than buying paint for twenty pumpkins at once. A basic pumpkin-painting kit needs three or four colours of acrylic paint, two brushes, a sealer, and one embellishment, such as gold leaf, ribbon, or felt, and that kit costs roughly $25 to $45 and covers several pumpkins. Buy small bottles, share colours across ideas, and test each colour on the bottom of a pumpkin or on paper before committing, because colours shift noticeably as they dry. Work in a ventilated area when using spray paint or spray sealer, protect tables with a drop cloth, and keep glitter, glue guns, and paint pens away from small children. For styling inspiration that places painted pumpkins within a whole room, House Beautiful shows how colour, texture, and metallic accents work together beyond a single pumpkin.
Display painted pumpkins where they will be seen in soft, natural light and protected from knocks, heat, and moisture. Group pumpkins in odd numbers, vary the heights with books, cake stands, or small crates, and repeat one colour or material — gold leaf, a single paint colour, or a ribbon — across the group so the display feels collected. Keep real painted pumpkins indoors, bring foam pumpkins inside during rain, and rotate a display every week or two so the same side does not fade in a sunny window. If a pumpkin gets scuffed, touch it up with the original paint and a small brush, then reseal just that spot, rather than repainting the whole pumpkin and risking a mismatched finish.
Final Thoughts
Painting pumpkins proves that the best fall decor is often the simplest: a clean pumpkin, a good brush, and the patience to let each coat dry. Start with the idea that suits your time — a solid matte colour, a set of polka dots, or a gold-leaf accent — and build outward from there, keeping one colour story, sealing every finish, and leaving a little breathing room around each pumpkin. The most charming displays are rarely the most expensive ones; they are the ones where the paint, the pattern, and the placement all point in the same direction, and where a visitor can tell the display was made by hand, with care, for this home and this season.
You May Also Like: – 22 Halloween Porch Decor Ideas for a Spooky Stylish Entry – 22 Halloween Mantel Decor Ideas for a Haunted Fireplace – 22 Halloween Entryway Decor Ideas for a Spooky Welcome
Frequently Asked Questions
What kind of paint do you use to paint pumpkins?
Acrylic craft paint is the best all-round choice for painting pumpkins because it sticks well to real and foam pumpkins, dries quickly, and comes in every colour and finish. Wash and dry a real pumpkin first, apply two thin coats, let each coat dry fully, and finish with a clear sealer to protect the colour.
Do you need to prime a pumpkin before painting it?
Priming helps most when you are painting a light colour over an orange pumpkin, or using metallic paint, because the orange shows through and muddies the finish. A coat of white primer or white acrylic paint solves the problem, while dark colours and chalk paint often cover well without a separate primer.
How do you keep paint from peeling off a pumpkin?
Paint peels when it is applied too thickly, over a dirty or damp surface, or without a sealer. Wash and dry the pumpkin, use two thin coats instead of one thick coat, let each coat dry completely, and seal with two thin coats of clear sealer matched to the finish you want.
Can painted pumpkins go outside?
Painted pumpkins can go outside if they are foam pumpkins sealed with an outdoor clear sealer, or real pumpkins kept under cover and brought in during rain. Real pumpkins left in rain or direct sun soften quickly, so treat outdoor painted pumpkins as a short display and check them every few days.
How long do painted pumpkins last?
A painted real pumpkin usually lasts two to four weeks indoors when it starts firm and unbruised, is kept cool and dry, and is sealed properly. Foam pumpkins last indefinitely, can be stored wrapped in tissue paper, and can be reused for many seasons, which makes them the better choice for an elaborate design.
Is pumpkin painting safe for kids?
Yes, pumpkin painting is one of the safest fall crafts for children when adults supervise scissors, hot glue, and spray sealer. Choose washable, water-based acrylic paint, cover clothes and tables, let each coat dry before handling, and keep glitter, rhinestones, and small embellishments away from very young children.