22 Painting Pumpkins Ideas DIY Girly for a Pretty Fall Look
Painting pumpkins is the easiest way to get a pretty, feminine fall display without the mess of carving, and girly painted pumpkins suit almost every corner of a home, from a mantel and entry table to a tiered tray and a bedroom dresser. The trick is not buying more supplies, but choosing one soft color story — blush, pearl, rose gold, or pastel — and repeating it across pumpkins of different sizes so the group looks deliberate rather than random. Real pumpkins give the most natural shape and texture, while foam craft pumpkins hold paint beautifully and can be stored and reused year after year.
Looking for more inspiration? Our Nest Decorz homepage gathers the latest home decor ideas, seasonal decorating guides and room-by-room styling tips in one place — start there and explore.
Below are 22 painting pumpkins ideas DIY girly style, each with the paints, materials, and approximate US costs you need, plus one mistake to avoid. Every idea works on real or foam pumpkins, uses supplies from a craft store, and can be finished in an afternoon, so you can start with one favorite pumpkin and build a whole coquette, cottagecore, or pastel fall display one pretty layer at a time.
1. Blush Pink Pumpkins With Gold Leaf Accents

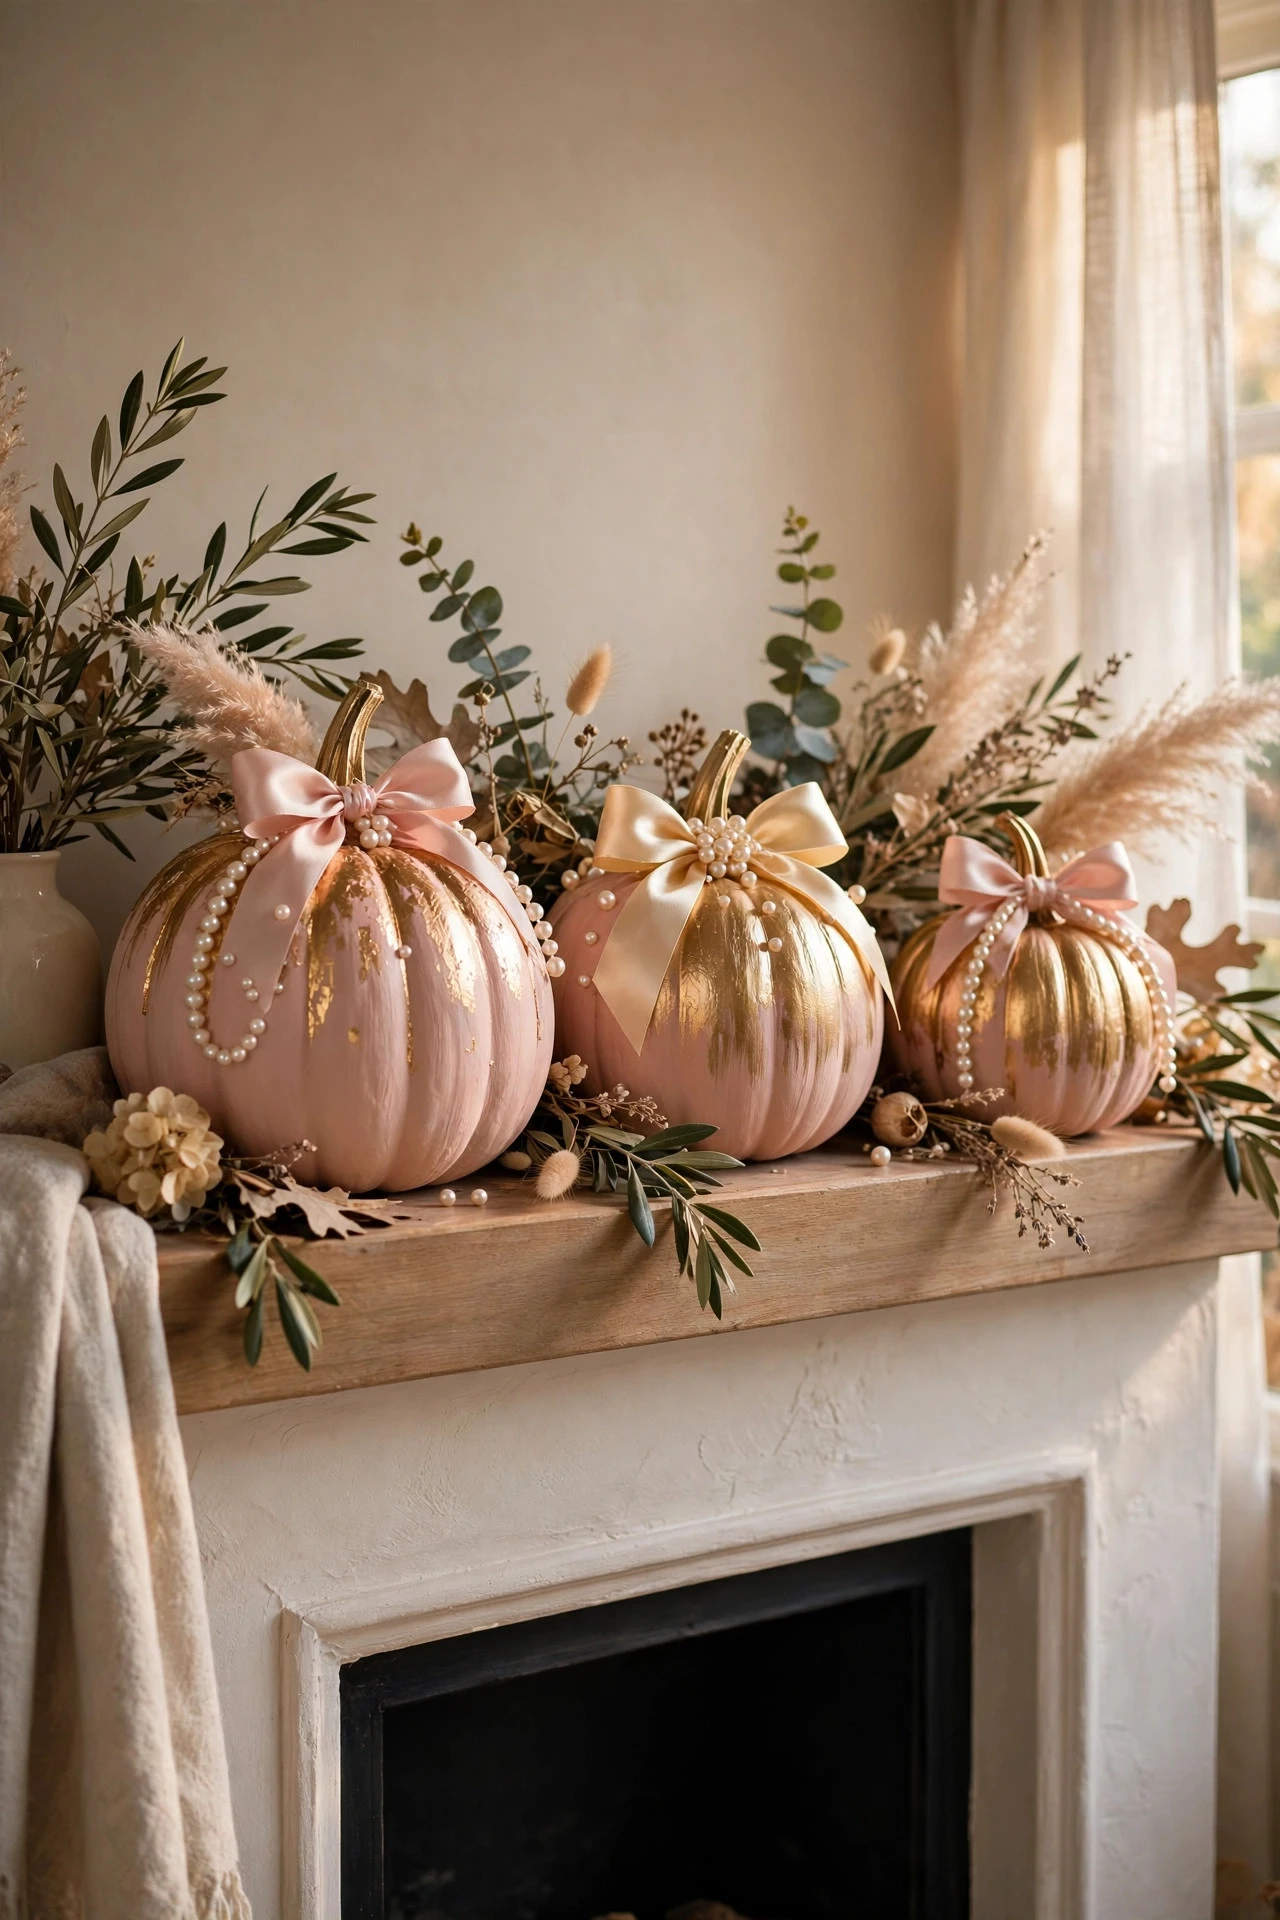
Blush pink pumpkins with gold leaf are the signature look of girly pumpkin painting, because the soft pink keeps the display sweet while the metallic leaf adds a grown-up, jewellery-box finish. Start with flat, ribbed Cinderella or Lumina pumpkins, or foam craft pumpkins for a display that lasts all season, and wipe each surface clean and dry before painting. Apply two thin coats of matte acrylic paint in blush pink, such as a pale rose or dusty pink, letting each coat dry for at least an hour, then brush gold-leaf adhesive size over the top third or along the ribs. Press small sheets of imitation gold leaf onto the tacky adhesive, smooth them gently with a soft brush, and seal everything with two coats of matte sealer. Expect to spend $18 to $35 for paint, leaf, adhesive, and sealer for three medium pumpkins. The mistake to avoid is applying gold leaf over wet paint, which tears the leaf and leaves dull, patchy metal instead of a clean shine.
2. Pearl and Champagne Painted Pumpkins
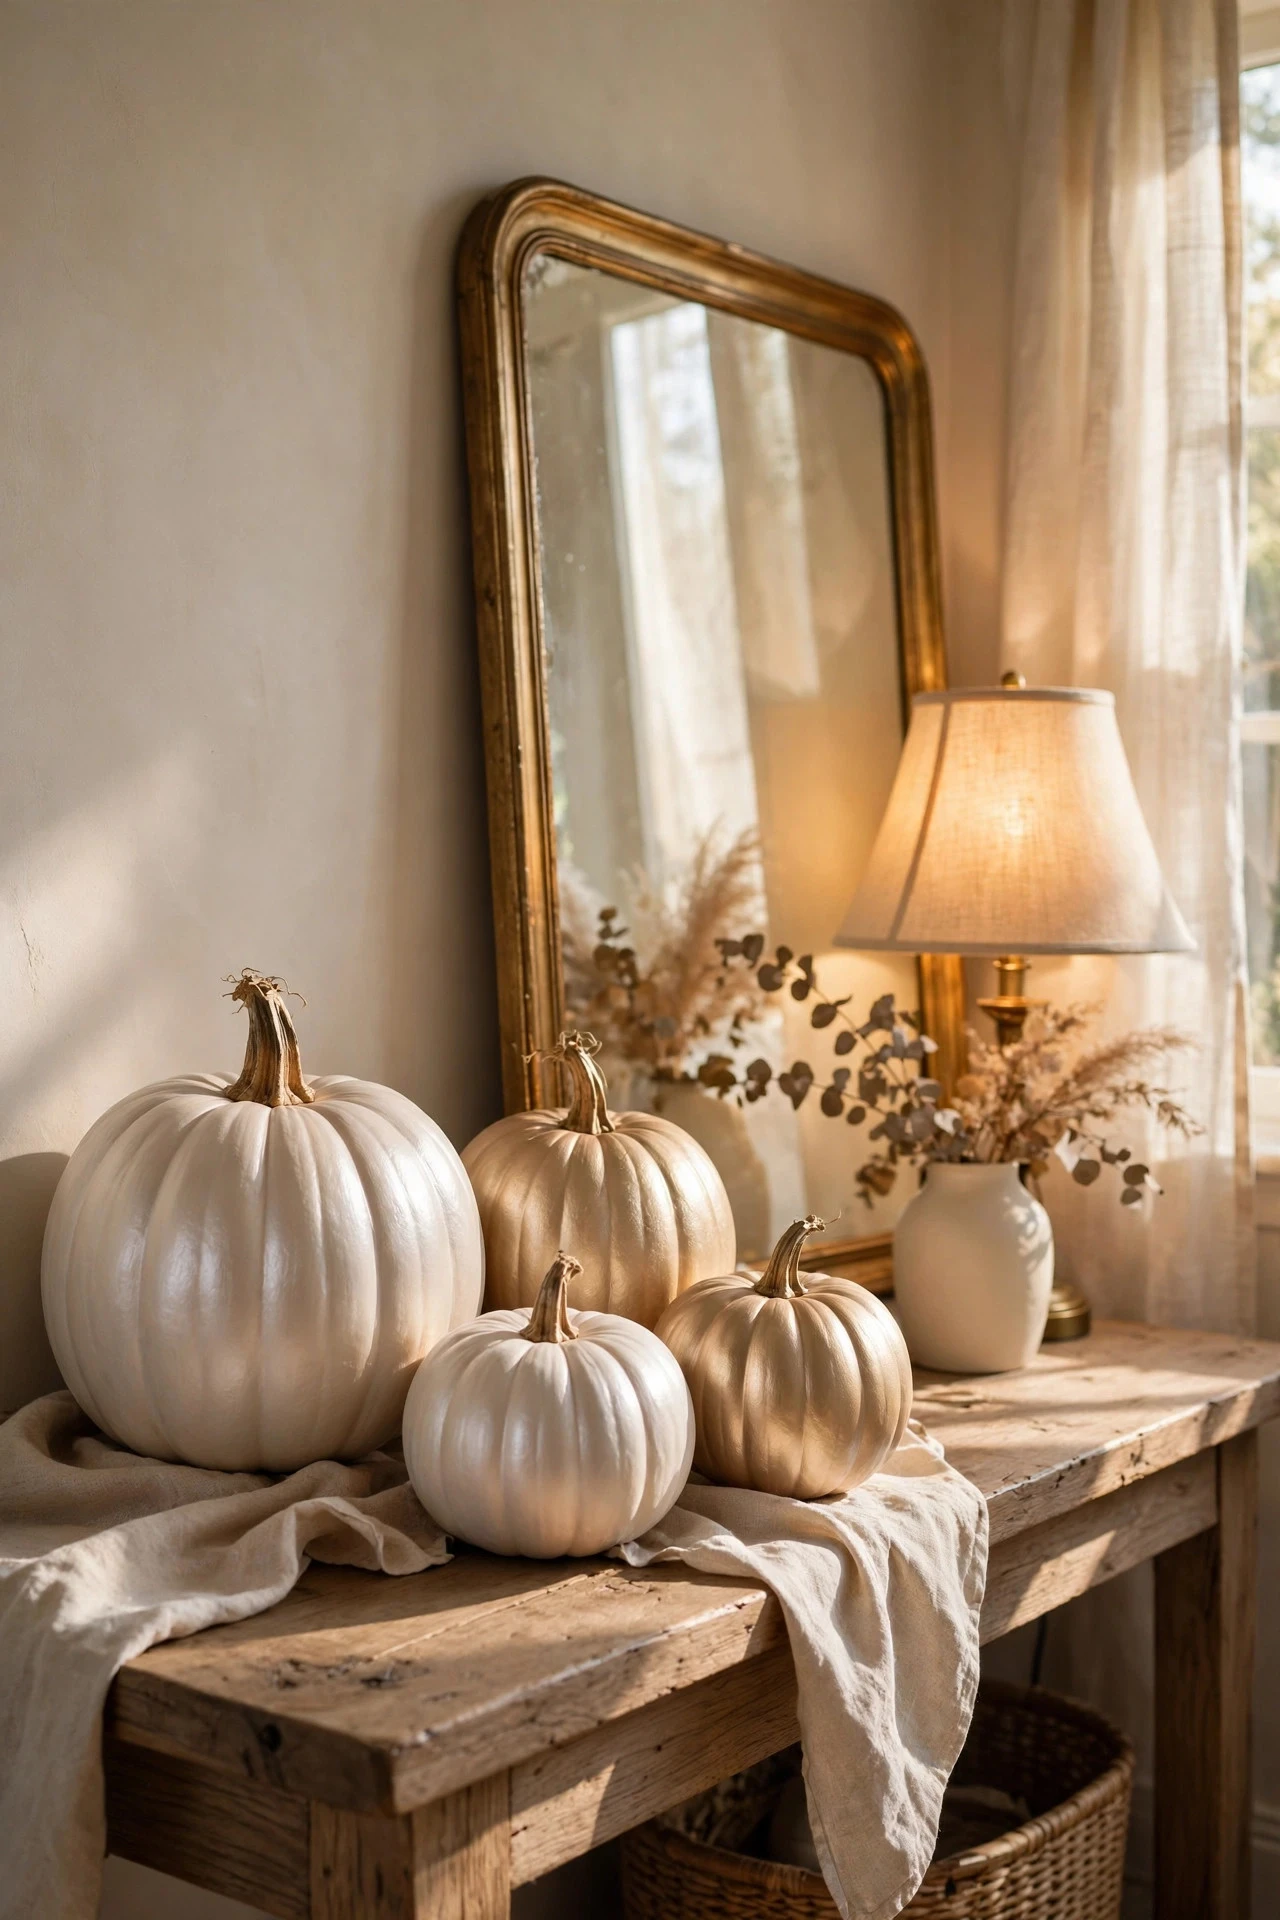
Pearl and champagne painted pumpkins give a fall display a soft, luminous glow that reads as elegant rather than glittery, and they pair beautifully with white furniture, mirrors, and warm lamplight. Choose smooth-skinned pumpkins, including white Lumina or pale cheese pumpkins, because deep ribs catch paint unevenly and break up the pearly sheen. Paint two coats of ivory or champagne acrylic paint, then add a thin coat of pearl or interference medium, which shifts subtly between white, pink, and gold as the light changes. A light dry-brush of champagne metallic paint along the ribs adds dimension without turning the pumpkin into a solid gold object. Budget $12 to $25 for paint, pearl medium, and a brush for a group of three pumpkins, plus $6 to $10 for a clear sealer. The mistake to avoid is using thick coats of metallic paint, which pool in the crevices, dry unevenly, and hide the natural pumpkin shape you are trying to celebrate.
3. Pastel Rainbow Pumpkin Cluster
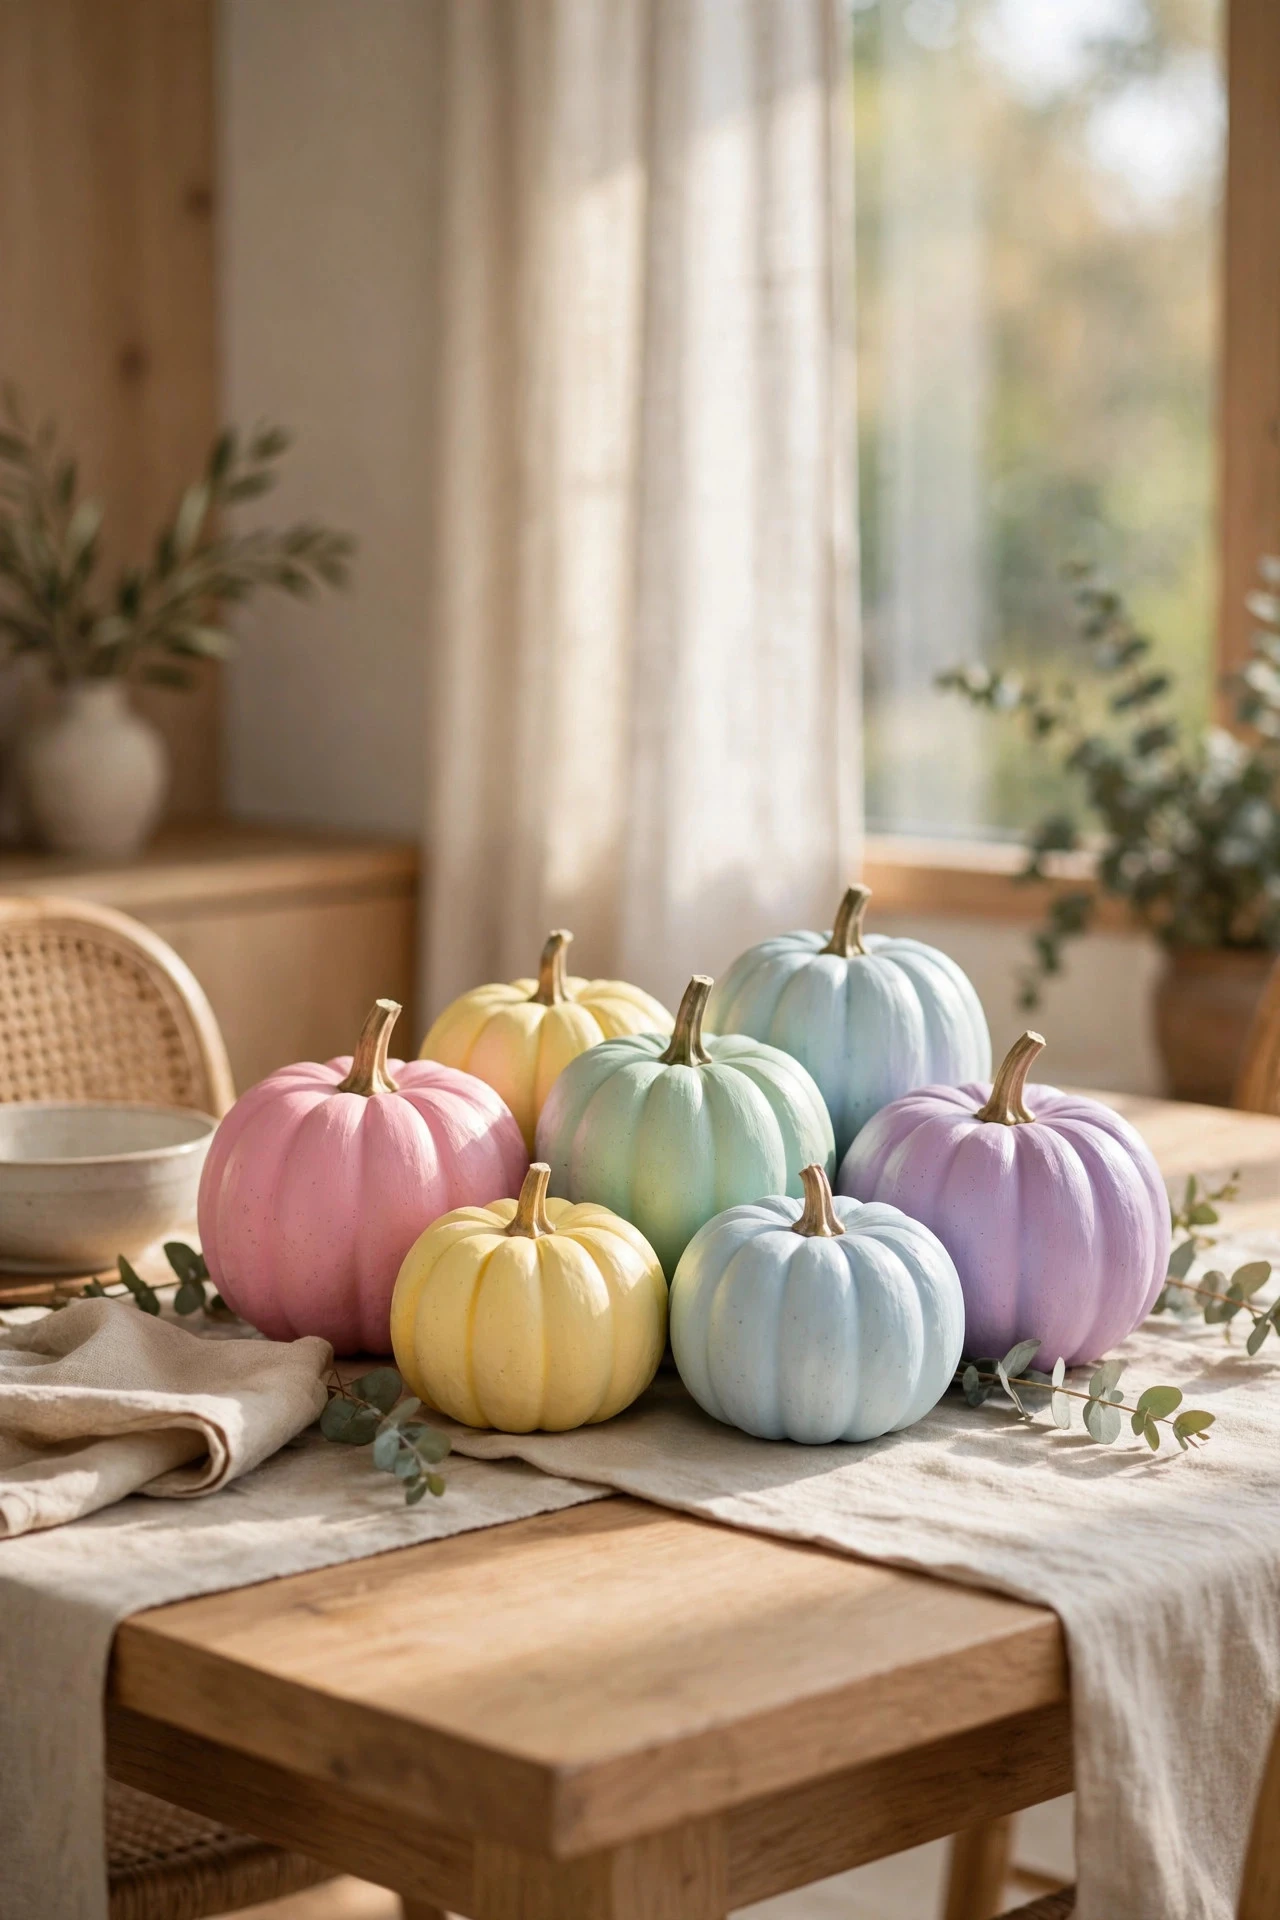
A pastel rainbow pumpkin cluster brings gentle color to a porch, mantel, or dining table without the bold, primary-color look that can overwhelm a soft, feminine room. Paint five or seven small to medium pumpkins in a row of pastels — blush pink, butter yellow, mint green, baby blue, and lilac — keeping the finish matte and the stems in a natural brown or a soft gold. Grouping odd numbers matters: three, five, or seven pumpkins look collected and intentional, while even pairs can look like matching bookends. Use the same paint brand and finish across the group so the colors sit together calmly, and add a few faux eucalyptus stems or dried grasses between the pumpkins to break up the round shapes. Expect $20 to $35 for five small bottles of acrylic paint and a sealer. The mistake to avoid is painting each pumpkin a different finish, such as mixing gloss, glitter, and matte in one cluster, which makes the rainbow look busy instead of soft and cohesive.
4. Rose Gold Metallic Pumpkins
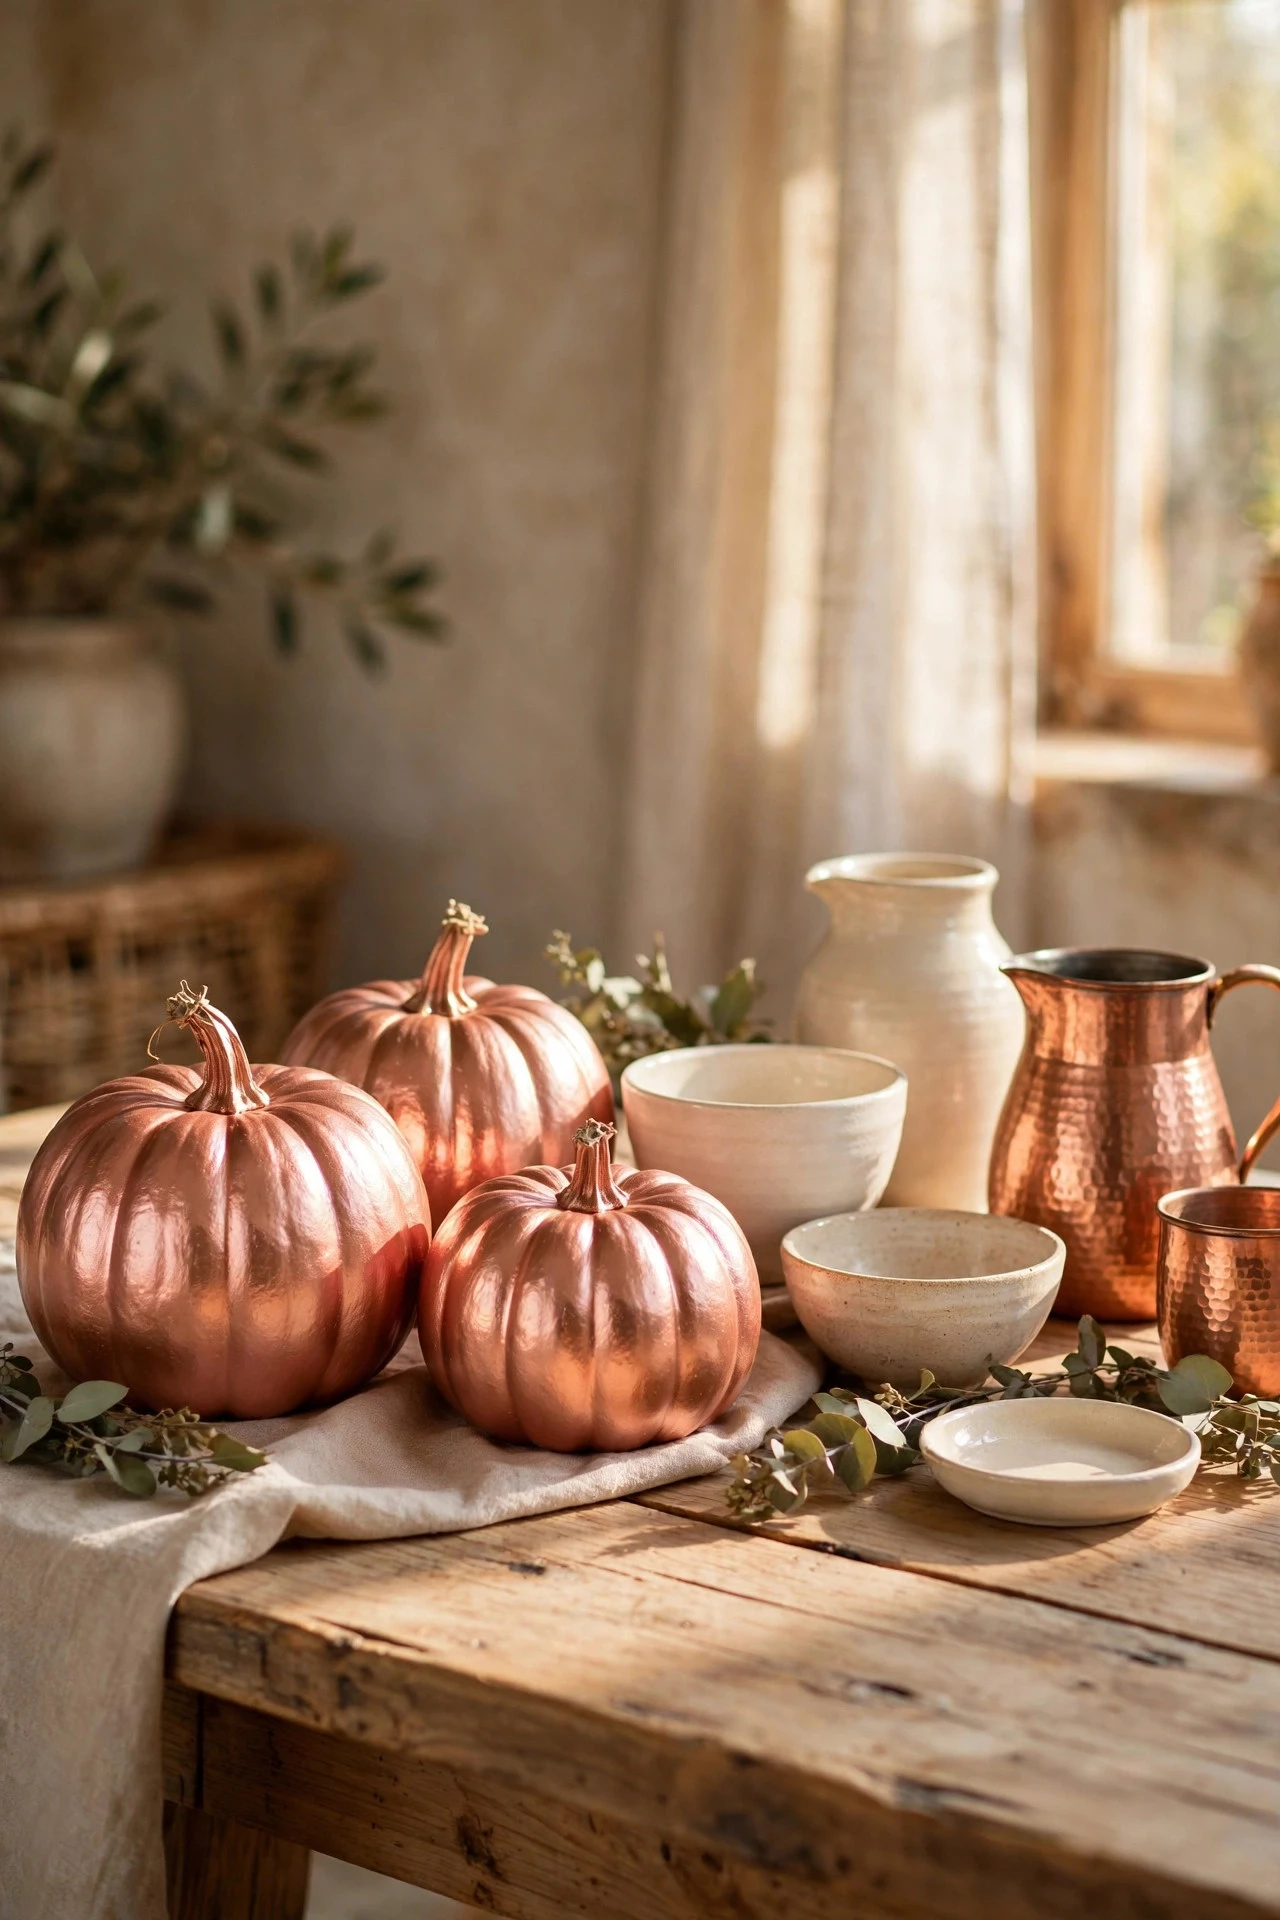
Rose gold metallic pumpkins are a warm, modern take on girly fall decor, and they work especially well beside copper, blush textiles, and cream-colored ceramics. Start with foam pumpkins for the smoothest metallic finish, sand any rough seams lightly, and apply a primer coat of pale pink or warm white so the rose gold paint does not have to cover a dark orange surface. Use two thin coats of rose gold metallic acrylic paint or a metallic spray paint made for crafts, holding the can 10 to 12 inches away and using light, even passes to prevent drips. Wrap the stem with thin gold wire for a jewellery-like detail. A trio costs $15 to $30 for paint, primer, and sealer. For a no-carve display that keeps the same soft, polished feeling, these no-carve pumpkin decorating ideas pair beautifully with metallic pumpkins. The mistake to avoid is skipping primer on a real orange pumpkin, because the orange shows through rose gold paint and turns it muddy and brown.
5. Hand-Painted Floral Pumpkins
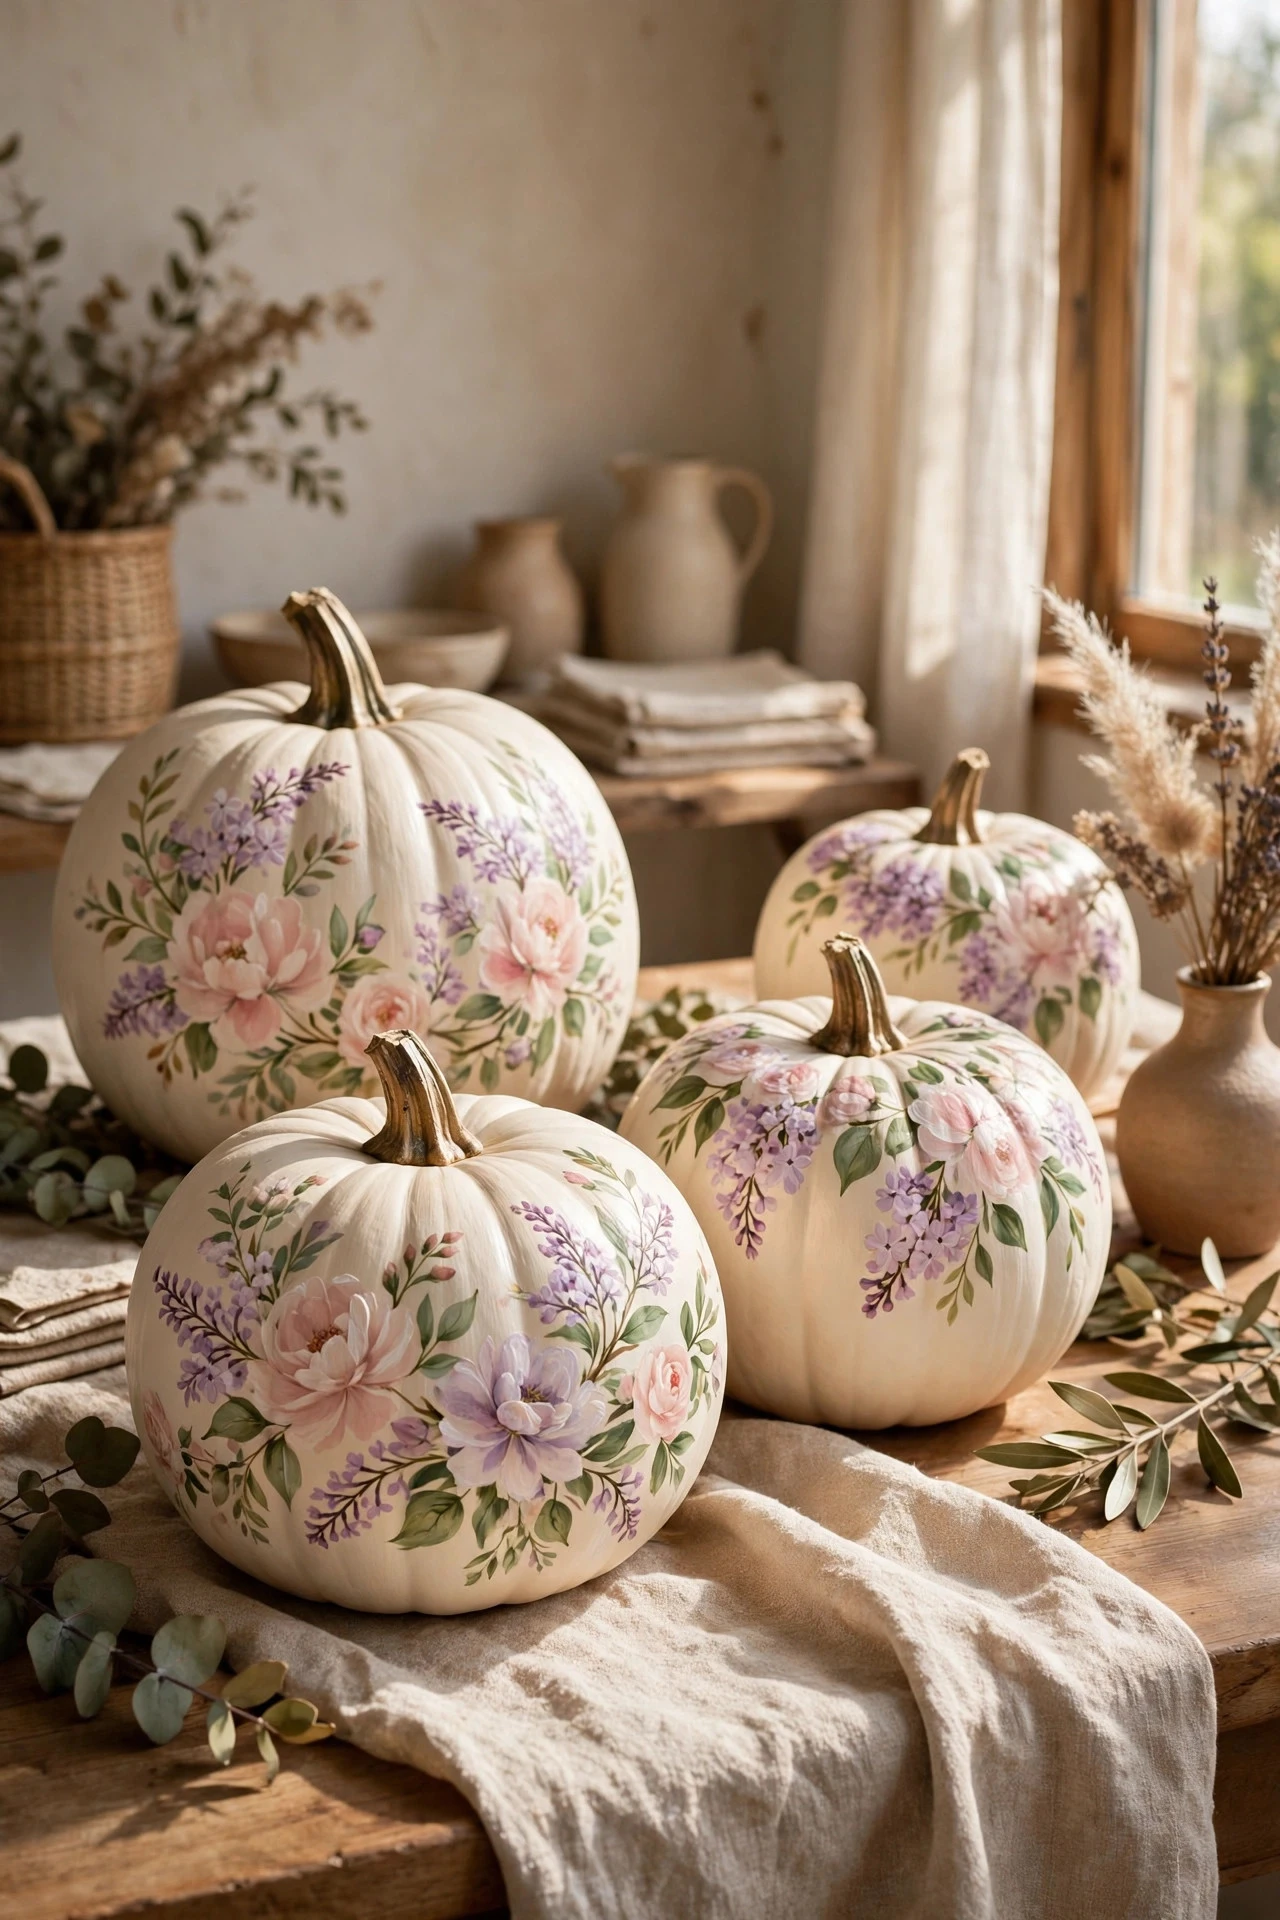
Hand-painted florals turn an ordinary pumpkin into a garden centerpiece, and you do not need to be a trained artist to get a pretty result if you build the flowers in simple layers. Paint the pumpkin a soft base color first — cream, sage, pale pink, or dusty blue — and let it dry completely, then use a round brush to paint five-petal flowers in blush, white, and lilac, adding a darker center dot and small green leaves between the blooms. Keep the flowers loose and slightly uneven, because hand-painted charm comes from variation, and leave some plain pumpkin showing so the design breathes. A set of fine detail brushes, three or four acrylic paint colors, and a clear sealer costs $16 to $30. Work from the top of the pumpkin downward so you do not smudge wet flowers with your hand. The mistake to avoid is outlining every petal in dark paint first, which makes the florals look like a coloring page instead of soft, painted blooms.
6. Bow-Adorned Pumpkins in Satin Ribbon
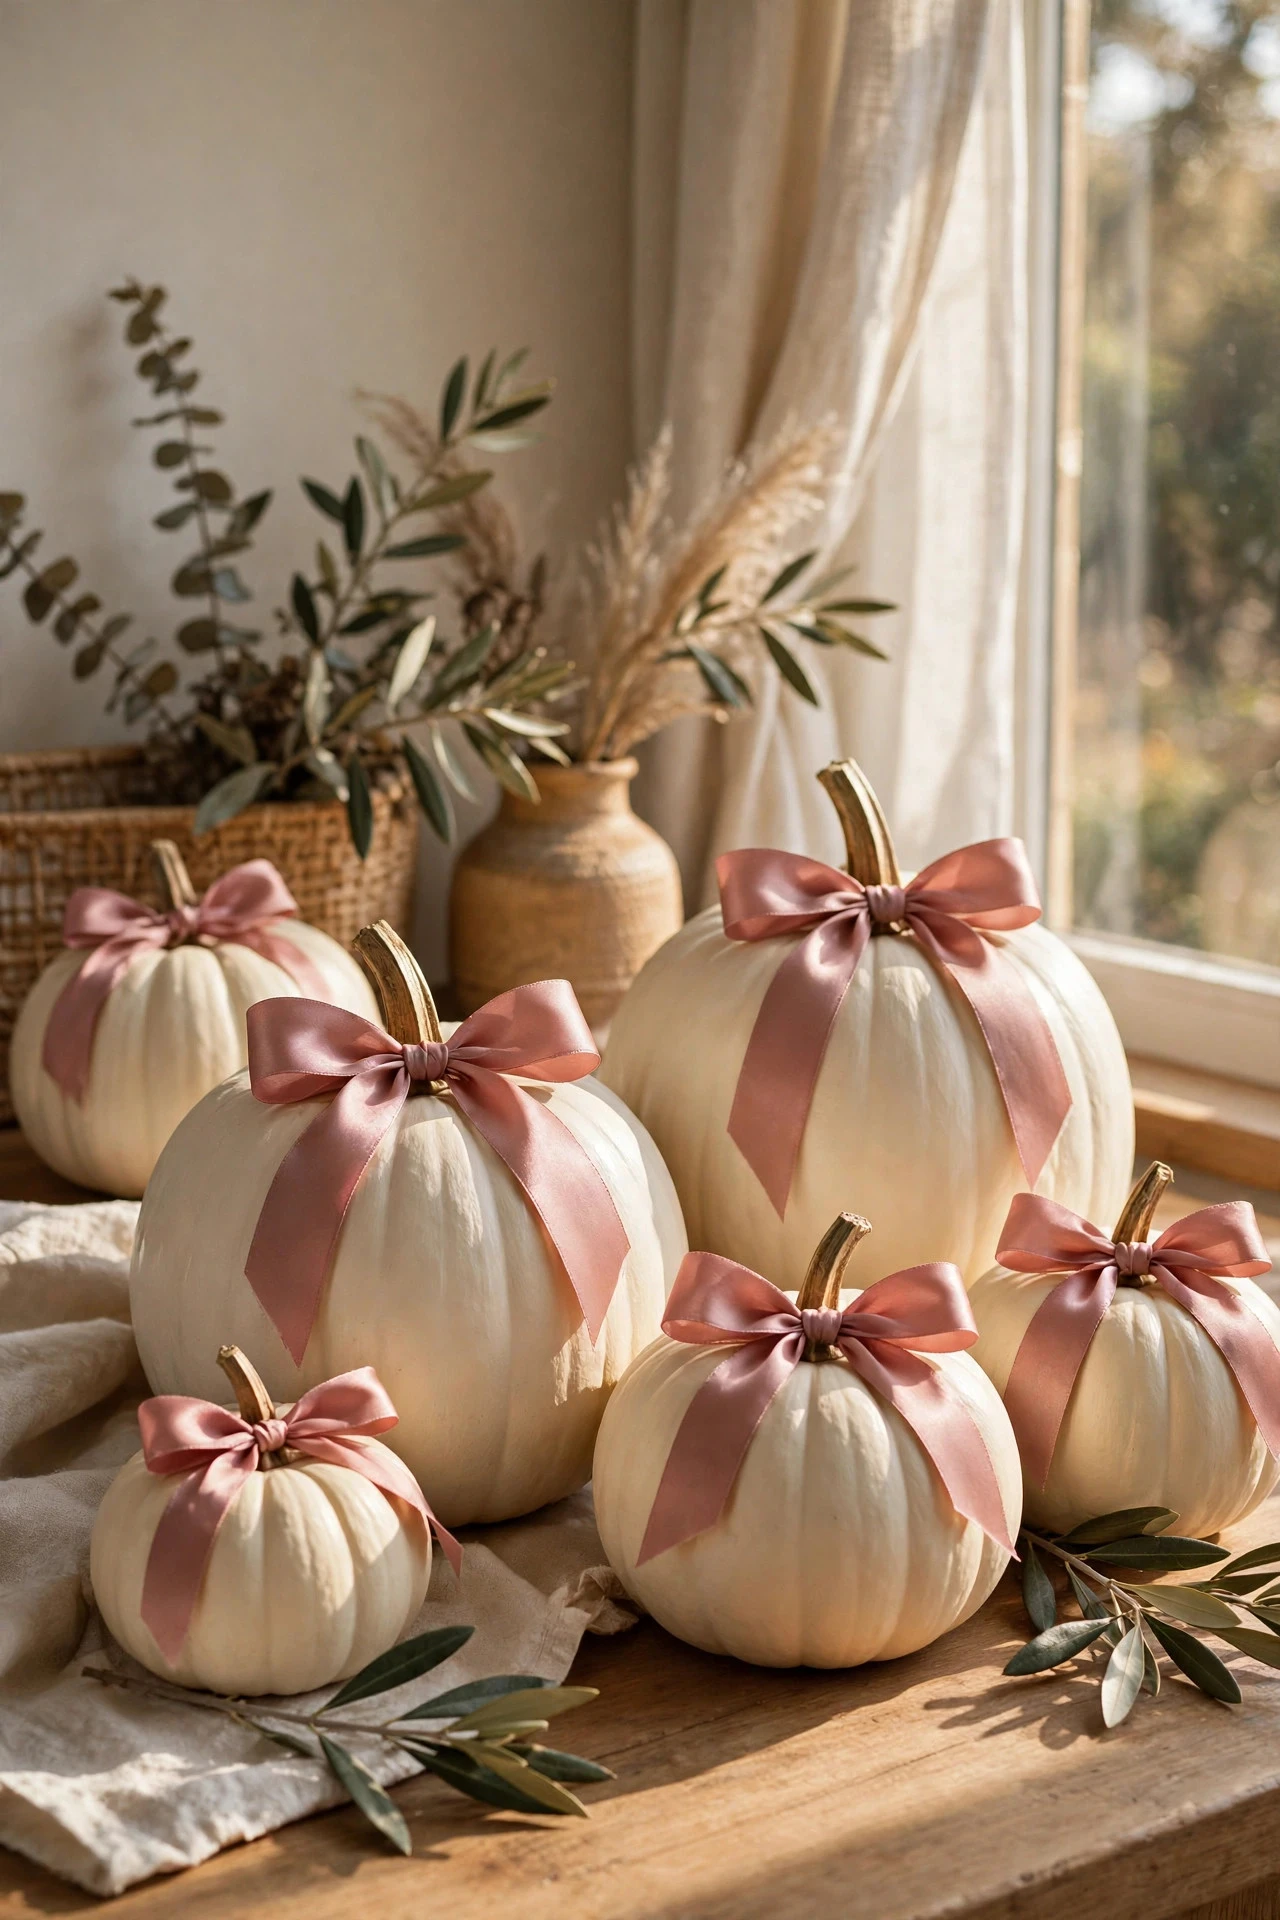
Bow-adorned pumpkins are one of the fastest girly pumpkin ideas, because a beautiful satin ribbon does most of the styling work and the paint underneath can stay simple. Paint pumpkins in cream, blush, or soft sage, then tie a wide satin ribbon around the middle or make a full, layered bow and hot-glue it to the front, just below the stem. Choose ribbon in dusty rose, champagne, or ivory, and cut the tails at an angle so they drape neatly instead of fraying. For a more finished look, add a small pearl pin or a tiny faux flower at the center of the bow, keeping the embellishment small so it does not overwhelm a small pumpkin. One roll of quality satin ribbon costs $5 to $10, and a group of three painted pumpkins costs $15 to $28 in total. The mistake to avoid is using a narrow, shiny polyester ribbon, which slips, wrinkles, and looks cheap next to matte paint and natural pumpkin texture.
7. Glitter Ombre Pumpkins in Pink and White
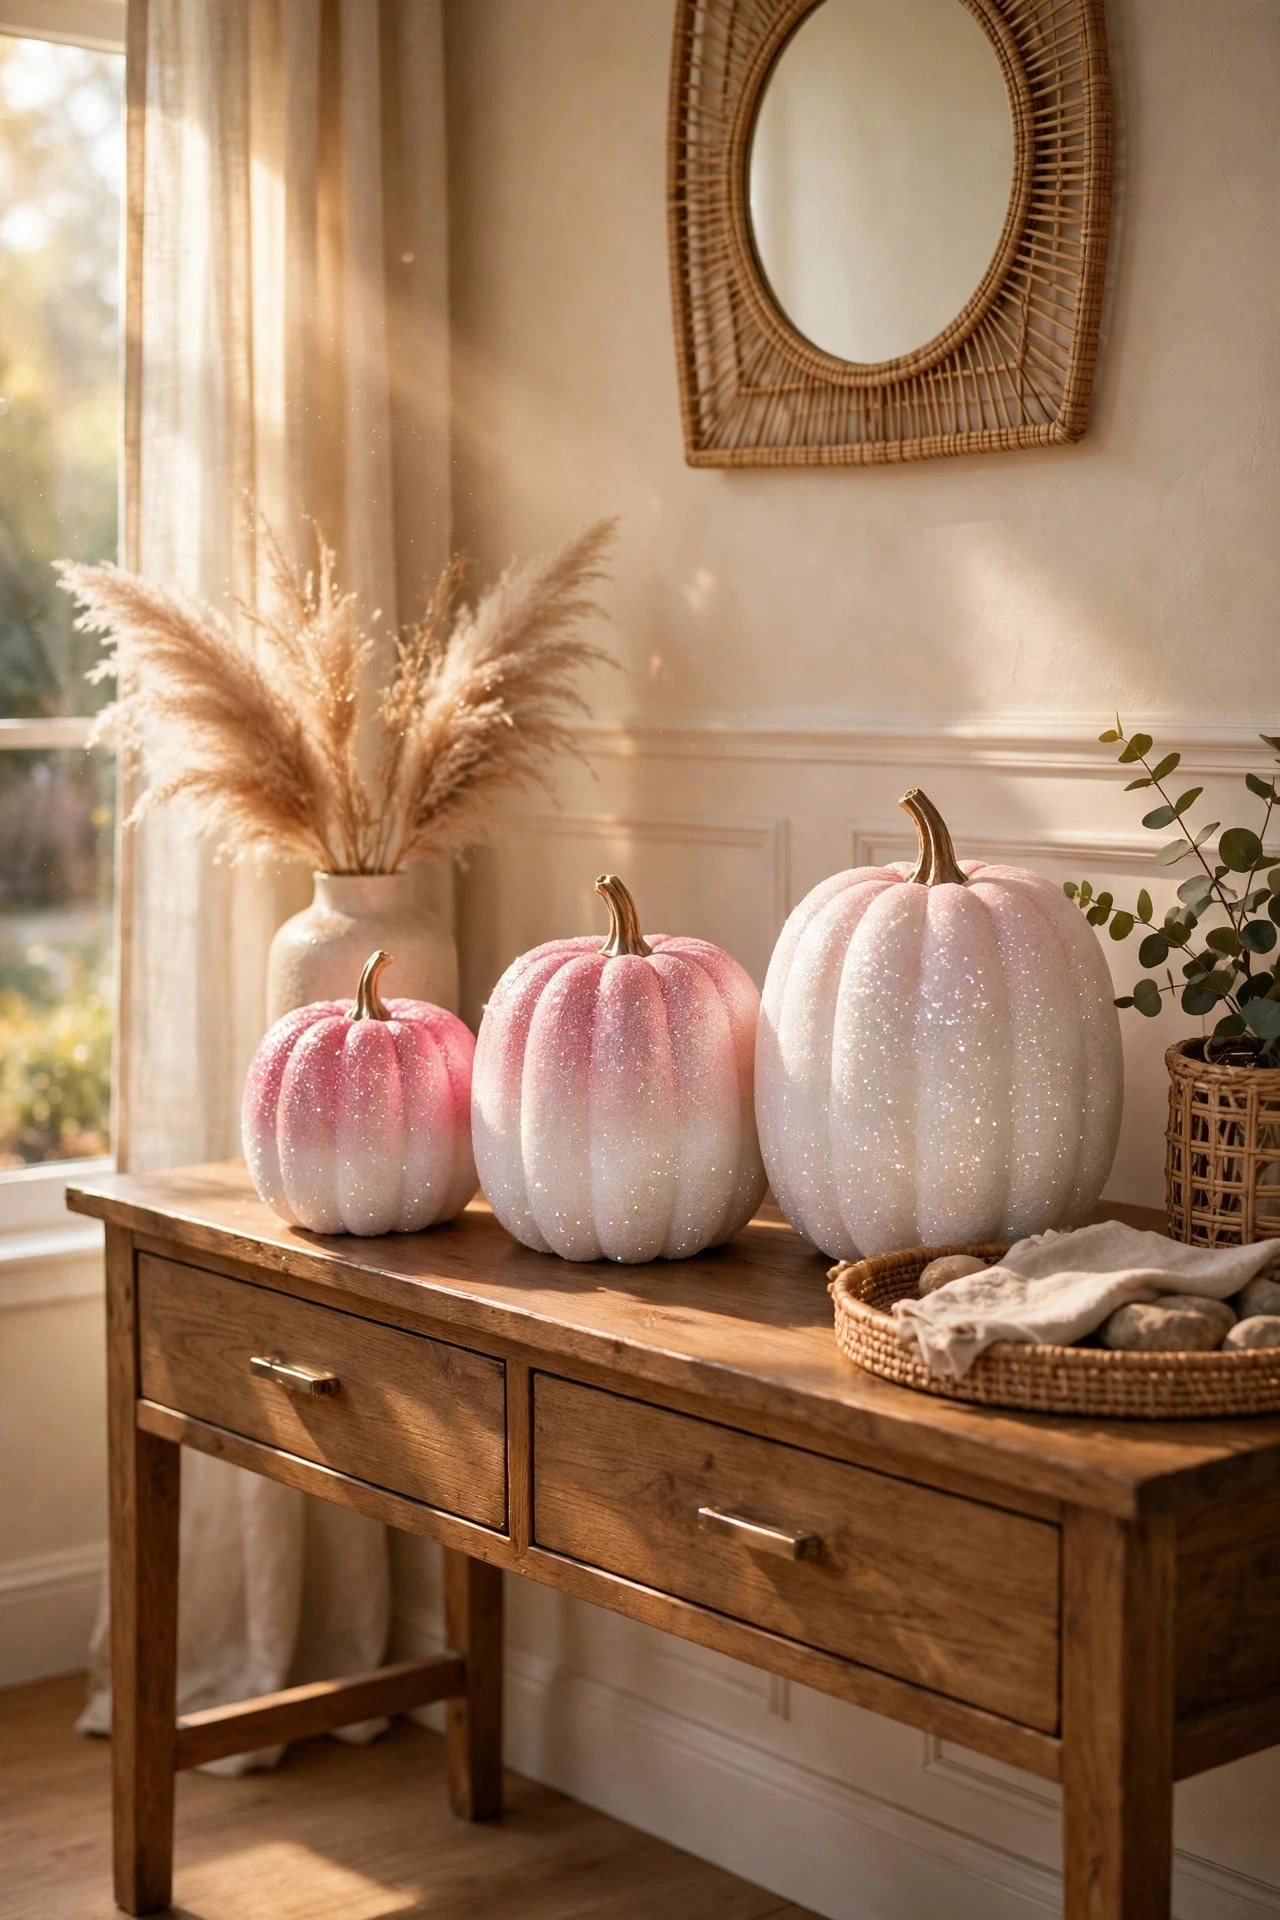
Glitter ombre pumpkins give you sparkle without covering the whole pumpkin in glitter, because the color fades from deep pink at the base to white at the top, with glitter concentrated where the color is deepest. Paint the pumpkin white first, then sponge blush pink acrylic paint onto the lower third, blending upward with a dry sponge so there is no hard line. While the pink is still slightly tacky, sprinkle fine pink or iridescent glitter over the lower half, tap off the excess over paper, and seal with two coats of clear gloss sealer to lock the glitter in place. Work outdoors or over a tray, because loose glitter travels everywhere. Supplies for three pumpkins cost $14 to $26, including paint, glitter, sponges, and sealer. The mistake to avoid is applying glitter over fully dry paint without adhesive, because most of it falls off the first time the pumpkin is moved and leaves bare, patchy spots.
8. Chinoiserie-Style Blue and White Pumpkins
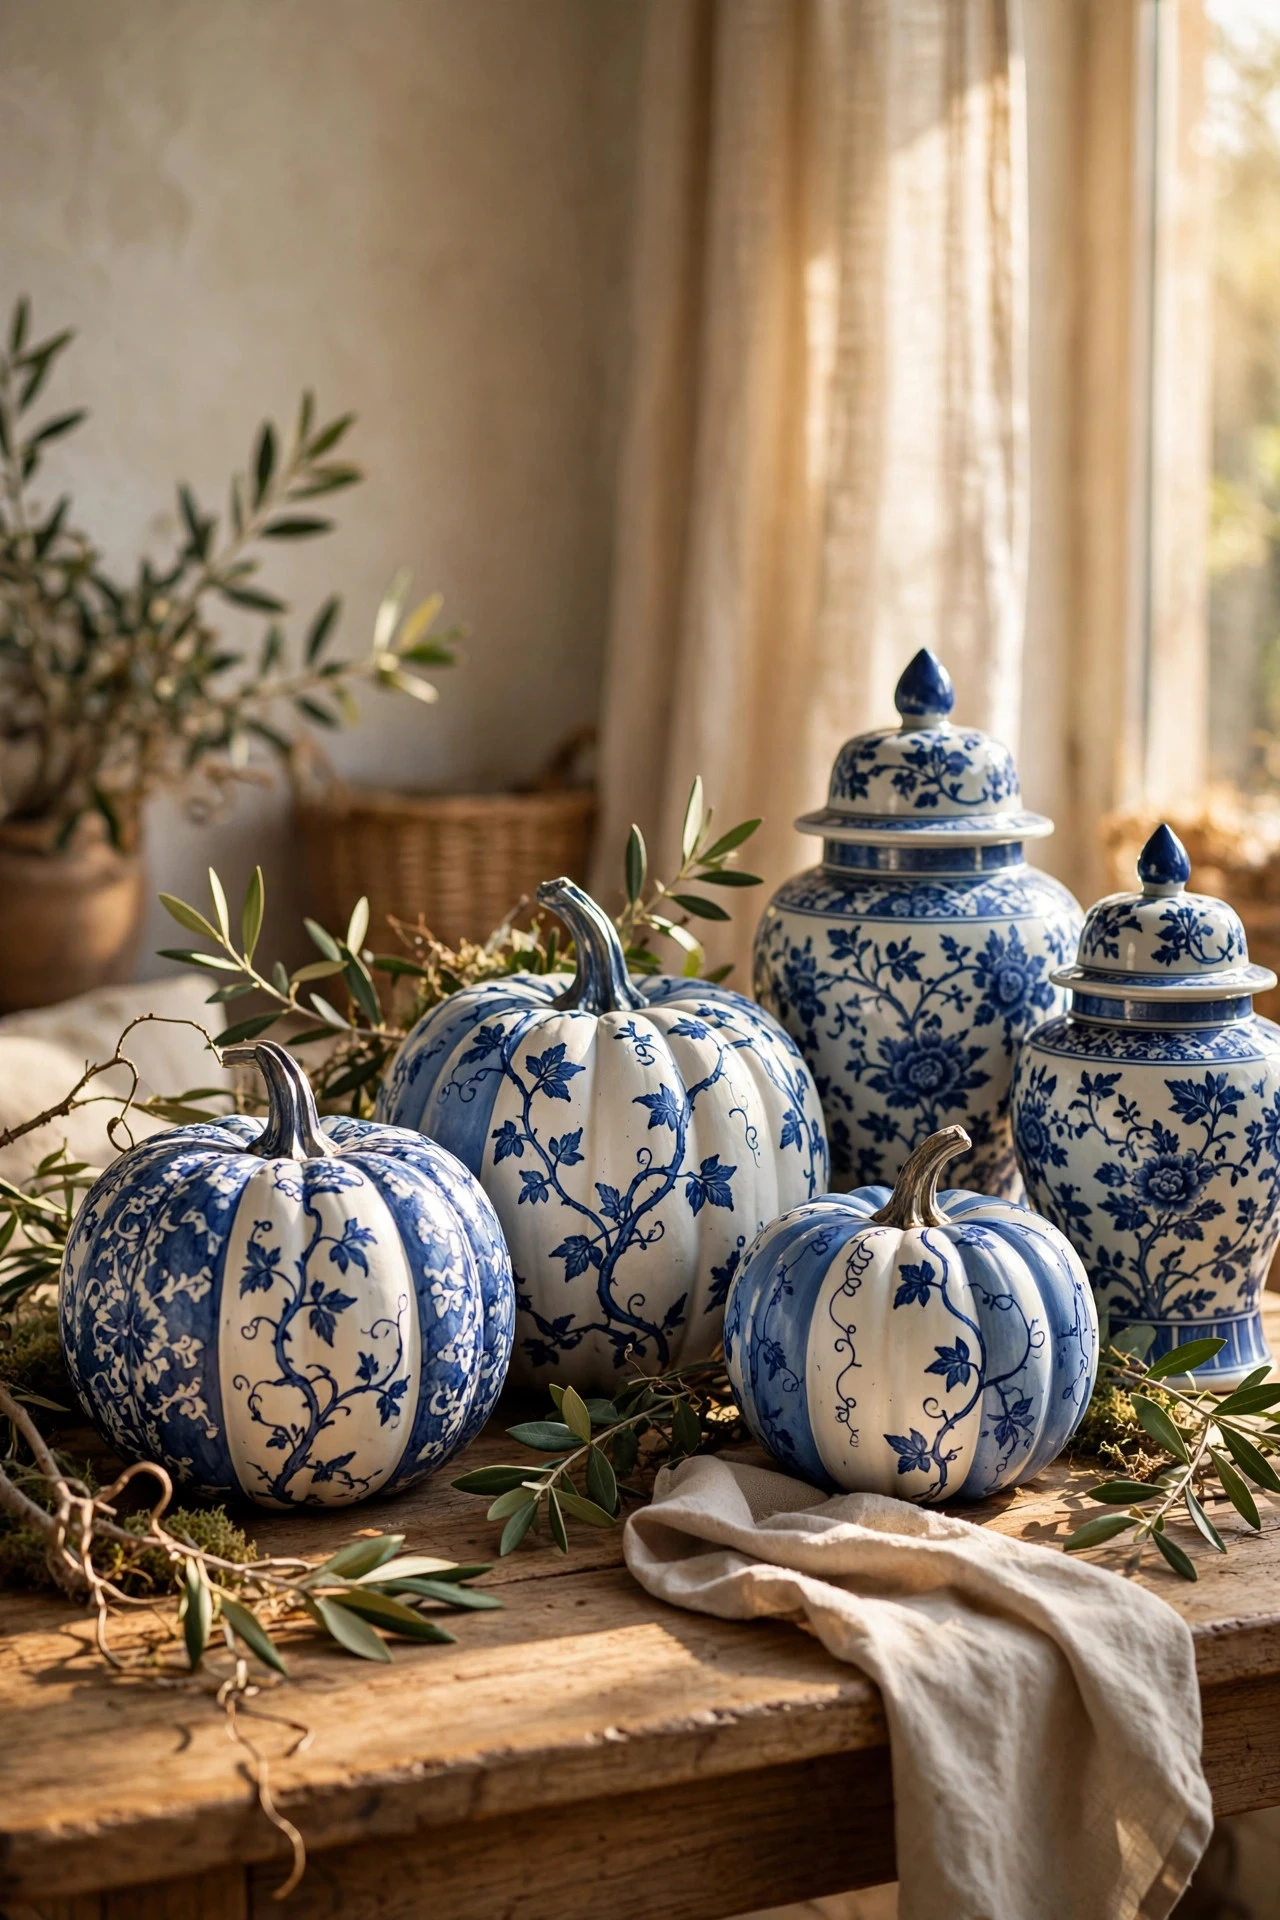
Chinoiserie-style blue and white pumpkins bring a classic, porcelain-inspired look to fall decor, and they suit rooms that already have ginger jars, blue-and-white ceramics, or traditional furniture. Paint the pumpkin a clean, bright white, then use a fine liner brush and cobalt blue acrylic paint to add scrolling vines, small flowers, and simple lattice bands around the middle, following the pumpkin's natural ribs as guides. Keep the motifs small and spaced apart, because a little blue pattern goes a long way, and leave generous white space so the pumpkin still reads as porcelain rather than a busy print. A white base coat, one bottle of cobalt paint, and detail brushes cost $12 to $22. If freehand painting feels daunting, practice the vine on paper first, then paint it in sections. The mistake to avoid is using a dark navy that is almost black, which makes the design look heavy and loses the fresh, airy feeling of real blue-and-white porcelain.
9. Lace-Effect Painted Pumpkins
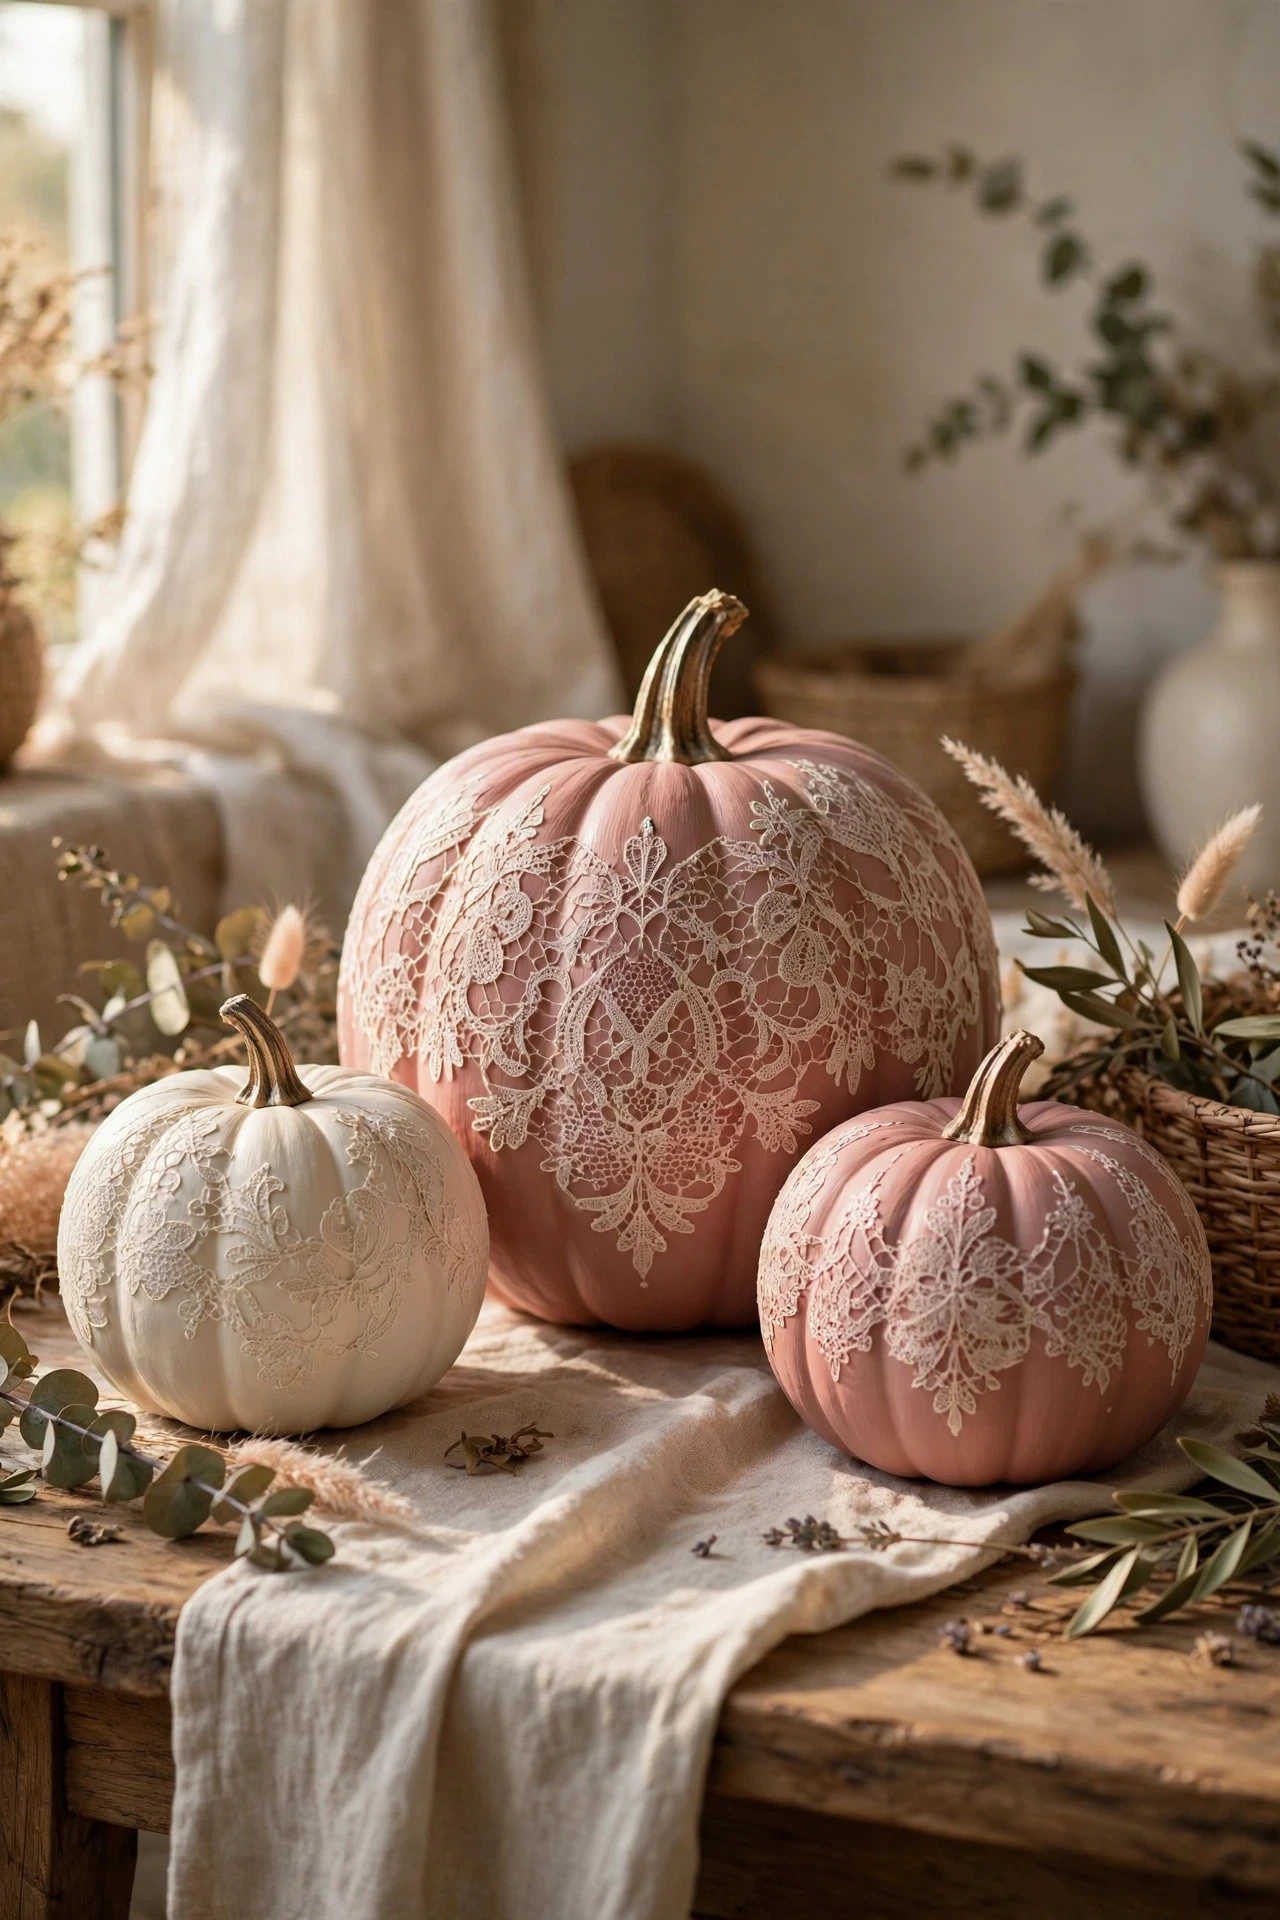
Lace-effect pumpkins look delicate and vintage, and the technique is surprisingly simple because the lace itself does the pattern work for you. Wrap a piece of inexpensive lace fabric or a lace doily tightly around a painted pumpkin in cream or blush, securing it with pins or tape at the back, then dab paint over the lace with a sponge or stippling brush in a slightly darker shade, such as dusty rose over cream. Peel the lace away carefully while the paint is still damp to reveal a crisp, lacy pattern, and touch up any blurred edges with a small brush once dry. A yard of lace costs $4 to $8, and paint and sealer for two or three pumpkins add $10 to $18. This method works best on foam pumpkins, which stay still and have a smooth, even surface. The mistake to avoid is using too much paint on the sponge, which seeps under the lace, blurs the pattern, and turns a delicate effect into a muddy smudge.
10. Polka Dot Pumpkins in Soft Pastels
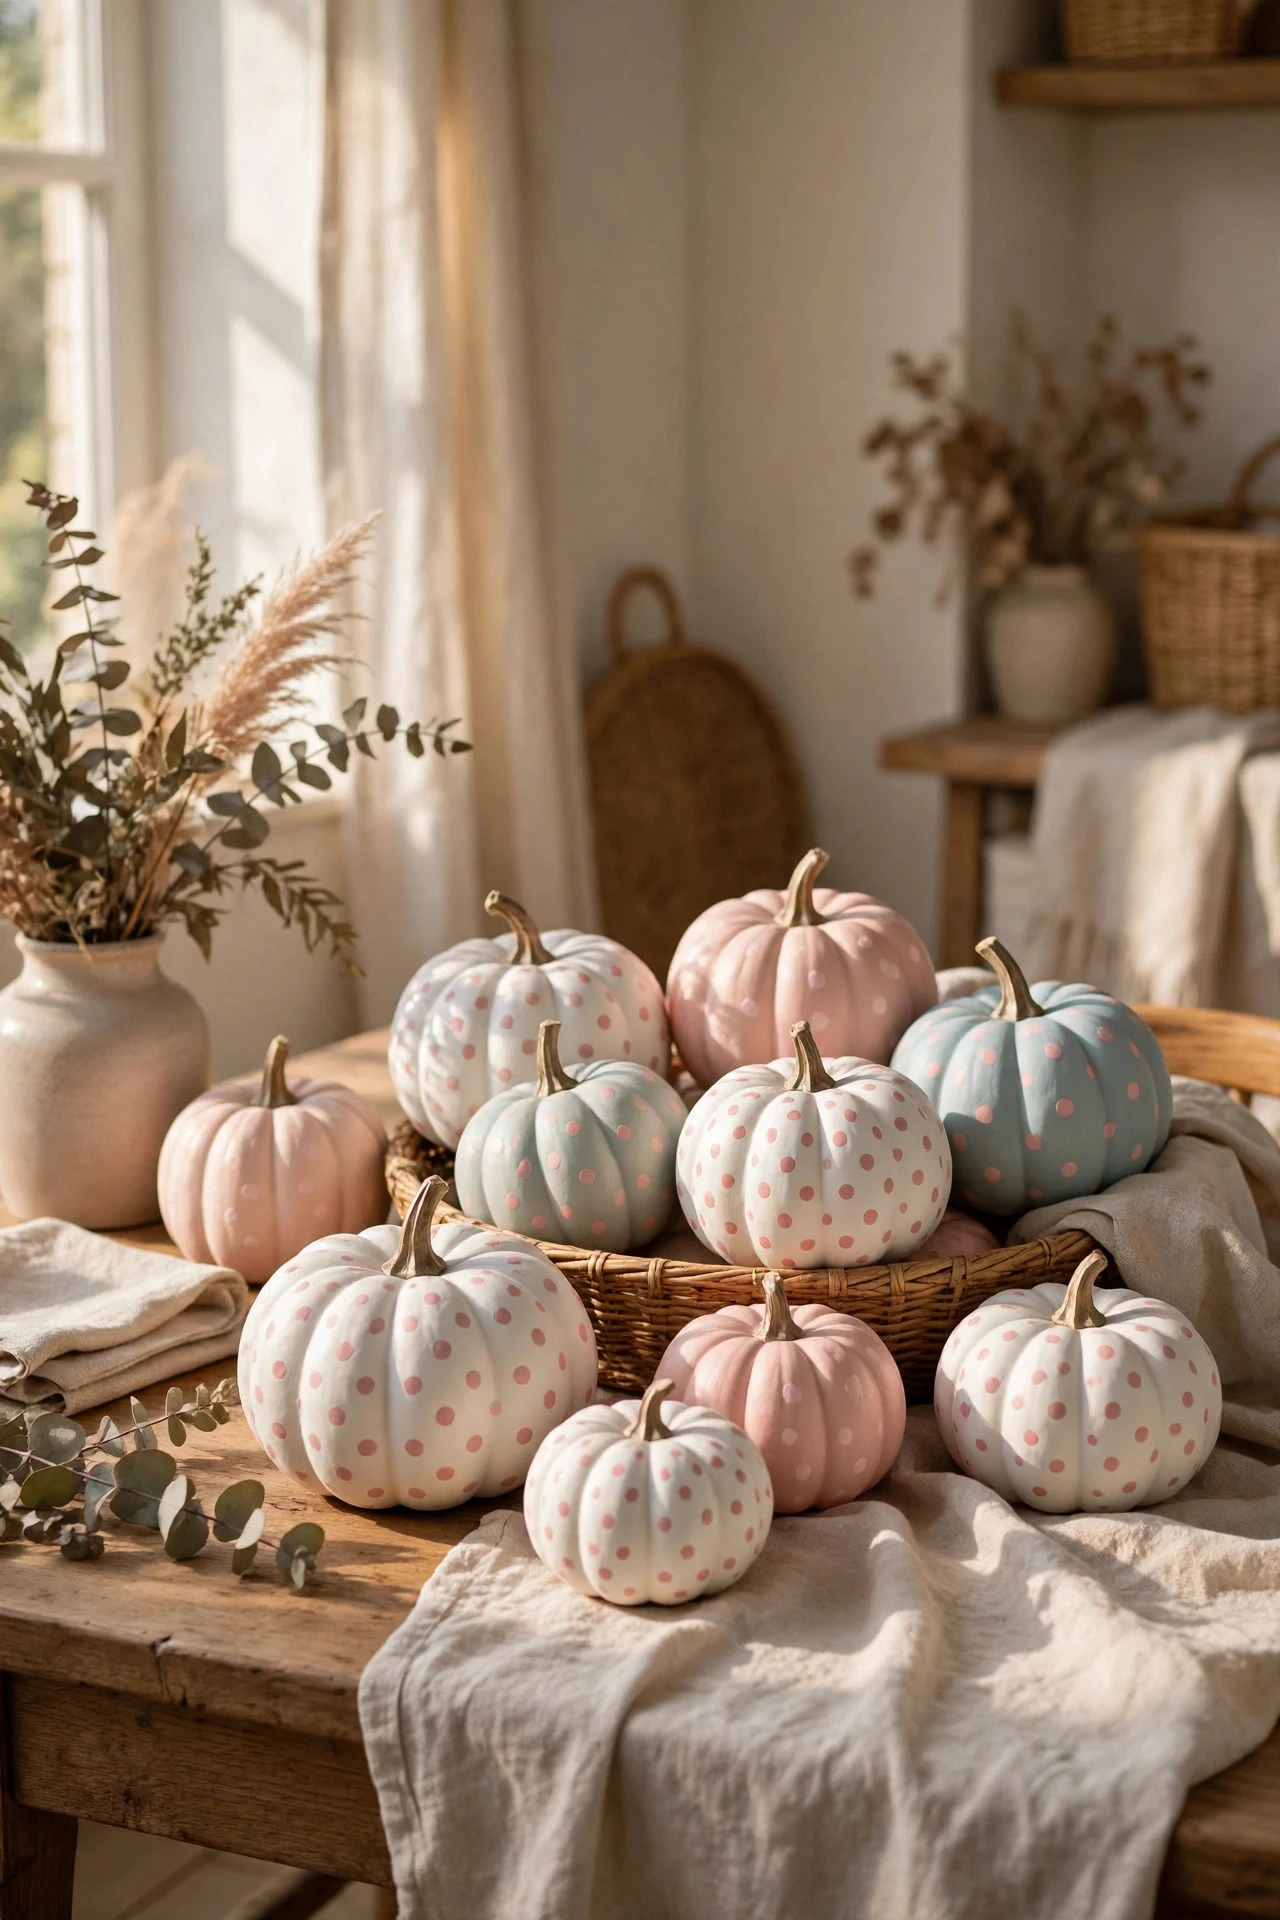
Polka dot pumpkins are cheerful, easy, and forgiving, which makes them ideal for beginners, older children, and anyone who wants a quick girly update to a plain pumpkin. Paint the base in white, cream, or pale pink, then use the round end of a pencil eraser, a wine cork, or a foam dauber dipped in pastel paint to stamp neat dots in a second color, spacing them evenly and varying the dot sizes slightly for a hand-painted feel. Try blush dots on white, white dots on mint, or gold dots on lilac for a more grown-up version, and keep the dots off the very top and bottom where they crowd together. Paint, daubers, and sealer for a group of pumpkins cost $10 to $20. Let each color dry before adding a second dot color so the dots stay crisp. The mistake to avoid is stamping dots freehand with a brush, which produces uneven blobs and wobbly edges instead of the clean, playful circles that make this design work.
11. Monogrammed Pumpkins With Pretty Script
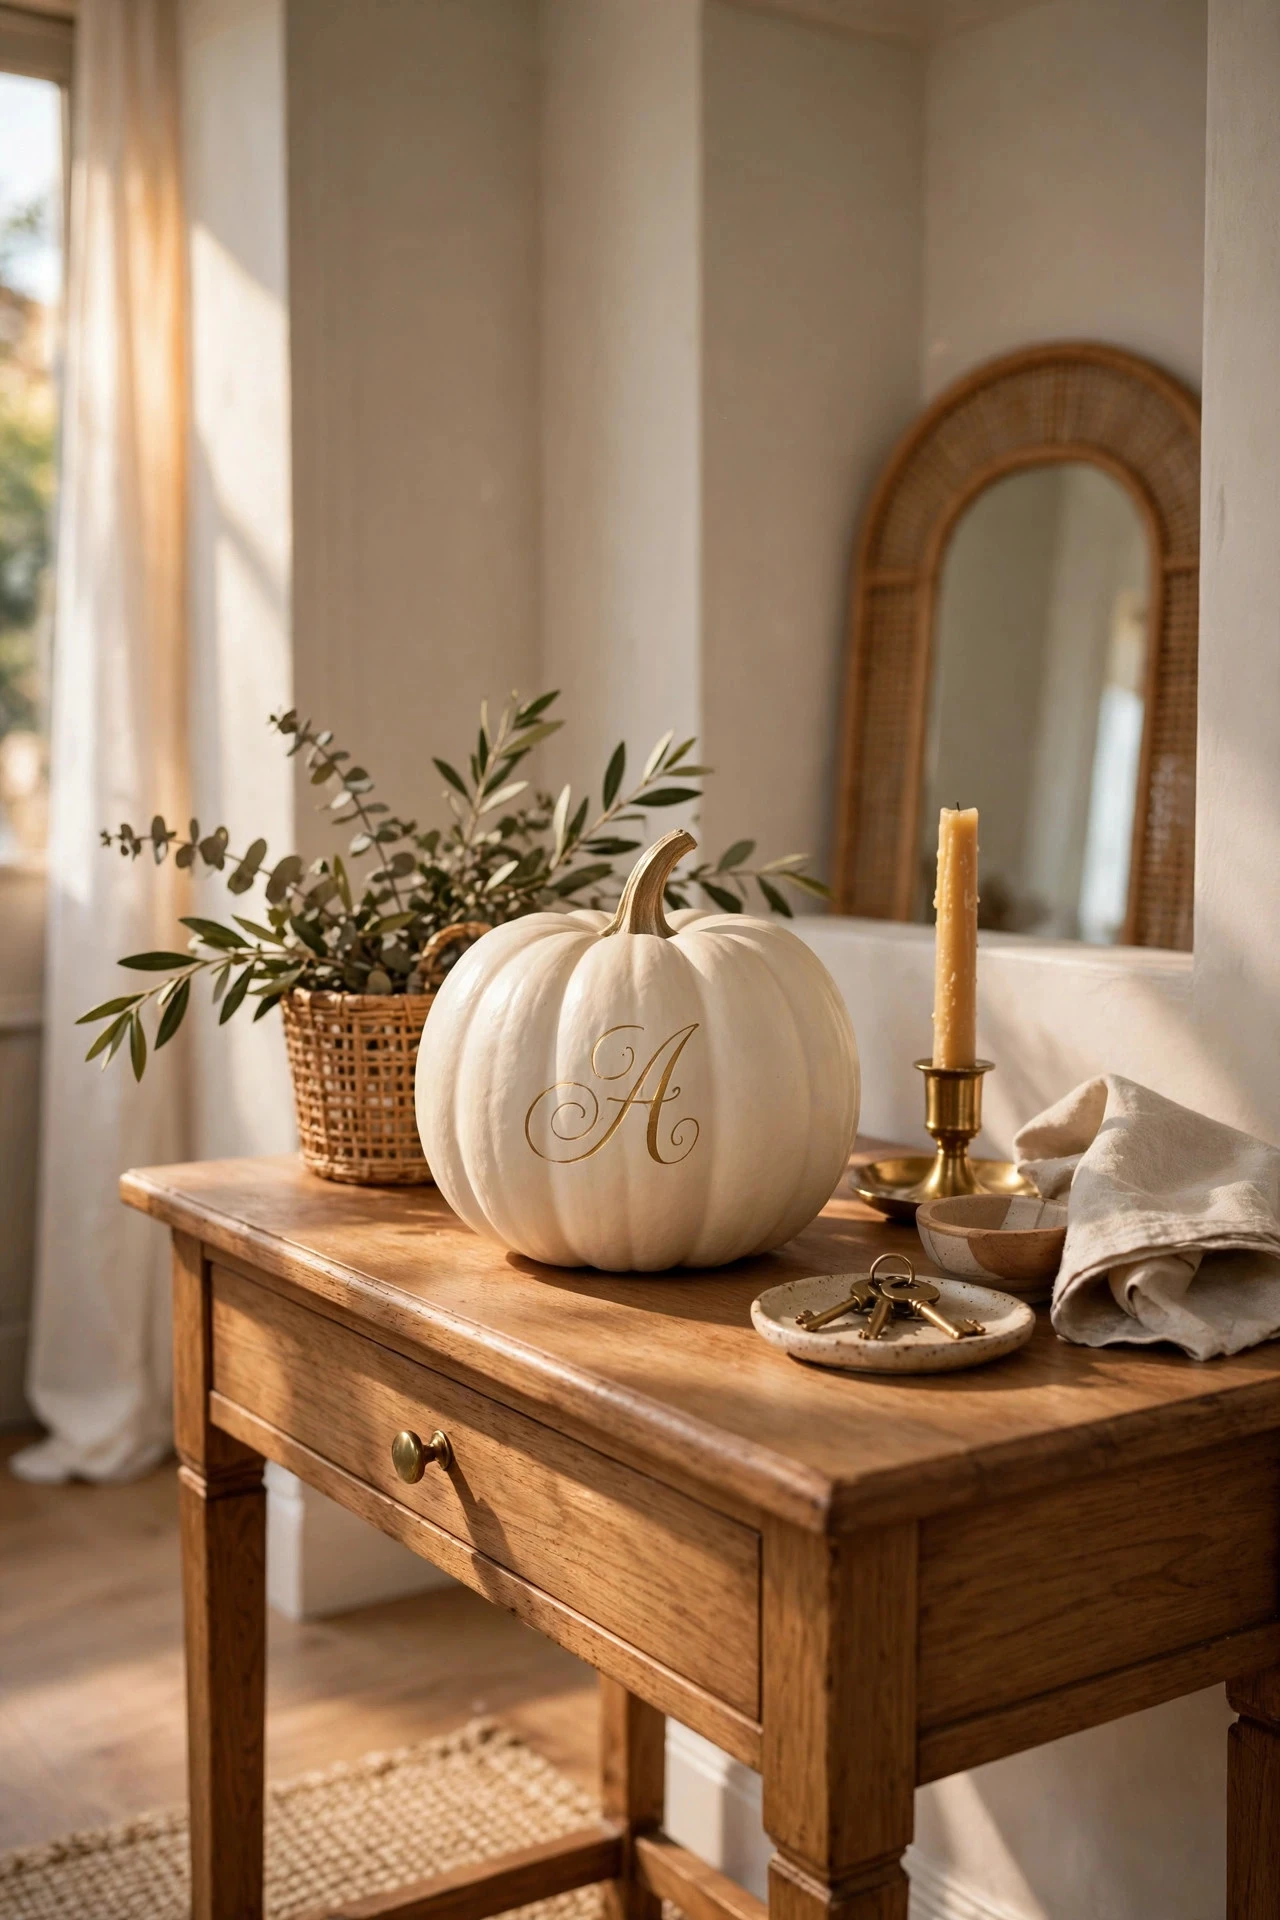
Monogrammed pumpkins add a personal, boutique touch to an entry table, mantel, or place setting, and a single initial or a short word is more elegant than a long phrase. Paint the pumpkin in a soft solid color, such as ivory, blush, or sage, then add an initial in gold, white, or deep rose using adhesive vinyl letters, a stencil, or careful freehand painting with a fine liner brush and a paint pen. Place the letter on the flattest, widest face of the pumpkin, centered just below the stem, and keep the script simple and readable from a few feet away. Vinyl letters or a reusable stencil cost $5 to $12, and paint and sealer add $8 to $15. Seal gently over vinyl with a light spray coat so the edges do not lift. The mistake to avoid is choosing a fussy, thin script font at a small size, which becomes unreadable across a room and looks like a smudge rather than a monogram.
12. Marble-Effect Pumpkins in Blush and Grey

Marble-effect pumpkins in blush and grey look expensive and modern, yet the technique relies on water, paint, and a little patience rather than special skill. Fill a shallow disposable container with room-temperature water, drip in drops of white, blush, and soft grey nail polish or marbling paint, swirl them lightly with a toothpick, and dip the pumpkin slowly so the floating color wraps around the surface. Alternatively, paint the pumpkin white, then use a fine brush to draw soft, wandering grey and blush veins, blurring them with a damp sponge while the paint is wet. Either method costs $14 to $28 for paint, polish, and sealer, plus gloves and a drop cloth. Work in a ventilated area and protect the stem with tape. The mistake to avoid is over-swirling the colors in the water, which blends them into a flat, muddy grey instead of the distinct, natural veining that makes marble convincing.
13. Velvet-Finish Pumpkins in Dusty Rose
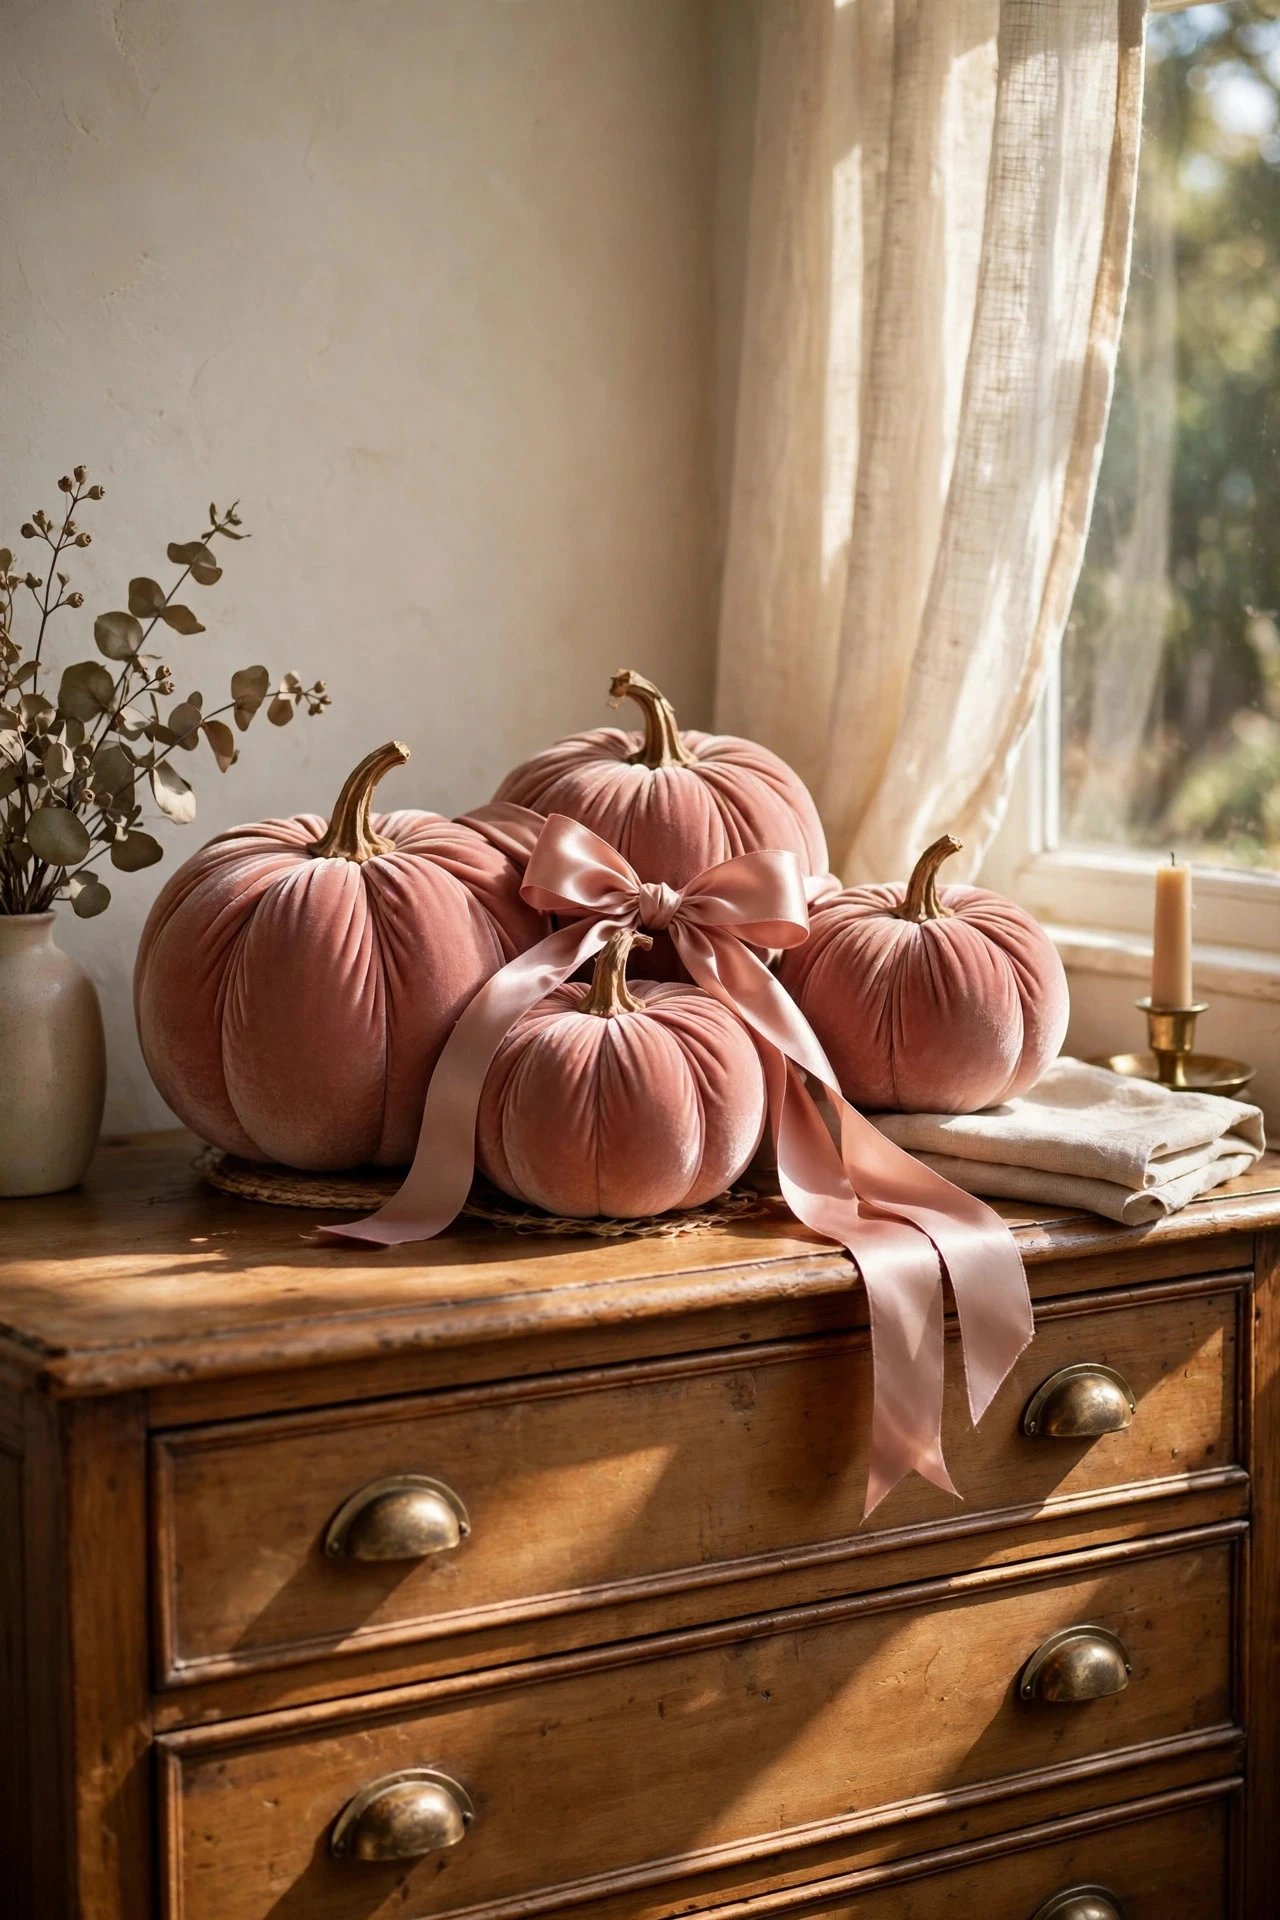
Velvet-finish pumpkins in dusty rose feel soft, luxurious, and tactile, and they are a lovely contrast to shiny metallic or glitter pumpkins in the same display. The easiest route is to buy velvet-covered foam pumpkins in dusty rose, mauve, or blush, which already have a plush surface and a realistic stem. To make your own, paint a foam pumpkin with fabric paint or cover it with a thin layer of flocking powder applied over spray adhesive, working in small sections so the adhesive stays tacky. Add a silk stem wrap or a small satin bow, but keep embellishments minimal so the velvet texture stays the star. Bought velvet pumpkins cost $8 to $18 each, while a do-it-yourself flocking kit costs $15 to $25 for several pumpkins. The mistake to avoid is placing velvet pumpkins outdoors or in a damp entry, where moisture mats the fibers, spots the surface, and ruins the soft finish.
14. Painted Pumpkins With Pressed Flowers

Pressed-flower pumpkins combine real botanicals with paint for a romantic, cottage-garden look that suits a mantel, bookshelf, or wedding-adjacent fall table. Paint the pumpkin a pale base color, such as cream, sage, or blush, then arrange small pressed flowers and leaves — pansies, daisies, ferns, and baby's breath work well — on the flattest faces, and seal them in place with several thin coats of decoupage medium, such as Mod Podge, brushing gently from the center of each flower outward. Build up three thin coats rather than one thick coat, letting each dry fully, and finish with a clear matte sealer so the flowers look embedded in the paint rather than stuck on top. Pressed flowers cost $6 to $12 a pack, and medium and paint add $10 to $18. The mistake to avoid is using fresh flowers instead of fully pressed, dry ones, because fresh petals shrink, brown, and bubble under sealer within days.
15. Gingham and Plaid Pumpkins in Pink
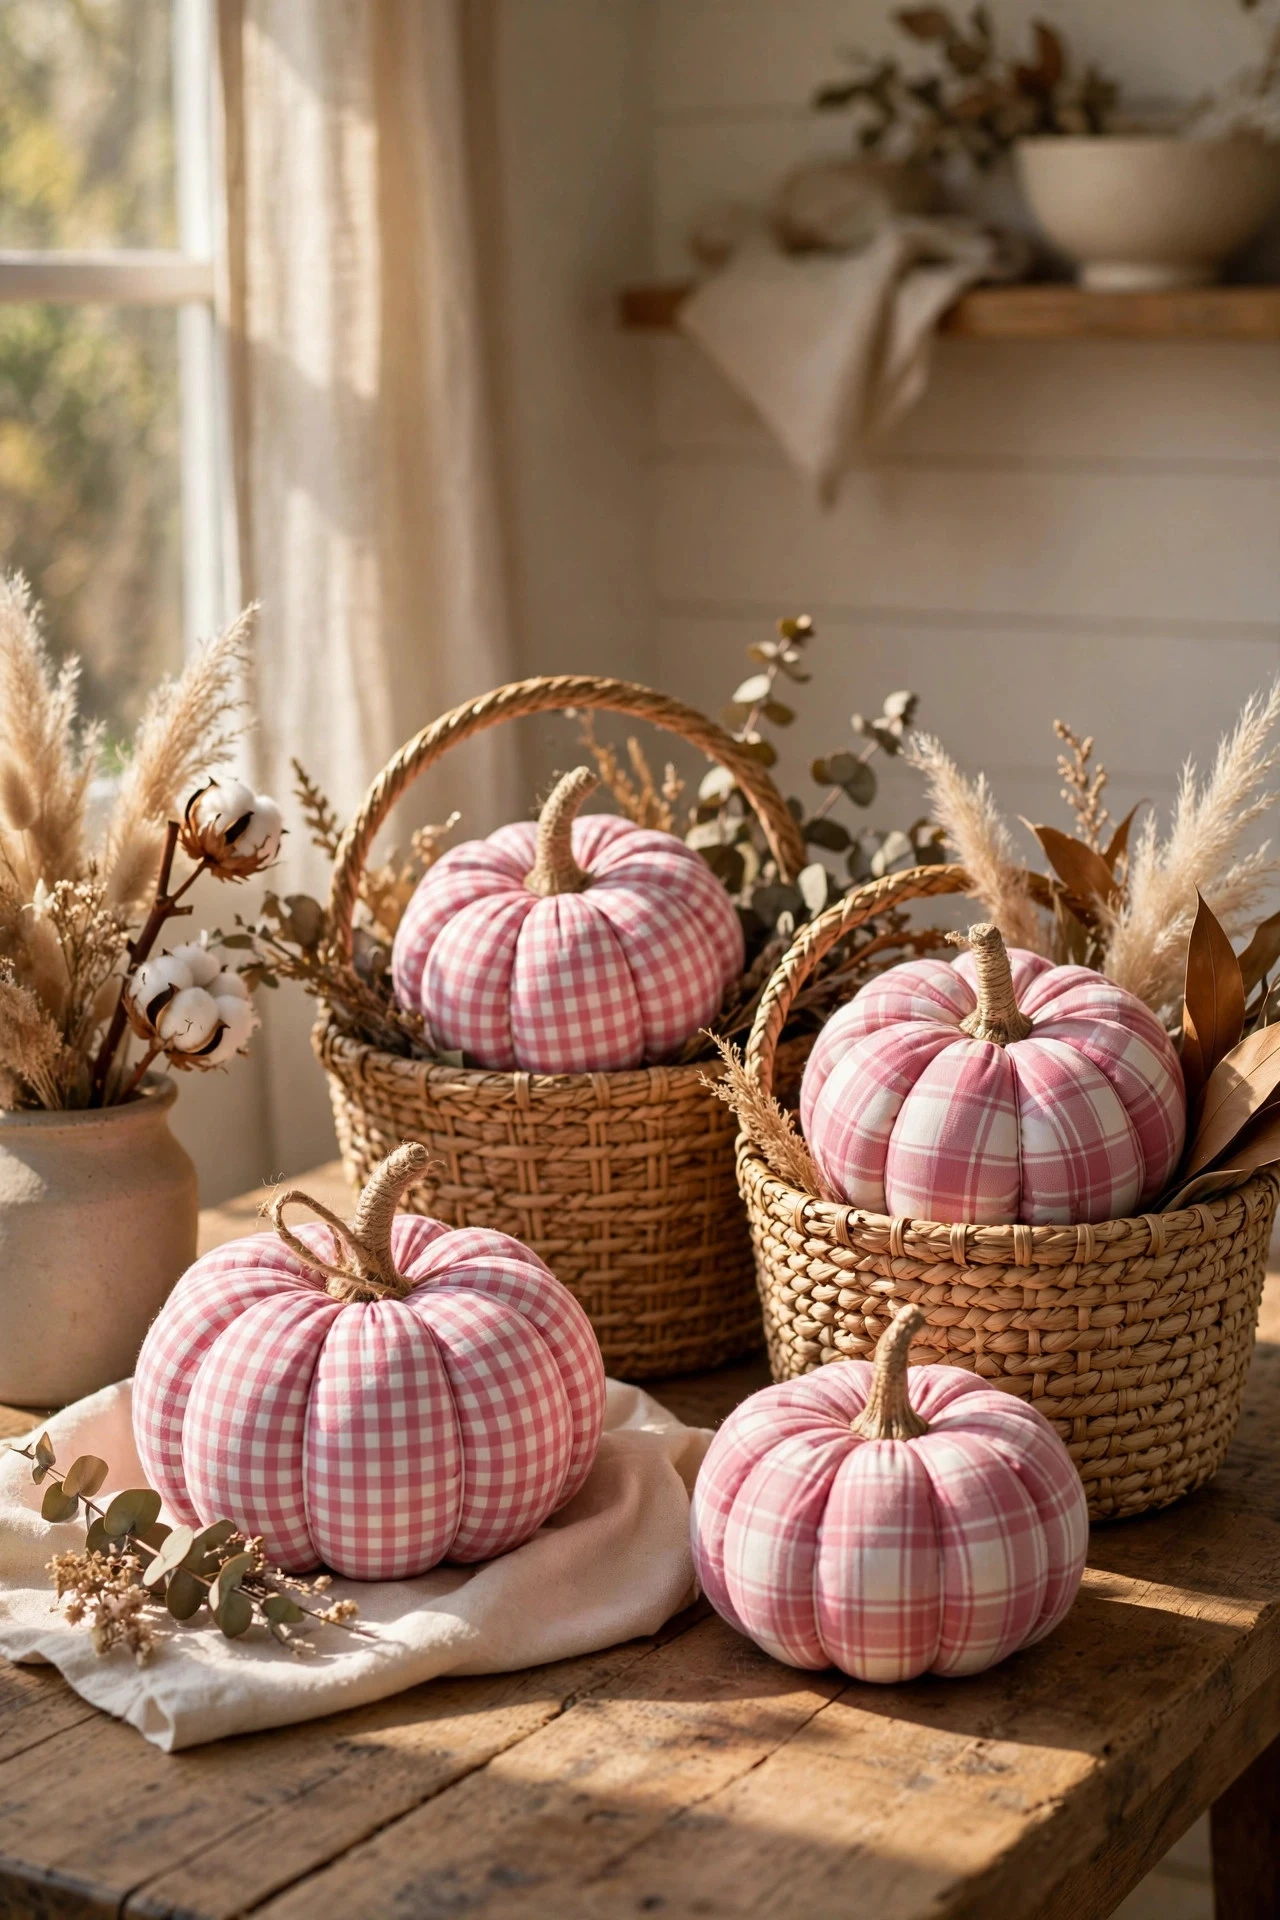
Gingham and plaid pumpkins in pink bring a sweet, farmhouse-meets-preppy pattern to fall decor, and they look especially good beside woven baskets, whitewashed wood, and checked textiles. Paint the pumpkin white or very pale pink, then use painter's tape to mark straight horizontal and vertical bands, painting alternate bands in dusty rose or blush and letting each layer dry before taping the next. Where the bands cross, the overlapping color naturally darkens, creating the checked effect, and a fine brush can sharpen any wobbly lines. Tape, two paint colors, and sealer cost $12 to $22 for two or three pumpkins. Take time with the tape, pressing the edges firmly so paint does not bleed underneath, and remove the tape while the final coat is slightly damp for the cleanest edge. The mistake to avoid is freehanding the checks without tape, which produces uneven squares that look accidental rather than crisp and charming.
16. Watercolour Wash Pumpkins
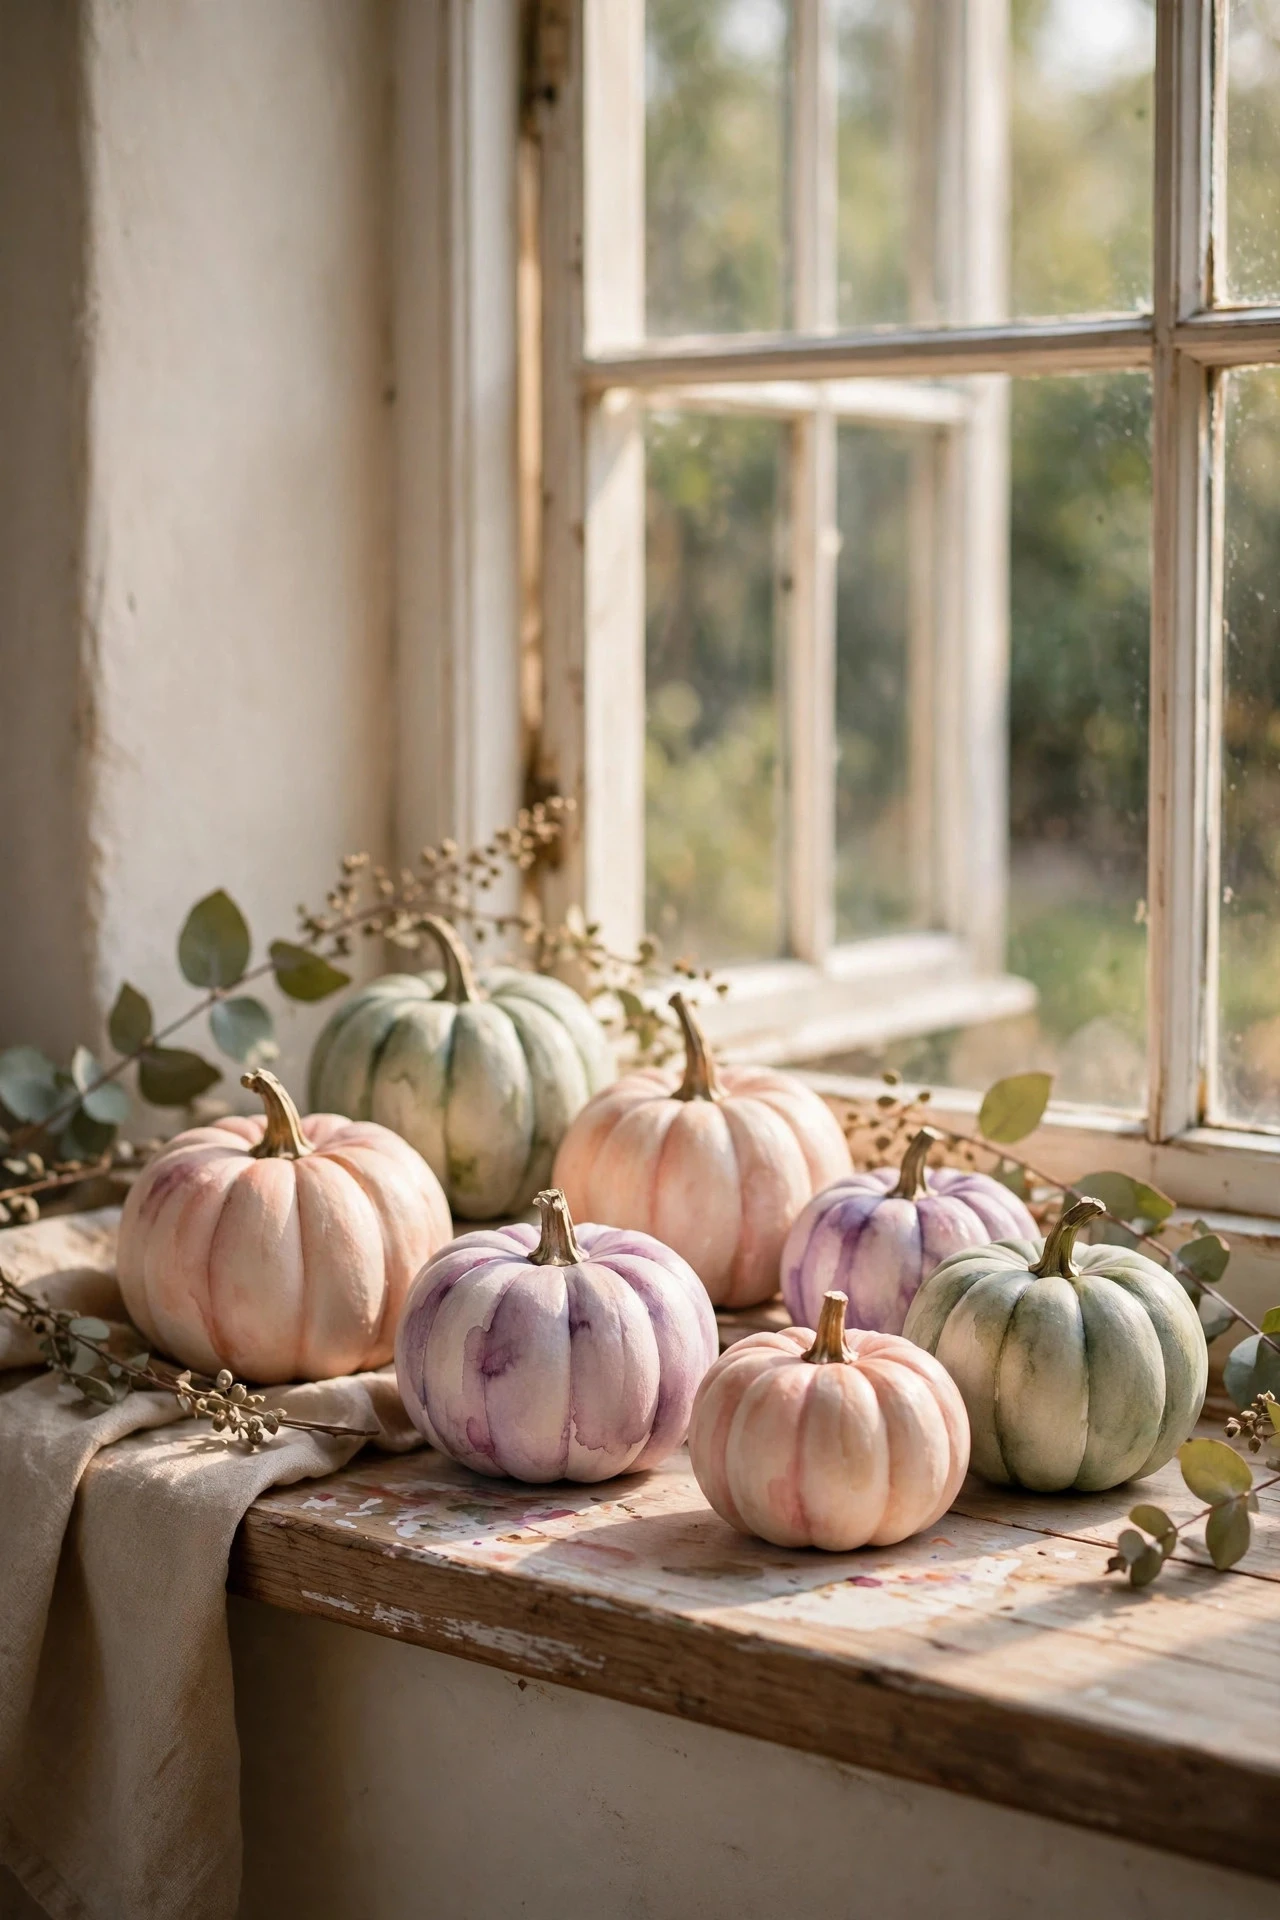
Watercolour wash pumpkins have a soft, dreamy quality that suits bedrooms, reading nooks, and light-filled living rooms where bold fall colors would feel too heavy. Thin acrylic paint with water until it is translucent, then brush it over a white or cream pumpkin in loose, overlapping washes of blush, peach, lilac, and sage, letting each wash dry before adding the next so the colors layer like watercolor on paper. Leave some white showing, especially near the top, and let the paint pool slightly in the ribs for natural shading. Because the wash is thin, two or three layers build depth without hiding the pumpkin's shape. Paint, brushes, and sealer cost $10 to $20, and a spray sealer protects the delicate surface without disturbing it. The mistake to avoid is using undiluted paint for the first layer, which covers the pumpkin opaquely and loses the translucent, watery glow that defines this style.
17. Pearl Bead and Rhinestone Pumpkins
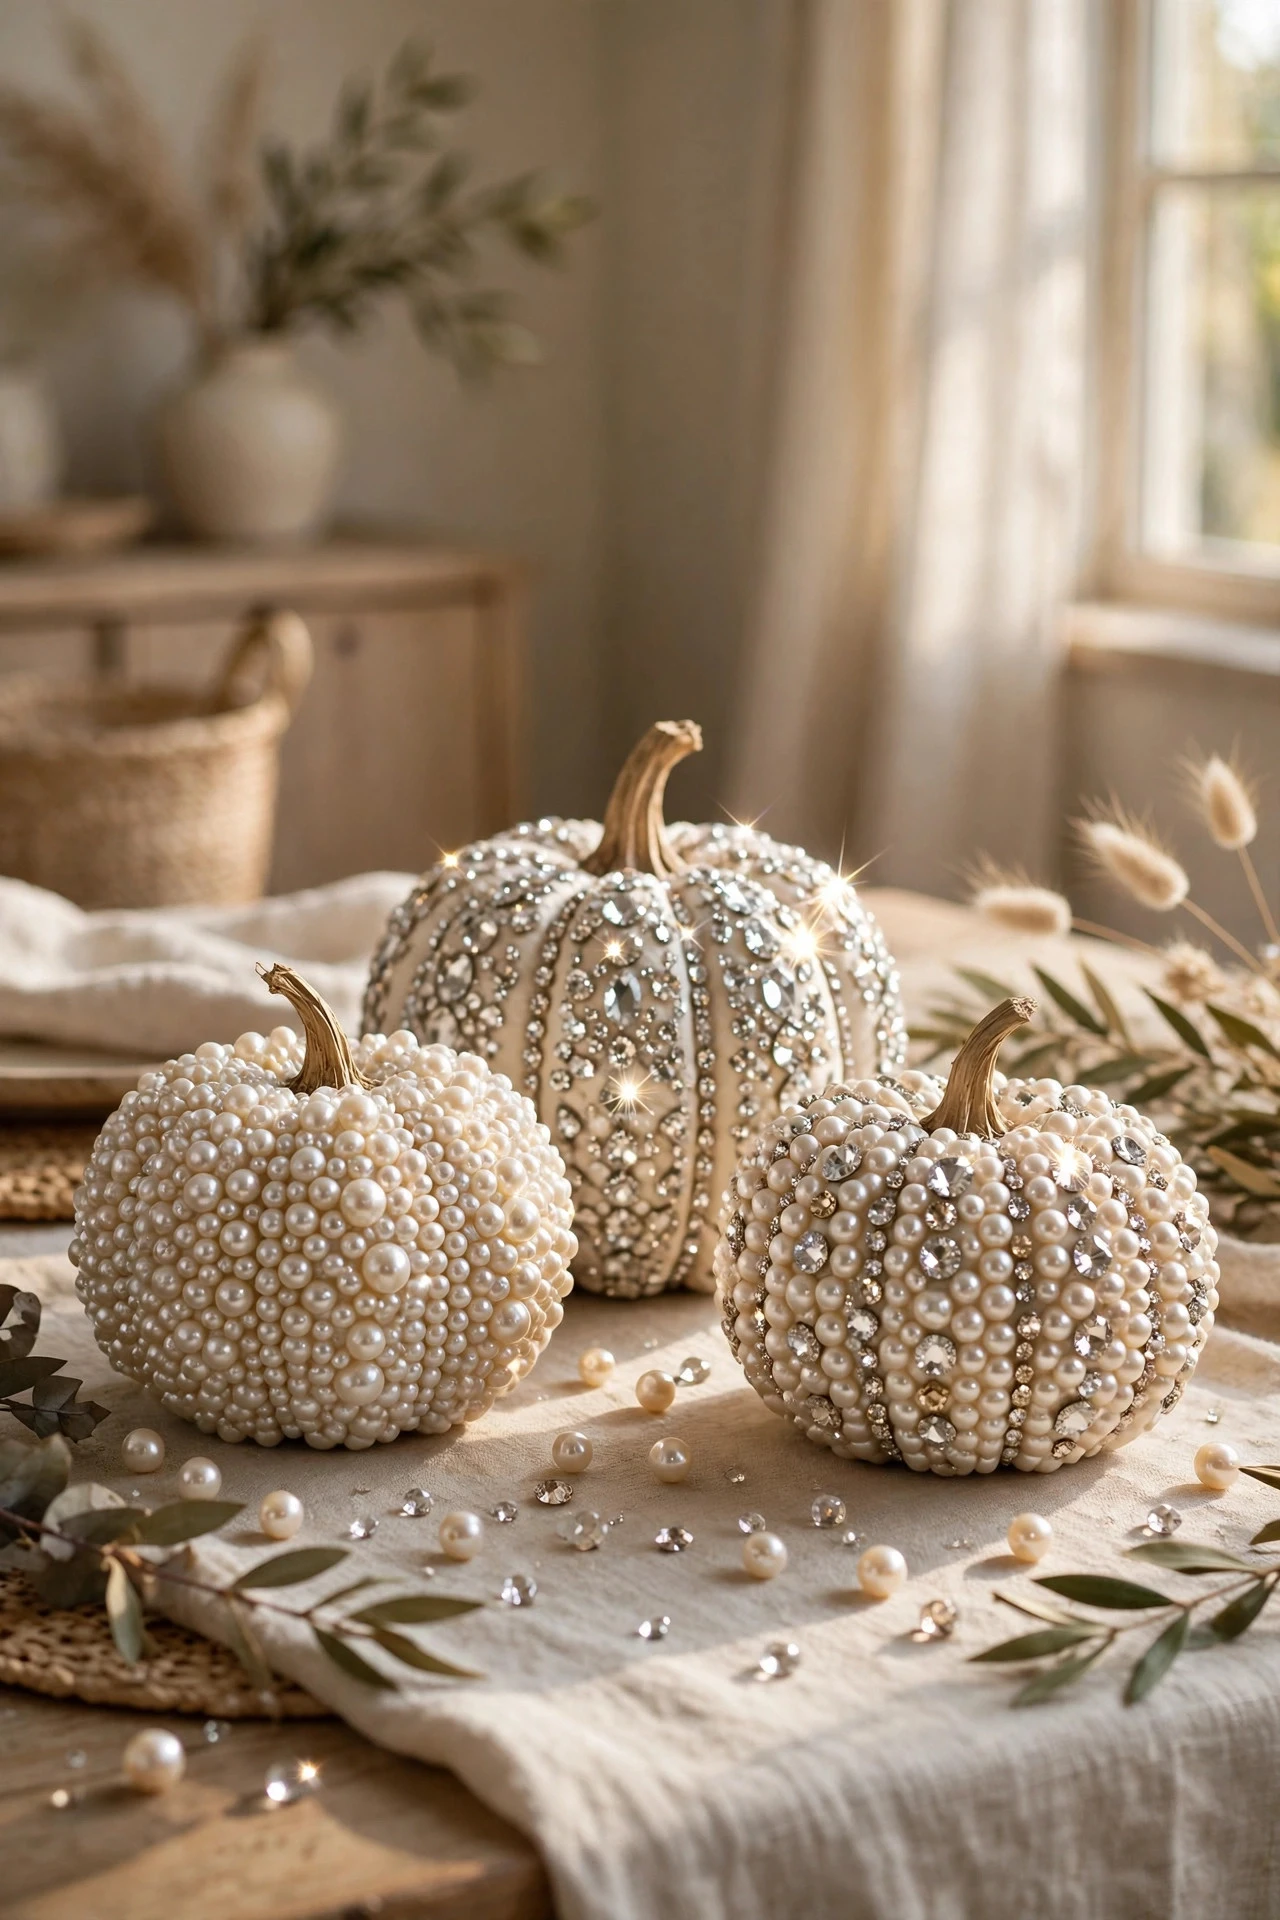
Pearl bead and rhinestone pumpkins are the most glamorous option in this list, and they work best as one or two statement pumpkins rather than a whole display, so the sparkle stays special. Paint the pumpkin a solid base color — ivory, blush, or pale grey — then glue flat-back pearls and rhinestones in a pattern, such as a vertical line down each rib, a scattered constellation on one face, or a dense band around the middle. Use a strong craft glue or a hot-glue gun on foam pumpkins, place the largest pearls first, and fill gaps with smaller rhinestones. A pack of mixed pearls and rhinestones costs $6 to $12, and paint and glue add $8 to $15. Handle the finished pumpkin by the base, not the decorated sides. The mistake to avoid is covering the entire pumpkin in gems, which hides the pumpkin shape, adds surprising weight, and reads as costume jewellery rather than elegant fall decor.
18. Cottagecore Pumpkins With Tiny Mushrooms and Ferns
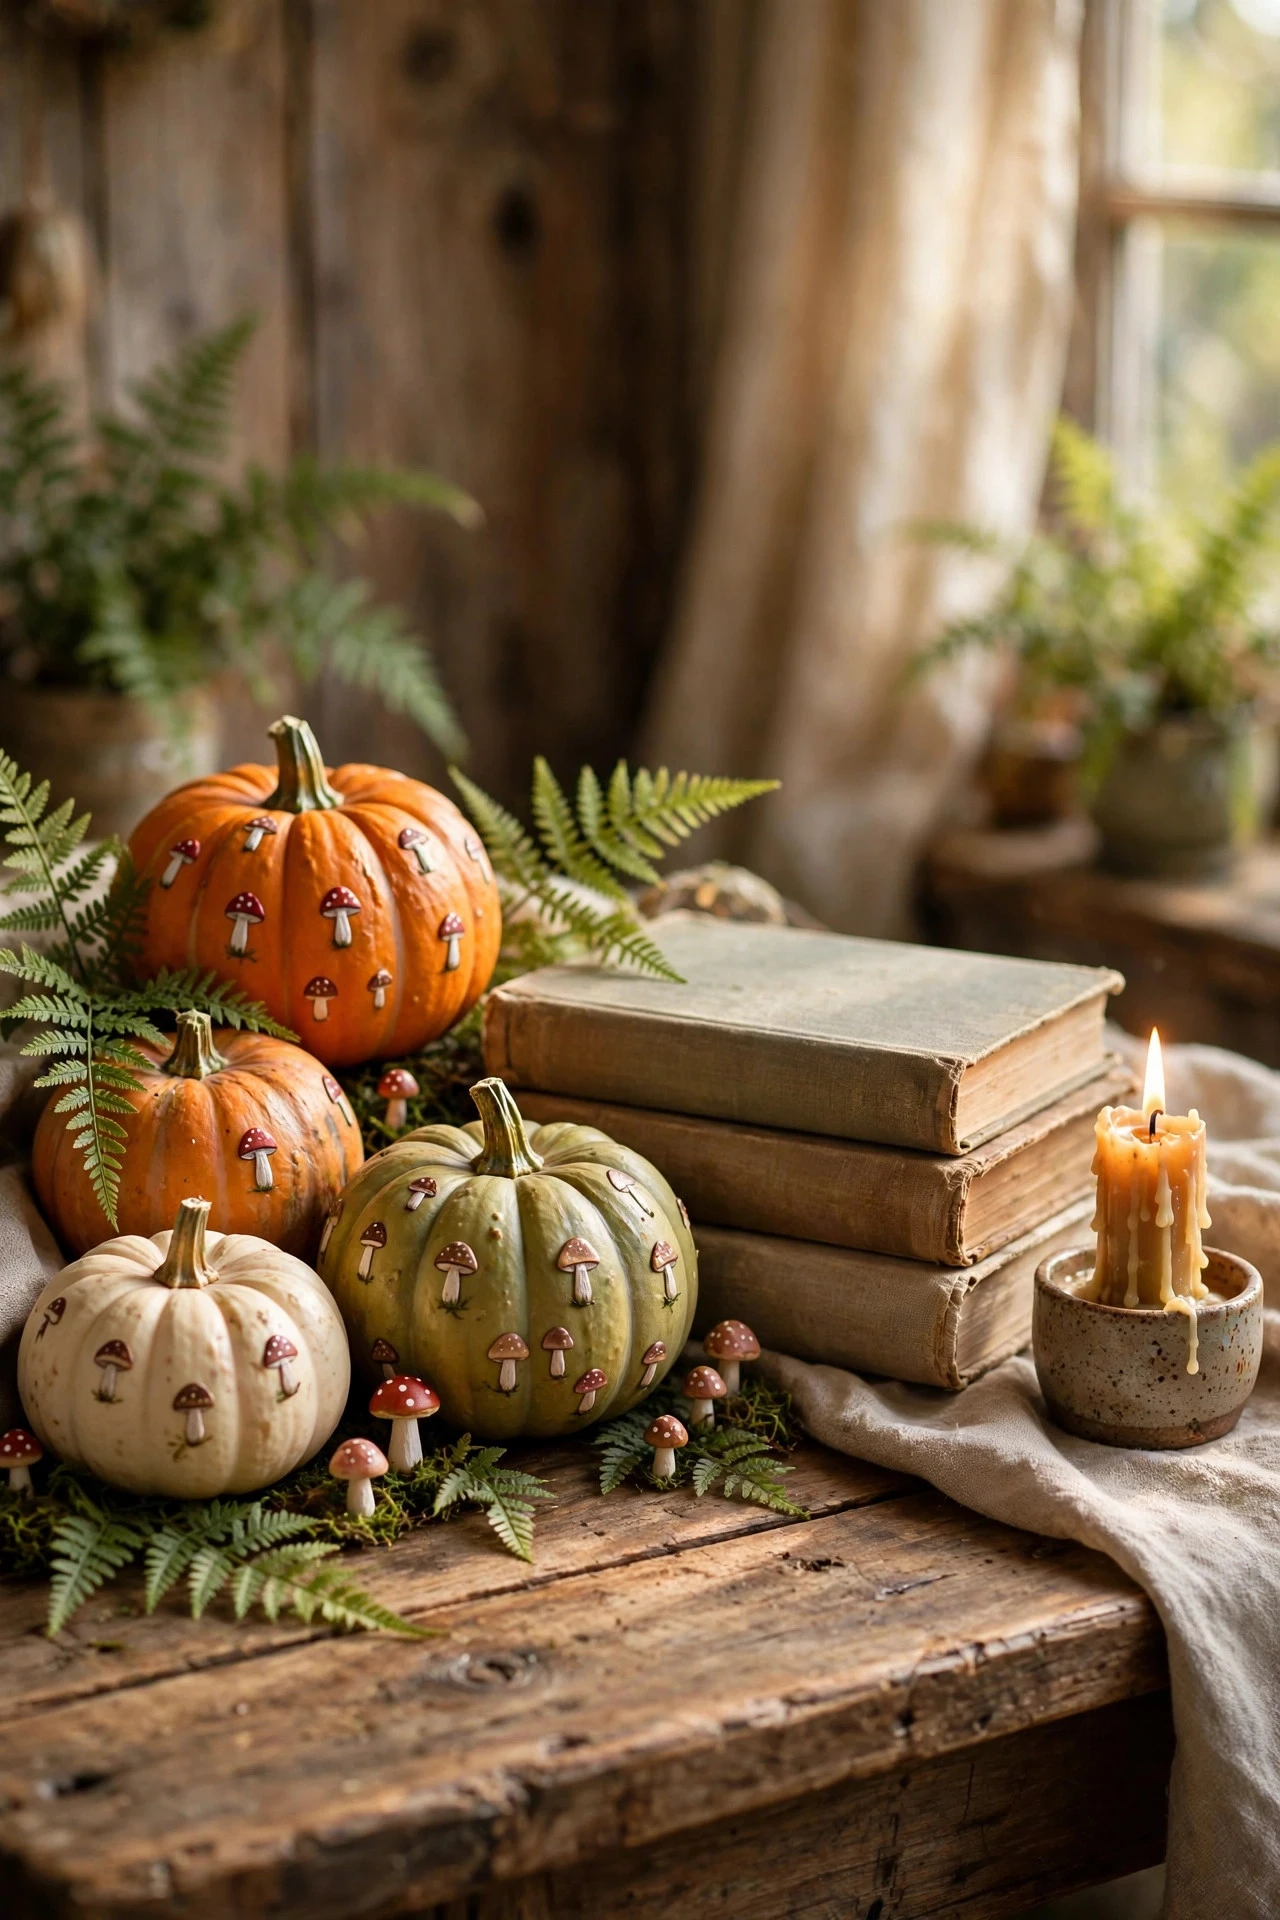
Cottagecore pumpkins with tiny mushrooms and ferns feel like a walk through an autumn woodland, and they suit a bookshelf, windowsill, or cozy reading corner better than a formal mantel. Paint pumpkins in sage, cream, mushroom brown, or dusty pink, then add small hand-painted ferns with a fine brush, tiny red-capped mushrooms with white dots, and a few faux moss patches glued around the base. Keep the motifs small and clustered on one side so the pumpkin still looks like a pumpkin, and add a twig stem or a wrapped jute stem for a woodland finish. Paint, faux moss, and miniature mushrooms cost $15 to $28 for three pumpkins. Pair them with stacked books and dried grasses. For more vintage, playful styling that shares this woodland charm, these whimsical Halloween decor ideas offer gentle, storybook inspiration. The mistake to avoid is adding too many different motifs at once, because mushrooms, ferns, acorns, and butterflies together crowd the surface and lose the calm, woodland feeling.
19. Painted Pumpkin Topiary for the Entry
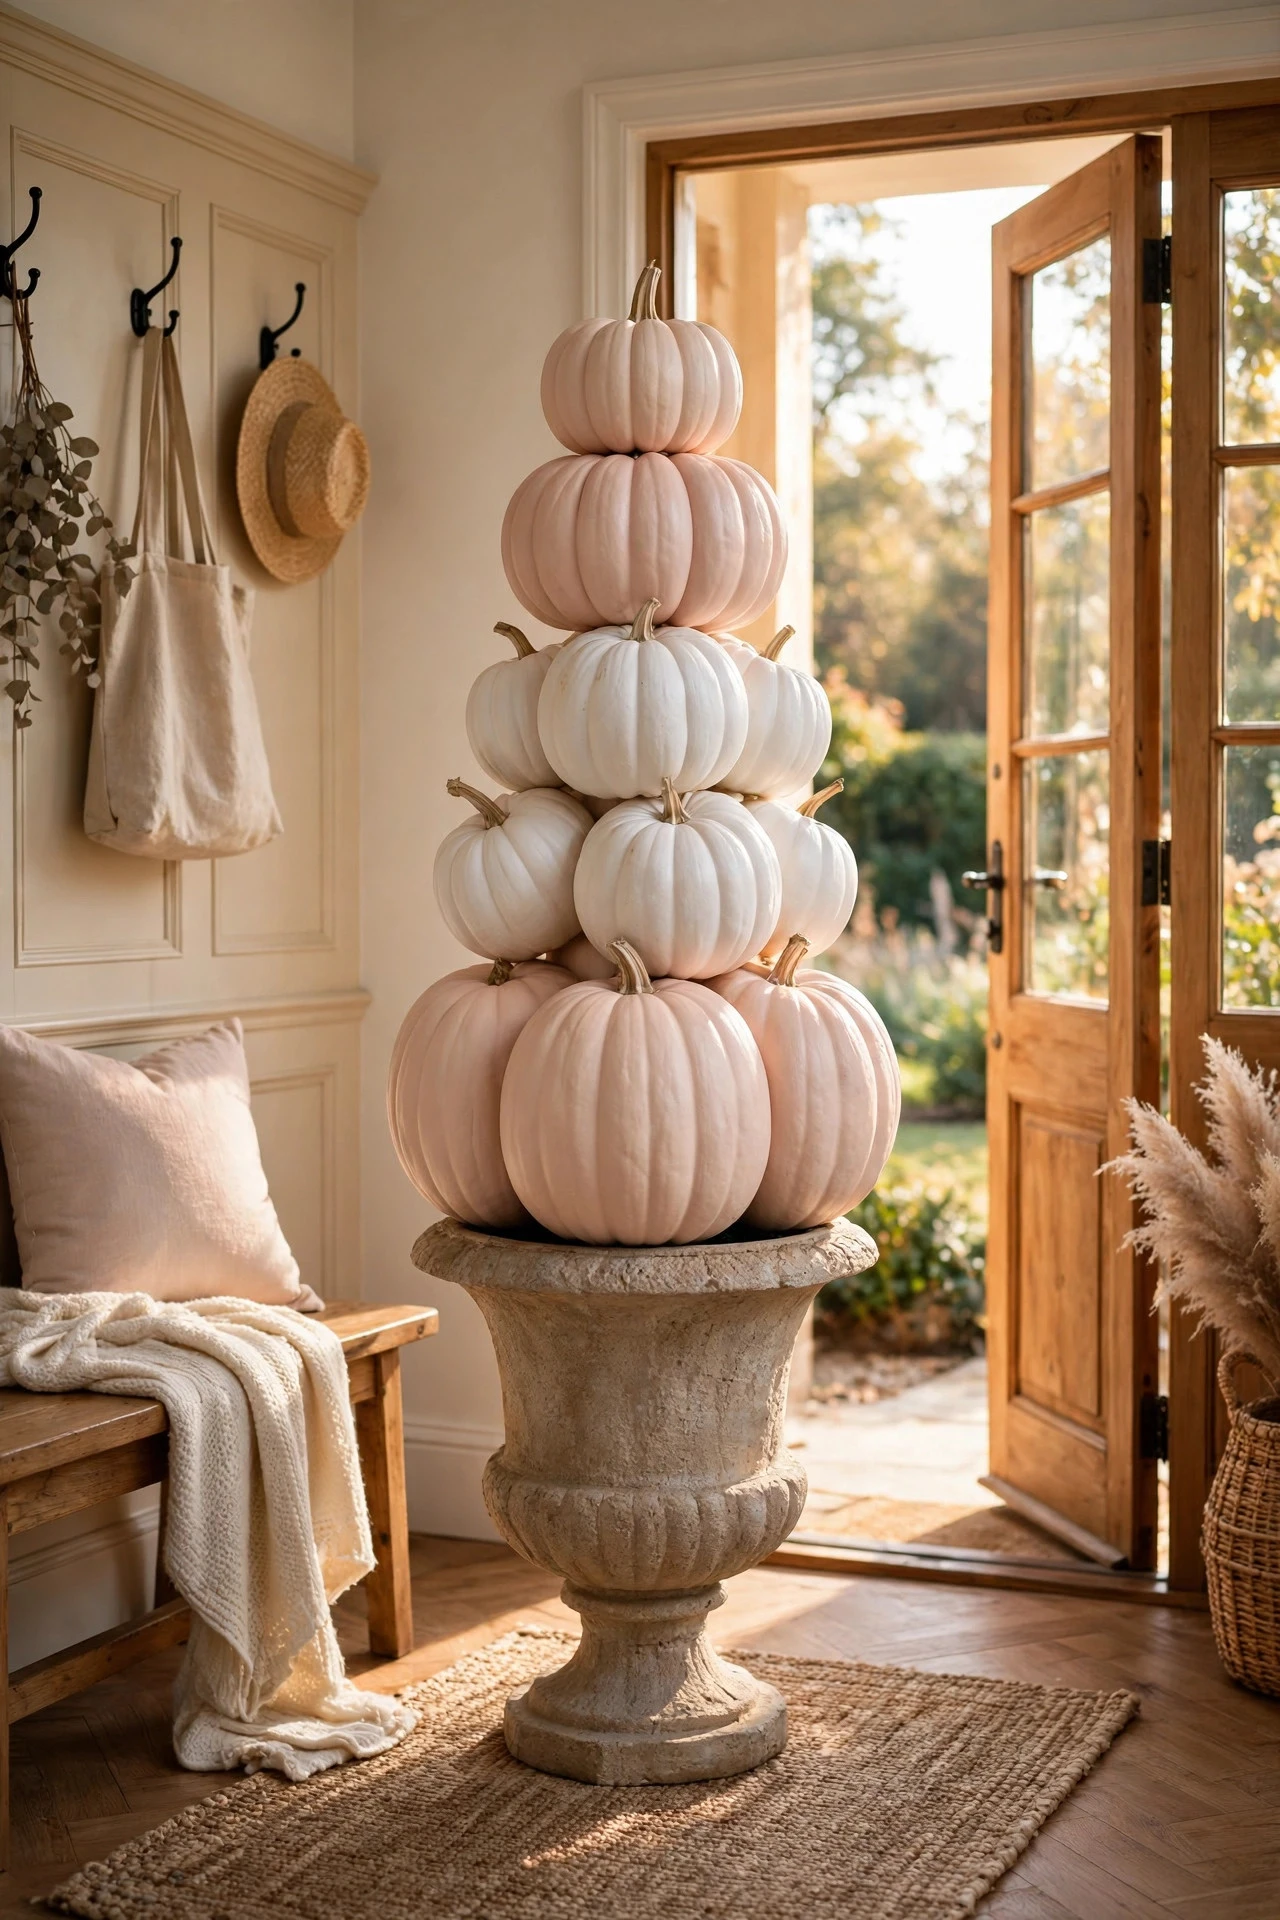
A painted pumpkin topiary makes a welcoming statement for an entry table or a covered porch, and it uses vertical space that a row of small pumpkins cannot. Stack three foam pumpkins in graduated sizes — large at the bottom, medium in the middle, and small on top — in a single color story, such as blush, cream, and white, or paint each one a different pastel. Secure them with a wooden dowel through the centers and hot glue between layers, set the stack in an urn or basket weighted with stones, and add a bow, faux greenery, or a small cluster of berries at the top. Foam pumpkins, paint, a dowel, and an urn cost $25 to $45 in total. Keep the topiary indoors or on a covered porch, and check that it is stable before leaving it near a doorway. The mistake to avoid is stacking real pumpkins without a dowel, because they shift, bruise, and topple at the first bump, especially on a smooth entry floor.
20. Pastel Pumpkins on a Tiered Tray
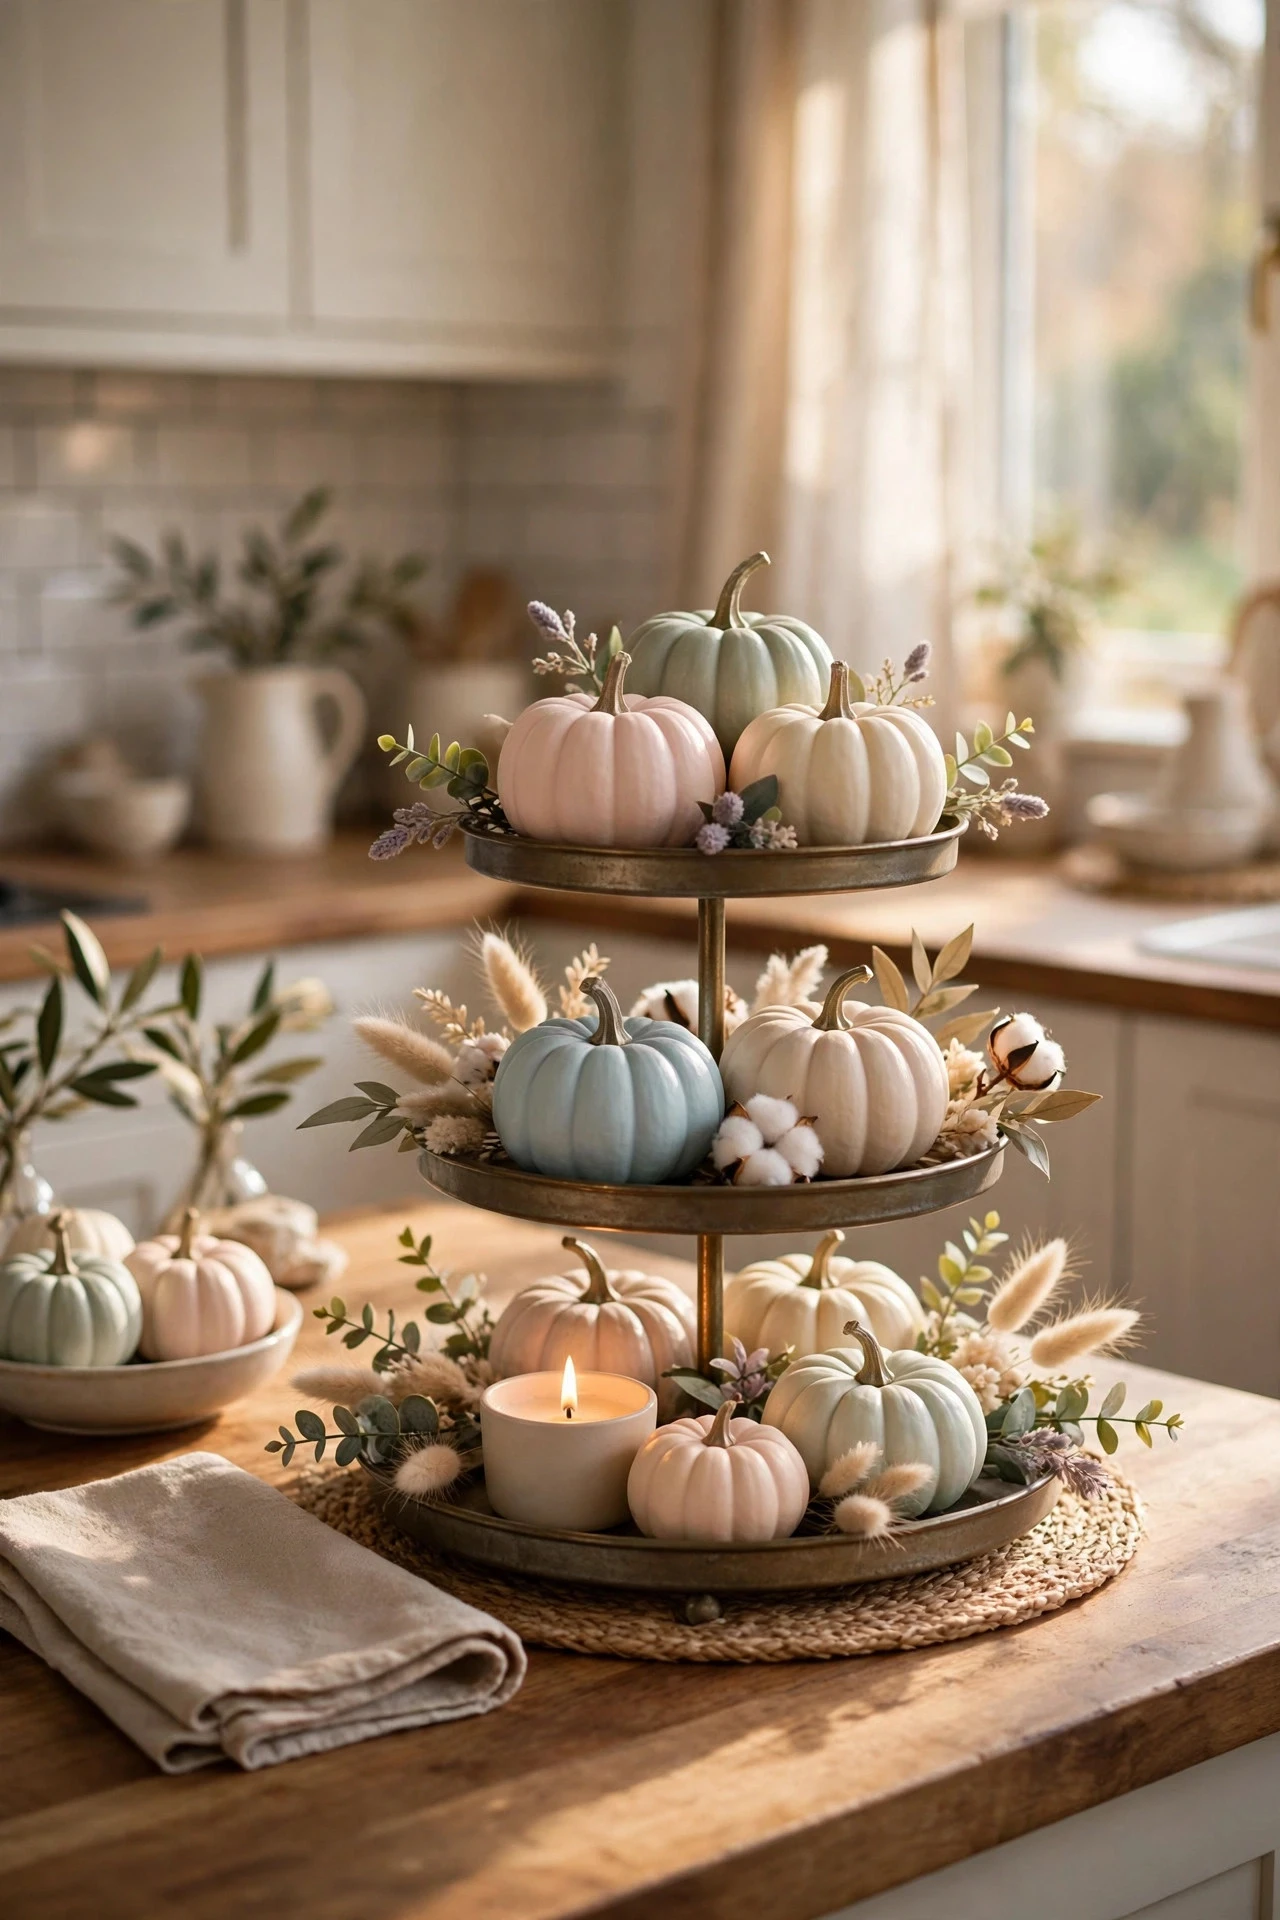
Pastel pumpkins on a tiered tray create a compact, girly fall display for a kitchen island, coffee bar, or bathroom counter, where a large arrangement would be in the way. Choose mini pumpkins in blush, mint, lilac, and cream, paint any that are still orange, and arrange them with small props that share the color story: a tiny vase with faux flowers, a small candle, a few pearl beads, and a miniature sign or wooden bead garland. Keep the tallest items at the back, leave breathing room between objects, and repeat one color on each tier so the tray reads as one display rather than two separate ones. Mini pumpkins and paint cost $12 to $22, and tray props add $8 to $15 if you do not already own them. The mistake to avoid is overfilling every inch of the tray, which makes the display look cluttered and hides the pumpkins behind candles, beads, and signs.
21. Coquette Pumpkins With Bows and Pearls
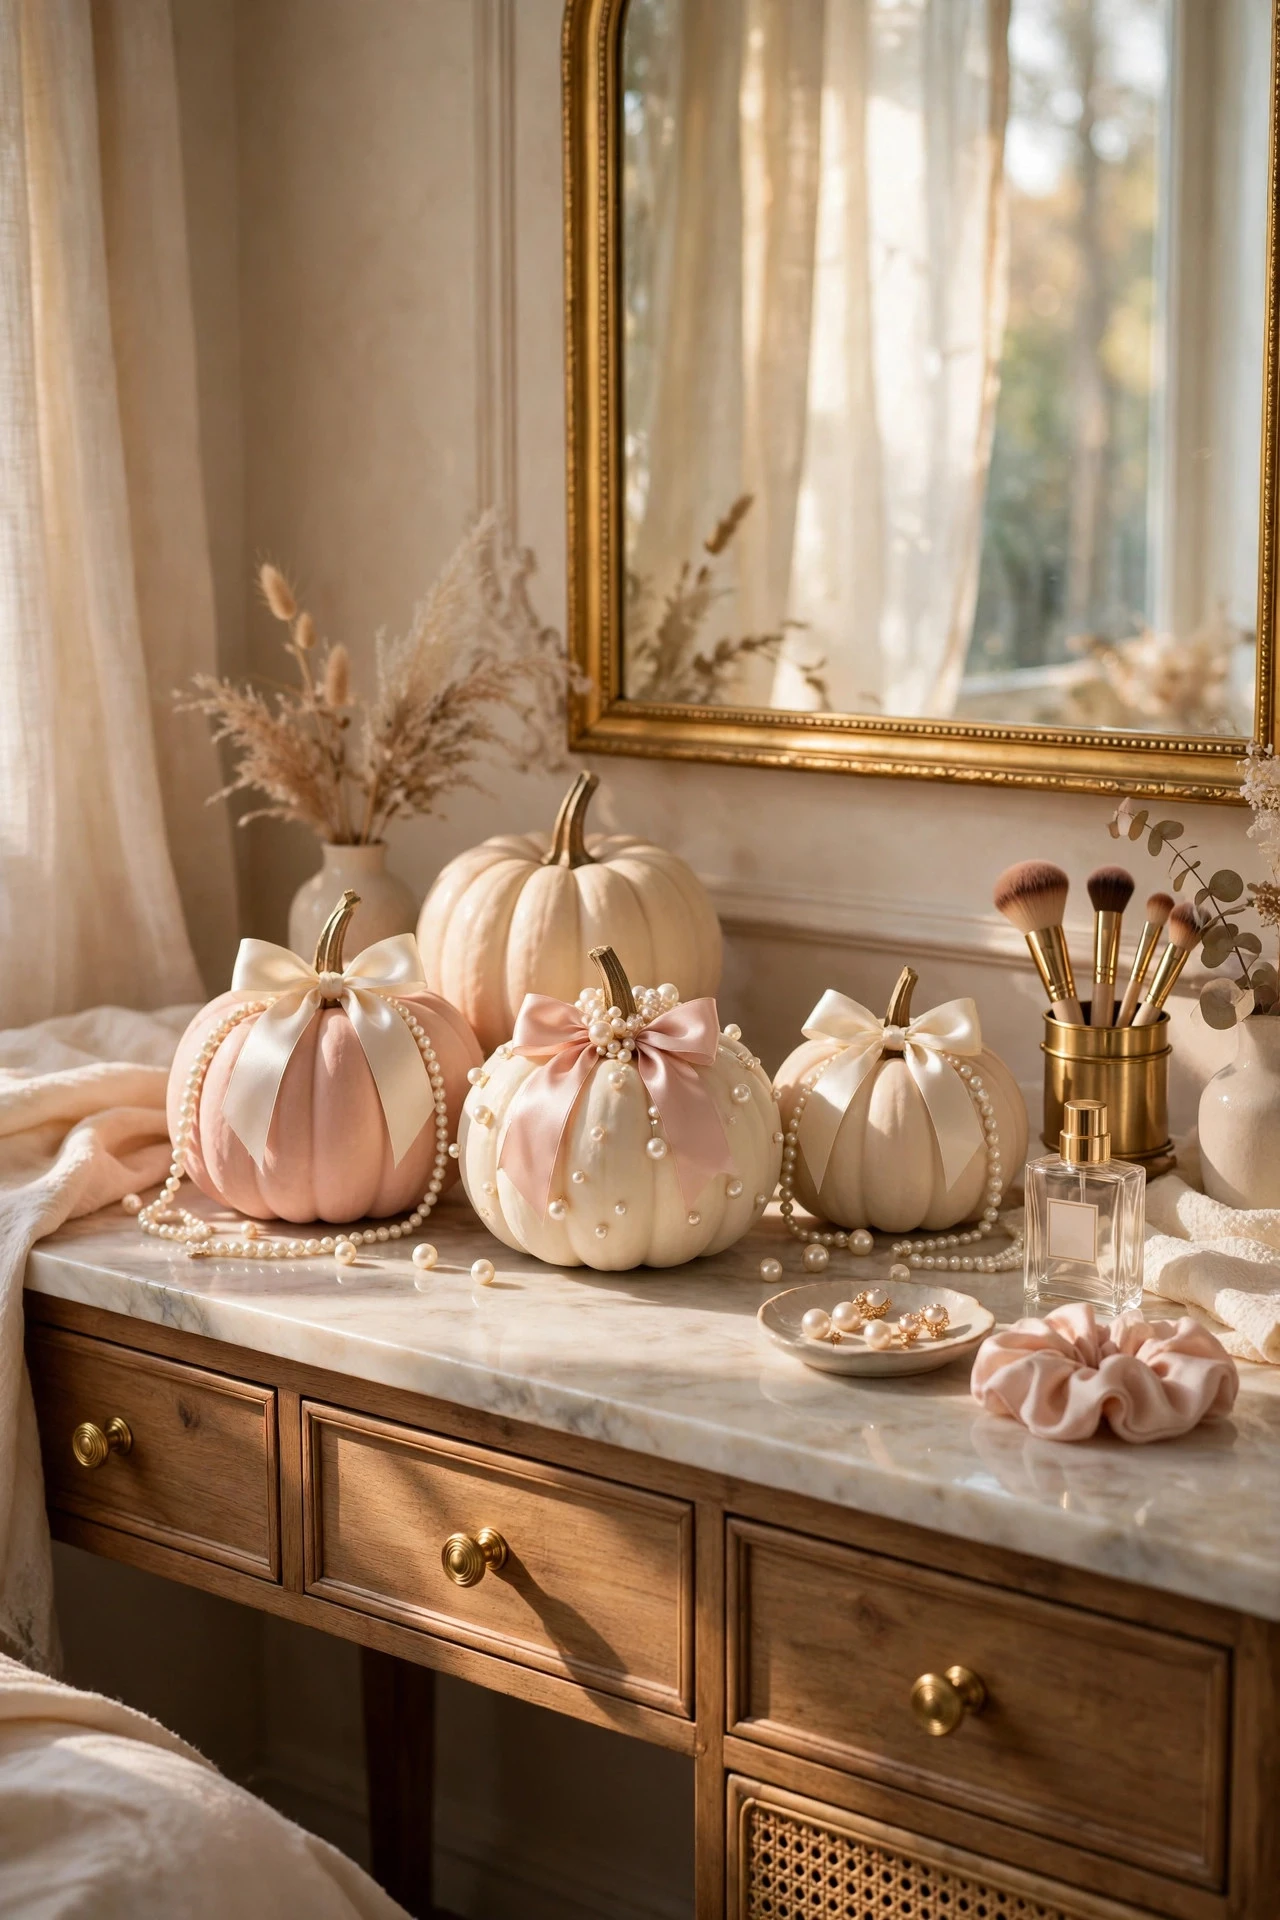
Coquette pumpkins with bows and pearls are the most feminine look in this collection, combining soft pink paint, satin bows, and pearl details in a style inspired by ballet, lace, and vintage lingerie trimmings. Paint pumpkins in blush, ivory, or pale pink, add a large satin bow at the stem and a second smaller bow on the front, then glue a scattering of small flat-back pearls along the ribs or around the base of the stem. A touch of lace trim around the middle, a tiny cameo, or a pearl-beaded garland draped over the group adds romance without clutter. Ribbon, pearls, and paint for three pumpkins cost $18 to $32. Keep the palette to two colors plus pearls, so blush and ivory with white pearls stay dreamy rather than busy. The mistake to avoid is mixing coquette details with bold Halloween motifs, such as black cats or spooky faces, which clash with the soft, romantic mood and confuse the whole display.
22. Sealed and Stored: Keeping Painted Pumpkins Pretty
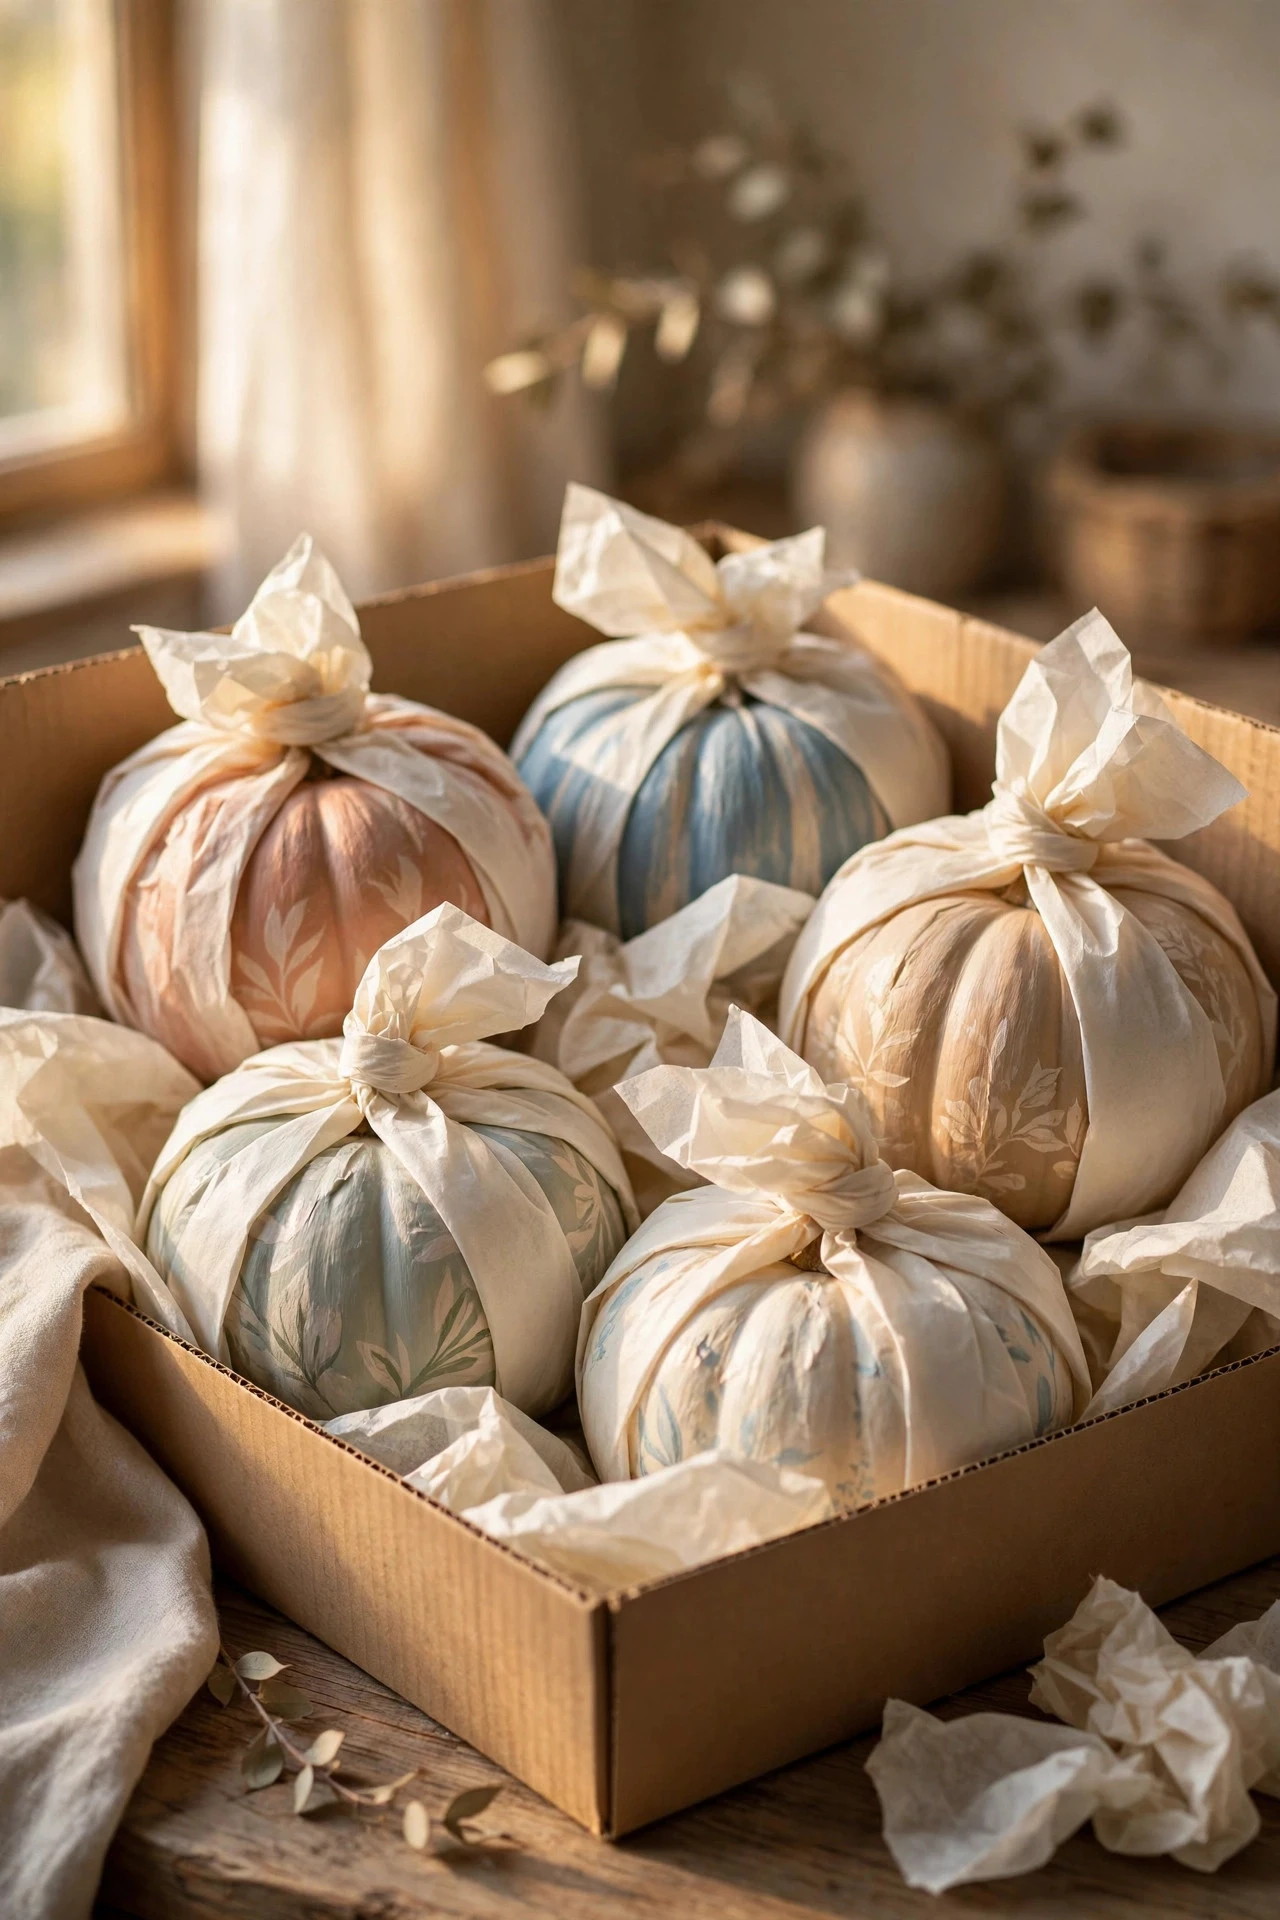
Sealing and storing painted pumpkins properly keeps a girly display pretty for weeks, and deserves as much attention as the painting itself. Seal every finished pumpkin with two thin coats of clear sealer suited to the finish — matte for chalk and velvet looks, gloss for glitter and metallic looks — and let each coat dry fully in a ventilated area before handling or displaying. Keep real painted pumpkins indoors, out of direct sun and away from radiators, and check them every few days for soft spots, wiping away condensation if it appears. For foam pumpkins, wrap each one in tissue paper, store them upright in a box in a cool, dry place, and keep bows and pearls in a bag so they do not snag. Sealer costs $6 to $12 a can, and storage supplies add $5 to $10. The mistake to avoid is stacking painted pumpkins on top of each other for storage, because the paint sticks, chips, and transfers, even when dry to the touch.
Practical Tips
Choose the right pumpkin and paint before you start, because the surface decides how pretty the finish will be. Smooth, unblemished real pumpkins and foam craft pumpkins take paint most evenly, while deeply ribbed or bruised pumpkins need extra coats and still show uneven color. Always wash real pumpkins with mild soapy water, dry them thoroughly, and apply a primer or a first coat of white paint when you are painting a light color over orange skin. Acrylic craft paint is the most forgiving choice for beginners, chalk paint gives a soft matte finish, and spray paint gives the smoothest metallic finish, so match the paint to the look you want. For broader guidance on paint types and indoor craft projects, the room and craft guides at The Spruce explain how different finishes behave on porous surfaces.
Budget wisely by starting with one hero pumpkin and a small group, rather than buying paint for twenty pumpkins at once. A basic girly pumpkin project needs three or four colors of acrylic paint, two brushes, a sealer, and one embellishment, such as ribbon, pearls, or gold leaf, and that kit costs roughly $25 to $45 and covers several pumpkins. Buy small bottles, share colors across ideas, and test each color on the bottom of a pumpkin or on paper before committing, because blush and rose gold shift noticeably as they dry. Work in a ventilated area when using spray paint or spray sealer, protect tables with a drop cloth, and keep glitter, glue guns, and paint pens away from small children. For styling inspiration that places soft, feminine fall color within a whole room, House Beautiful shows how blush, cream, and metallic accents work together beyond a single pumpkin.
Display painted pumpkins where they will be seen in soft, natural light and protected from knocks, heat, and moisture. Group pumpkins in odd numbers, vary the heights with books, cake stands, or small crates, and repeat one color or material — gold leaf, pearls, or satin ribbon — across the group so the display feels collected. Keep real painted pumpkins indoors, bring foam pumpkins inside during rain, and rotate a display every week or two so the same side does not fade in a sunny window. If a pumpkin gets scuffed, touch it up with the original paint and a small brush, then reseal just that spot, rather than repainting the whole pumpkin and risking a mismatched finish.
Final Thoughts
Girly painted pumpkins prove that fall decor can be soft, pretty, and personal all at once, so start with the idea that makes you smile — blush and gold leaf, hand-painted florals, or a coquette bow — and build outward from there, keeping one color story, sealing every finish, and leaving a little breathing room around each pumpkin. The most charming displays are rarely the most expensive ones; they are the ones where the paint, the ribbon, and the pearls all point in the same gentle direction, and where a visitor can tell that the display was made by hand, with care, for this home and this season.
You May Also Like: – 22 Easy Pumpkin Carving Ideas: Cute, Funny and Creative – 22 Farmhouse Halloween Decor Ideas – 22 Elegant Halloween Decor Ideas That Are Chic, Not Scary
Frequently Asked Questions
What paint works best on real pumpkins?
Acrylic craft paint works best on real pumpkins because it sticks well to the skin, dries quickly, and comes in every pastel and metallic shade a girly display needs. Wash and dry the pumpkin first, apply two thin coats, let each coat dry fully, and finish with a clear sealer to protect the color.
Can I paint foam pumpkins the same way as real pumpkins?
Yes, foam pumpkins take acrylic, chalk, and spray paint beautifully, and they often give a smoother finish than real pumpkins because the surface is even. Sand rough seams lightly, prime dark foam if you are using a pale color, and use hot glue rather than heavy craft glue for bows and pearls.
How do I stop painted pumpkins from rotting or peeling?
Paint alone does not prevent rotting, so keep real painted pumpkins indoors, out of direct sun and heat, and seal them with two thin coats of clear sealer. Check for soft spots every few days, wipe away condensation gently, and discard any pumpkin that softens, smells, or leaks, rather than trying to save it.
How long do painted pumpkins last indoors?
A painted real pumpkin usually lasts two to four weeks indoors when it starts firm and unbruised, is kept cool and dry, and is sealed properly. Foam pumpkins last indefinitely and can be stored and reused for many seasons, which makes them the better choice for an elaborate painted design you love.
What is the cheapest way to get a girly painted pumpkin look?
The cheapest girly look uses one small bottle of blush or white acrylic paint, a satin ribbon bow, and a clear sealer, which together cost about $10 to $15 for several small pumpkins. Paint mini pumpkins in one soft color, tie a bow at each stem, and group them in odd numbers for a finished display.
Can kids help paint pumpkins safely?
Yes, children can help with water-based acrylic paint, sponge painting, polka dots, and tying ribbons, with adult supervision for scissors, hot glue, and spray sealer. Choose washable paints, cover clothes and tables, let each coat dry before handling, and keep glitter, rhinestones, and small pearls away from very young children.