
22 No-Carve Pumpkin Decorating Ideas That Skip the Mess
Carving a pumpkin is a rite of passage — but the slimy seeds, the sore wrist, and the jack-o'-lantern that collapses into mush within a week? That's the part nobody misses. Here's what seasoned decorators know: an uncarved pumpkin lasts two to three months, while a carved one barely survives seven days. Skip the knife and you don't just skip the mess — you get decor that survives all of October and rolls straight into Thanksgiving.
The trick is choosing techniques that bond with the pumpkin's waxy rind instead of fighting it. Acrylic craft paint, chalk paint, Mod Podge, and hot glue all adhere beautifully when the skin is clean and dry, while fabric wrapping and twine coiling need no adhesive at all. These 22 no-carve pumpkin decorating ideas deliver porch-worthy results with zero goo.
Looking for more inspiration? Our Nest Decorz homepage gathers the latest home decor ideas, seasonal decorating guides and room-by-room styling tips in one place — start there and explore.
Quick Answers
– Paint that sticks: clean the rind, then use acrylic craft paint, chalk paint, or spray paint. Seal with clear matte spray for outdoor use. – Longest-lasting: an uncarved pumpkin kept cool and dry lasts 8–12 weeks — far longer than any carved jack-o'-lantern. – Kid-safe winners: polka dots, painted faces, and yarn wrapping need no knives or heat. – Cheapest: napkin decoupage and twine wrapping cost under $5 per pumpkin. – Biggest mistake: decorating a damp pumpkin — trapped moisture is the number-one cause of early rot.
1. Why Is Matte Black Chalk Paint the Easiest No-Carve Upgrade?
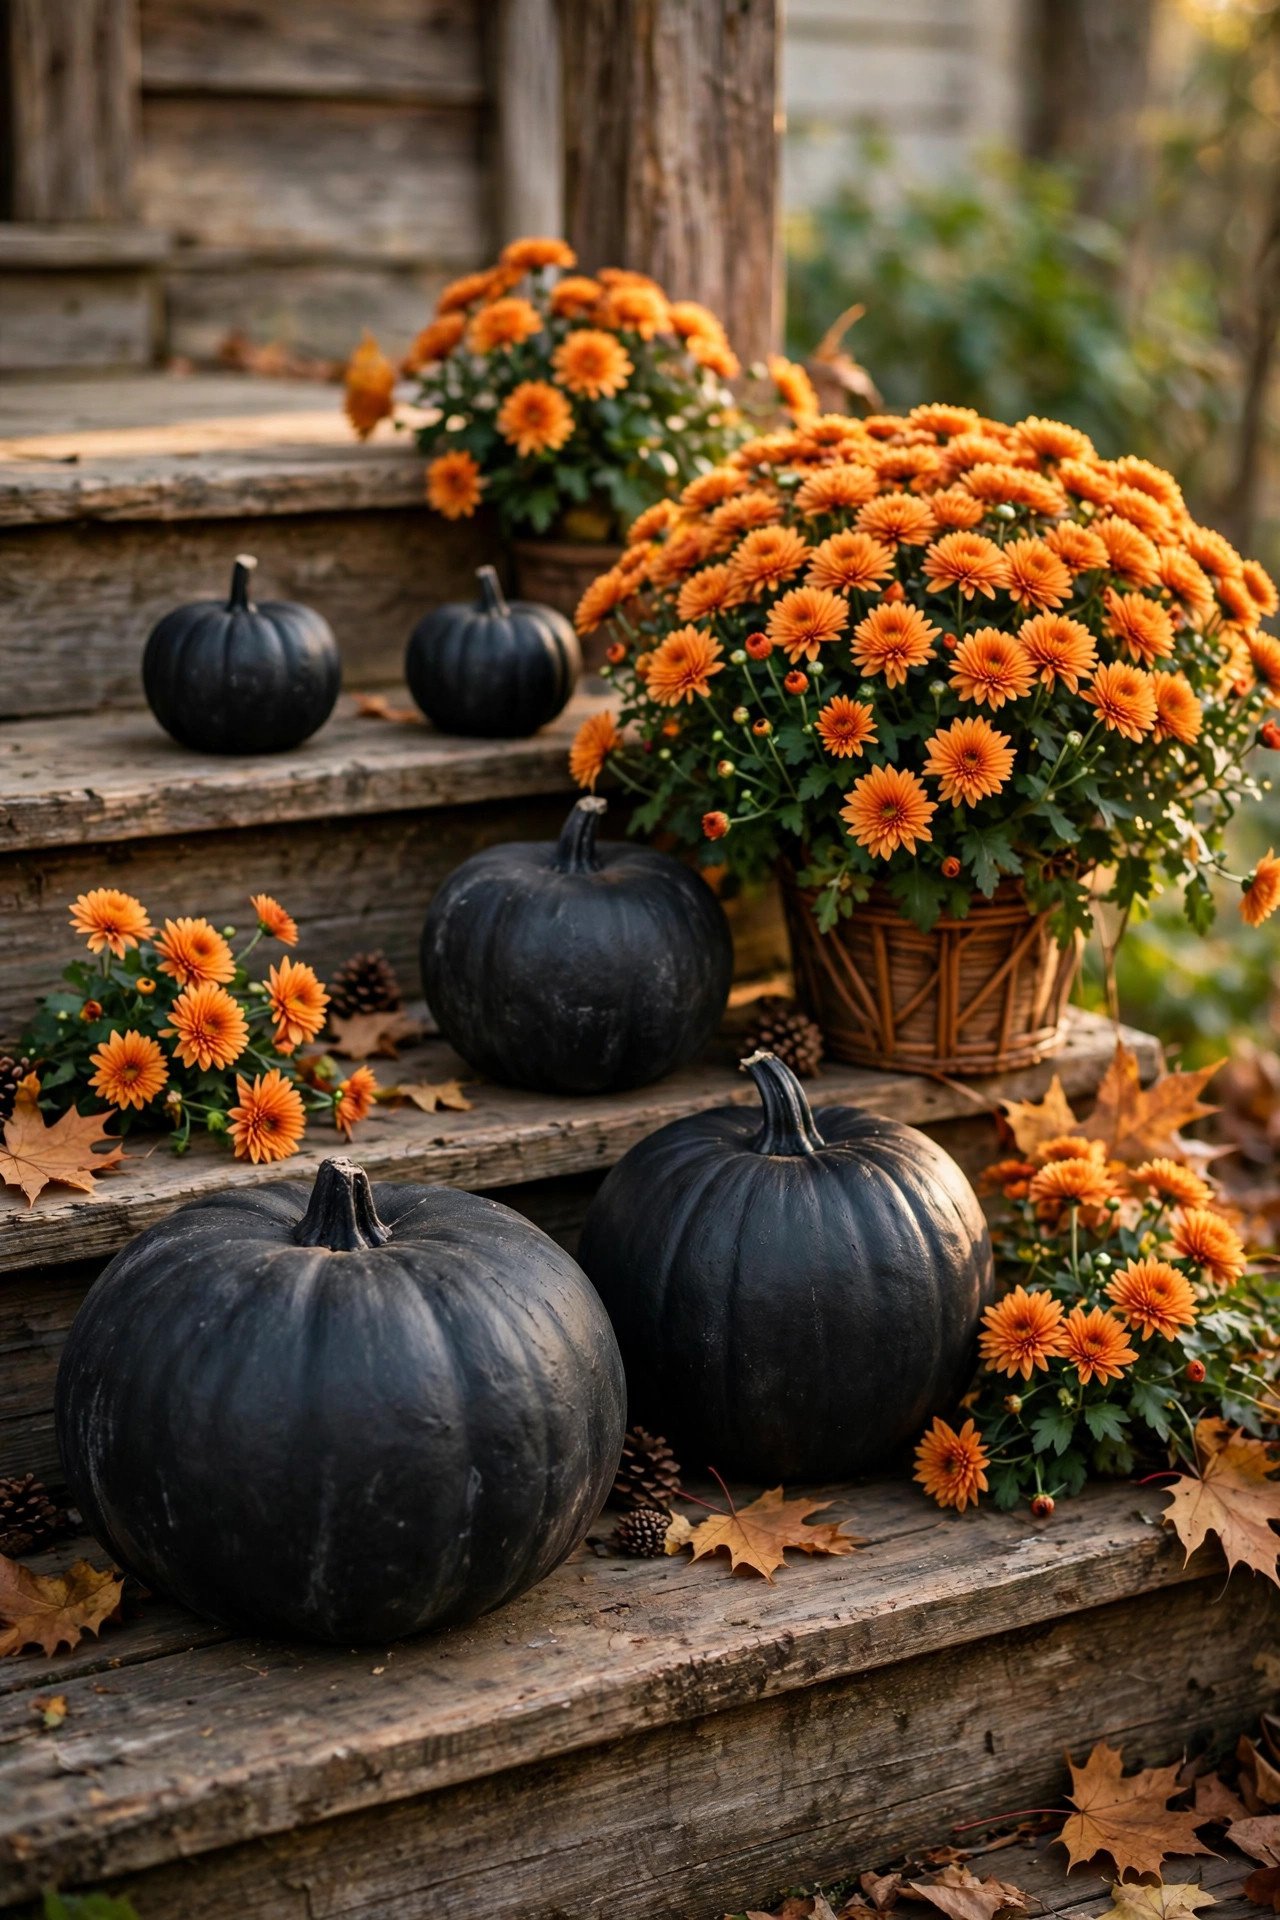
A single coat of matte black chalk paint turns even a lumpy field pumpkin into a sculptural, high-end accent. Chalk paint grips the pumpkin's waxy rind without sanding or priming, dries to a velvety finish in under an hour, and looks deliberate rather than crafty — especially on blue-gray Jarrahdale or white Lumina pumpkins grouped with orange mums.
Apply two thin coats with a soft brush, letting the first dry fully to avoid drag marks. Skip the primer — chalk paint's matte formula bonds to the rind on its own — but wipe the pumpkin with a damp cloth first, since dust blocks adhesion. For outdoor display, finish with a clear matte sealer spray; unsealed chalk paint is porous and rain will spot it.
2. How Do You Gild a Pumpkin with Metallic Gold Leaf?

Gold leafing a white Lumina pumpkin creates the single most elegant no-carve pumpkin in this roundup. Brush on metal-leaf adhesive (called sizing), wait until it turns tacky-clear, then press torn sheets of gold leaf onto the surface and burnish gently with a soft brush — the leaf bonds only where the sizing is, giving a luxurious mottled-metal finish.
Use imitation gold leaf rather than the real thing; it's a fraction of the cost and looks identical at porch distance. Tear the sheets instead of cutting them — ragged edges blend invisibly into the finish. Seal the completed pumpkin with a clear gloss spray so the leaf doesn't flake in autumn wind. A gilded pumpkin glows beside candlelight, making it a natural centerpiece for elegant halloween decor ideas that stay chic instead of scary.
3. What Makes Decoupage Pumpkins Look Professionally Crafted?
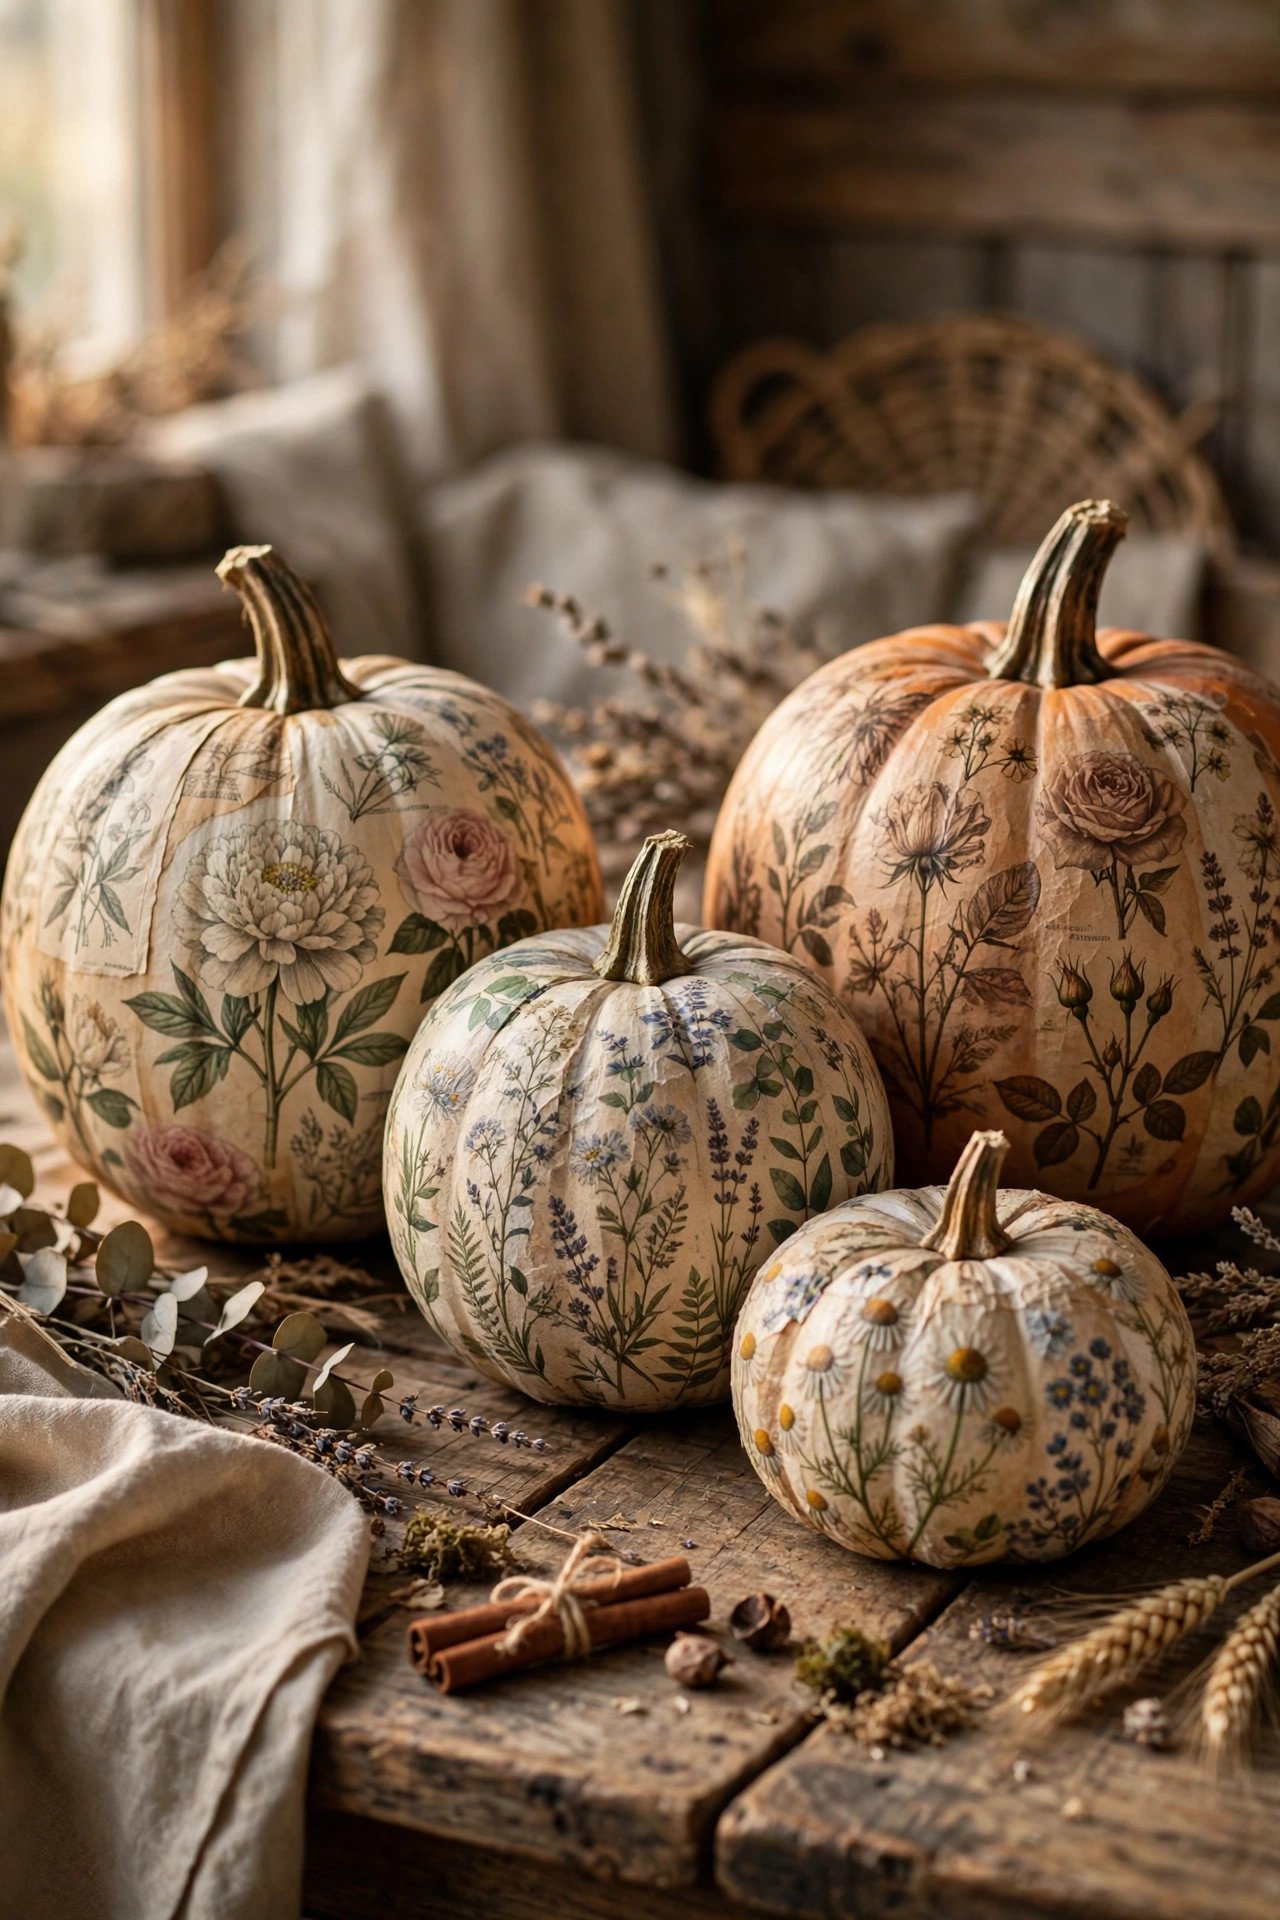
The secret is paper napkins — their single-ply thinness melts into the pumpkin's curves with zero wrinkles, unlike stiff scrapbook paper. Brush a thin coat of Mod Podge onto the rind, lay down your napkin motif, then seal with another whisper-thin coat. Harvest botanicals, vintage seed-packet prints, and toile patterns all look genuinely expensive when applied this way.
Choose smooth-skinned sugar pie pumpkins; deep ribs fight the paper and create air pockets. Peel the napkin down to its printed ply before you start, and work in small sections since Mod Podge dries fast. Overlap motifs slightly for a hand-painted look — botanical prints hide seams beautifully. Keep decoupaged pumpkins indoors or under a covered porch, as the paper layer hates standing water, and they'll hold their looks for a month or more.
4. How Do You Get a Smooth Glitter Ombré Without the Shed?

Paint a band of craft glue or Mod Podge around the pumpkin's middle, then dust fine glitter over it while slowly rotating the pumpkin — the ombré fade comes from applying dense glitter at the base and feathering it upward. Fine-grade glitter sheds far less than chunky craft glitter and produces a smoother, almost metallic gradient.
Let the first coat dry completely, then add a second pass only where you want density — two thin applications bond better than one thick one. Seal with a clear glitter sealant spray to lock everything down before display. Shake the pumpkin gently outside once before bringing it in, and you'll have a sparkle pumpkin that survives the whole season without leaving a trail.
5. Can You Really Paint Buffalo Check on a Round Pumpkin?
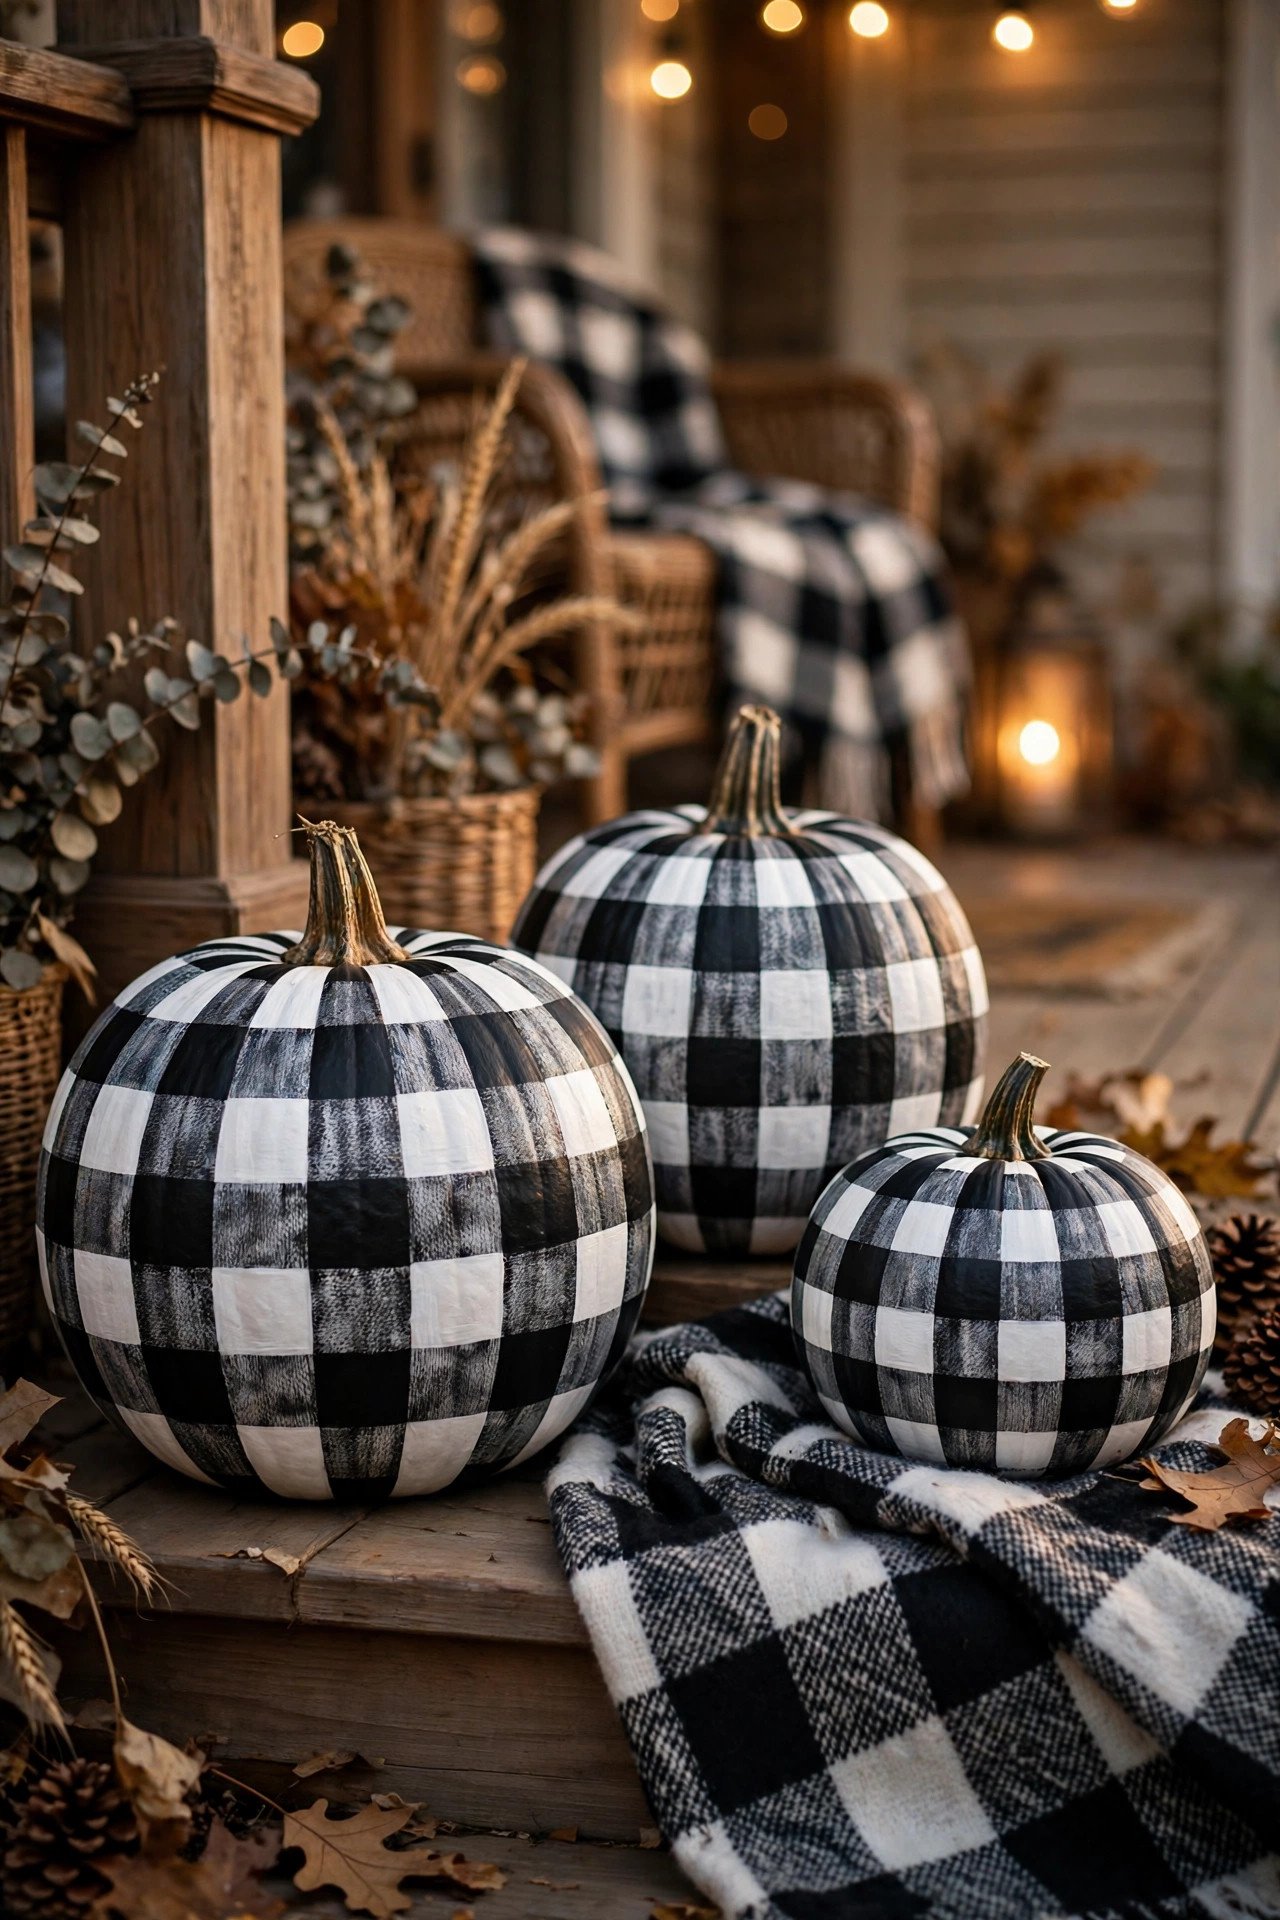
Yes — the trick is flexible painter's tape and a pumpkin that's close to spherical. Mark the equator with tape, then lay horizontal and vertical strips to form the grid, painting the overlapping squares in a second color. Peel the tape while the paint is still slightly tacky for razor-crisp lines on a curved surface.
Cream and charcoal is the classic farmhouse pairing, but black-and-white reads modern and red-and-black screams cabin cozy. Cinderella pumpkins (Rouge Vif d'Etampes) are ideal canvases: their flattened shape and shallow ribs keep tape lying flat. Acrylic craft paint works best here — it dries fast enough that the grid doesn't smudge between layers. A finished buffalo-check pumpkin anchors a rustic porch display and pairs beautifully with plaid throw blankets and wooden crates.
6. How Do You Hand-Letter a Pumpkin Without Artistic Skills?

Write one short word — "boo," "gather," "spooky" — in pencil first, then trace it with a white or black paint marker. Short words forgive wobbly lettering, and a white Lumina pumpkin gives you a clean, high-contrast canvas that makes even beginner script look intentional and charming.
Acrylic paint markers are the right tool; standard permanent markers bleed on the waxy rind and chalk markers smudge at the first touch. Practice your word on paper three or four times to settle letter spacing, then sketch it lightly on the pumpkin — pencil erases cleanly from the rind. Center the word on the pumpkin's flattest face and keep the stem as your visual anchor. Seal with a light clear coat so the lettering survives October rain, and group three lettered pumpkins for a playful entryway message.
7. Are Polka-Dot Pumpkins Really Toddler-Proof?

They're the most toddler-proof pumpkin craft in existence. Hand a two-year-old washable tempera paint and sponge daubers, and the worst outcome is a speckled shirt — no knives, no heat, no small parts. Vary the dot sizes for a confetti look, and a white pumpkin makes every color pop.
Washable tempera is the key choice for under-fives: it rinses off hands, clothes, and the pumpkin itself, so mistakes vanish with a damp cloth. Older kids can graduate to acrylic dots applied with a pencil eraser for perfect circles. A rainbow-dotted pumpkin won't win a design award, but it teaches color mixing, keeps little hands busy for an hour, and looks genuinely joyful on a porch step beside the grown-up pumpkins.
8. How Do You Paint a Jack-o'-Lantern Face Without Carving?
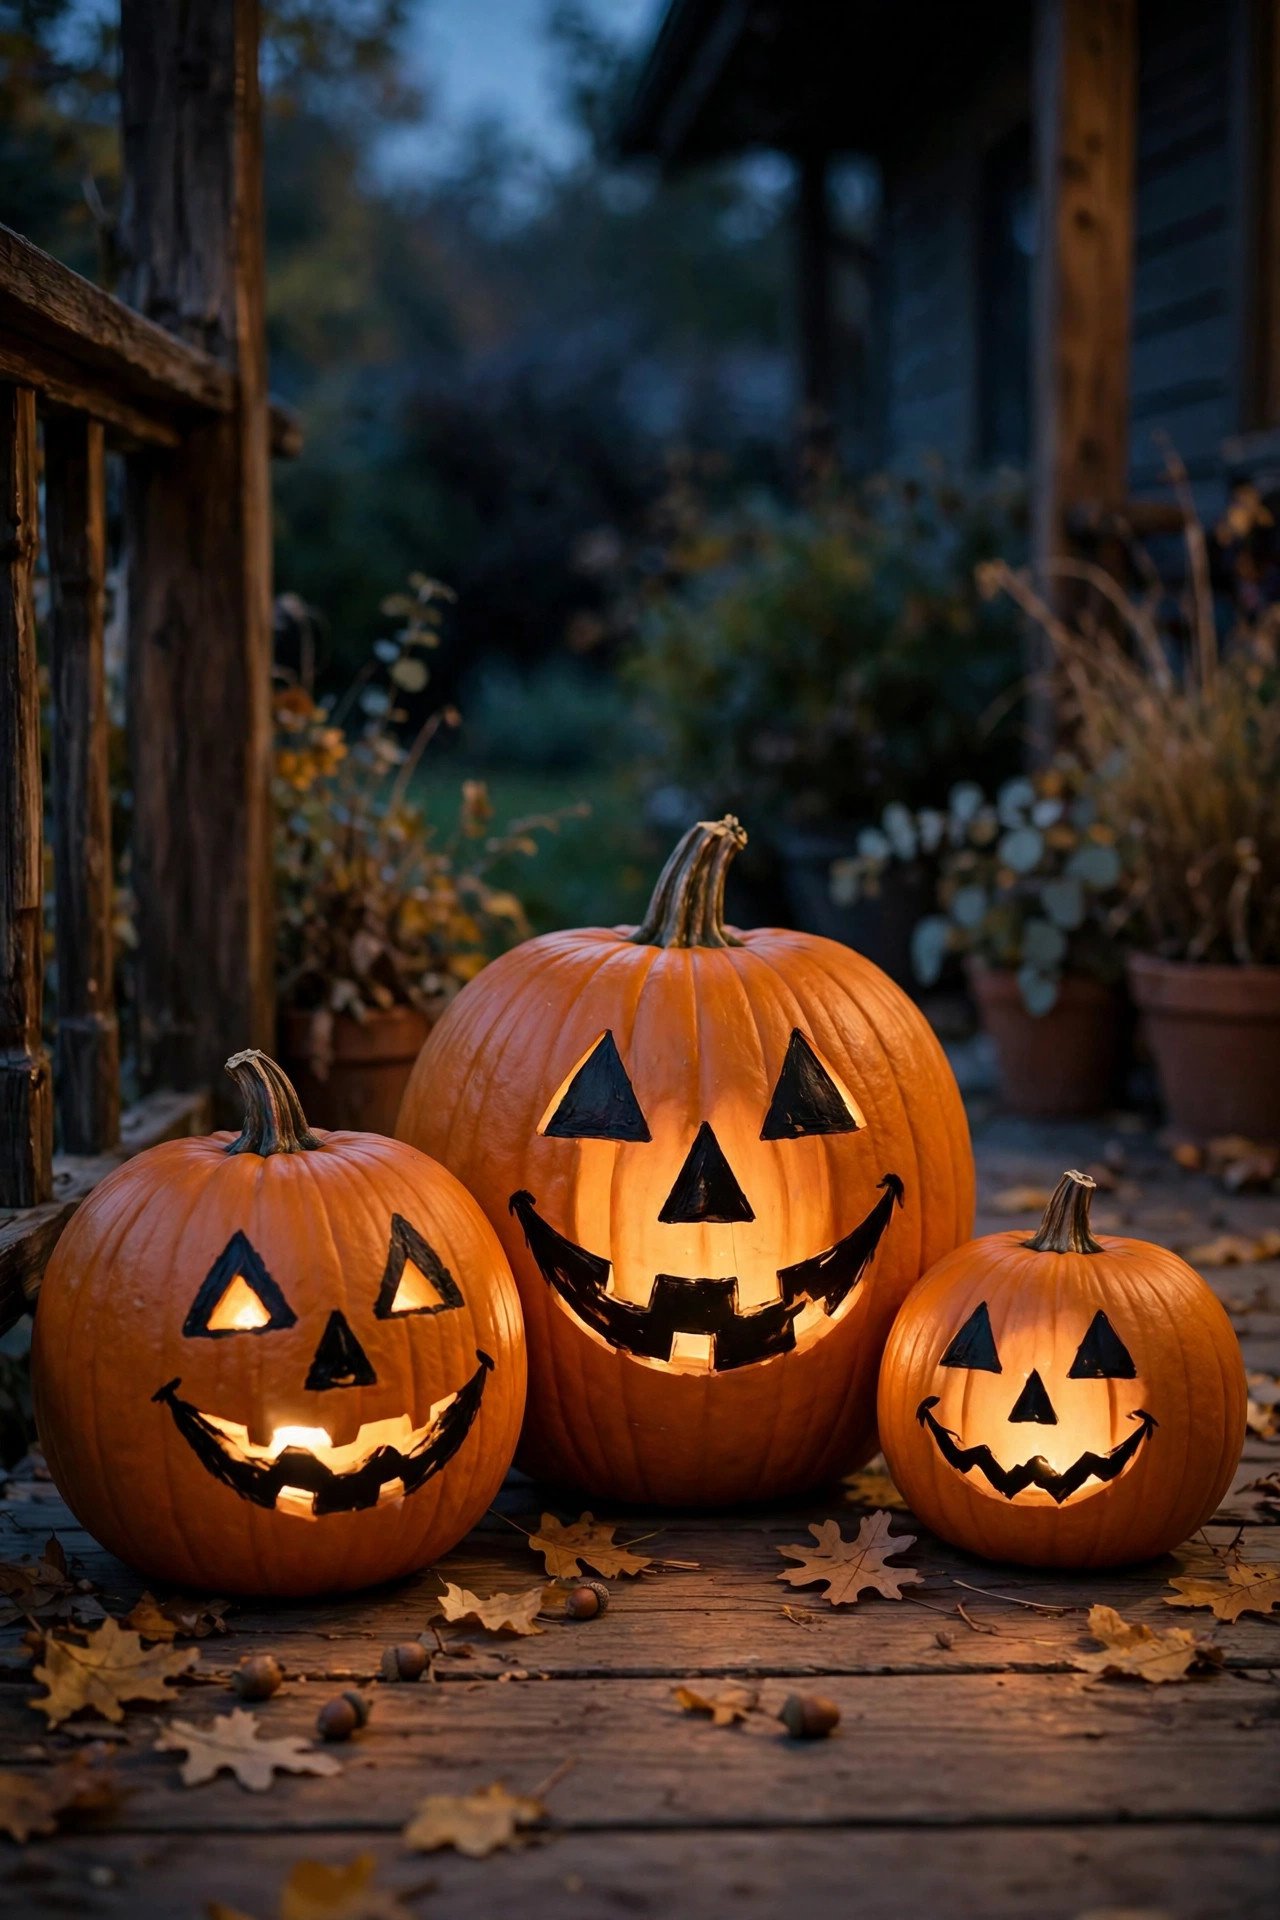
Paint the classic triangle eyes and jagged grin directly onto the rind with black acrylic — you get the jack-o'-lantern look with zero knives and zero rot. A painted face lasts weeks instead of days, lets toddlers "carve" safely, and you can wipe it off and repaint whenever you want a new expression.
Fill the shapes with two coats of black acrylic for true opacity, then add a coat of glow-in-the-dark paint over the top for a face that charges in daylight and glows after dark. For the traditional cut look, study classic face patterns — our easy pumpkin carving ideas show the timeless expressions worth copying in paint. When Halloween passes, repaint the whole pumpkin cream and it becomes Thanksgiving decor.
9. Which Fabric Wraps a Pumpkin Best for a Cozy Fall Look?
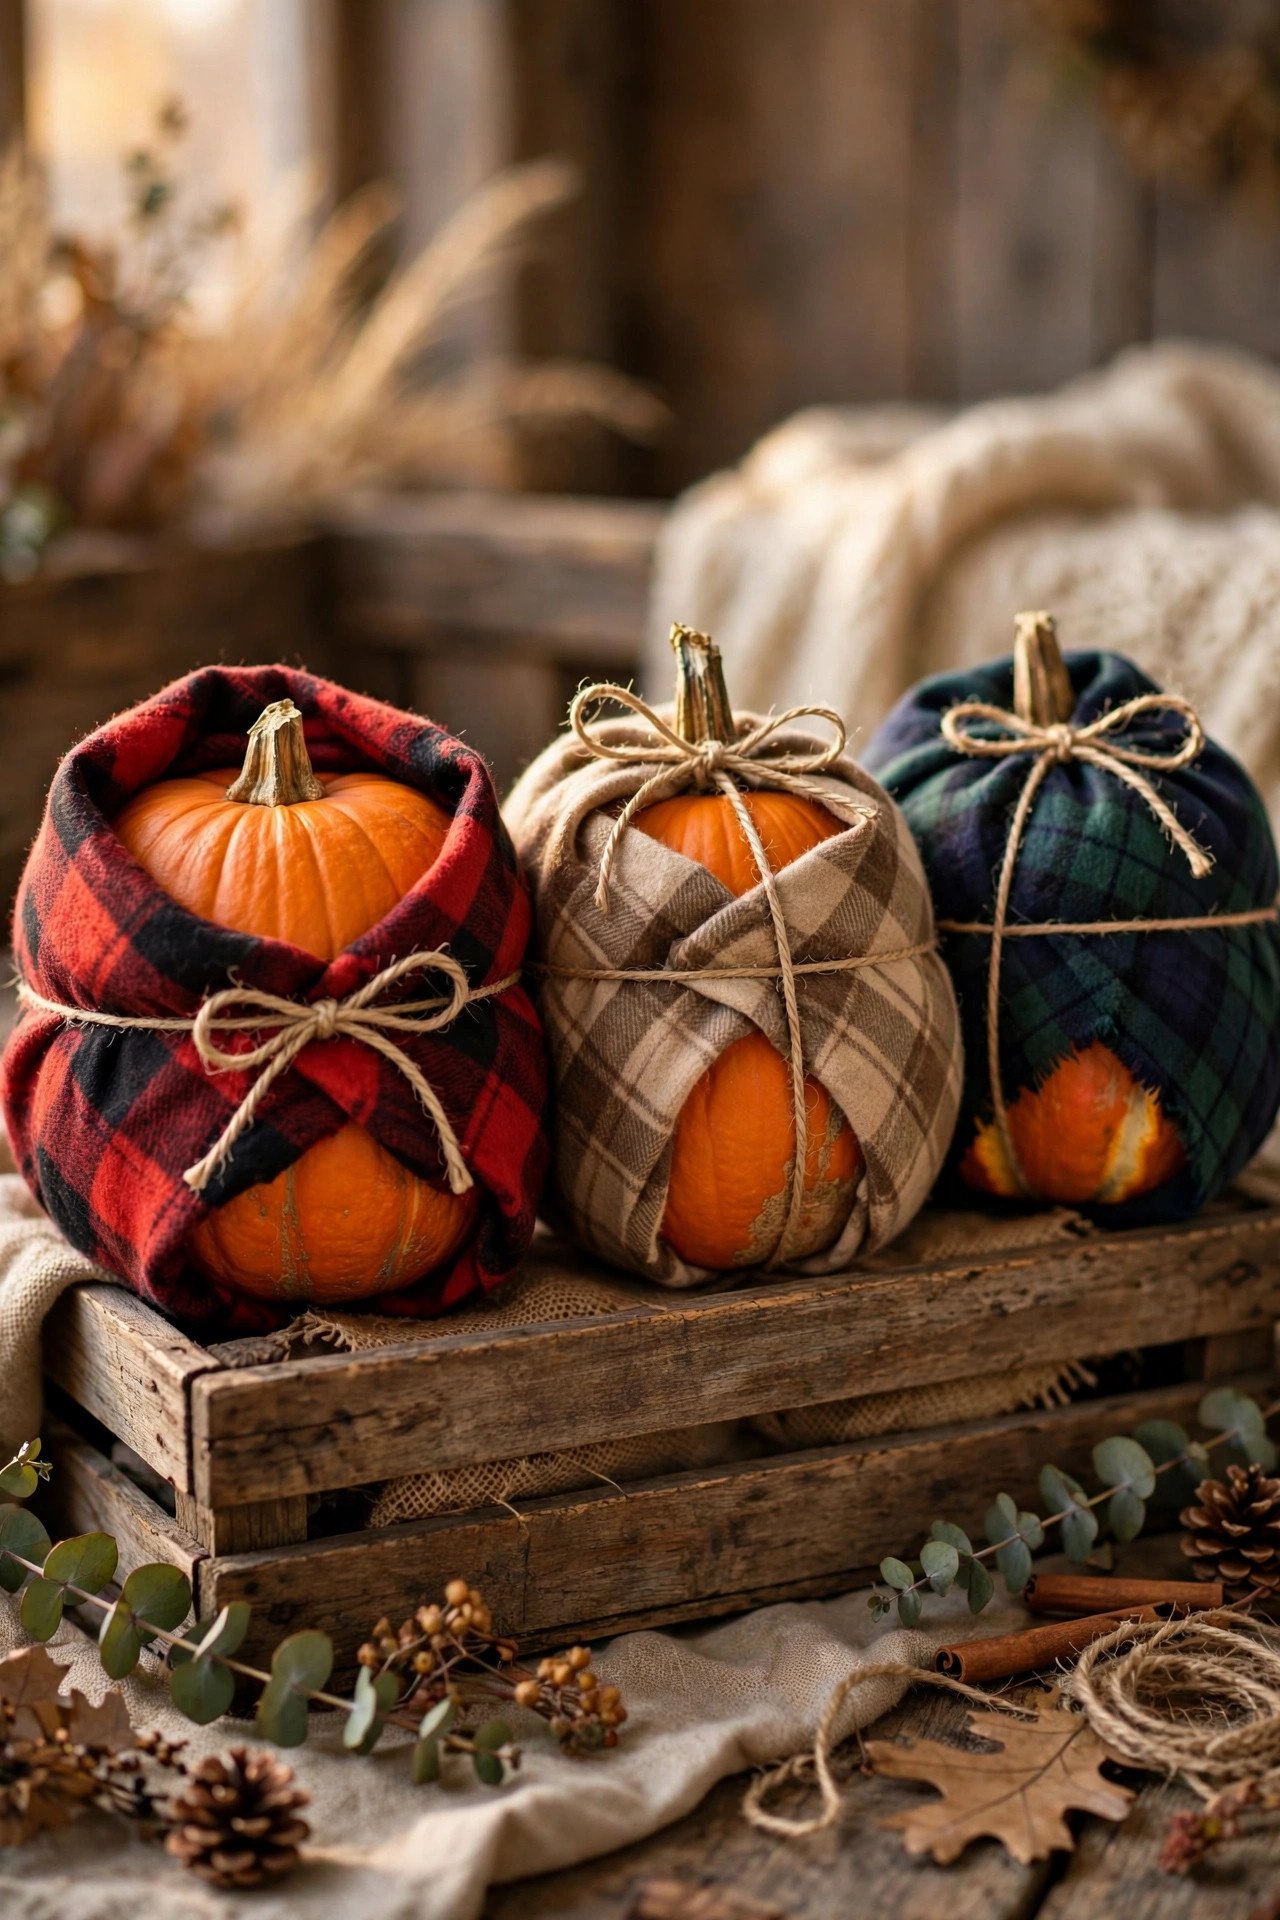
Flannel and velvet win for coziness — their texture reads instantly as autumn. Cut a large circle of fabric, center the pumpkin, gather the fabric up around the stem, and cinch it with jute twine or a velvet ribbon. No glue touches the rind at all, so the pumpkin stays perfectly fresh underneath.
Flat-sided Cinderella pumpkins are the ideal shape; tall field pumpkins create bulky gathers that look sloppy. Cut the fabric circle roughly three times the pumpkin's diameter for full coverage. One caution: fabric wicks moisture, so bring wrapped pumpkins under cover when it rains — a damp wrap pressed against the rind accelerates rot. Indoors, a fabric-wrapped pumpkin lasts as long as a bare one, which is to say all season.
10. How Does Lace Turn an Ordinary Pumpkin Vintage?

Draping cream or ivory lace over an orange pumpkin instantly mutes the color and adds a shabby-chic, vintage texture that paint alone can't achieve. Adhere lace panels with Mod Podge, overlapping doily edges for a layered look, and the pumpkin reads as an antique-shop find rather than a grocery-store gourd.
Cut the lace into manageable panels instead of wrestling a whole sheet around the curve, and smooth each piece with a foam brush to press out bubbles. White Lumina pumpkins under white lace create a tone-on-tone bridal look, while black lace over orange goes full Halloween goth. Seal the finished piece with a matte topcoat and keep it in a dry spot; lace holds its vintage charm for weeks on a mantel or bookshelf.
11. Why Does Jute Twine Work So Well on Pumpkins?
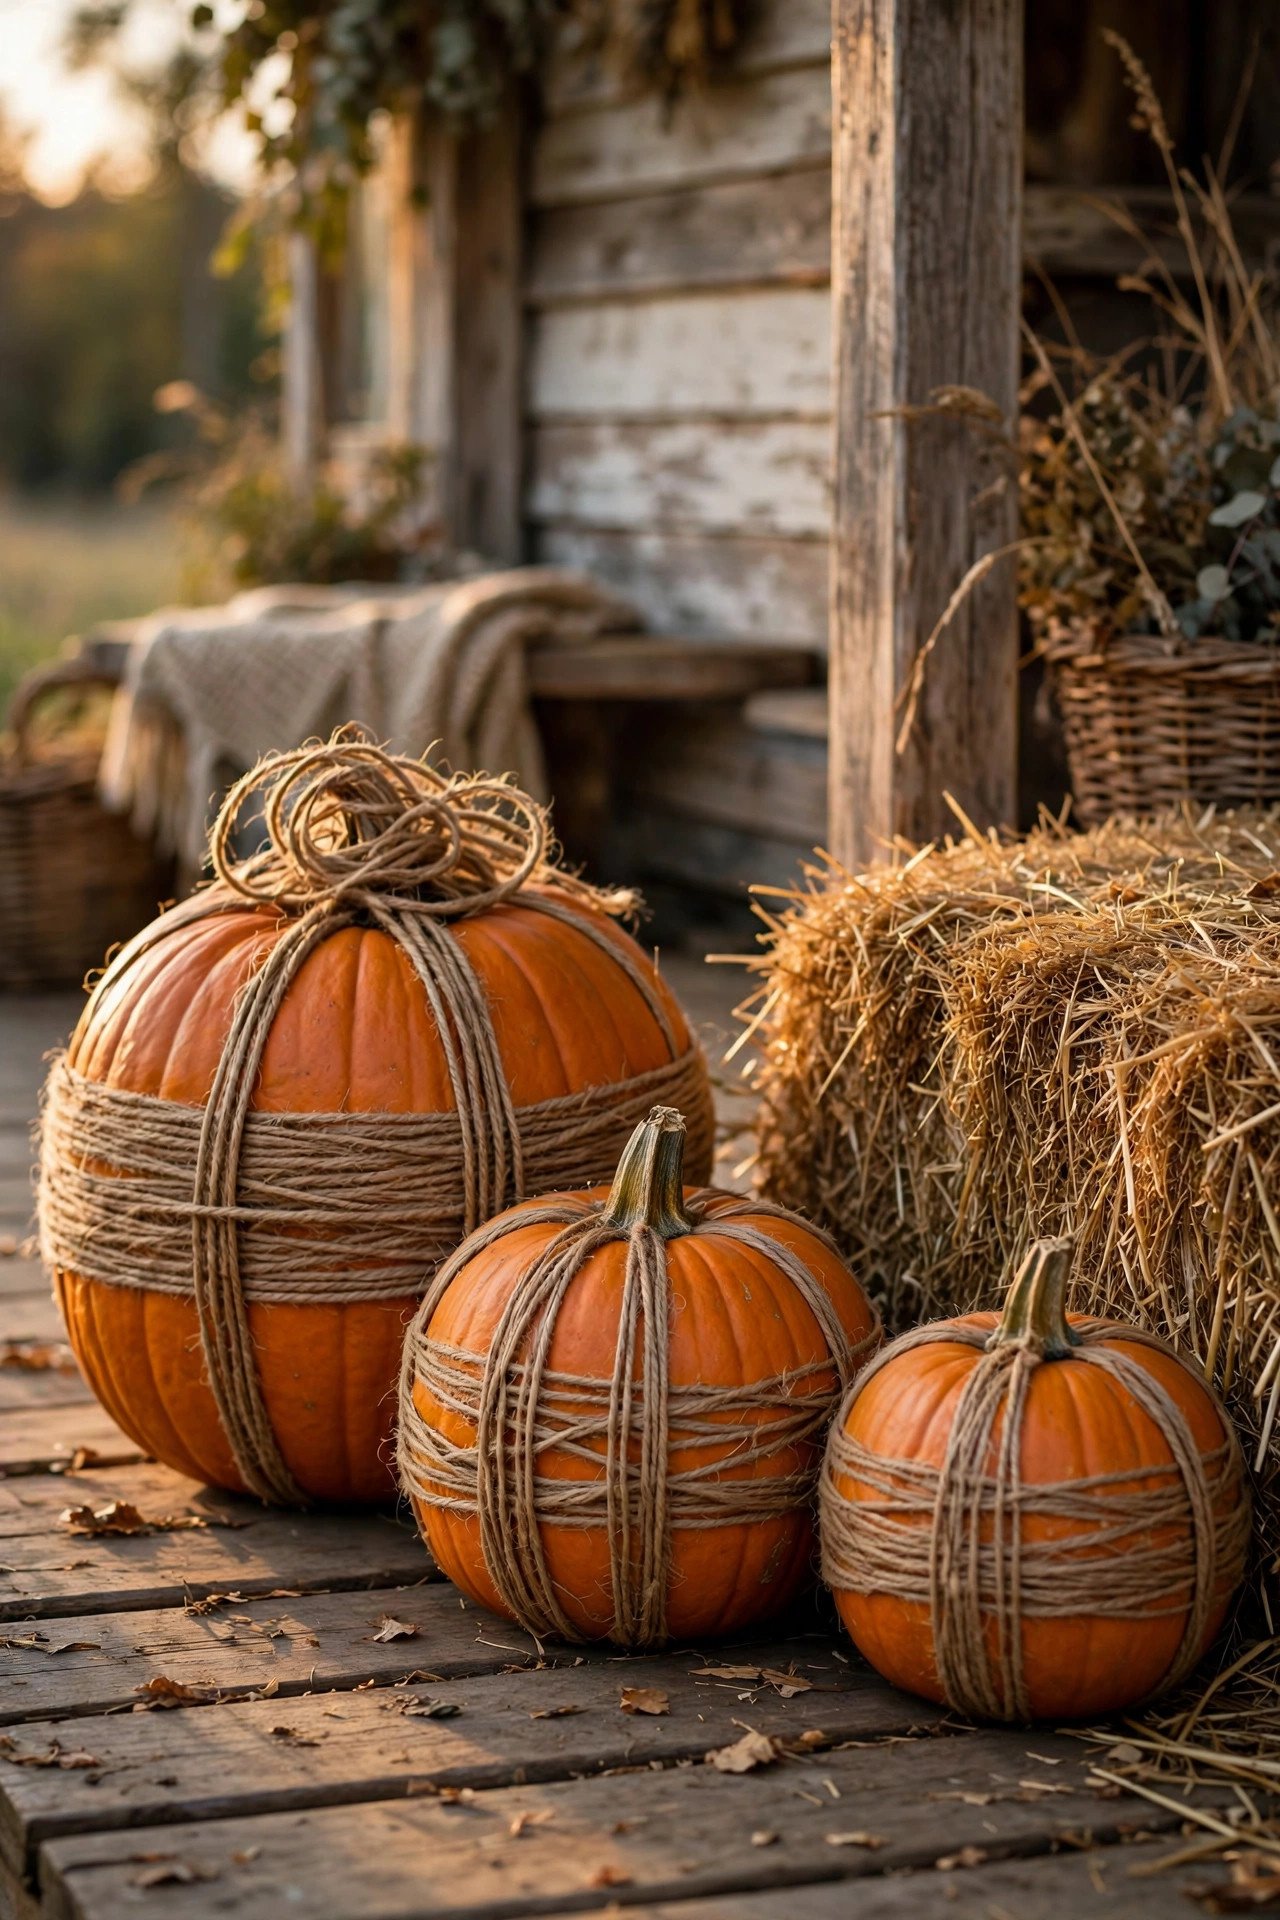
Twine's natural fiber and warm tan color are a perfect textural match for pumpkin rind — it looks like the two grew together. Anchor one end with a dab of hot glue at the bottom, coil tightly upward, and add a glue dot every few rows. The result is a rustic, farmhouse pumpkin that costs almost nothing to make.
Keep the coils snug with no gaps; visible rind between rows reads as unfinished. Leave the stem exposed — a twine-wrapped body with a natural dried stem is the signature look. This technique forgives bumpy, imperfect pumpkins beautifully, since the texture hides every flaw. A trio of twine pumpkins in graduated sizes, tucked beside a wooden crate of mums, is one of the cheapest high-impact fall displays you can make.
12. What Are Push-In Pumpkin Kits and Are They Worth It?
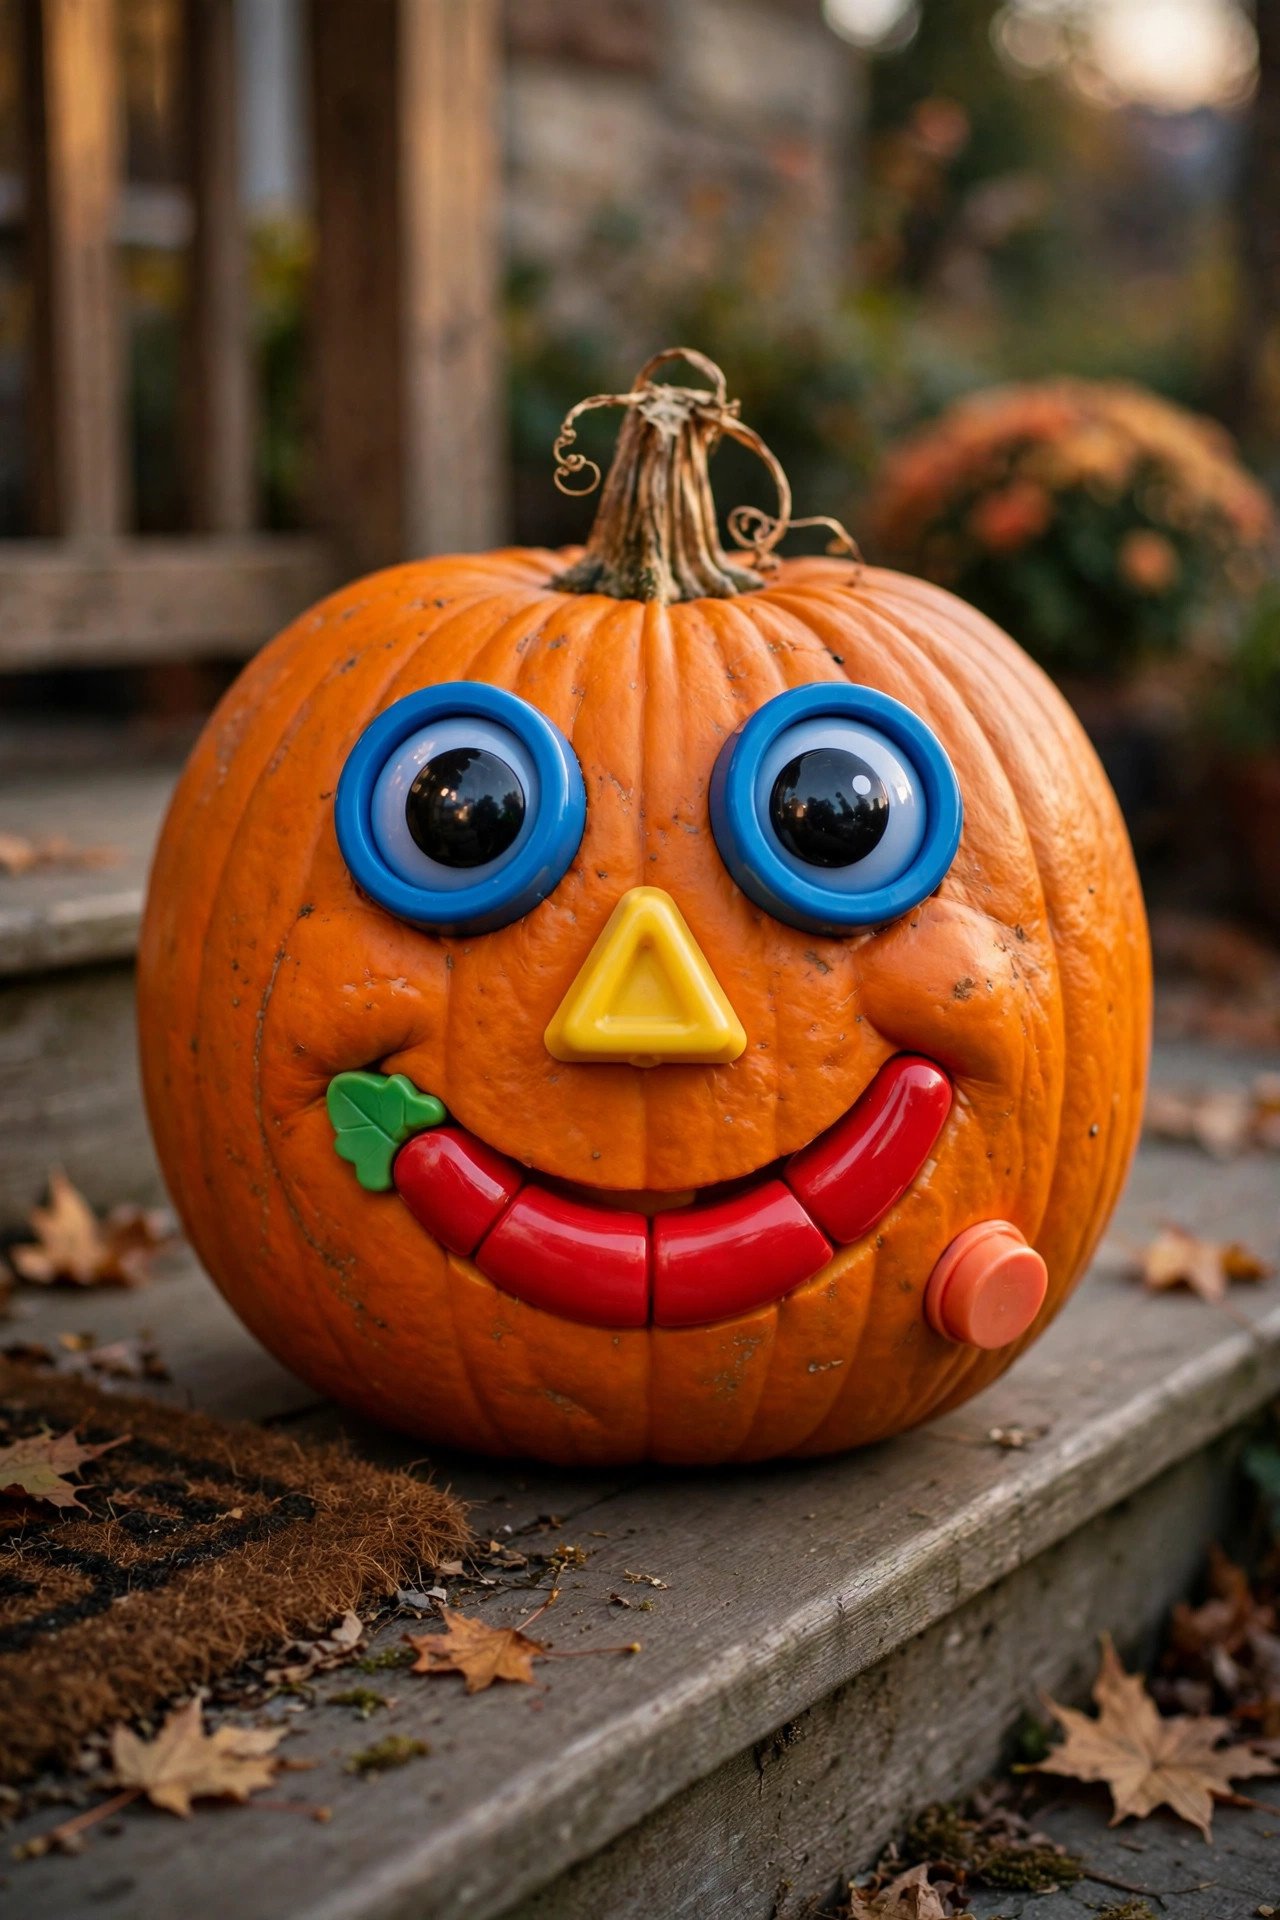
Push-in kits are sets of plastic eyes, noses, mouths, hats, and limbs with pointed backs that press straight into the pumpkin rind — no cutting, no glue. They're absolutely worth it for families: a toddler can "build" a face in minutes, the pieces store in a bag for next year, and one kit decorates pumpkins across multiple Halloweens.
Choose a firm, thick-walled pumpkin so the pieces grip; thin-skinned varieties let them droop by morning. Mix kit pieces with painted details for a custom character, or go full silly with multiple noses and crooked eyes. These kits are the gateway to whimsical halloween decor ideas that stay playful rather than scary. When the season ends, pull the pieces out, wipe them down, and the pumpkin itself is still perfectly compostable.
13. How Do You Make a Mummy Pumpkin Kids Actually Love?
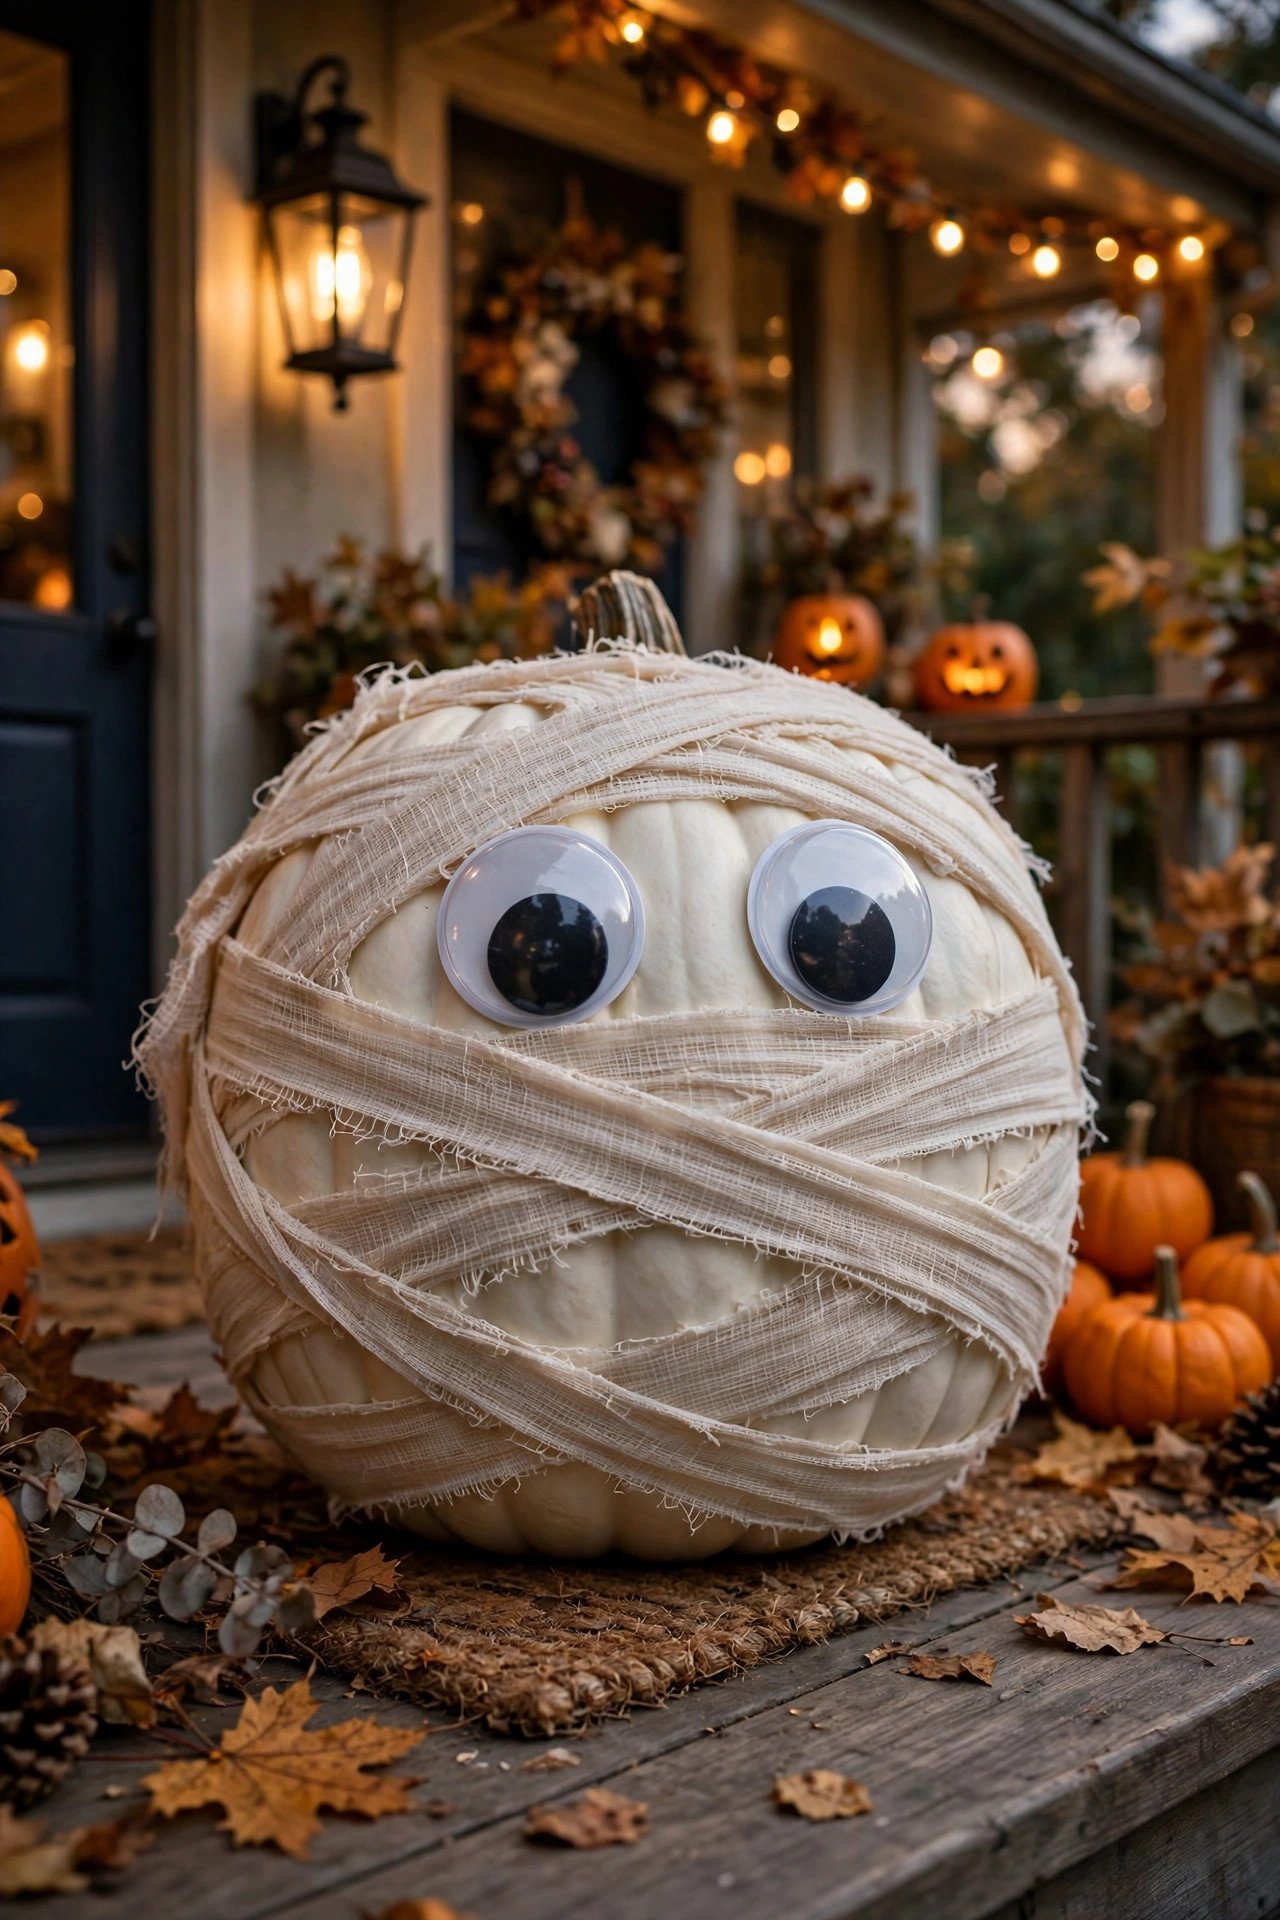
Wrap a white Lumina pumpkin loosely in strips of gauze or cheesecloth, leaving a horizontal gap for two big googly eyes, and secure the ends with small dabs of hot glue underneath. The mummy reads as friendly-spooky rather than frightening, which is exactly why kids adore it.
Tea-stain the gauze first for an aged, ancient look — soak it in strong black tea for ten minutes, then dry completely. Wrap in alternating directions for authentic mummy chaos, and don't pull too tight; loose wraps cast better shadows. Attach the googly eyes with hot glue so they survive porch bumps and curious fingers. A mummy pumpkin paired with a black cat silhouette and a hay bale makes a perfect halloween entryway decor vignette — spooky enough for trick-or-treaters, gentle enough for toddlers.
14. How Do You Create String-Art Spiderwebs on a Pumpkin?

Push map pins into the rind in a radiating circle pattern, then crisscross black string between them to form a web — the pins anchor the design and the string does the visual work. Add a plastic spider from the dollar store and you have a graphic, high-contrast Halloween pumpkin in about twenty minutes.
White or silver string pops dramatically on a black-painted pumpkin; black string works best on white Lumina. Keep the string taut — sagging lines ruin the geometric effect. Adults should handle the pinning while kids do the stringing, which makes this a genuinely collaborative craft. When Halloween ends, pull the pins out and the pumpkin is unmarked and ready for a Thanksgiving repaint — the rind heals over pinpricks invisibly.
15. What Can You Write on a Chalkboard-Painted Pumpkin?
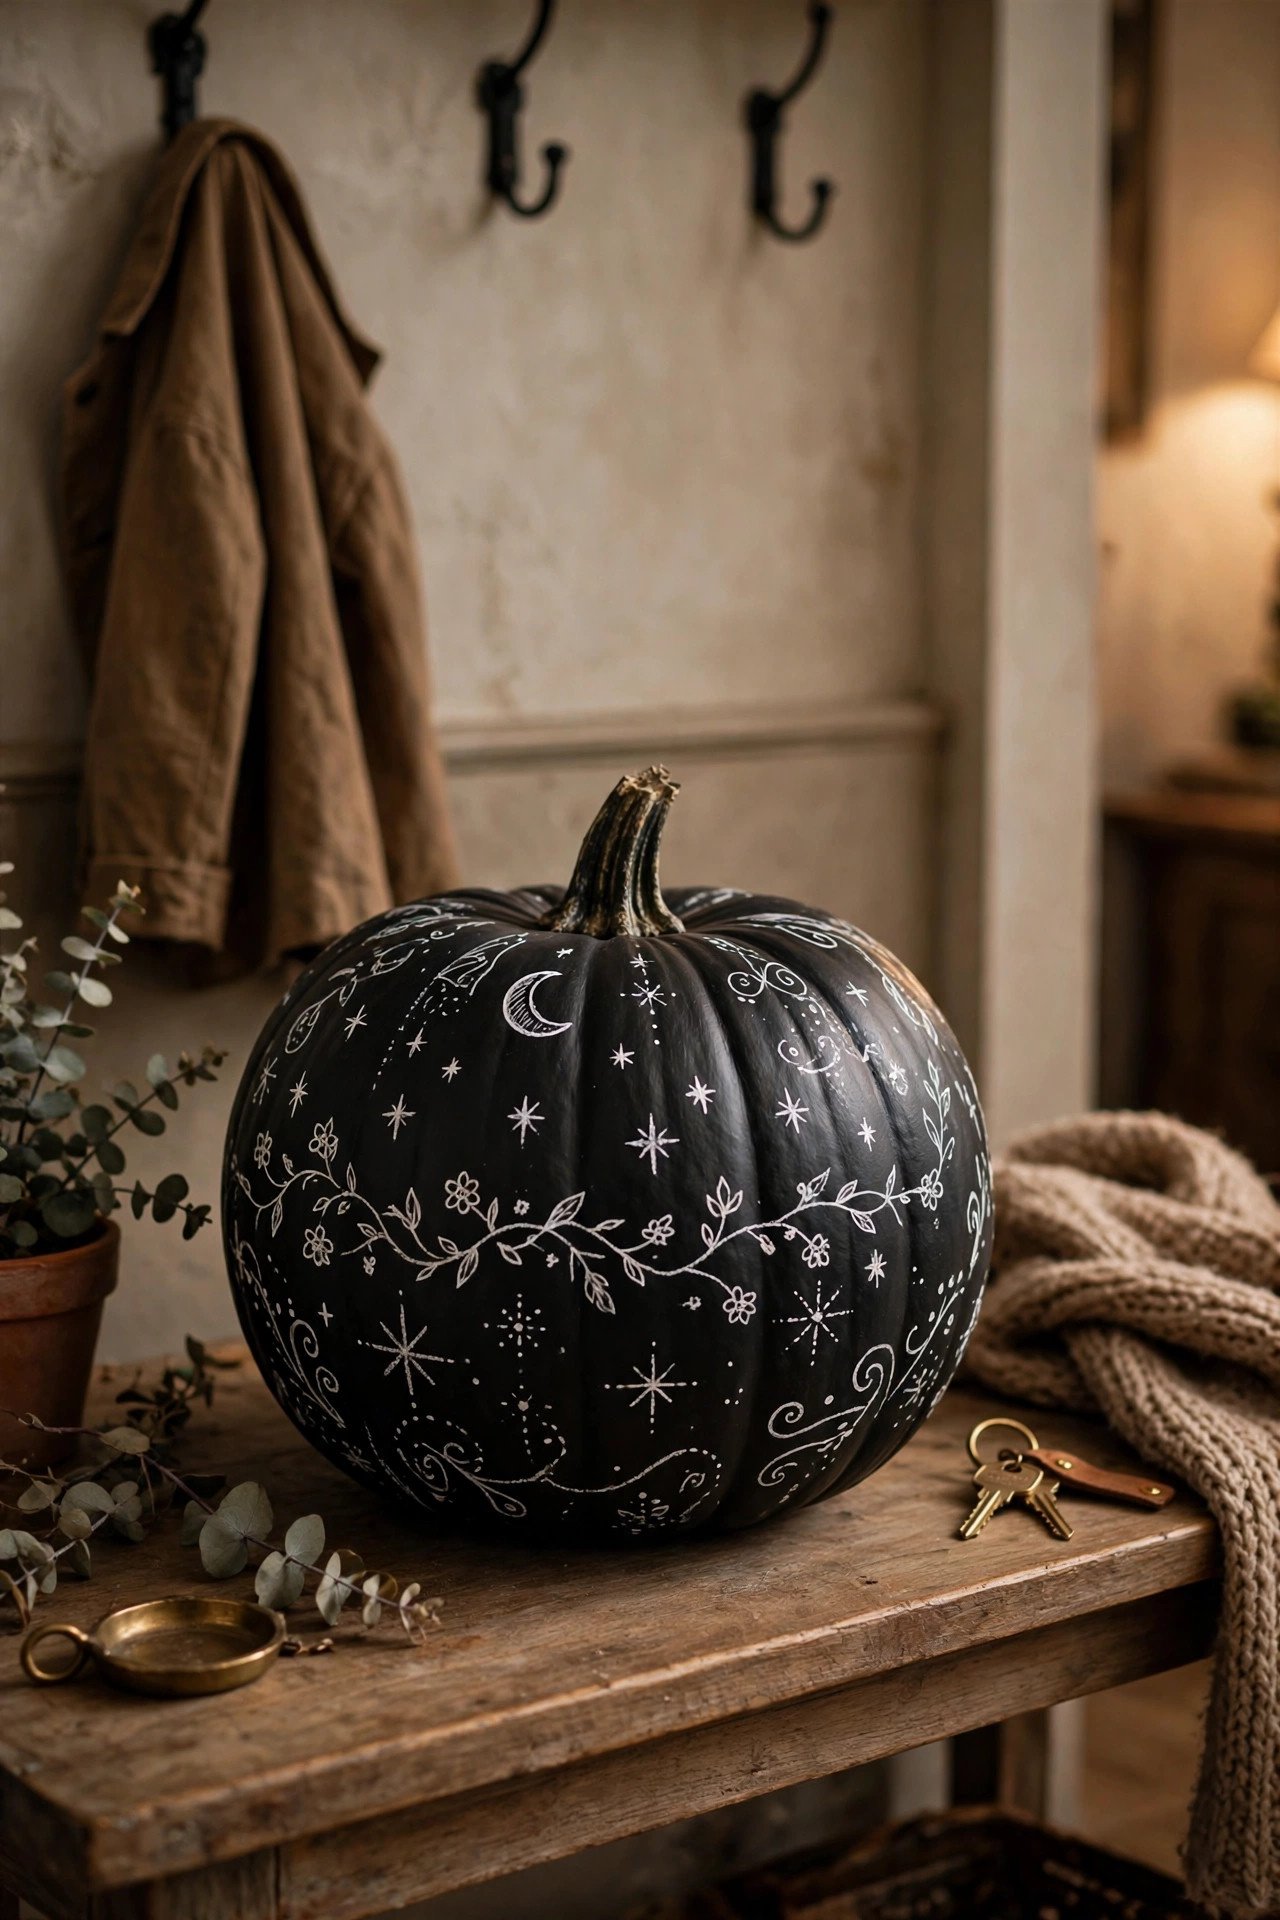
Anything — that's the entire point. Two coats of chalkboard spray paint turn a pumpkin into a rewritable message board: a Halloween countdown, your house number for trick-or-treaters, a dinner-party menu, or a new joke every day. It's the only pumpkin in this list you can completely redesign in thirty seconds.
Let the chalkboard paint cure a full 24 hours, then "season" it by rubbing chalk over the whole surface and wiping it off — this prevents ghosting of your first message. A tall, oval pumpkin gives you the most writing space. Keep a piece of chalk in a small dish beside it so party guests can leave messages. The paint layer actually protects the rind, so chalkboard pumpkins rank among the longest-lasting decorated pumpkins you can make.
16. How Do Stencils Make Bat and Moon Pumpkins Foolproof?

Adhesive stencils eliminate freehand wobble: press the stencil onto the rind, stipple paint through the openings with a pouncer brush, and peel to reveal a crisp bat, moon, or haunted-house silhouette. The stencil does the drawing for you, so the result looks professional even if you can't draw a straight line.
Repositionable stencil film is worth the small upgrade over paper stencils — it hugs the pumpkin's curve without letting paint bleed underneath. Stipple straight up and down rather than brushing side to side; brushing pushes paint under the stencil edges. A set of moon-phase stencils marching around a white pumpkin is a sophisticated take on the theme. For more stencil inspiration, browse these pumpkin decorating ideas from Better Homes & Gardens — their gallery shows how far one simple stencil can go.
17. Does the Nail-Polish Marble Dip Really Work on Pumpkins?

It works beautifully — drip several nail-polish colors onto room-temperature water, swirl once with a toothpick, and dip a small pumpkin quickly through the film. The polish transfers as a one-of-a-kind marble pattern in seconds. Each dip is genuinely unique, which is why this technique photographs so well.
Use small sugar pie or mini pumpkins; large ones are hard to dip cleanly and waste polish. Work in a ventilated space and wear gloves — fumes and stained fingers are the real costs here. Dip fast and pull straight out; lingering lets the film wrinkle on the surface. Let the pumpkin dry on a rack for several hours, then seal with clear spray. The result looks like artisan ceramic and fools guests regularly.
18. How Do You Wrap a Pumpkin in Yarn Without Glue Everywhere?

Start with a single dab of hot glue at the stem to anchor the yarn, then wrap downward in tight, overlapping rows, adding only a tiny glue dot every few inches on the back side. Chunky yarn covers fast — a medium pumpkin takes about fifteen minutes — and the finished texture looks like a cozy hand-knit sweater.
Choose chunky or super-bulky yarn in autumn tones: rust, mustard, cream, and forest green are foolproof. Wrap in color blocks for stripes, or spiral two colors together for a marled effect. Kids around five and up can manage the wrapping while an adult handles the glue gun. Yarn-wrapped pumpkins are indoor stars — the fiber holds dust outdoors — and they'll look perfect from October straight through Thanksgiving.
19. Can You Decoupage Real Pressed Flowers onto a Pumpkin?

Yes, and the result is stunning — real pressed wildflowers sealed onto a white Lumina pumpkin look like botanical illustration come to life. Press the flowers flat for a week first, arrange them on the rind, and seal with thin coats of Mod Podge. The white background makes every petal glow.
Press flowers between book pages with parchment for seven to ten days; they must be completely dry or they'll mold under the sealant. Arrange your composition on the pumpkin before gluing anything — tweezers help place delicate petals precisely. Brush Mod Podge over each flower gently from the center outward to avoid tearing. This is an indoor-only technique; moisture is the enemy of pressed botanicals. Handle the finished pumpkin like the artwork it is, and it will stay beautiful for a month.
20. How Do You Attach Sequins and Jewels So They Stay Put?
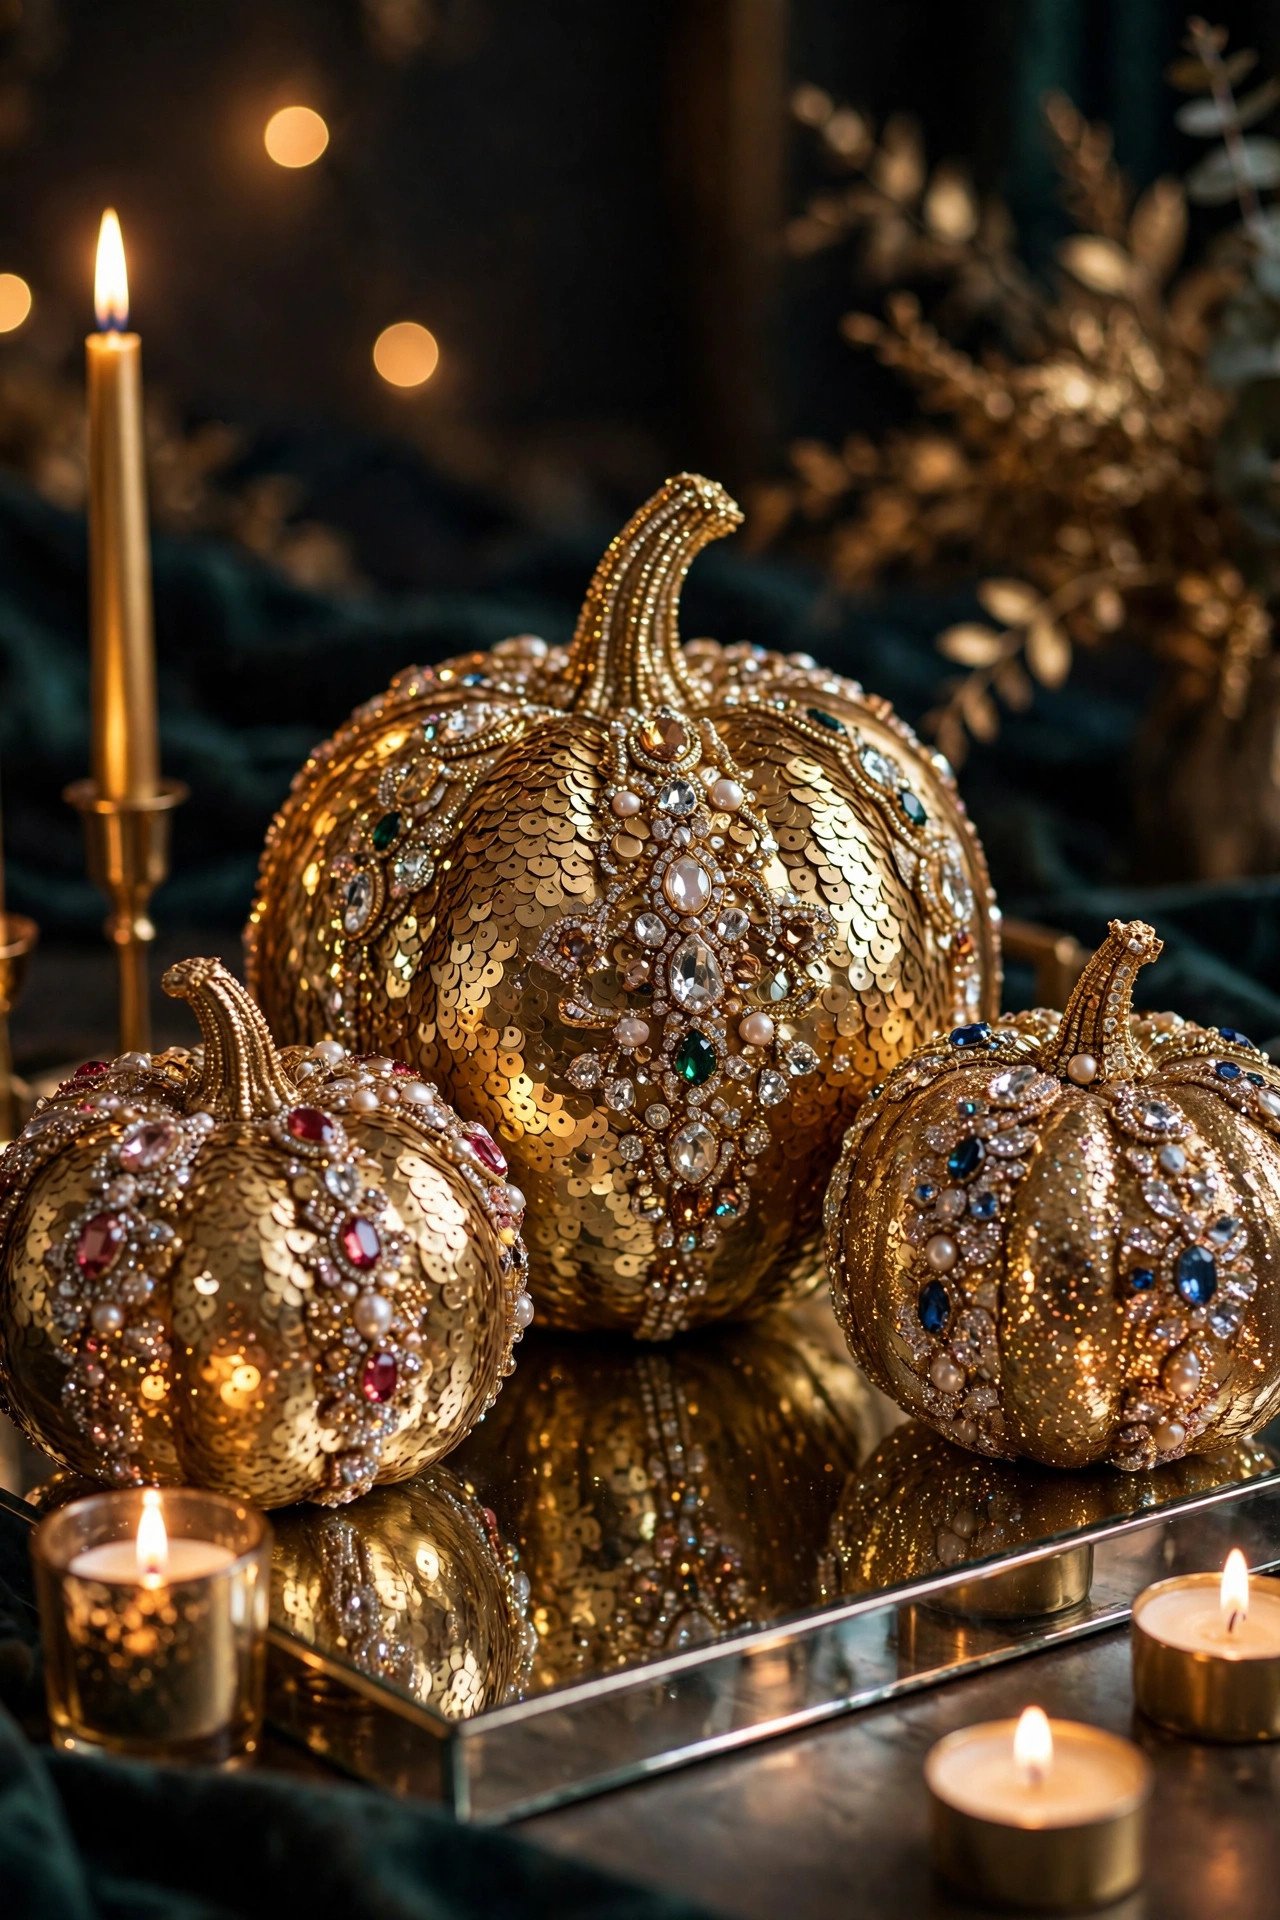
Flat-back gems need a strong adhesive — hot glue for speed, or a heavy-duty craft glue for pieces that must survive wind and curious hands. Press each jewel firmly and hold for a count of five. Work in deliberate patterns — stripes, monograms, or a jeweled band around the equator — rather than scattering randomly, and the pumpkin reads as glam rather than gaudy.
Spray the pumpkin metallic gold or silver first; jewels pop dramatically against a metallic base. Use tweezers for small sequins — fingers get gluey fast. A bejeweled pumpkin is a natural fit for a candlelit halloween tablescape, where the gems catch the light. Keep jeweled pumpkins indoors or under cover; heavy dew loosens even strong adhesives over time.
21. How Do You Stack a Pumpkin Topiary That Won't Topple?

Use three flat-bottomed Cinderella pumpkins in descending sizes, run a sturdy wooden dowel or metal rod through their centers, and seat the stack in a heavy urn filled with sand. The dowel is the structural secret — stacked pumpkins without one always lean and eventually tumble.
Push the rod through the soft stem scar rather than drilling; it slides in with firm pressure on most varieties. Choose pumpkins with naturally flat bottoms and test each one's balance before stacking. Tuck Spanish moss around the joints to hide the seams. Decorate each tier differently — painted, twine-wrapped, plain — for a designer look. A pumpkin topiary is the single highest-impact piece in any halloween porch decor scheme, visible from the street and impossible to ignore.
22. How Long Will an Uncarved Decorated Pumpkin Actually Last?

Eight to twelve weeks when you treat it right — which is the entire reason no-carve decorating wins. An uncarved pumpkin's skin is its own perfect seal, so while a carved jack-o'-lantern collapses in under a week, your painted, wrapped, or decoupaged pumpkin can span Halloween and roll straight into Thanksgiving.
Start at the patch: choose pumpkins with intact stems and no soft spots, since damage is where rot begins. Wipe the rind with a diluted bleach solution (about one part bleach to ten parts water) to kill surface mold spores, then rub a little petroleum jelly on the stem to slow its drying. Display pumpkins off bare concrete on a mat or stand, keep them out of harsh afternoon sun, and bring them in before a hard frost. For more preservation science, see these tested pumpkin preservation hacks.
Pro Tips for Making No-Carve Pumpkins Last
Wash and dry every pumpkin before decorating. Dust and field grime block paint adhesion and trap moisture. A damp-cloth wipe plus full air-dry takes two minutes and prevents most failures.
Match the technique to the variety. Smooth sugar pie and Lumina pumpkins suit paint, stencils, and decoupage. Ribbed Cinderella and Jarrahdale pumpkins flatter twine, fabric, and chalk paint that follows the ridges.
Apply thin coats of everything. Two thin coats of paint, glue, or Mod Podge bond better and dry faster than one thick coat, which cracks as the pumpkin loses moisture.
Seal anything displayed outdoors. A clear matte or gloss sealer spray protects against dew, rain, and UV fading. Two light coats beat one heavy coat.
Never carry a pumpkin by its stem. A cracked stem invites rot — lift from the base and the pumpkin lasts weeks longer.
Keep pumpkins off bare concrete. Concrete holds cold and moisture; a doormat or plant stand underneath prevents bottom rot.
Bring fabric and paper pumpkins inside when it rains. Moisture trapped under wraps is the fastest way to lose a decorated pumpkin.
Choose faux pumpkins for reusable designs. Foam pumpkins accept paint, decoupage, and fabric just like real ones — and your favorite design returns next October free.
Frequently Asked Questions
How long will a no-carve pumpkin last?
An uncarved pumpkin kept cool and dry lasts eight to twelve weeks — several times longer than a carved jack-o'-lantern, which collapses within about a week. Paint and wraps don't shorten that lifespan as long as the rind stays intact and dry. Pick a firm pumpkin with a solid stem and keep it off the ground.
What kind of paint sticks best to pumpkins?
Acrylic craft paint is the all-around winner: it bonds to the waxy rind, dries fast, and comes in every color. Chalk paint needs no primer and gives a velvety matte finish; spray paint covers large pumpkins quickest. Skip watercolor and washable poster paint outdoors — the first rain washes them off.
Are no-carve pumpkin crafts safe for toddlers?
Yes — that's their biggest advantage. Polka dots with washable tempera, sticker faces, yarn wrapping, and push-in kits involve no knives, no heat, and no small parts with age-appropriate materials. Toddlers can join in with sponge daubers and finger paint. Save hot glue guns and nail-polish dips for older kids and adults.
How do I keep my decorated pumpkin from rotting?
Wipe the rind with a diluted bleach solution (one part bleach to ten parts water) before decorating to kill mold spores. Keep the pumpkin off bare concrete, out of harsh afternoon sun, and bring it in during frost or heavy rain. Trapped moisture under fabric or paper is the number-one cause of early rot.
Should I use real or fake pumpkins for no-carve decorating?
Real pumpkins look authentic, cost less, and compost afterward — ideal for one-season designs. Faux foam pumpkins are worth it when you've perfected a design to reuse yearly; they accept paint, decoupage, and fabric just like real ones and never rot. Many decorators mix both: real on the porch, faux on the mantel.
Do I need to seal a painted pumpkin?
Indoors, no — acrylic and chalk paint cure hard enough for a mantel. Outdoors, yes: a clear matte or gloss sealer spray guards against dew, rain, and UV fading. Apply two light coats over fully cured paint. Sealed pumpkins stay vivid all season instead of chalking out by mid-October.
Final Thoughts
Skipping the carving knife doesn't mean skipping the creativity — it means your pumpkins look better for longer, your kids can join in safely, and your porch still turns heads on Halloween night. Pick the technique that matches your style, grab a few firm pumpkins this weekend, and enjoy a completely mess-free October.
You May Also Like:
– 22 Halloween Kids Room Decor Ideas (Playful, Not Scary) – 22 Halloween Living Room Decor Ideas (Spooky Yet Stylish) – 22 Halloween Party Decor Ideas for a Spooktacular Celebration – 22 DIY Halloween Decorations on a Budget That Look Expensive
FAQ_SCHEMA:
<script type="application/ld+json"> { "@context": "https://schema.org", "@type": "FAQPage", "mainEntity": [ { "@type": "Question", "name": "How long will a no-carve pumpkin last?", "acceptedAnswer": { "@type": "Answer", "text": "An uncarved pumpkin kept cool and dry lasts eight to twelve weeks — several times longer than a carved jack-o'-lantern, which collapses within about a week. Paint and wraps don't shorten that lifespan as long as the rind stays intact and dry. Pick a firm pumpkin with a solid stem and keep it off the ground." } }, { "@type": "Question", "name": "What kind of paint sticks best to pumpkins?", "acceptedAnswer": { "@type": "Answer", "text": "Acrylic craft paint is the all-around winner: it bonds to the waxy rind, dries fast, and comes in every color. Chalk paint needs no primer and gives a velvety matte finish; spray paint covers large pumpkins quickest. Skip watercolor and washable poster paint outdoors — the first rain washes them off." } }, { "@type": "Question", "name": "Are no-carve pumpkin crafts safe for toddlers?", "acceptedAnswer": { "@type": "Answer", "text": "Yes — that's their biggest advantage. Polka dots with washable tempera, sticker faces, yarn wrapping, and push-in kits involve no knives, no heat, and no small parts with age-appropriate materials. Toddlers can join in with sponge daubers and finger paint. Save hot glue guns and nail-polish dips for older kids and adults." } }, { "@type": "Question", "name": "How do I keep my decorated pumpkin from rotting?", "acceptedAnswer": { "@type": "Answer", "text": "Wipe the rind with a diluted bleach solution (one part bleach to ten parts water) before decorating to kill mold spores. Keep the pumpkin off bare concrete, out of harsh afternoon sun, and bring it in during frost or heavy rain. Trapped moisture under fabric or paper is the number-one cause of early rot." } }, { "@type": "Question", "name": "Should I use real or fake pumpkins for no-carve decorating?", "acceptedAnswer": { "@type": "Answer", "text": "Real pumpkins look authentic, cost less, and compost afterward — ideal for one-season designs. Faux foam pumpkins are worth it when you've perfected a design to reuse yearly; they accept paint, decoupage, and fabric just like real ones and never rot. Many decorators mix both: real on the porch, faux on the mantel." } }, { "@type": "Question", "name": "Do I need to seal a painted pumpkin?", "acceptedAnswer": { "@type": "Answer", "text": "Indoors, no — acrylic and chalk paint cure hard enough for a mantel. Outdoors, yes: a clear matte or gloss sealer spray guards against dew, rain, and UV fading. Apply two light coats over fully cured paint. Sealed pumpkins stay vivid all season instead of chalking out by mid-October." } } ] } </script>