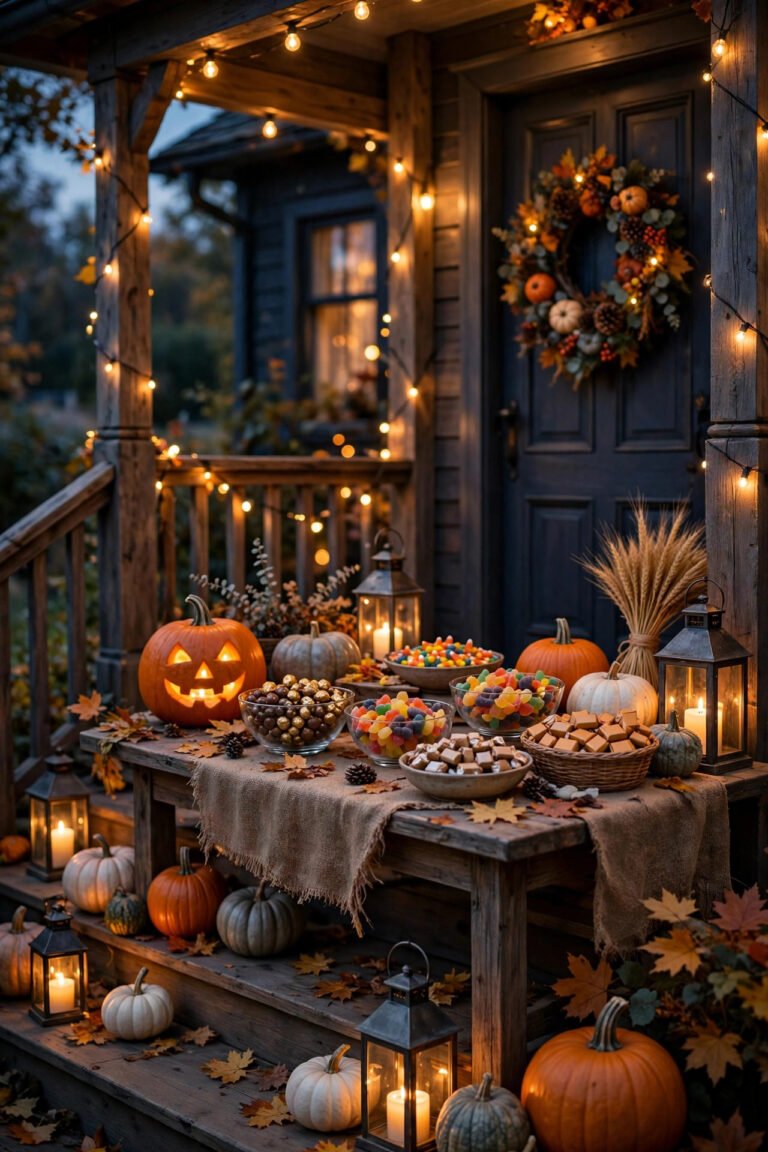
22 Easy Pumpkin Carving Ideas That Are Cute, Funny & Creative
Pumpkin carving ideas are having a moment — Pinterest Trends reports saves on "Halloween Pumpkin Carving Ideas" are up 200% over last month, with pinners searching for easy pumpkin carving ideas, cute pumpkin carving designs, and funny pumpkin carving ideas more than ever. With Halloween just days away (October 31, 2026), the porch jack-o'-lantern is back as the centerpiece of fall decorating.
A carved pumpkin is more than a Halloween decoration — it's a glowing lantern, a porch statement, and a family tradition rolled into one. The trick is picking a design that matches your skill level: simple pumpkin carving ideas like polka dots and triangle faces take 20 minutes, while creative pumpkin carving techniques like layered shading reward patience with gallery-worthy results. Below are 22 pumpkin carving ideas spanning cute, funny, spooky, simple, and creative styles — each with the tools, techniques, and pro tips to carve it like a designer, not a first-timer.
Quick answers:
– The easiest pumpkin carving ideas for beginners are polka dots, simple triangle faces, and star/moon patterns — cookie cutters and a serrated knife are all you need. – Cute pumpkin carving designs (kitten faces, owls, ladybugs) use rounded shapes and big eyes; funny designs lean on googly eyes, crooked teeth, and expressions. – Carve pumpkins 1–2 days before Halloween for maximum freshness, and rub petroleum jelly on cut edges to slow shriveling. – Always use flameless LED candles inside carved pumpkins around kids, pets, and dry fall leaves. – A serrated pumpkin-carving kit knife, a dry-erase marker, and an ice cream scoop cover 90% of beginner designs.
Looking for more inspiration? Our Nest Decorz homepage gathers the latest home decor ideas, seasonal decorating guides and room-by-room styling tips in one place — start there and explore.
1. What's the Simplest Pumpkin Carving Idea for Total Beginners?
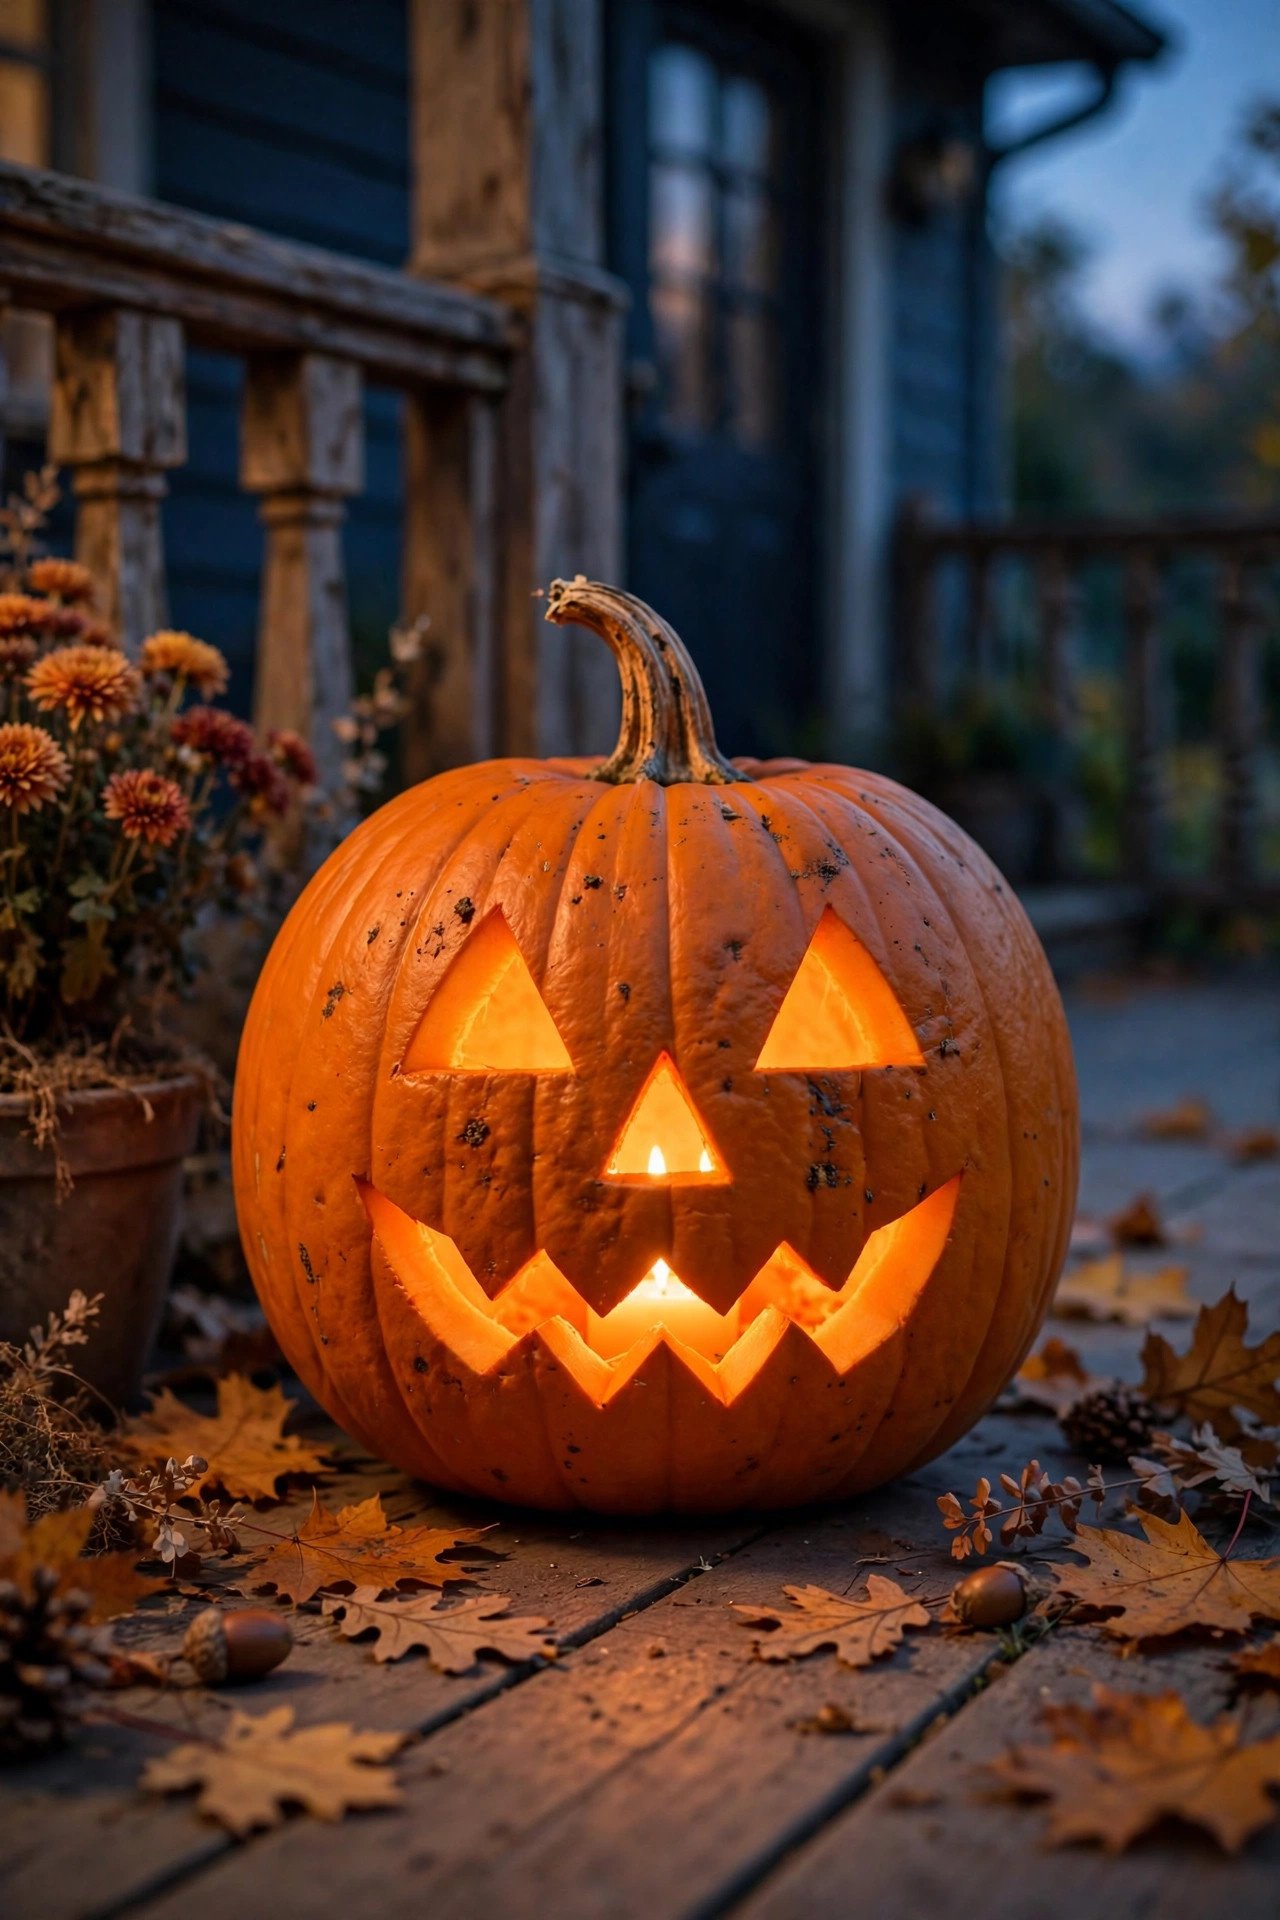
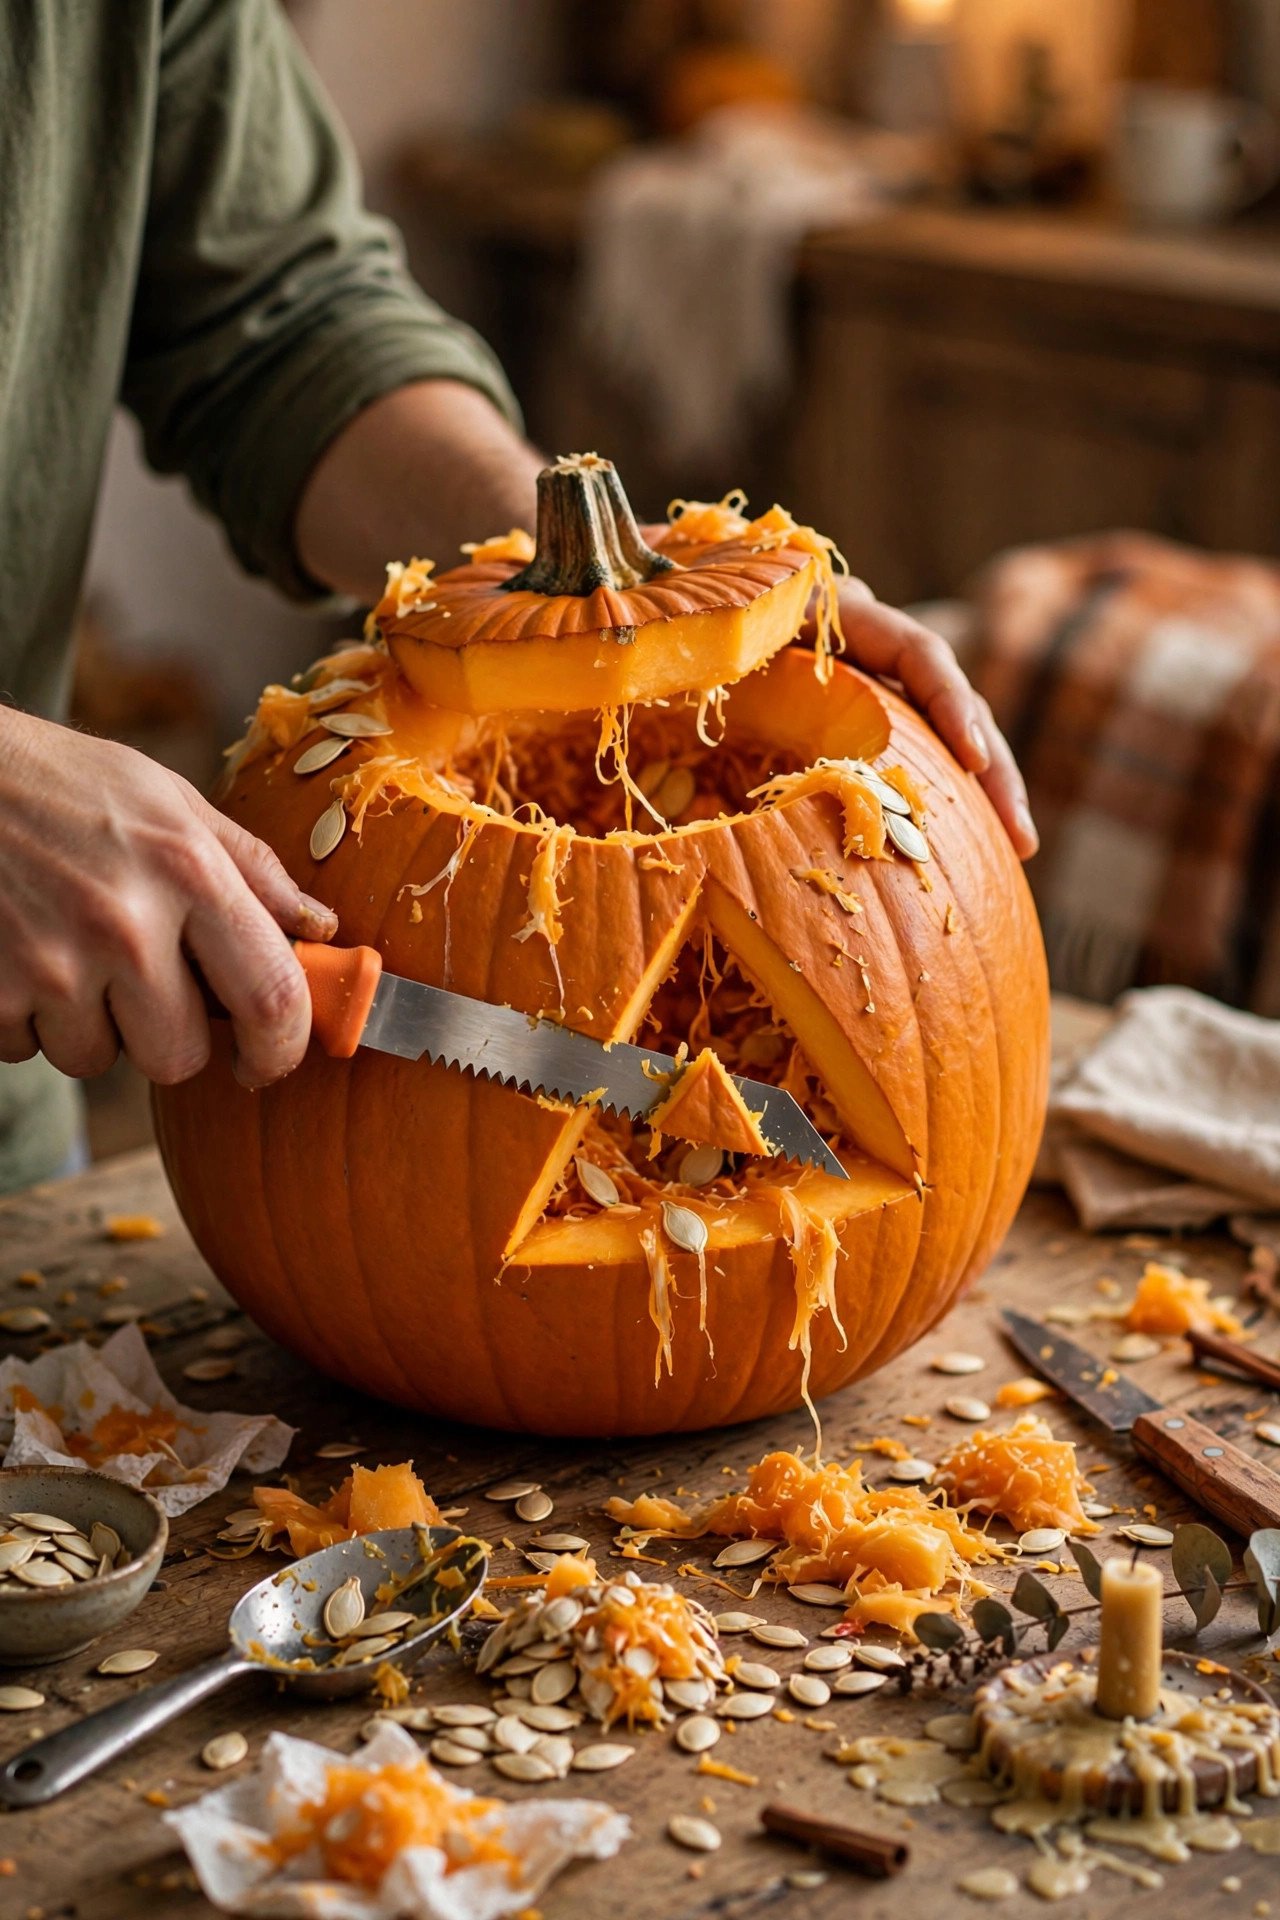
The classic triangle-eyes jack-o'-lantern is the simplest pumpkin carving idea that still looks like Halloween: two triangle eyes, a triangle nose, and a jagged grin. Draw the shapes with a dry-erase marker (erasable, unlike permanent marker), then saw along the lines with a serrated carving knife using a gentle up-and-down motion. Pop each cut piece out from the inside with your finger, not the knife.
Thin the pumpkin's inner walls to about one inch thick with an ice cream scoop before carving — thinner walls let more light through and make cutting dramatically easier. Keep the mouth wide rather than narrow; small intricate mouths are where beginners snap the rind. This design takes about 20 minutes, suits round medium pumpkins, and glows beautifully with a single LED tea light. Let kids draw the face and handle the scooping while adults do the cutting.
2. How Do You Carve a Cute Kitten Face Pumpkin?

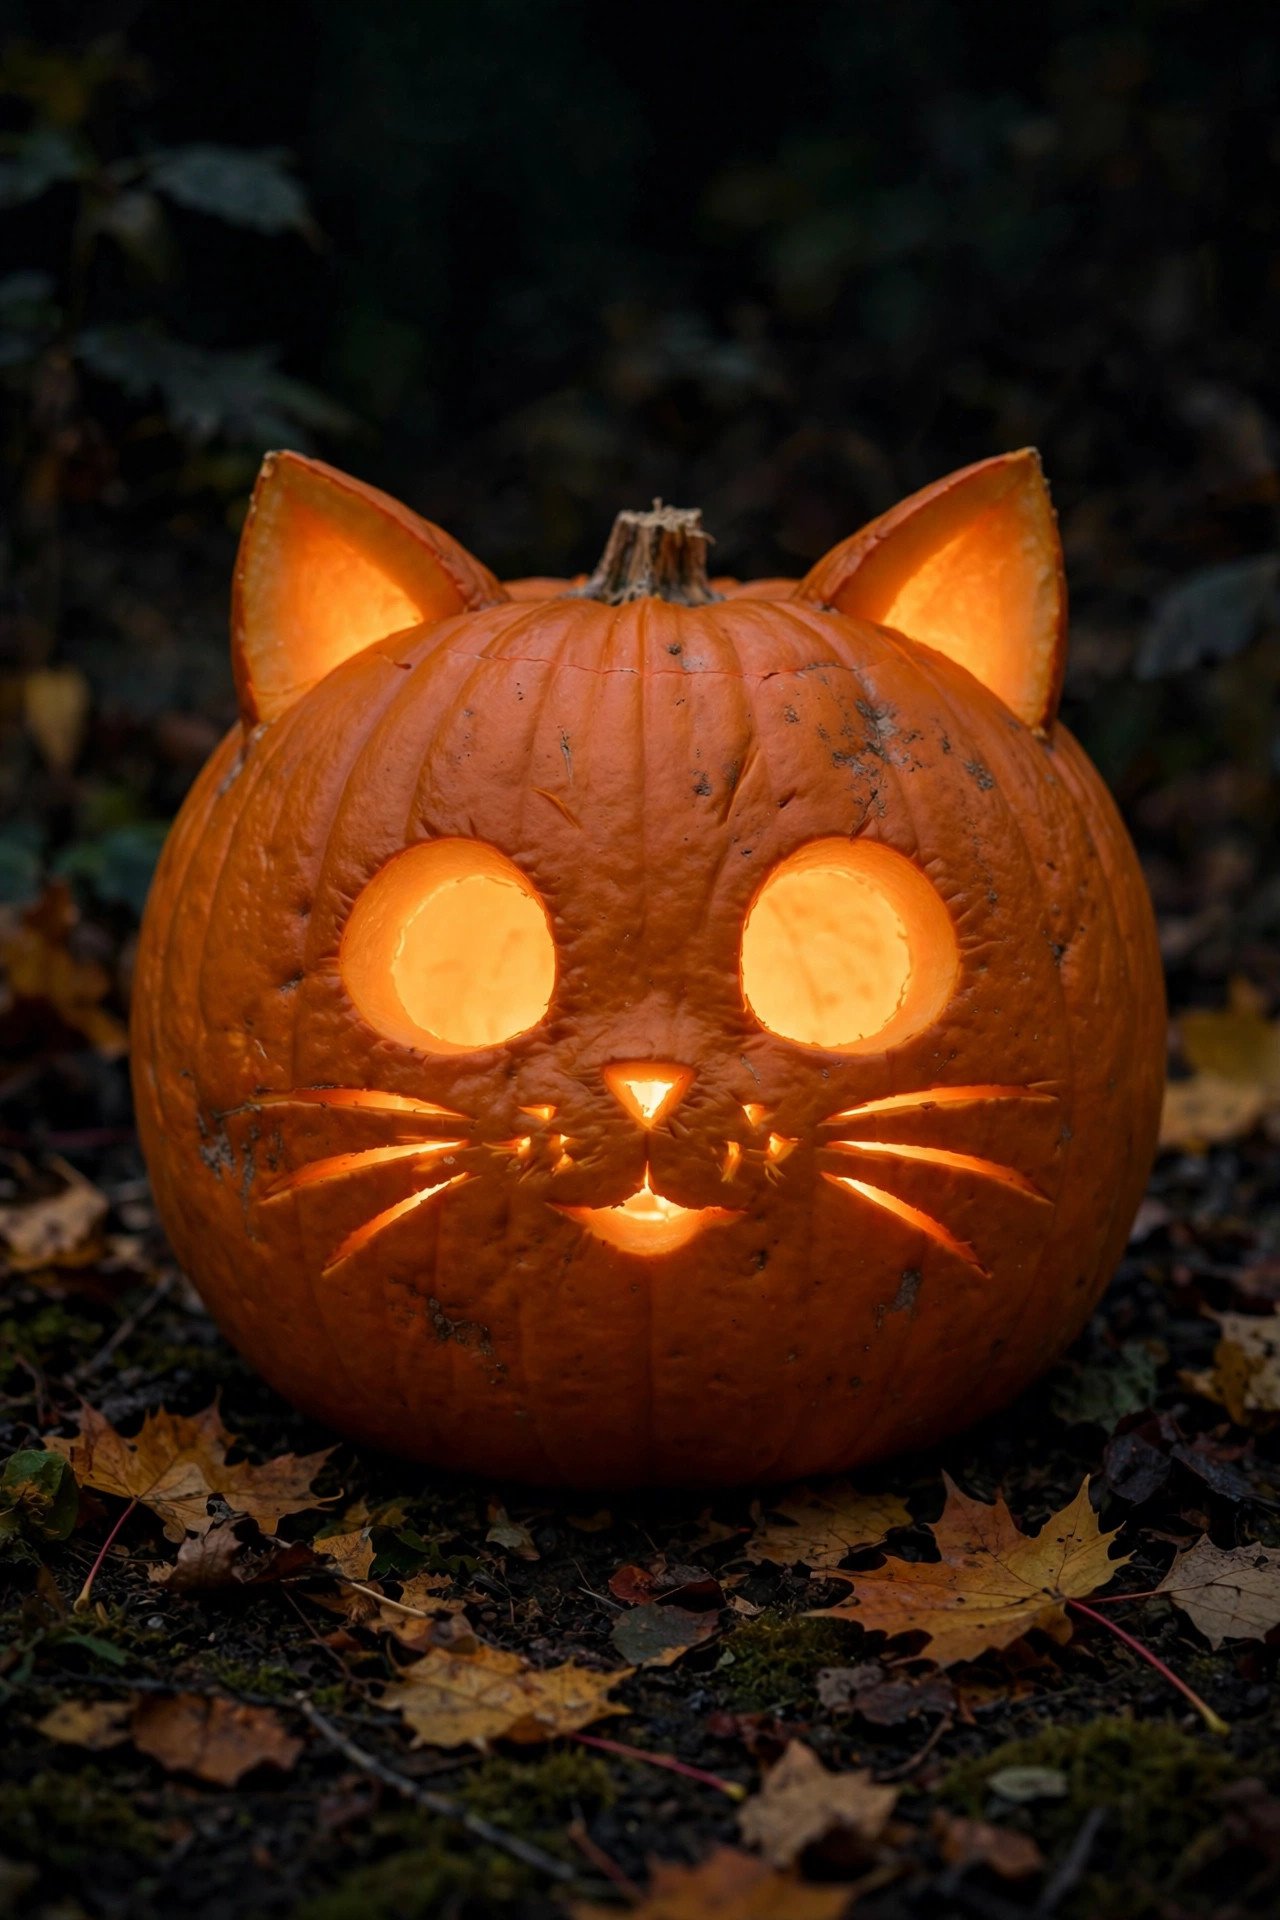
A cute pumpkin carving of a kitten face uses big round eyes, a tiny triangle nose, and whisker slits instead of scary angles. Sketch two large circles for eyes, a small inverted triangle for the nose, and a "w" shaped mouth below it. Carve the eyes and nose as clean cut-outs, then use a shallow scoring technique (cutting only halfway through the rind) for the whisker lines so they glow softly without becoming holes.
Round pumpkins photograph best for cute designs — their full cheeks read as chubby and friendly. For the ears, cut two small triangles from a second mini pumpkin and pin them to the top with toothpicks. Keep every line curved; sharp angles read as scary, curves read as cute. Add a pink painted nose instead of carving it for extra sweetness. This is one of the most saved cute pumpkin carving ideas on Pinterest, and it takes under 30 minutes once the design is drawn.
3. What Makes a Funny Pumpkin Carving Actually Funny?
Funny pumpkin carving ideas work through expression exaggeration — cross-eyed pupils, one crooked tooth, lopsided grins, and mismatched eye sizes. Carve one big eye and one tiny eye, then add a single square tooth hanging from an otherwise normal smile. The asymmetry is what triggers laughter; perfectly symmetrical faces read as serious even when smiling.
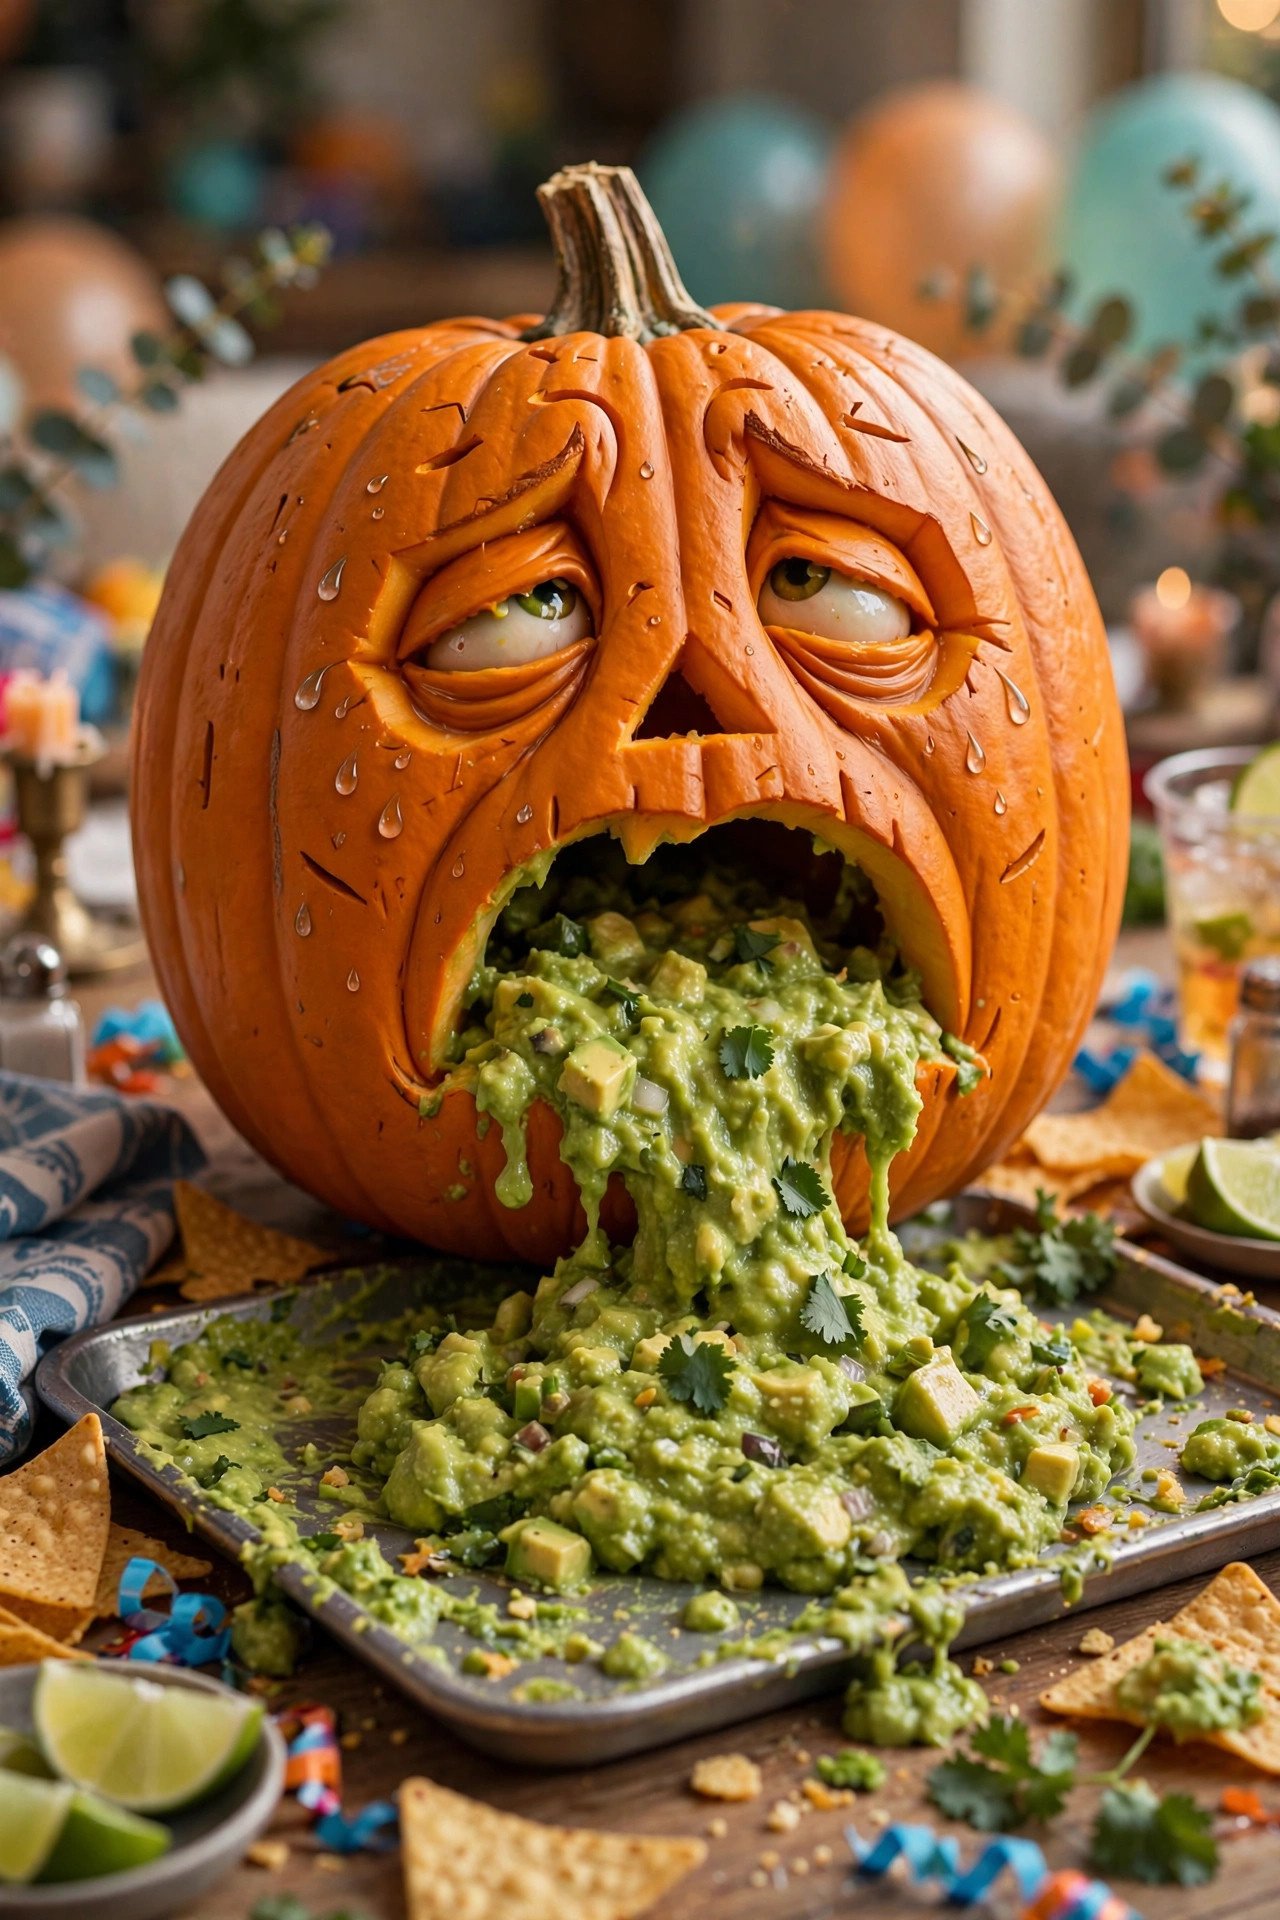
The "puking pumpkin" is the funniest classic: carve an open oval mouth, then pile guacamole, salsa, or pumpkin guts spilling from the mouth onto the table as if the pumpkin is being sick. Position the pumpkin at the edge of a tray so the "spill" has somewhere to go. For extra comedy, stick googly eyes (craft-store adhesive eyes) onto an uncarved pumpkin face area instead of carving them — the 3D wobble is irresistible to kids. These cool pumpkin carving ideas get the biggest reactions at parties, and they're forgiving: crooked cuts only make them funnier.
4. Are Polka Dot Pumpkins a Good Simple Pumpkin Carving Idea?

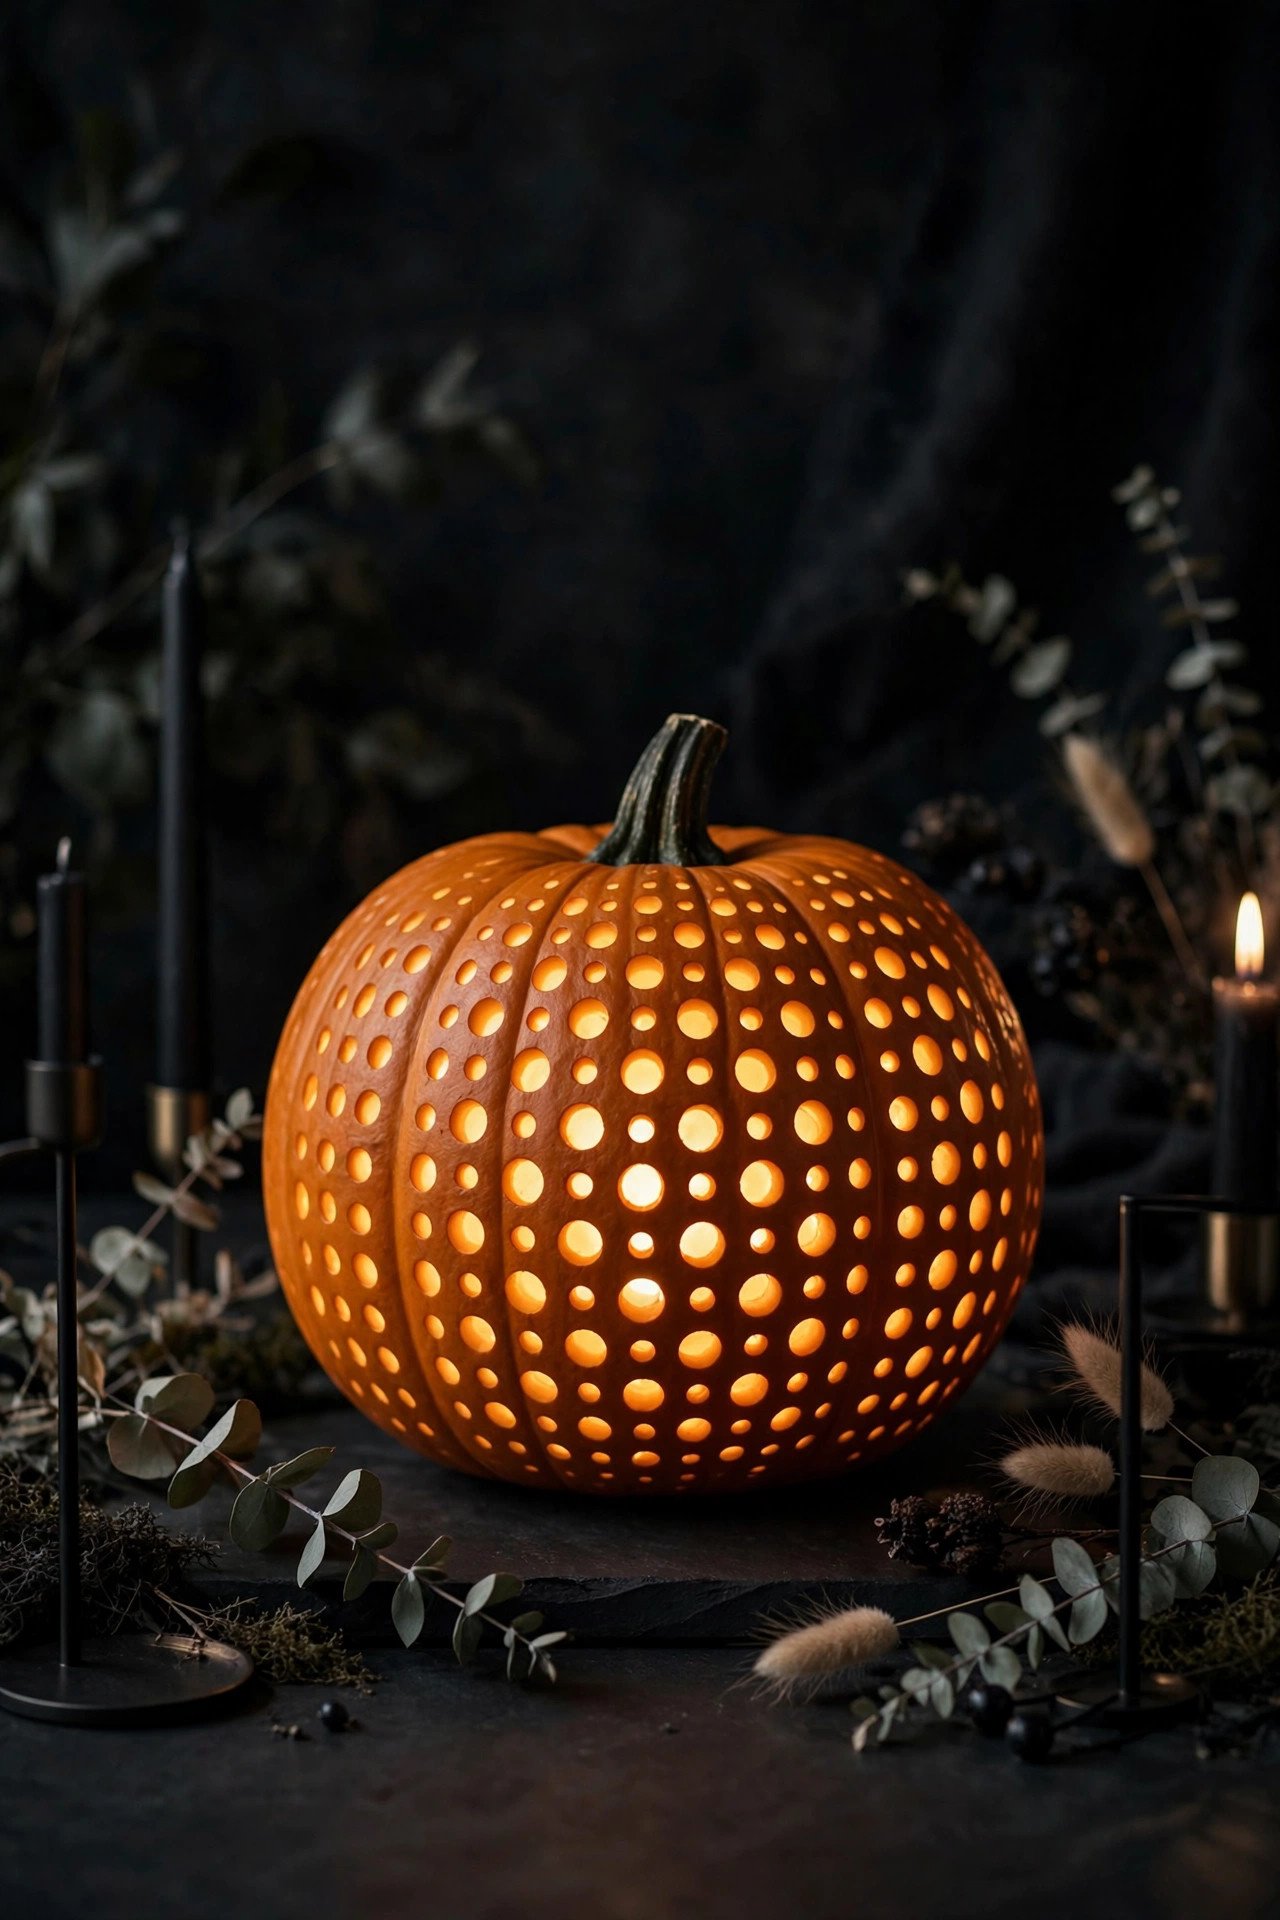
Polka dots are one of the best simple pumpkin carving ideas because they're impossible to mess up and look modern, not childish. Use a melon baller or apple corer to punch clean circles straight through the rind in a scattered pattern — vary the sizes between dime and quarter diameter. The glowing dots create a starry, elegant effect that's as chic as it is easy.
No drawing skill needed: press the corer into the rind, twist, and pull. Space dots at least an inch apart so the pumpkin stays structurally sound, and keep the pattern denser near the top where the wall is thickest. White Lumina or Casper pumpkins make the dots glow with an especially ghostly quality. This technique doubles as a great kids' activity — even a five-year-old can twist a corer with supervision. Finish with a pillar LED candle for an even, all-over glow.
5. How Do You Carve Scary Vampire Fangs on a Pumpkin?
A vampire pumpkin carving needs two sharp downward fangs carved as part of an angry face. Sketch slanted oval eyes (angled down toward the center for menace), a small nose, and a wide mouth with two long triangles pointing down from the upper lip. Carve the fangs as separate narrow triangles rather than part of the mouth cut-out — thin fangs glow dramatically against the dark mouth opening.
Depth matters here: thin the mouth area's inner wall to half an inch so the fangs catch maximum light. Paint the fangs with glow-in-the-dark paint for a double effect after dark, or leave them natural orange for classic contrast. A tall, slightly oval pumpkin suits the vampire's elongated face better than a squat round one. This spooky design sits in the sweet spot between scary and fun — menacing enough for teens, not so terrifying that it scares toddlers on the porch.
6. What's the Cutest Way to Carve Baby Ghost Faces?
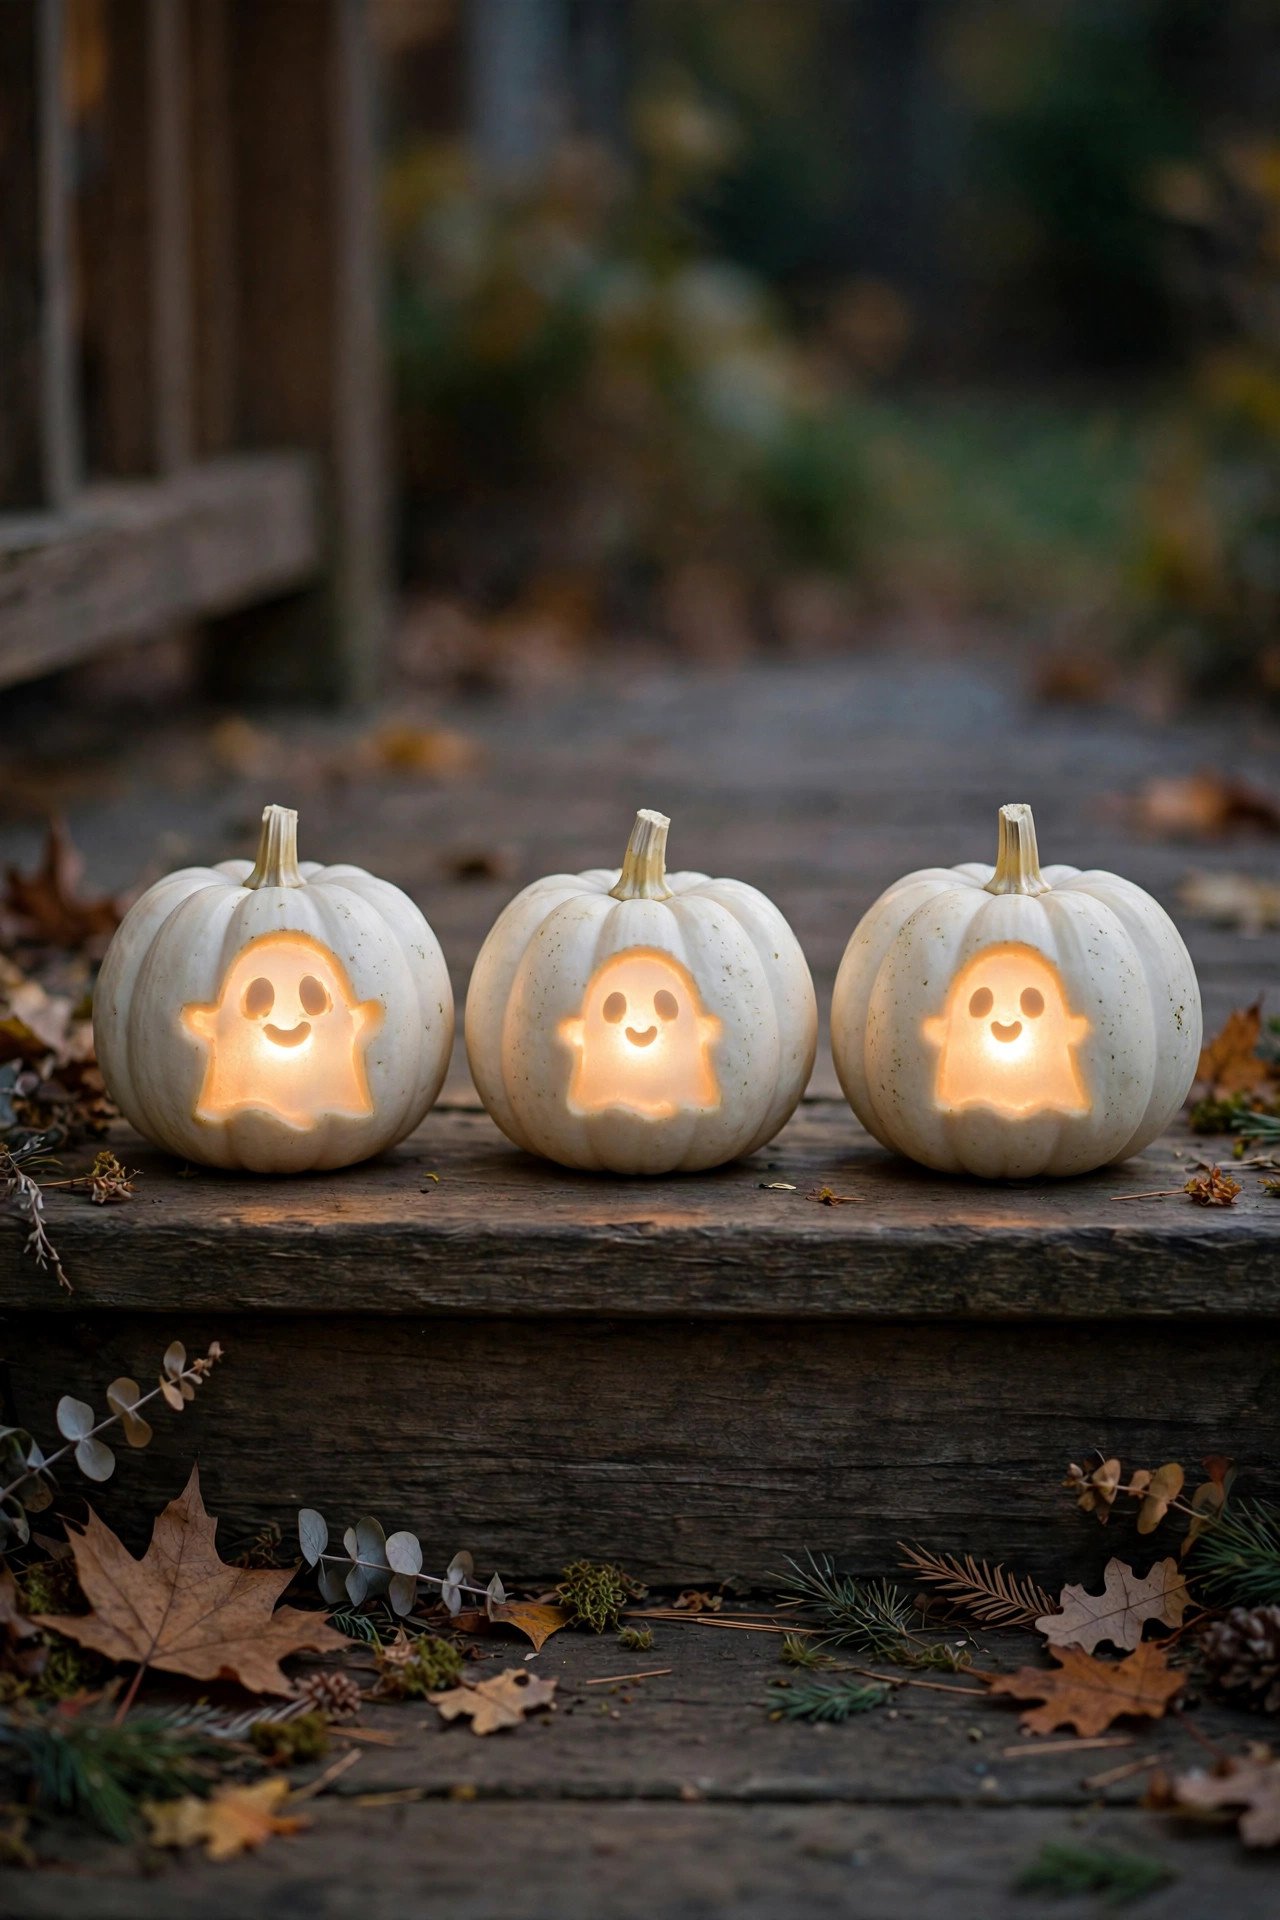
Three small ghost faces in a row is peak cute pumpkin carving: carve two oval eyes and a small oval mouth for each ghost, keeping every shape rounded and small. The trick is scale — tiny faces on a big pumpkin read as adorable, while big faces on a small pumpkin read as crowded. Space three ghosts evenly around the pumpkin's front face.
Instead of cutting all the way through, try the etched technique for one of the ghosts: scrape away only the outer orange skin with a linoleum cutter or clay tool, leaving the pale flesh beneath. When lit, etched ghosts glow softly while cut-through ghosts glow bright — the mix of intensities looks magical. Mini white pumpkins are perfect for this; their smooth skin etches cleanly. Line up five or six mini ghost pumpkins along porch steps for a glowing ghost parade that trick-or-treaters will love.
7. How Do You Make a Starry Night Pumpkin Carving Design?
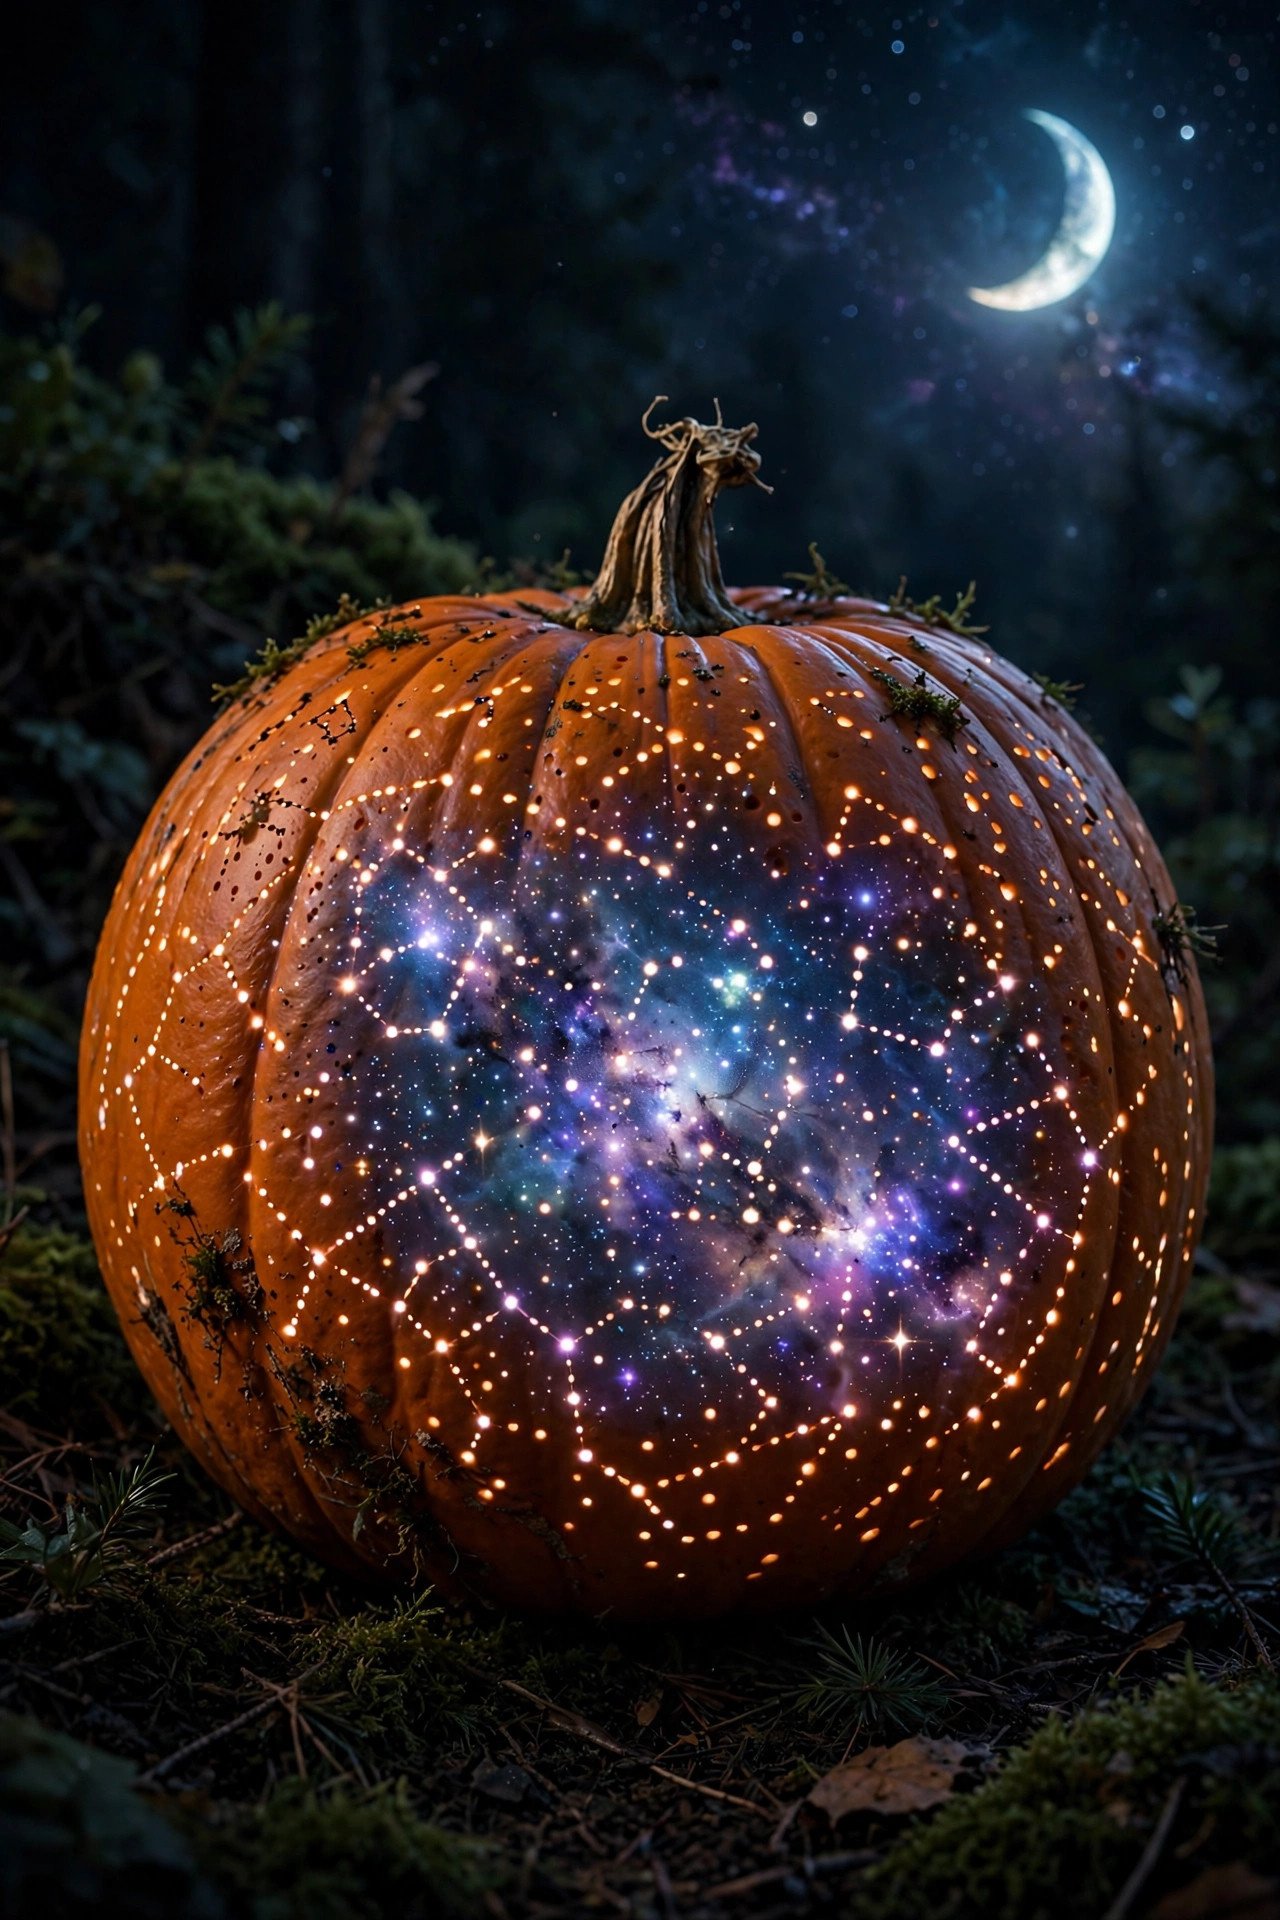
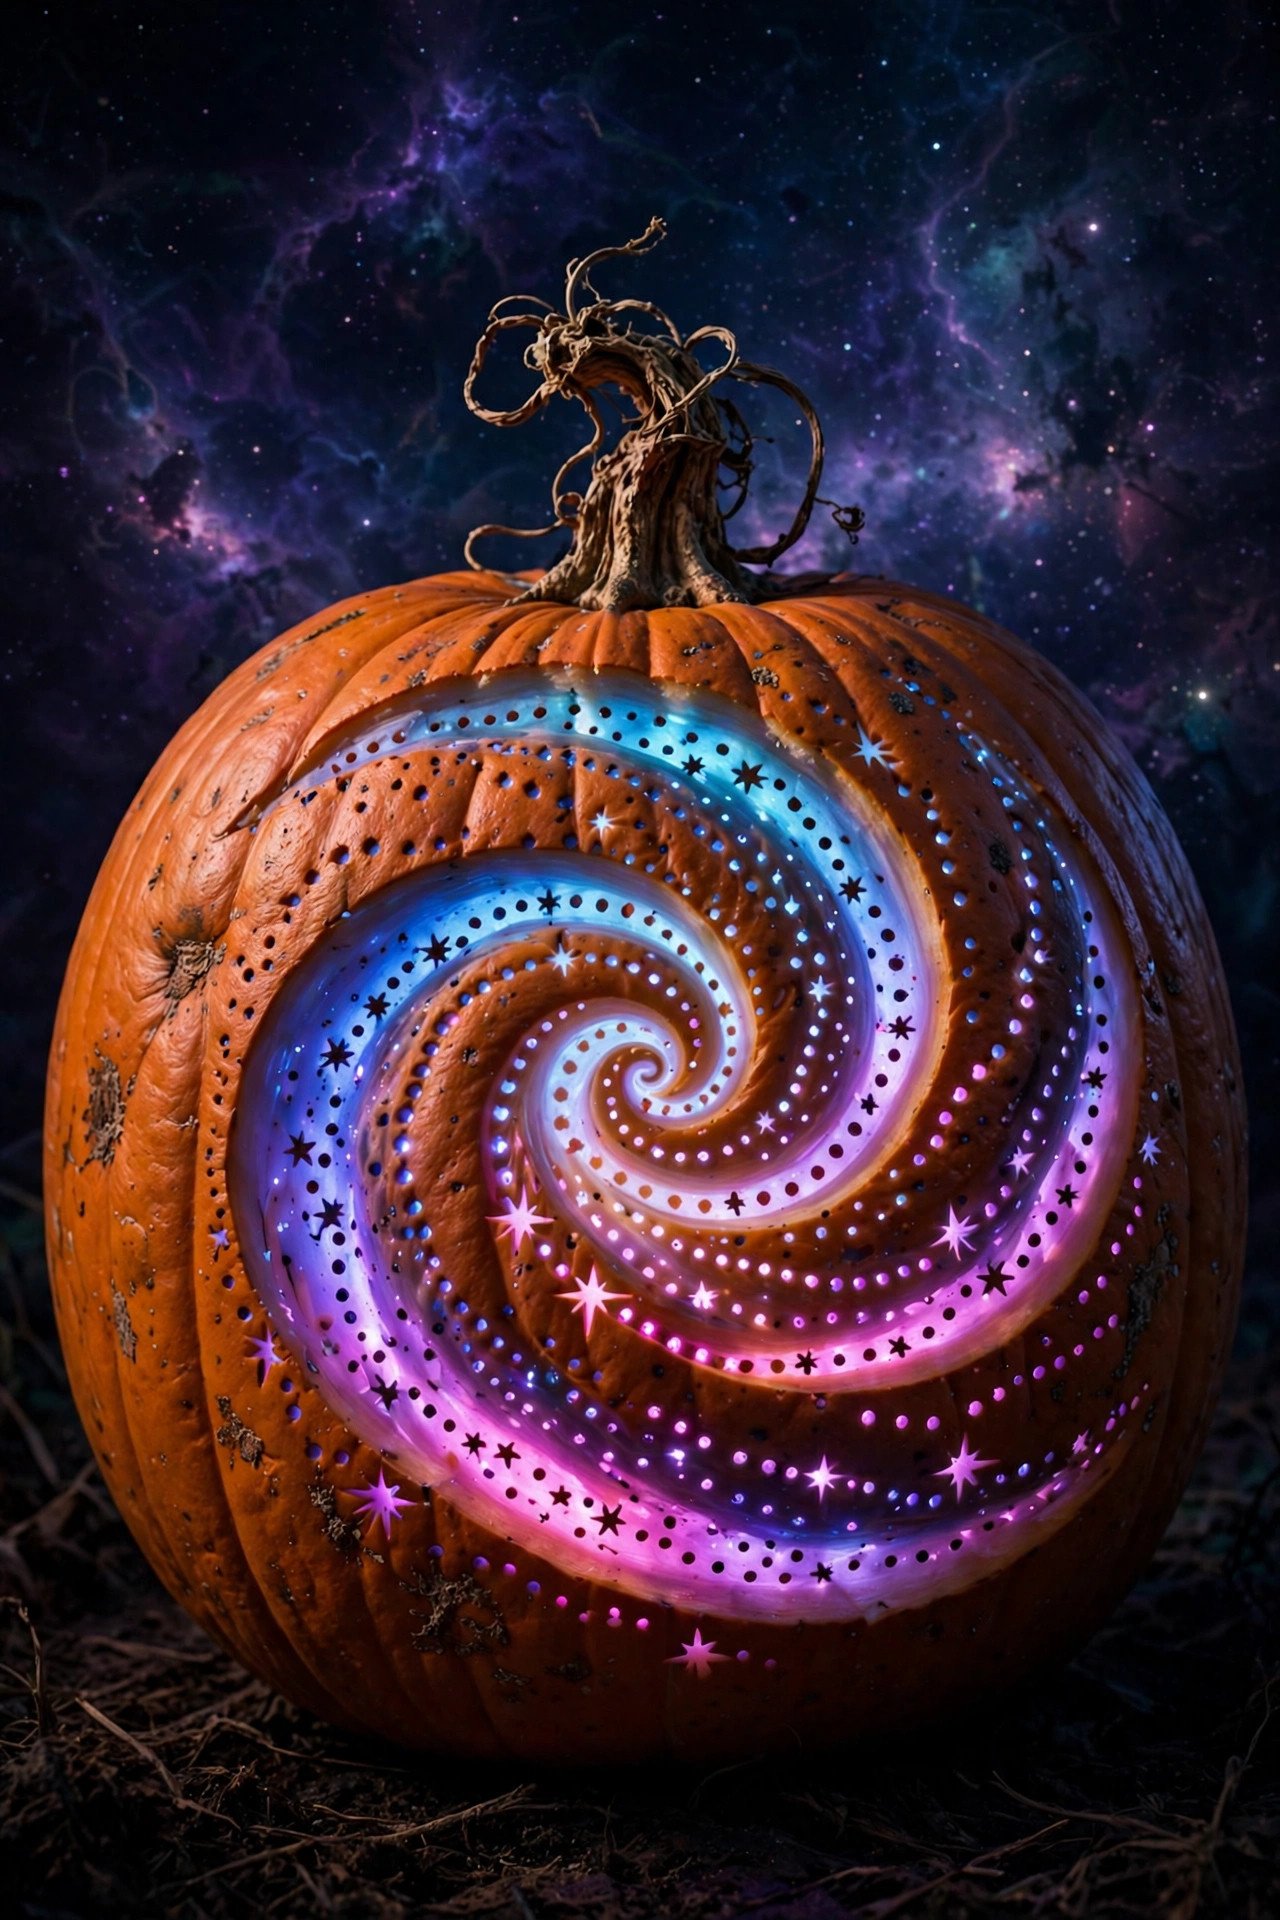
A starry night design is a creative pumpkin carving idea that turns your pumpkin into a glowing constellation. Use a drill with a small bit (1/8 inch) to poke dozens of tiny holes across the pumpkin's surface in swirling galaxy patterns — cluster them like the Milky Way, with a carved crescent moon as the centerpiece. The drilled holes glow as pinpricks of light, completely different from cut-out shapes.
No carving knife needed for the stars, which makes this one of the safest cool pumpkin carving ideas for older kids (with adult drill supervision). Mark your constellation with a pencil first, or tape a printed star map to the pumpkin and drill through the paper. Vary hole sizes slightly using two drill bits for depth and realism. The effect is breathtaking on a dark porch — dozens of tiny lights swirling around a glowing moon. This unique pumpkin carving idea works beautifully on tall, dark-orange pumpkins with thick walls that hold the drilled holes cleanly.
8. What's the Trick to the Classic "Puking Pumpkin" Funny Design?

The puking pumpkin is the funniest pumpkin carving idea because it breaks the fourth wall — the pumpkin appears to be vomiting its own guts. Carve a wide oval mouth and slightly queasy, half-closed eyes (horizontal slits with small pupils). Then pile the pumpkin's own scooped-out pulp and seeds so they spill from the mouth onto a tray or directly onto the porch, as if mid-heave.
Presentation sells the joke: set the pumpkin at the table's edge with a dark placemat or black tray underneath to catch the "puke," and add a few candy corn pieces in the spill for color. The eyes are key — straight-across lids with tiny carved pupils read as nauseous, while round surprised eyes read as scared. This is consistently one of the most photographed funny pumpkin carving ideas at parties. Keep it fresh by carving the morning of the event, since the pulp spill dries out fast — refresh it with a spritz of water before guests arrive.
9. How Do You Carve a Haunted House Silhouette Pumpkin?
A haunted house silhouette is a spooky showstopper: instead of carving a face, you carve an entire scene. Draw a crooked house with a pointed roof, two lit windows, a crooked chimney, and a bare tree beside it — then carve the background away (a technique called negative carving) so the house itself stays solid orange and glows around its edges. This inversion makes it look like a glowing apparition.
Tape a printed haunted house stencil to the pumpkin and transfer it with pinpricks (poke along the lines with a nail, remove the paper, connect the dots with marker). Carve the sky areas out completely and leave the house shape intact. A large, flat-faced pumpkin gives you the most "canvas." Light it with two LED candles for even illumination across the whole scene. This unique pumpkin carving idea takes 60–90 minutes but produces the kind of carved pumpkin neighbors stop to photograph — it's the difference between decoration and art.
10. Can You Carve an Owl Pumpkin That's Cute Instead of Scary?
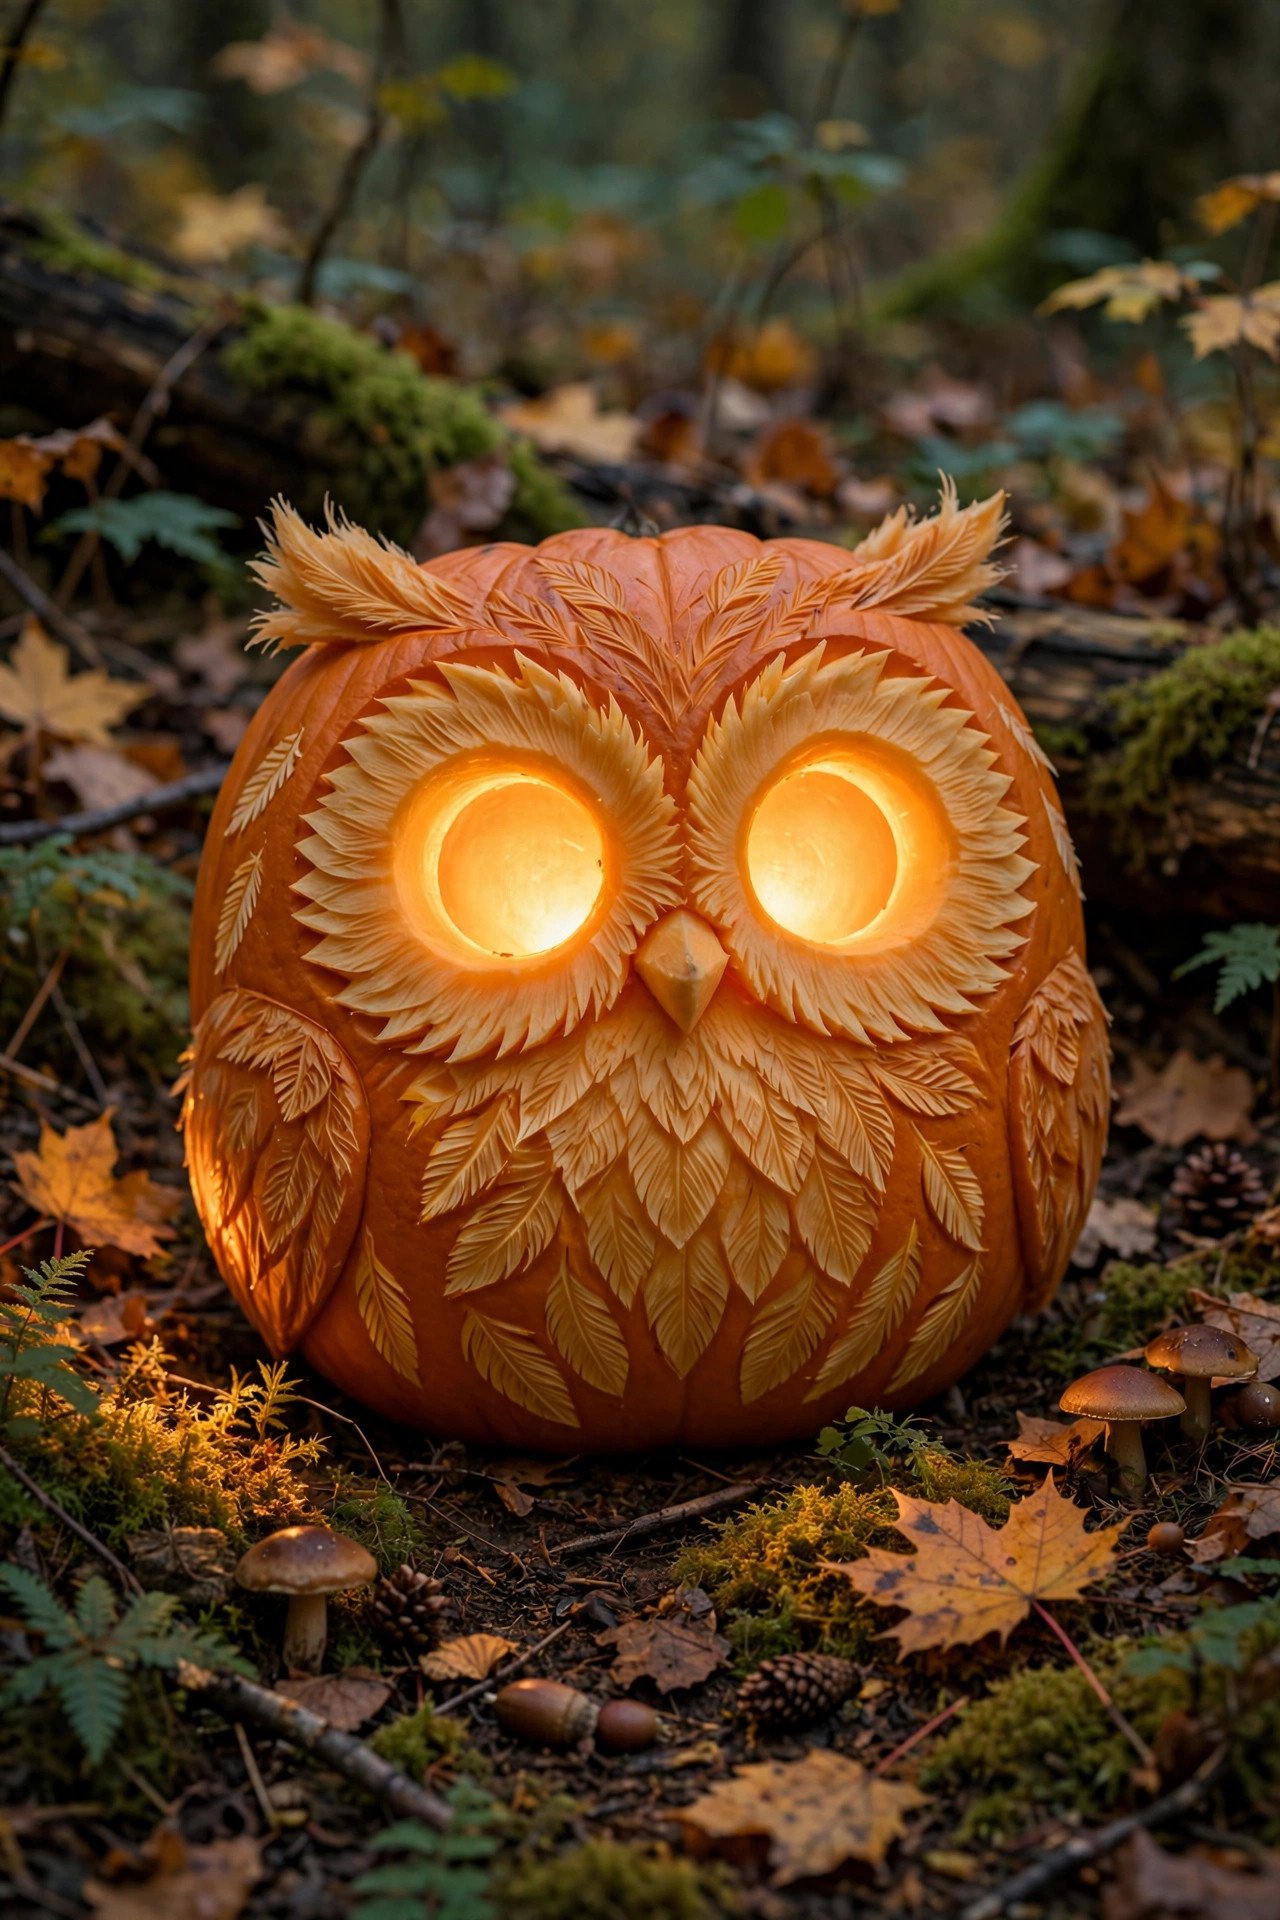
An owl pumpkin carving stays cute by using huge round eyes — carve two large circles and leave the pupils as uncarved dots in the center (don't cut the pupils out). Add a small diamond beak and carve shallow feather scallops around the face with a clay loop tool, cutting only through the outer skin so they glow softly. Big eyes plus soft texture equals adorable, not ominous.
A squat, wide pumpkin mimics an owl's round body perfectly. For ears, carve two small triangles at the top edge or attach dried corn husks with pins. The secret to cute-versus-scary is the brow: skip the angry angled brow ridge that owls have in nature, and keep the forehead smooth and round. This is one of the sweetest cute pumpkin carving ideas for a woodland-themed Halloween display — pair it with pinecones, moss, and fairy lights on the porch for a full enchanted-forest vignette.
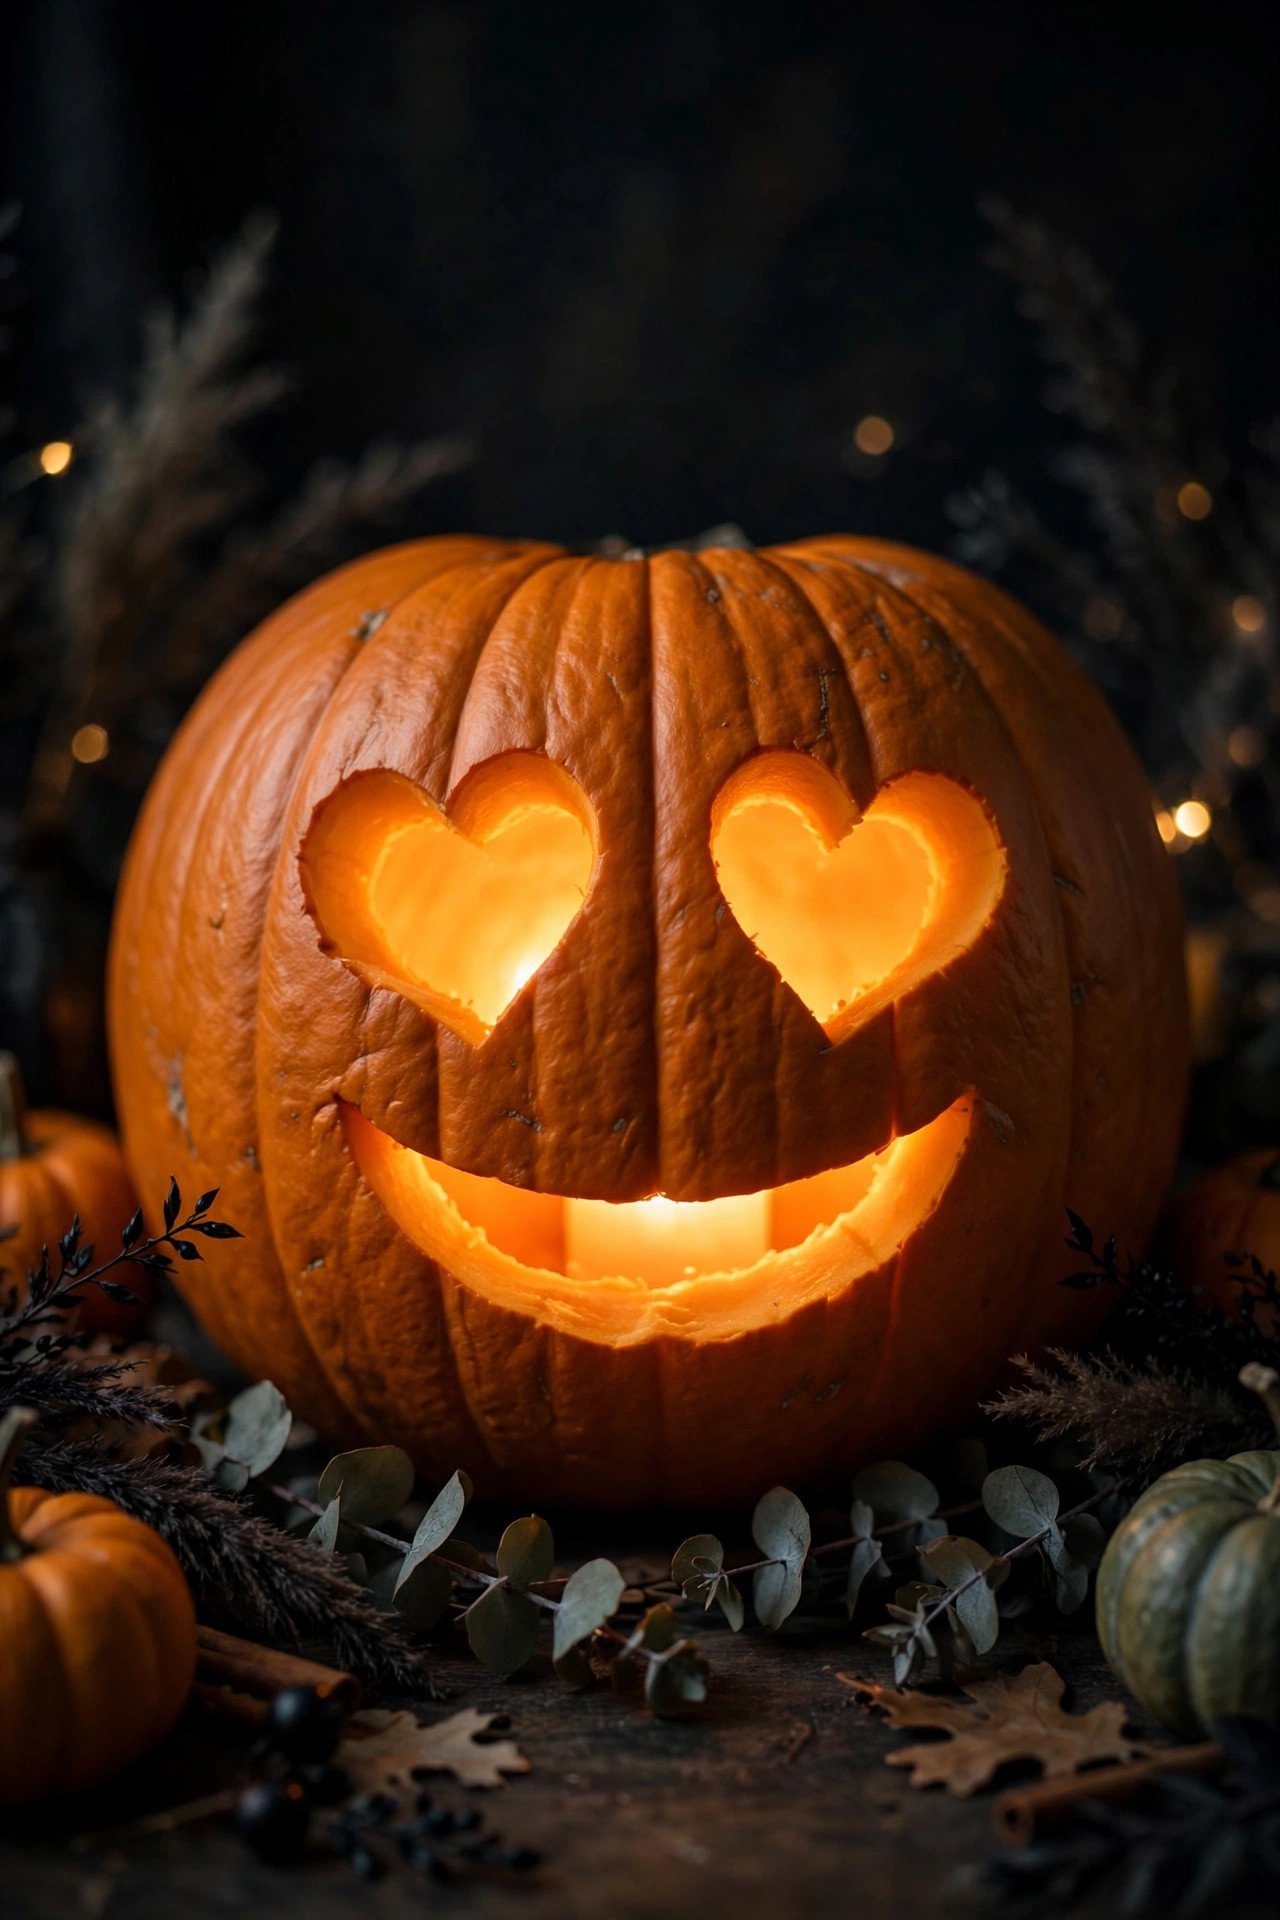
11. Are Emoji Face Pumpkins a Good Cool Carving Idea?
Emoji pumpkins are cool pumpkin carving ideas because everyone instantly recognizes the expression — the laughing-crying face, the heart-eyes face, and the winking face translate perfectly to pumpkin form. The heart-eyes emoji is the crowd favorite: carve two heart shapes for eyes and a simple open smile. Use a printed emoji as your stencil; the bold, simple shapes are forgiving to carve.
Hearts and circles are beginner-friendly shapes since they have no sharp corners to snap. For the laughing-crying face, carve the classic squinted eyes and add teardrop shapes etched (not cut through) below each eye so they glow blue-white if you drop in a color-changing LED. Teens love these — they're the rare pumpkin carving designs that feel current rather than traditional. Carve a row of three different emojis on medium pumpkins and line them up like a text message thread across your porch railing.
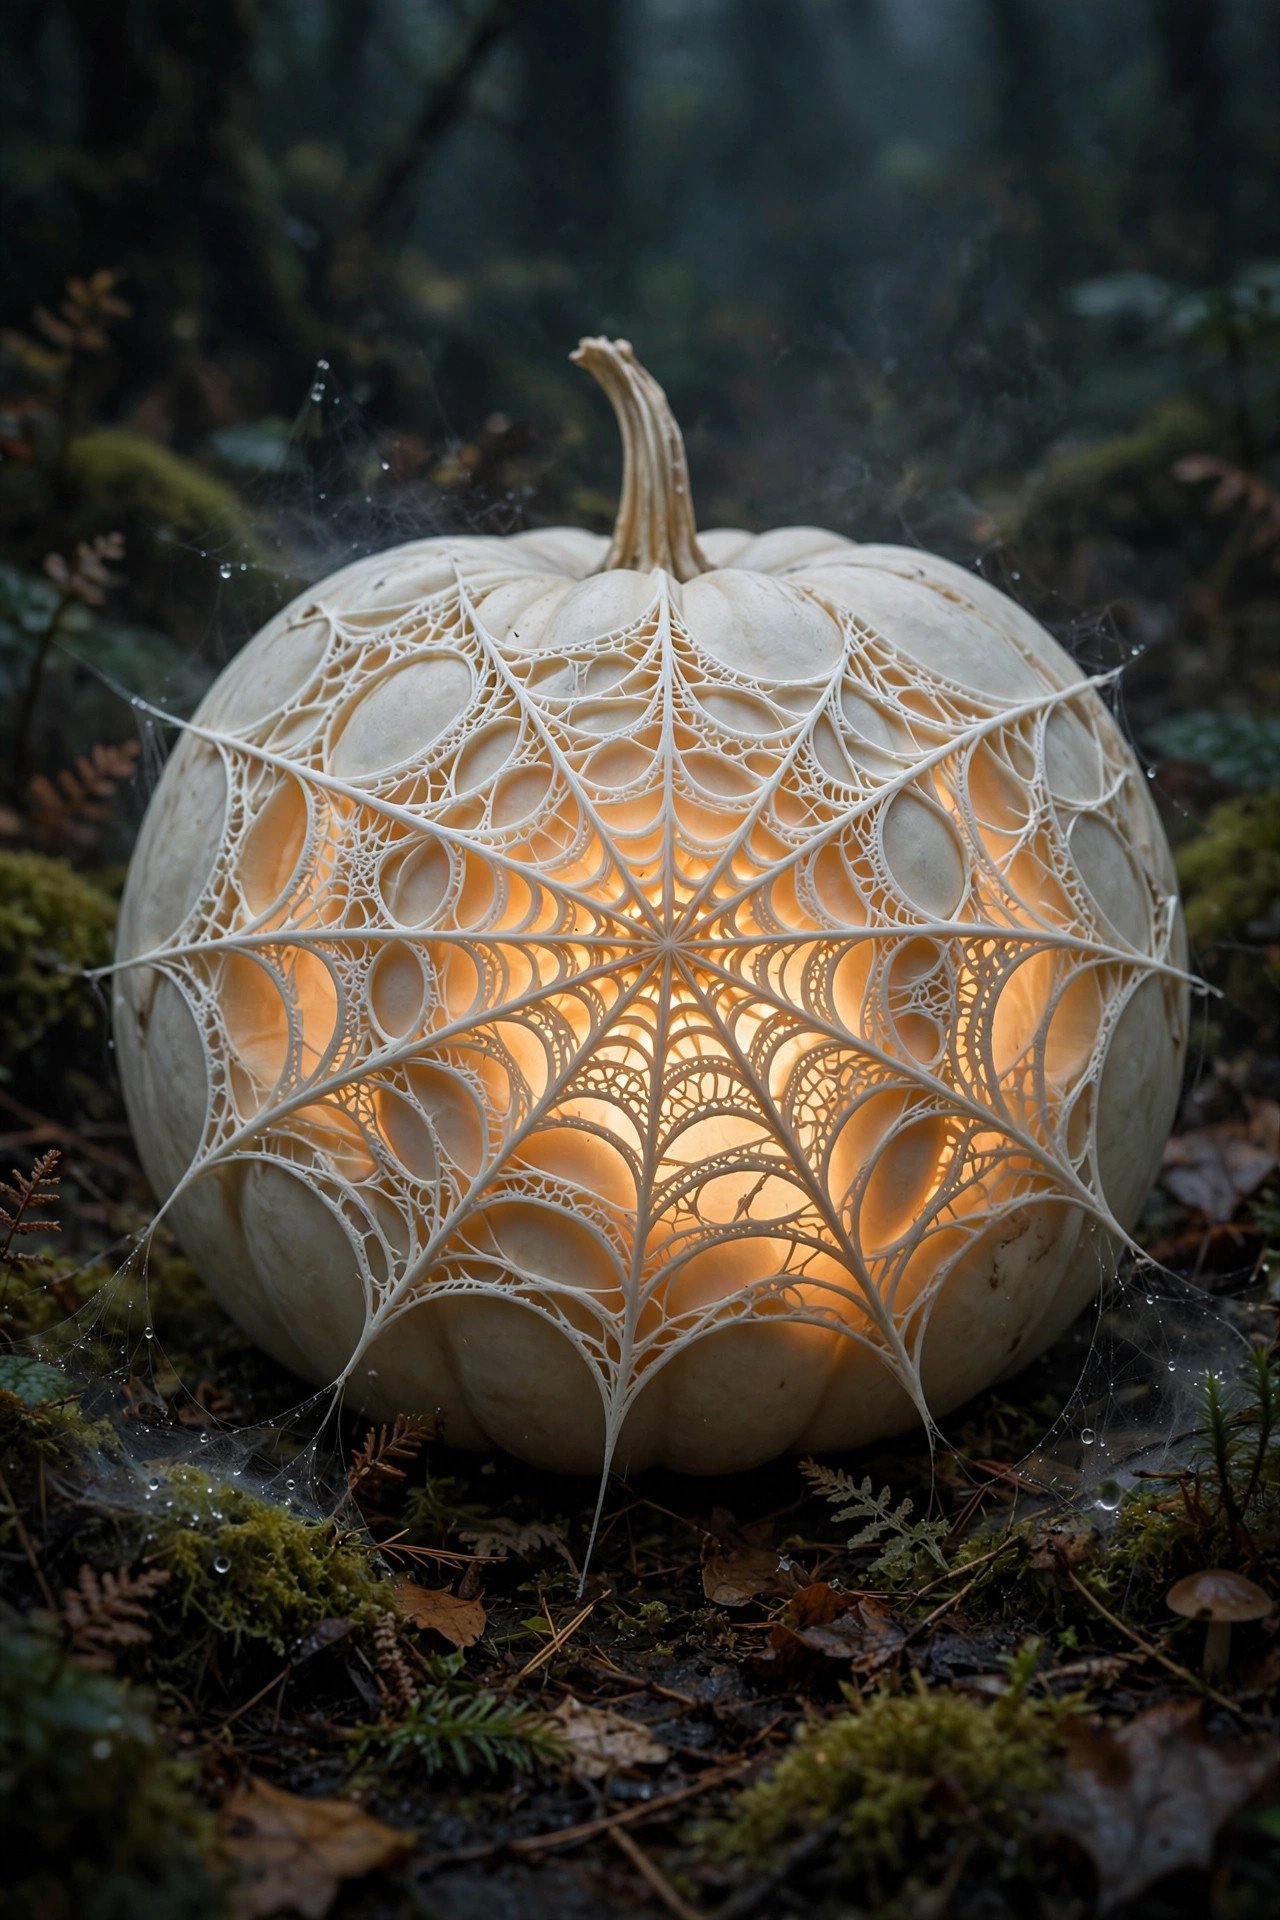
12. How Do You Carve a Spider Web Design?
A spider web pumpkin carving uses radial lines and concentric arcs — draw a central point and carve straight spokes outward, then connect them with curved arcs between spokes, cutting only the arcs through and leaving the spokes as thin glowing lines. The result is a delicate web that glows like lace when lit. Add a small plastic spider (craft store, a few dollars) perched on top with hot glue for the full effect.
Precision matters more than speed here: use a thin, sharp carving saw and cut slowly, because the thin web strands snap easily if you rush. A white or pale-green pumpkin makes the web look especially eerie, like a web in moonlight. This is one of the most elegant spooky pumpkin carving ideas — it reads as haunted-mansion chic rather than cartoon-scary, which makes it perfect for an [elegant Halloween porch](https://nestdecorz.com/22-halloween-porch-decor-ideas-for-a-spooky-stylish-entry/) where you want atmosphere without gore.
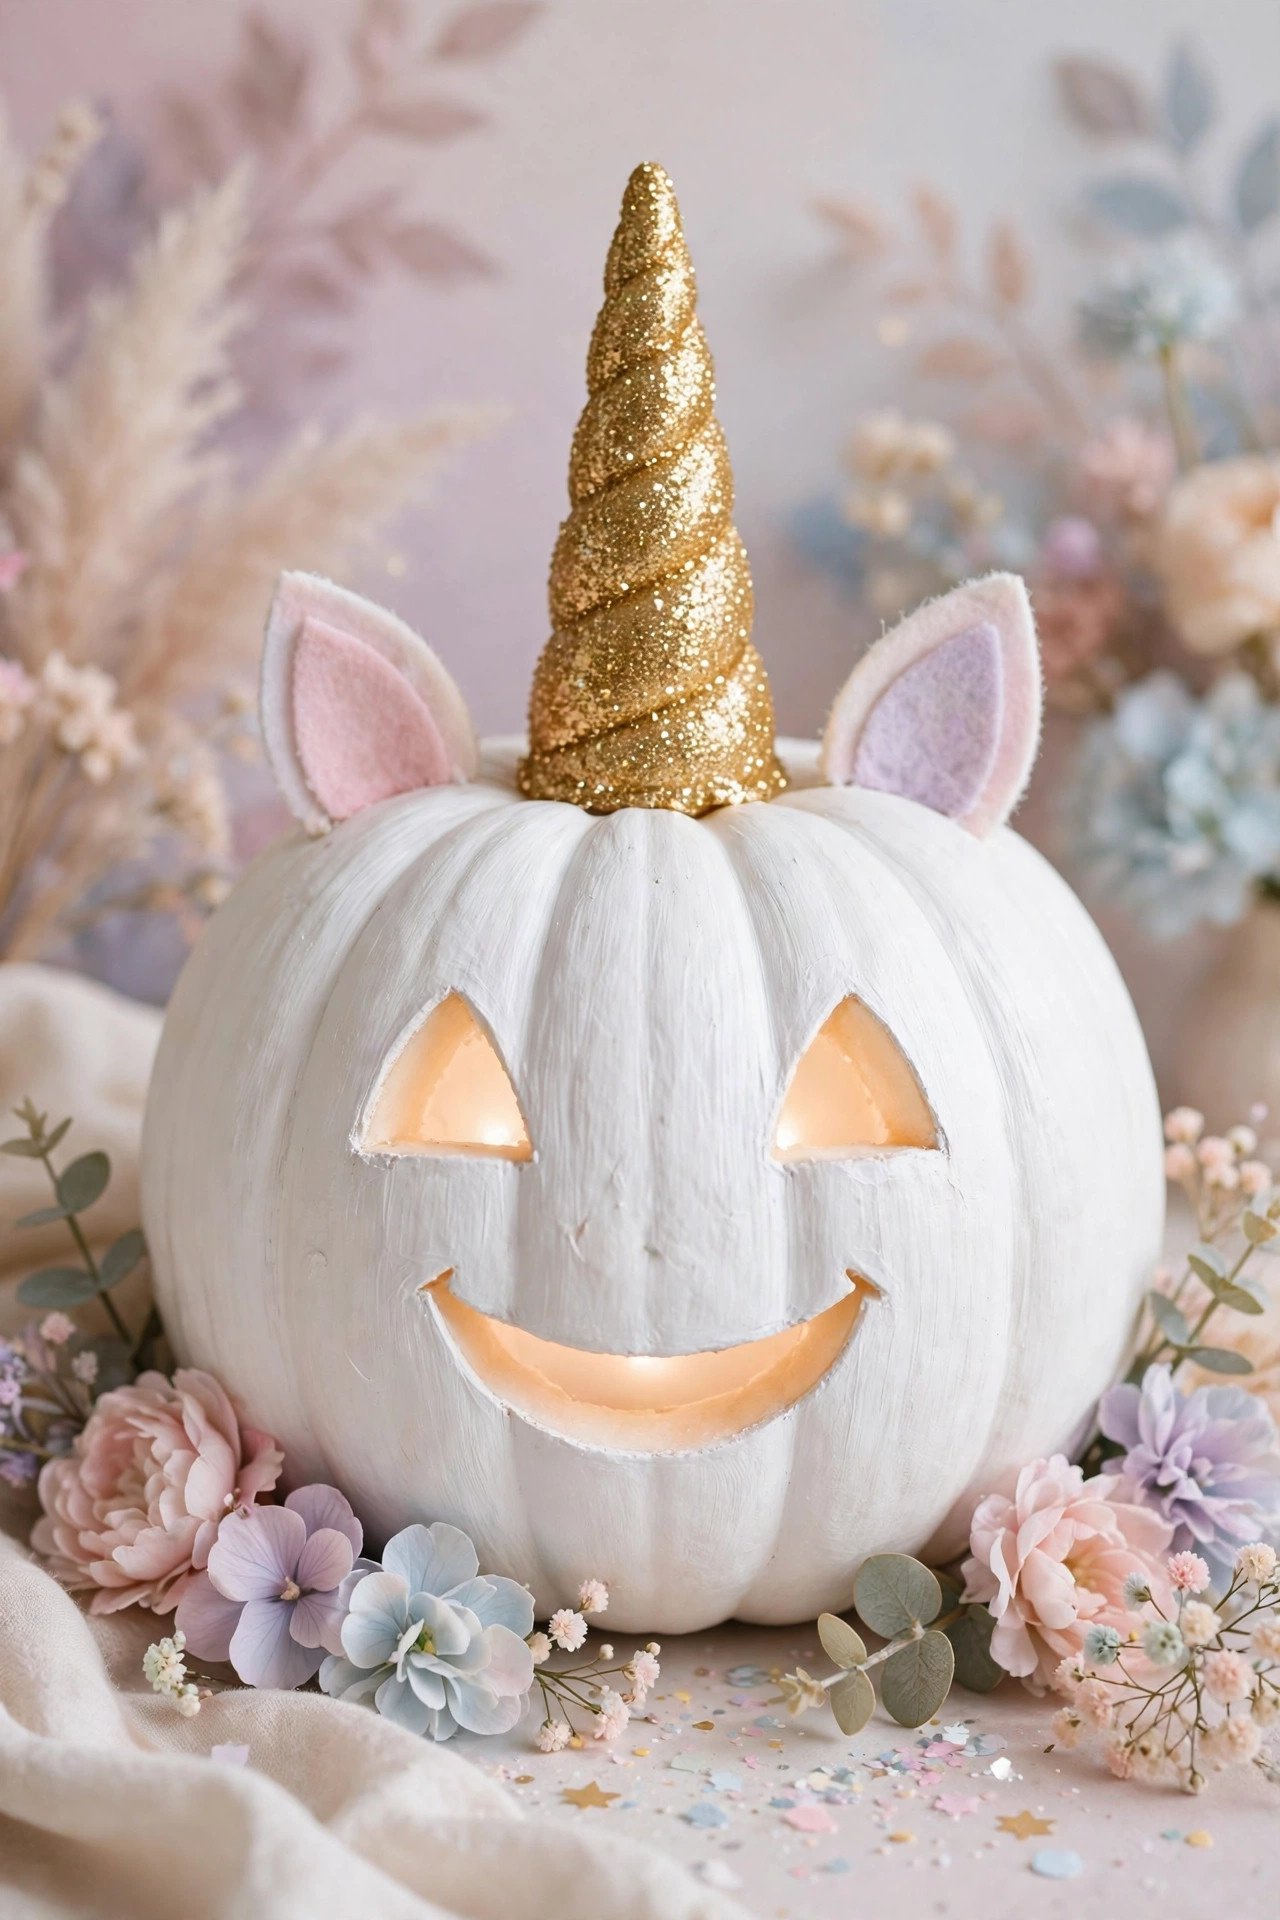
13. What's a Unique Pumpkin Carving Idea Nobody Else Has?
A unicorn pumpkin is a genuinely unique pumpkin carving idea: carve a sweet smiling face, then add a glittery gold horn (a paper cone wrapped in gold foil, pinned into the top) and pastel painted mane swirls around the face. The contrast between the traditional carved jack-o'-lantern face and the fantasy horn is unexpected and delightful — it's the pumpkin equivalent of a plot twist.
Paint the pumpkin white or pastel pink first with acrylic craft paint (let it dry fully before carving the face), then carve simple happy features. Add stick-on gems around the eyes for extra sparkle. This design dominates at kids' Halloween parties because it's the anti-scary pumpkin — proof that pumpkin carving ideas can be magical instead of macabre. It also photographs beautifully for Pinterest, which matters if you're sharing your work. Budget about 45 minutes plus paint drying time.
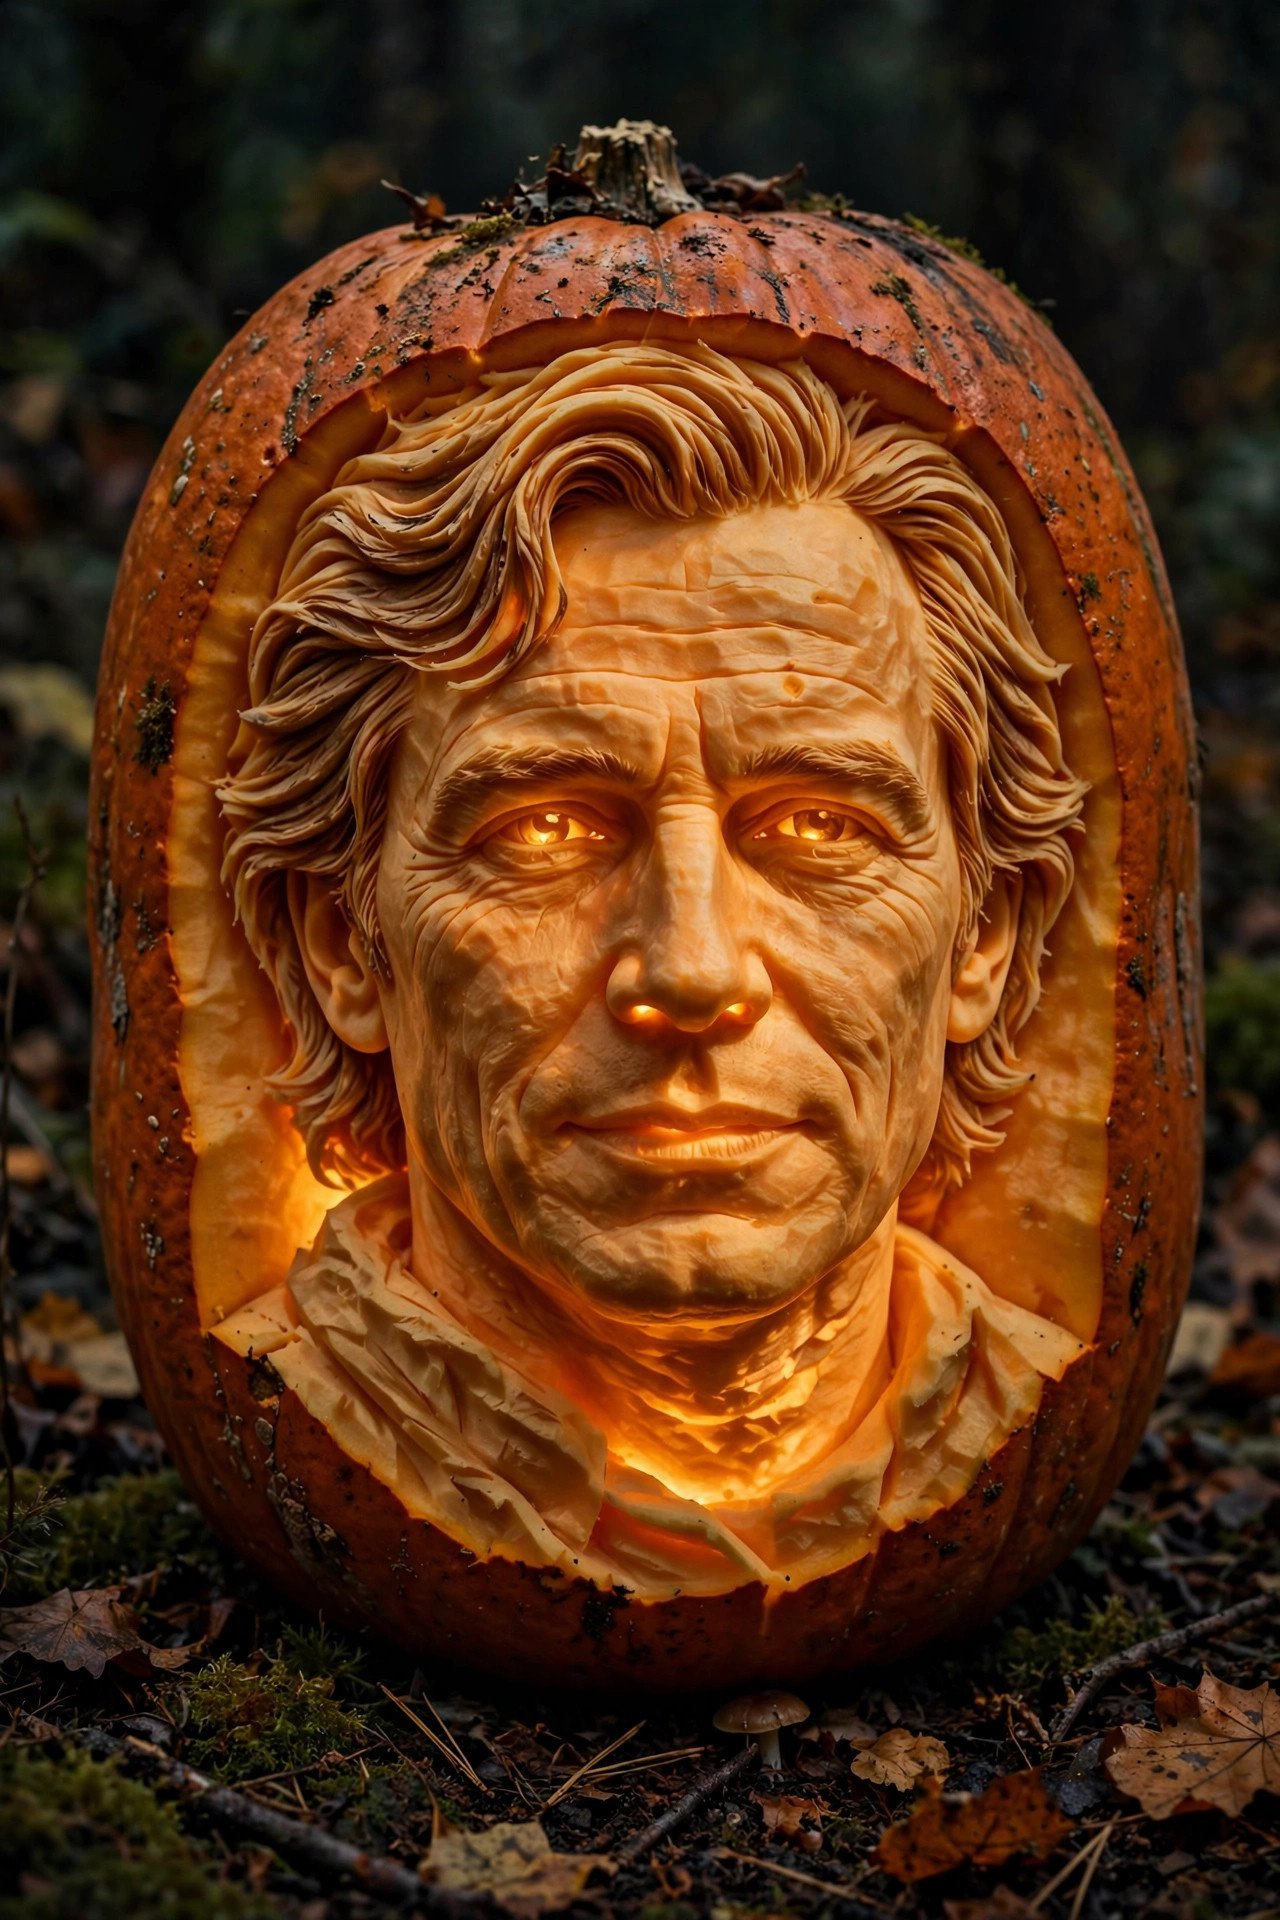
14. What Is Layered Shading in Creative Pumpkin Carving?
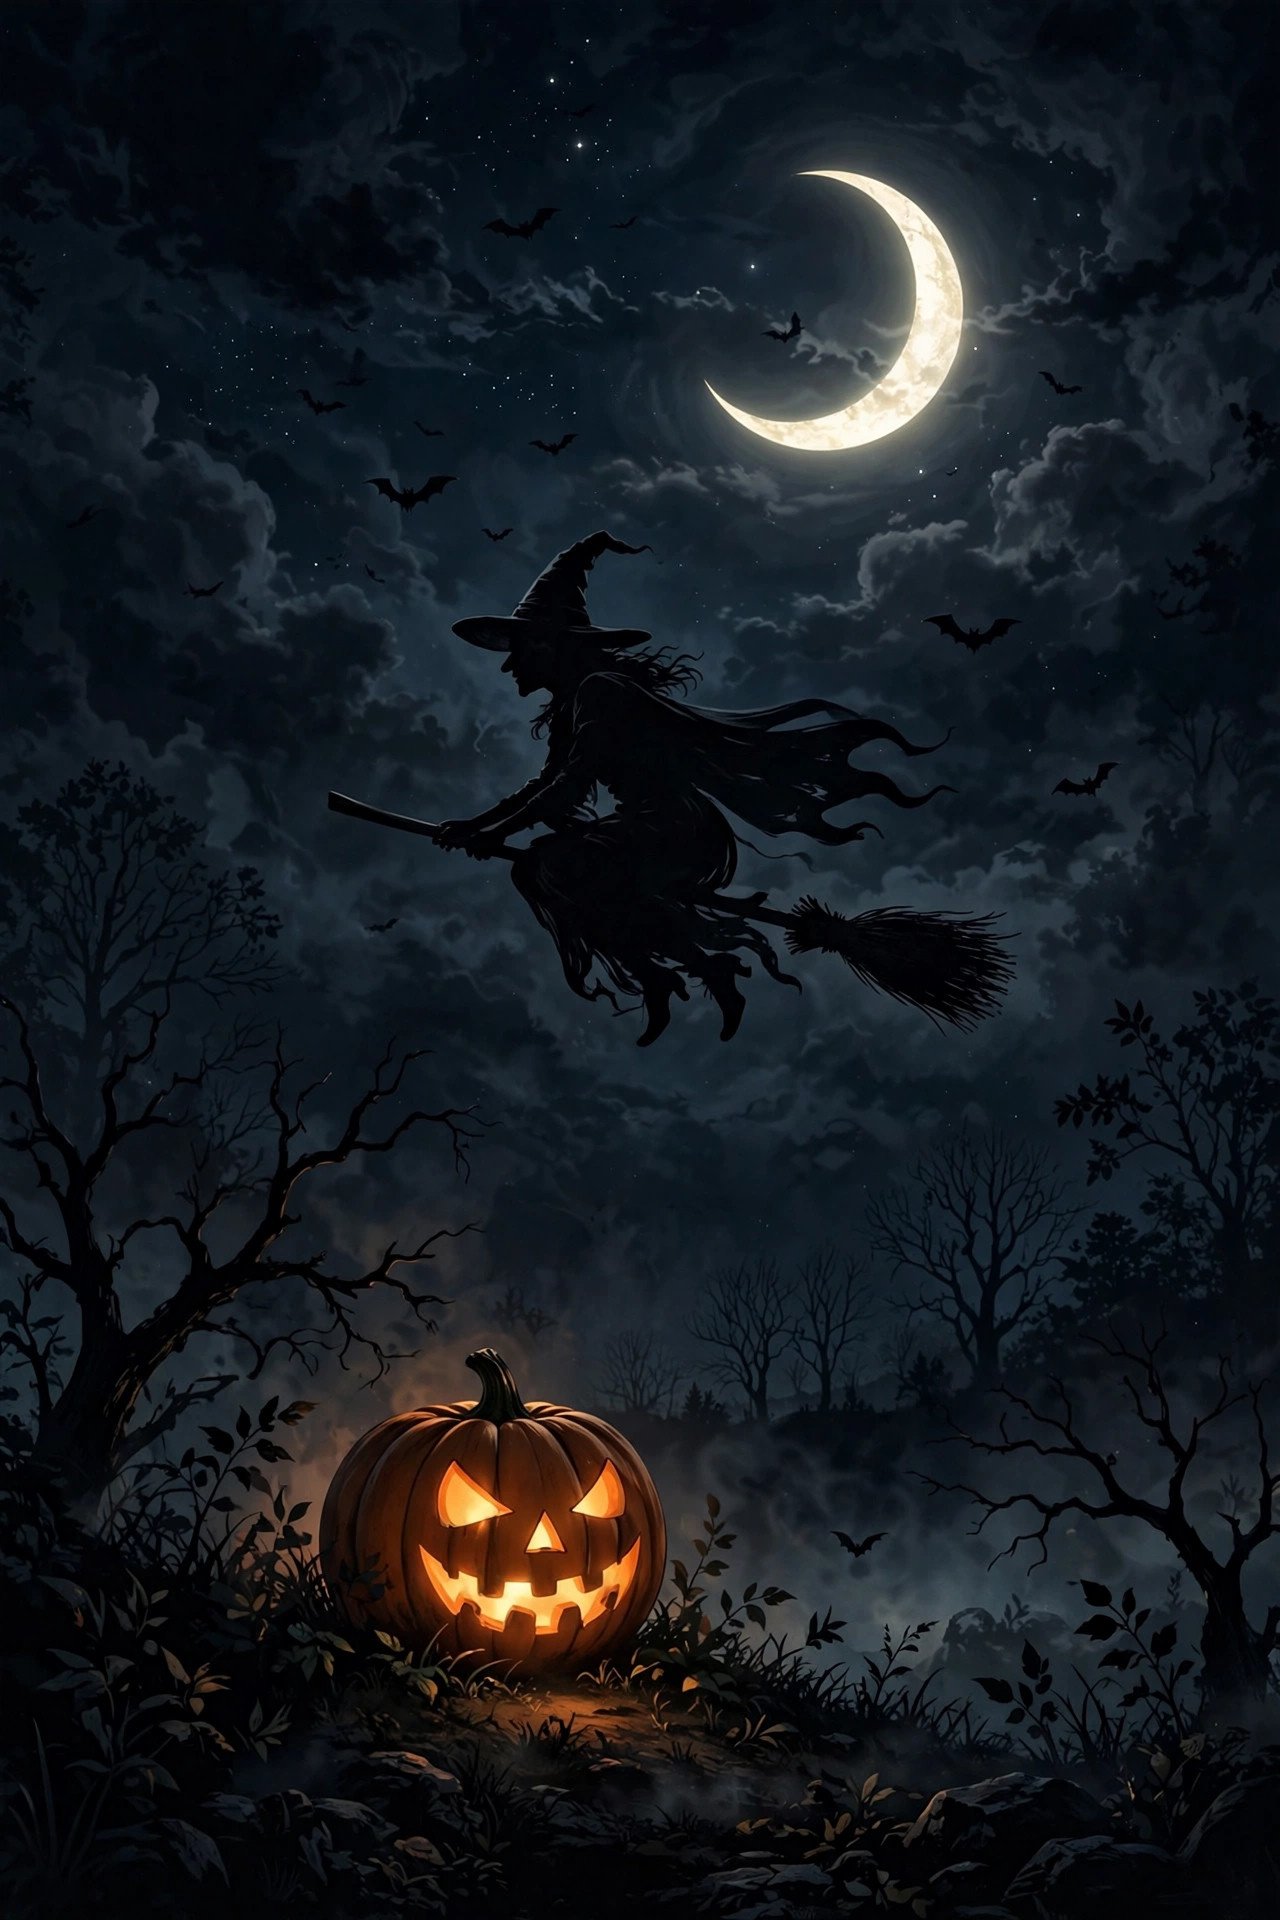
Layered shading is the most advanced creative pumpkin carving technique: instead of cutting all the way through, you carve to three different depths — full cut-through for the brightest areas, half-depth for mid-tones, and surface-skin removal for the softest glow. This creates a photographic, shaded portrait effect, like a lithophane. A face, a wolf, or a moonlit tree rendered this way looks impossibly detailed.
You need a linoleum cutter or wood-carving gouge set (about $15) plus patience — plan 2–3 hours. Print your design, transfer it, then work from the deepest cuts outward, constantly holding a flashlight inside to check your progress. Thick-walled pumpkins (Howden or Cronus varieties — see [BHG's pumpkin variety guide](https://www.bhg.com/types-of-halloween-pumpkins-12134919) for the best carving types) give you the most depth to work with. This is the technique behind those jaw-dropping carved pumpkins that go viral every October — it's the ceiling of what pumpkin carving designs can achieve.
15. How Do You Carve a Witch Silhouette on a Pumpkin?

A witch-on-broomstick silhouette is a classic spooky pumpkin carving idea: draw the witch's profile — pointed hat, flowing cape, broomstick angled beneath — then carve the sky away around her so she remains as a solid dark shape against the glow. The silhouette technique is forgiving because wobbly edges read as motion and atmosphere rather than mistakes.
Use a printed witch stencil (free ones are everywhere online) and the pinprick transfer method. A tall pumpkin gives the witch room to "fly" with space above and below. Carve a crescent moon in the upper corner as a cut-through shape for contrast — the bright moon against the dark witch silhouette is the money shot. This design looks best from a distance, making it ideal for a [spooktacular front yard display](https://nestdecorz.com/22-outdoor-halloween-decor-ideas-for-a-spooktacular-yard/) where trick-or-treaters see it from the sidewalk. Allow a full hour; silhouettes have lots of small cut-outs.
16. Can You Carve Letters and Monograms on Pumpkins?
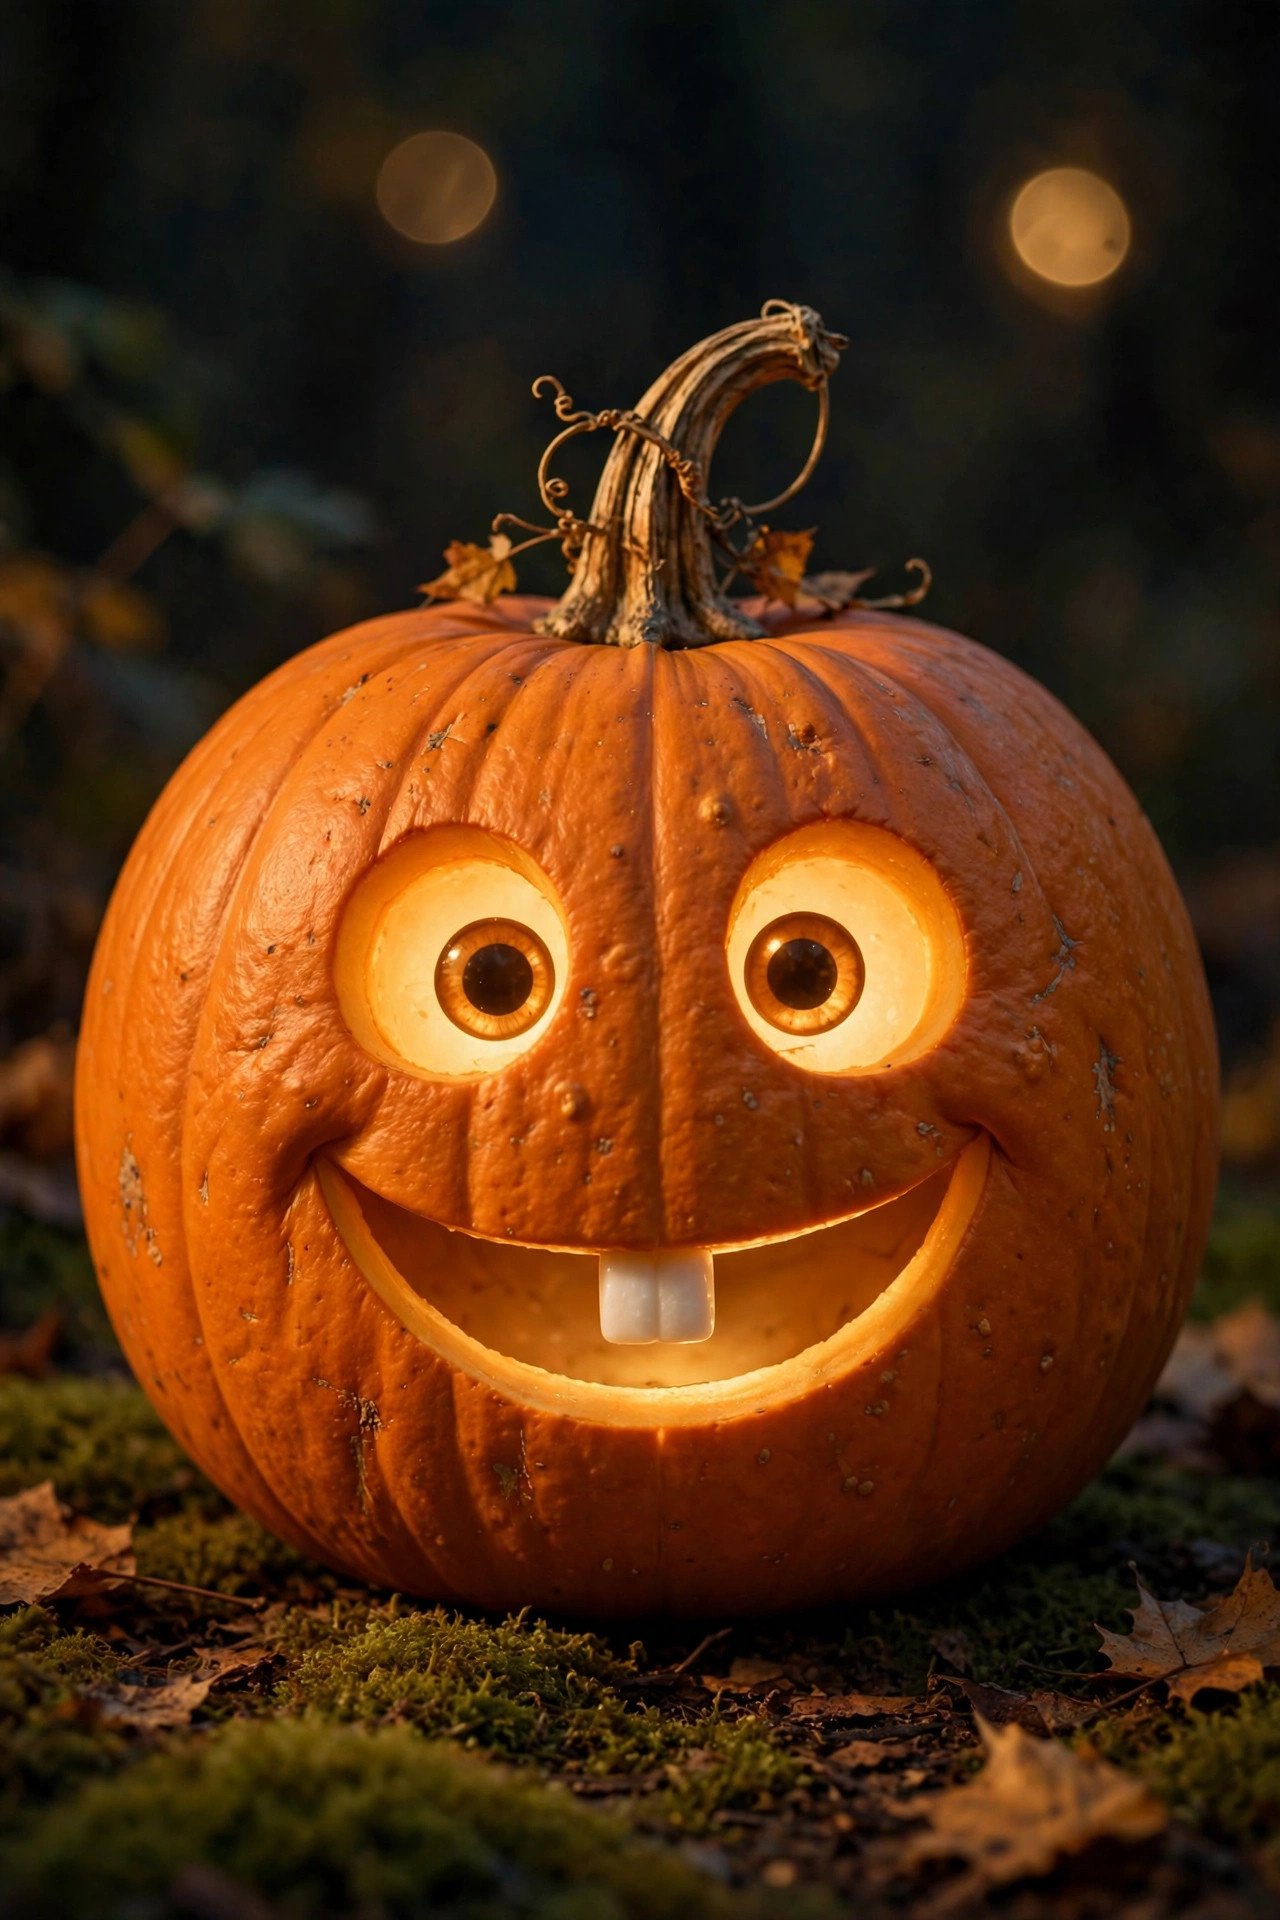
Monogram pumpkins are unique pumpkin carving ideas with a personal touch: carve your family initial in an elegant serif font, surrounded by a carved laurel or vine border. Print the letter large, transfer it, and carve the letter as a cut-through while etching the decorative border (surface-only) for a two-tone glow. The letter blazes bright; the border glimmers softly.
This is the pumpkin carving equivalent of a monogrammed doormat — it personalizes your porch in a way no store-bought decoration can. Use a foam brush to rub a thin layer of petroleum jelly into the carved letter to keep the edges from browning. Serif fonts carve more cleanly than script fonts (fewer hairline strokes to snap). These make stunning housewarming or host gifts during Halloween season, and they photograph beautifully for holiday cards. One large pumpkin with a single bold initial beats a cluttered design every time.
17. What's the Funniest Simple Face to Carve?
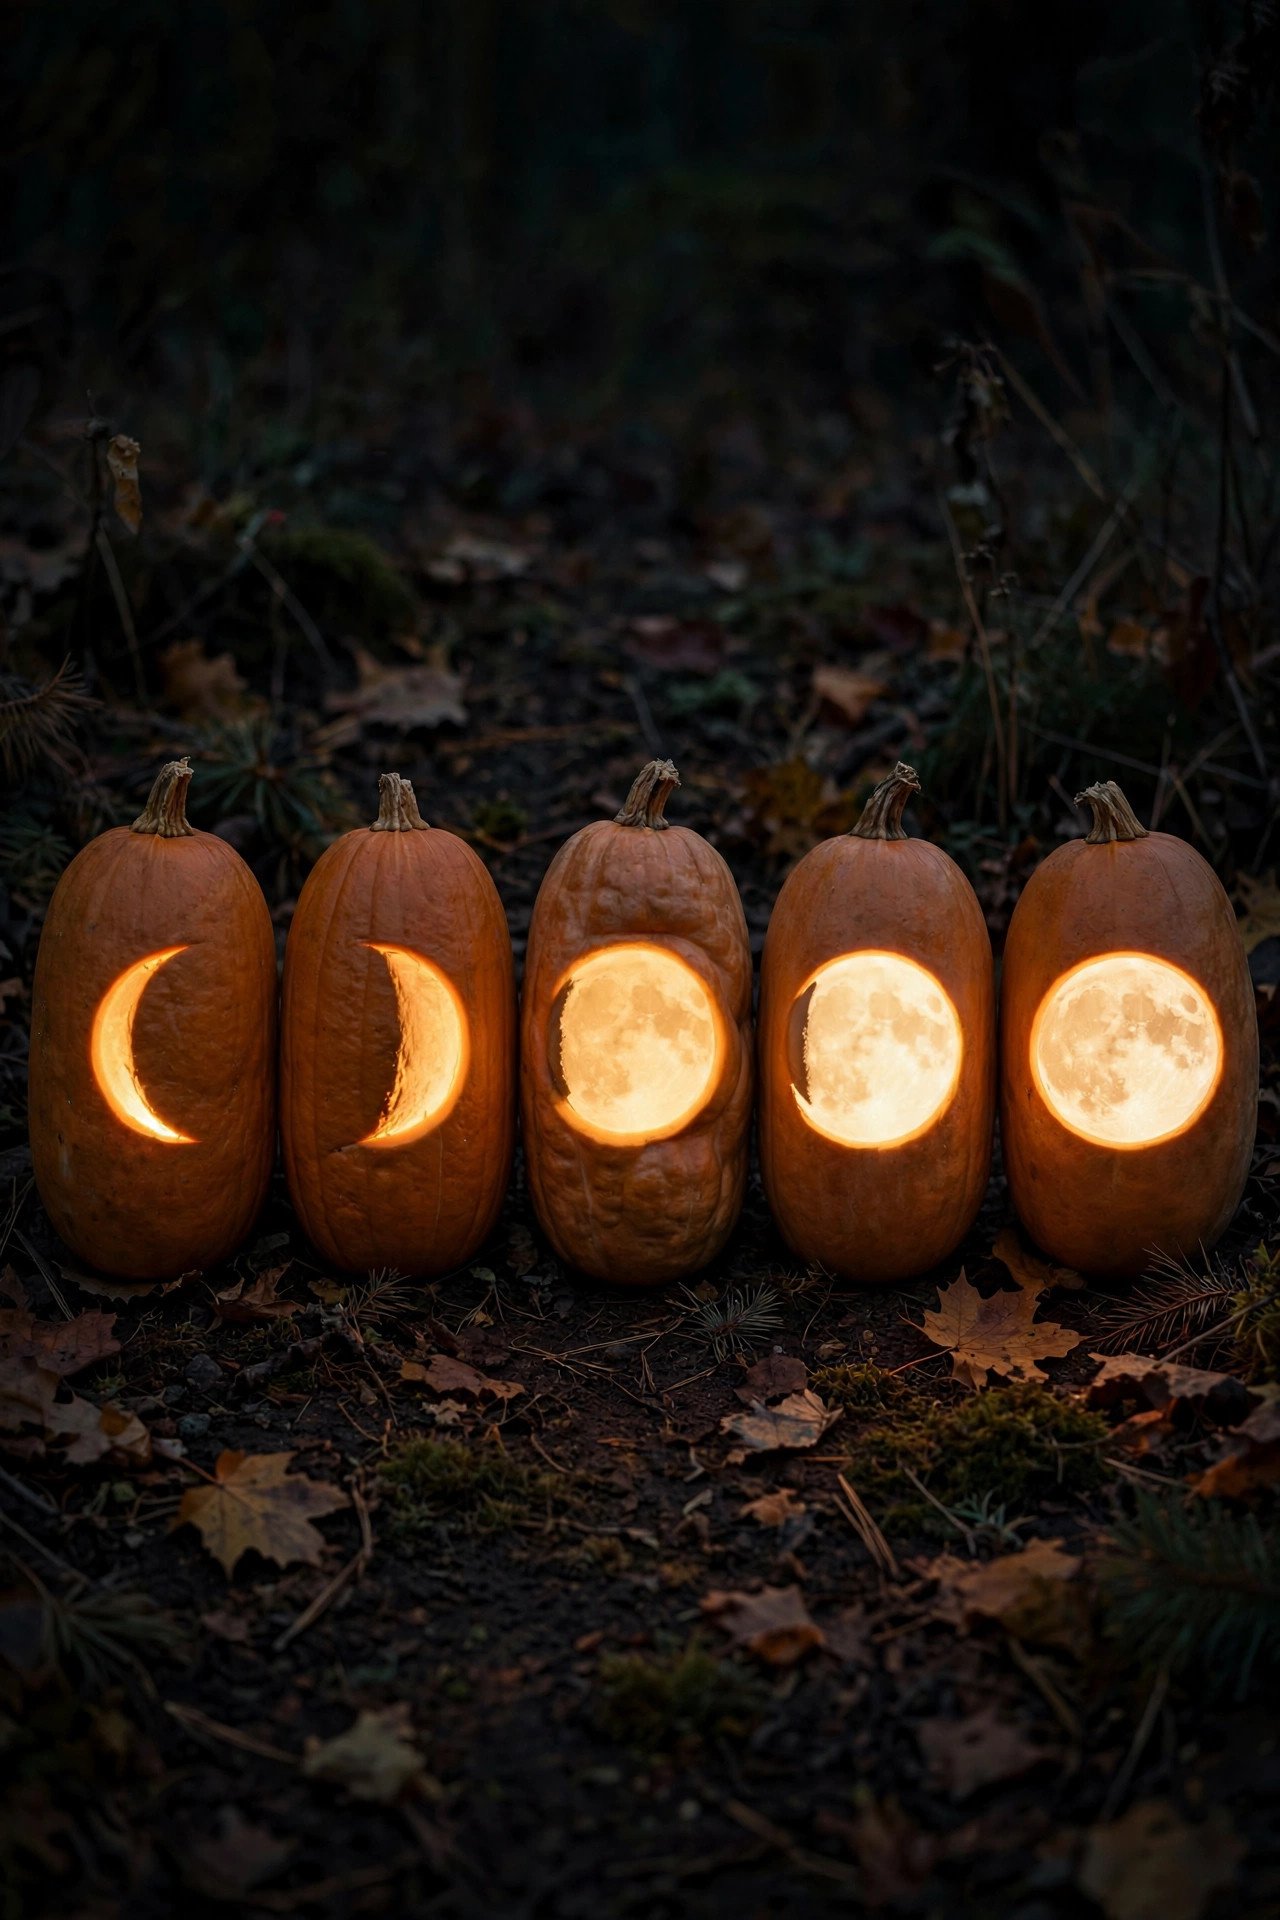
The one-tooth grin is the funniest simple pumpkin carving idea: carve two round friendly eyes, then a wide smile with a single square tooth left standing in the middle. That lone tooth — slightly off-center is even better — transforms an ordinary jack-o'-lantern into a goofy character with personality. It's the pumpkin equivalent of a kid losing their front teeth.
The technique is dead simple: draw the full grin, then draw the tooth as a rectangle bridging the upper and lower lip lines, and carve around it carefully so the tooth stays connected at the top. Kids find this design hilarious, and it's nearly impossible to mess up — even a wobbly tooth looks intentional. Pair it with a crooked stem (choose a pumpkin with a naturally bent stem) for maximum character. This is the design to carve when you want laughs in under 25 minutes.
18. How Do You Carve Moon Phases on a Pumpkin?
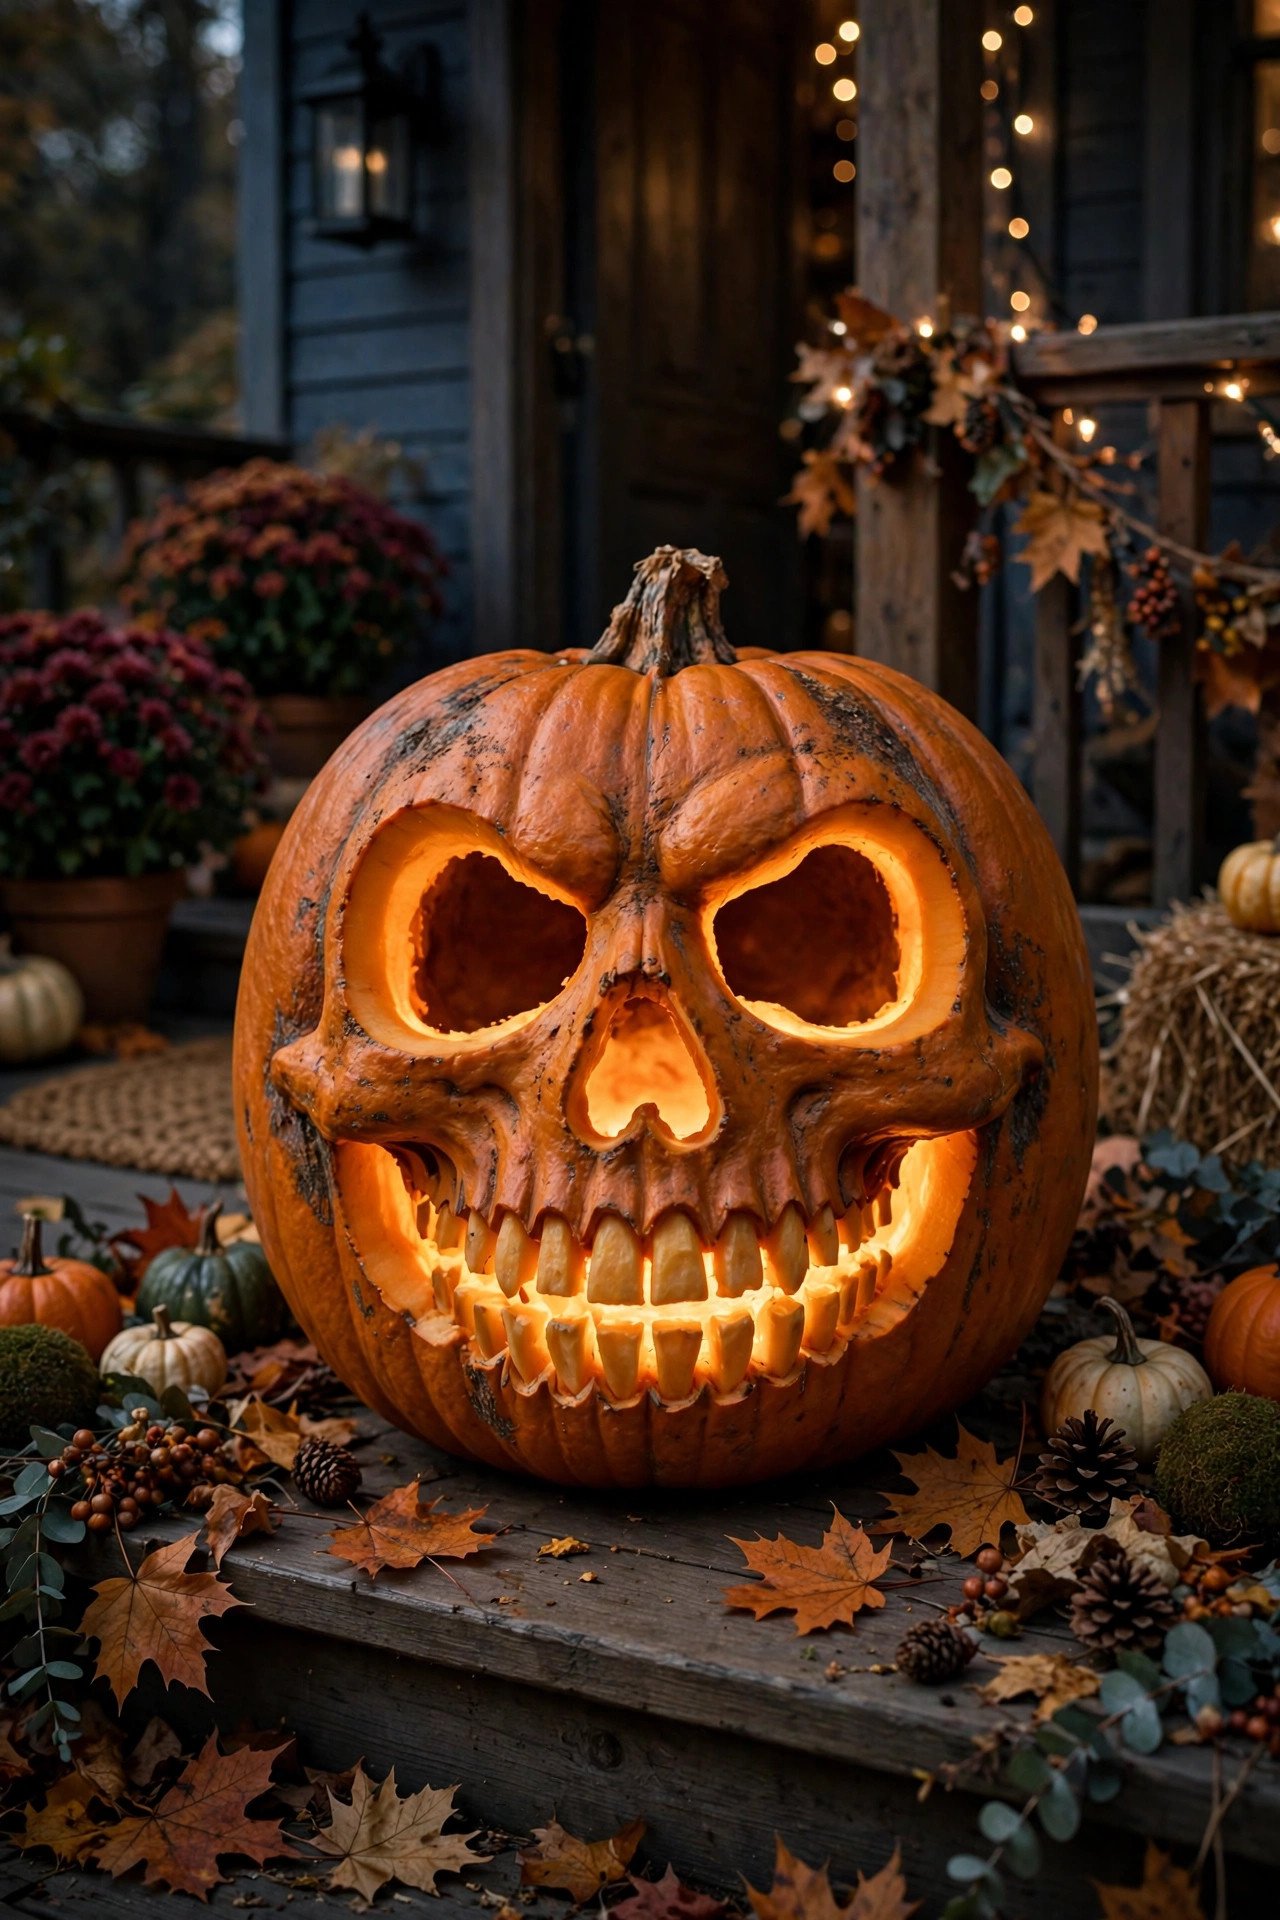
A moon-phase row is a creative pumpkin carving idea that's secretly simple: carve five circles in a horizontal line, then etch (surface-scrape) portions of each to show the phases — full moon cut clean through, crescent as a thin carved sliver, new moon left completely uncarved. The progression from dark to blazing across the pumpkin is mesmerizing when lit.
Use a round cookie cutter or jar lid to trace perfect circles, then a small spoon to scrape the etched phases. This design suits long, oblong pumpkins better than round ones — the horizontal layout needs width. It's one of the most sophisticated simple pumpkin carving ideas: minimal cutting, maximum visual impact, and it appeals to the celestial-decor crowd that loves moon-phase wall art. Space the moons evenly and keep them the same size; consistency is what makes the phases read clearly from across the porch.
19. How Scary Can a Skull Pumpkin Carving Get?
A skull pumpkin carving goes full haunted-house: carve large hollow eye sockets, a nasal cavity triangle, and a grinning jaw with individual teeth separated by thin carved lines. The teeth are the make-or-break detail — carve them as vertical slits in the lower face, leaving thin rind strips between them that glow like fangs. The more teeth, the scarier.
Choose the largest pumpkin you can find; skulls need real estate for the teeth to read clearly. Thin the entire face area to half an inch so the teeth glow brightly — dim teeth look muddy, bright teeth look menacing. For extra horror, drip fake blood (red craft paint) from the mouth corners and let it dry before displaying. This is the design for the house that goes all-out — pair it with fog machines and strobe lights for a genuinely frightening [Halloween entryway](https://nestdecorz.com/22-halloween-entryway-decor-ideas-for-a-spooky-welcome/) that older trick-or-treaters will remember for years.
20. Are Ladybug Pumpkins a Cute Carving Idea for Kids?

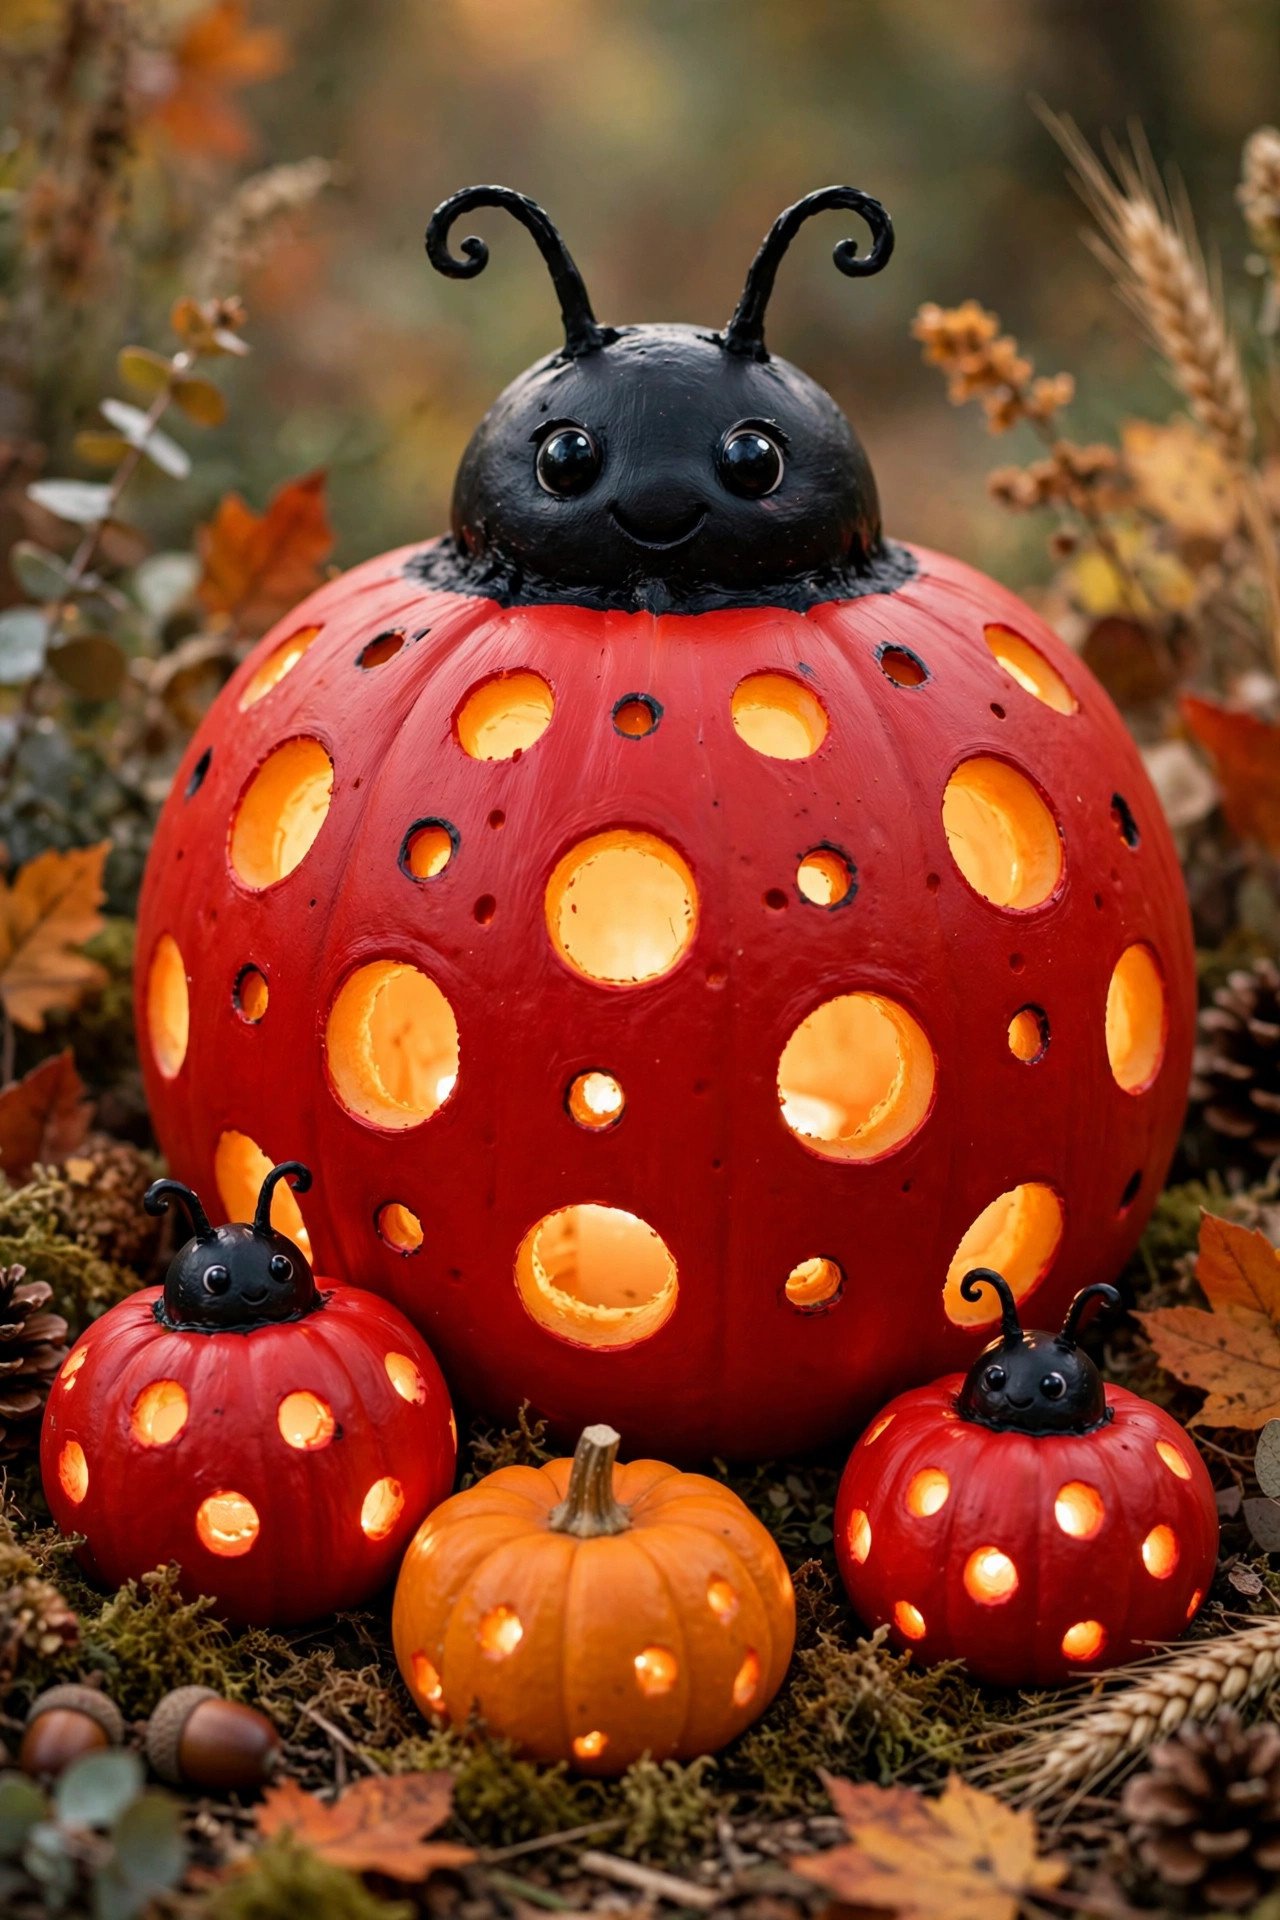
Ladybug pumpkins are adorable cute pumpkin carving ideas and perfect for toddlers: paint the pumpkin red, carve a black head semicircle at the top, then punch spots with a melon baller — the glowing spots against the red paint look exactly like a ladybug's shell. No scary elements whatsoever, which makes it ideal for preschool Halloween parties.
The paint-first approach is key: two coats of red acrylic, fully dry, then carve. The black head can be painted on rather than carved (less cutting, more kid-safe), while the punched spots provide the glowing effect. Add pipe-cleaner antennae poked into the top for a 3D touch. This is one of the easiest pumpkin carving ideas that still looks impressive — the color contrast does all the work. Mini pumpkins work wonderfully as a ladybug family: one large mama ladybug surrounded by baby ones on the porch steps.
21. What Is a Pumpkin Diorama Carving?
A pumpkin diorama is the most unique pumpkin carving idea on this list: instead of carving a face, you cut a large window into the front of the pumpkin and build a tiny scene inside — a miniature haunted house, a graveyard with tiny tombstones, or a forest of twig trees with cotton-ball ghosts. Light it from within and the window becomes a glowing shadowbox theater.
Cut the window as a large arch or rectangle, scoop the pumpkin completely clean, then arrange your scene on the inner floor: bottle-cap tombstones, twig trees glued to the base, a tiny LED string for starlight. The scene is viewed through the window, so build it facing forward. This creative pumpkin carving idea takes 1–2 hours but produces something no one has seen before — it's the pumpkin equivalent of a dollhouse. Kids can help build the scene (no knives needed for the interior decorating), making it a great family project.
22. How Do You Create a Galaxy Swirl Pumpkin?
A galaxy swirl is a cool pumpkin carving idea for the space-obsessed: drill swirling constellations of tiny holes radiating from a carved spiral center, then add a few cut-through stars for brightness anchors. The drilled holes create a nebula effect — hundreds of tiny lights swirling around the pumpkin like a distant galaxy. Use a printed spiral galaxy image as your drilling guide.
Combine techniques for depth: drill the star field, carve the spiral arms as shallow etched curves (surface-only, glowing softly), and cut three or four larger stars all the way through for bright focal points. Drop in a color-changing LED and the galaxy shifts through purples, blues, and pinks — genuinely magical. This is one of the most creative pumpkin carving designs for teens and adults who've outgrown traditional faces. It takes about an hour of drilling, and the result looks like you captured deep space in a gourd.
Pro Pumpkin Carving Tips That Make Every Design Better
### How Do You Keep a Carved Pumpkin Fresh Longer?
Carve 1–2 days before Halloween — a carved pumpkin lasts 3–5 days in cool weather. Rub petroleum jelly into every cut edge to seal in moisture, store in a cool shaded spot (never direct sun), and spritz carved areas with water daily.
### What Tools Do You Actually Need for Pumpkin Carving?
A basic serrated pumpkin-carving kit ($8–12) covers 90% of designs. Add a dry-erase marker for sketching, a melon baller for perfect circles, and a cordless drill with small bits for dot patterns. Skip giant kitchen knives — the top cause of carving injuries. For advanced layered shading, add a linoleum cutter set.
### Should You Use Real Candles or LED Lights Inside?
Use flameless LED tea lights or fairy light strings — full stop. Real candles are a fire hazard inside dried-out pumpkins, especially around dry leaves, costumes, and pets. Modern warm-white LEDs mimic candle flicker convincingly and won't scorch the inner walls. Save real candles for your [Halloween tablescape](https://nestdecorz.com/22-halloween-tablescape-ideas-for-a-spooky-dinner-party/) where you can watch them.
### Which Pumpkin Varieties Are Best for Carving?
Choose pumpkins with thick walls and a flat face: Howden and Cronus are the classic carving varieties, while white Lumina pumpkins look ghostly and etch beautifully. Avoid soft spots or mold near the stem — they rot fast once carved. For the full breakdown of carving varieties, [BHG's pumpkin variety guide](https://www.bhg.com/types-of-halloween-pumpkins-12134919) is the best reference.
Pumpkin Carving FAQs
### What are the easiest pumpkin carving ideas for beginners?
The easiest pumpkin carving ideas are polka dots (melon baller holes), the classic triangle-face jack-o'-lantern, and star/moon patterns traced with cookie cutters. These need only a serrated knife and 20–30 minutes. Avoid intricate silhouettes and thin details until you've carved two or three simple designs — the rind snaps easily on delicate cuts.
### How do you transfer a stencil design onto a pumpkin?
Print the stencil to fit your pumpkin's face, tape it on, then poke holes along every line with a nail or pushpin. Remove the paper and connect the dots with a dry-erase marker. This pinprick method works on curved surfaces where tracing fails. For detailed free stencils, [BHG's cat pumpkin stencils](https://www.bhg.com/halloween/pumpkin-carving/pumpkin-stencils-of-favorite-cat-breeds/) show the technique well across 14 designs.
### How long does a carved pumpkin last?
A carved pumpkin lasts 3–5 days in cool (50–60°F) weather. Heat, sun, and rain shorten that to 1–2 days. Petroleum jelly on cut edges, cool storage, and carving 1–2 days before Halloween maximize its life. Uncarved pumpkins last 6–8 weeks, so buy early and carve late.
### Can kids safely participate in pumpkin carving?
Yes — kids can draw designs, scoop guts, punch dots with a melon baller, paint, and place LED lights. Adults should handle all knife and drill work; no-carve designs (painted faces, googly eyes, stacked pumpkins) are fully kid-safe alternatives. Always use flameless LEDs, never real candles, when kids are involved.
### What's the difference between carving and etching a pumpkin?
Carving cuts all the way through the rind so light shines through the opening; etching removes only the outer orange skin, letting light glow softly through the pale flesh beneath. Etching creates subtle, shaded effects (ghost faces, borders, textures) while carving creates bold bright shapes. The best creative pumpkin carving designs combine both for layered depth.
Final Thoughts
These 22 pumpkin carving ideas prove there's a perfect design for every skill level and style — from the 20-minute polka dot pumpkin to the gallery-worthy layered shading portrait. The Pinterest trend data doesn't lie: with saves up 200%, carved pumpkins are the Halloween decoration people want most right now, and with October 31 just days away, tonight is the perfect night to carve.
Pick one design that made you smile, grab a serrated knife and a dry-erase marker, and remember the golden rules: thin walls, petroleum jelly on the cuts, LED lights inside, and carve 1–2 days before the big night. Your porch is about to become the most photographed on the block.
You May Also Like:
– [22 Halloween Porch Decor Ideas for a Spooky Stylish Entry](https://nestdecorz.com/22-halloween-porch-decor-ideas-for-a-spooky-stylish-entry/) — style your carved pumpkins into a full porch display – [22 Halloween Mantel Decor Ideas for a Haunted Fireplace](https://nestdecorz.com/22-halloween-mantel-decor-ideas-for-a-haunted-fireplace/) — bring the Halloween glow indoors – [22 Outdoor Halloween Decor Ideas for a Spooktacular Yard](https://nestdecorz.com/22-outdoor-halloween-decor-ideas-for-a-spooktacular-yard/) — take the spooky beyond the porch – [22 DIY Halloween Decorations on a Budget That Look Expensive](https://nestdecorz.com/22-diy-halloween-decorations-on-a-budget-that-look-expensive/) — more budget-friendly Halloween crafts