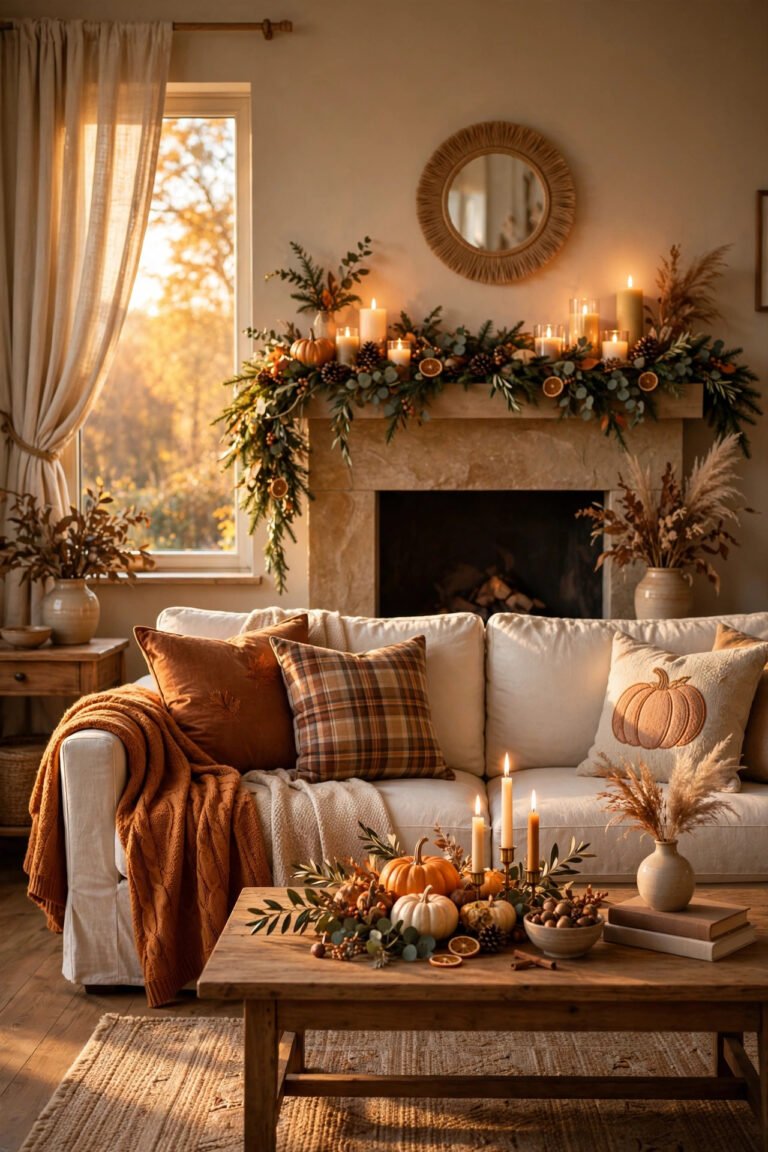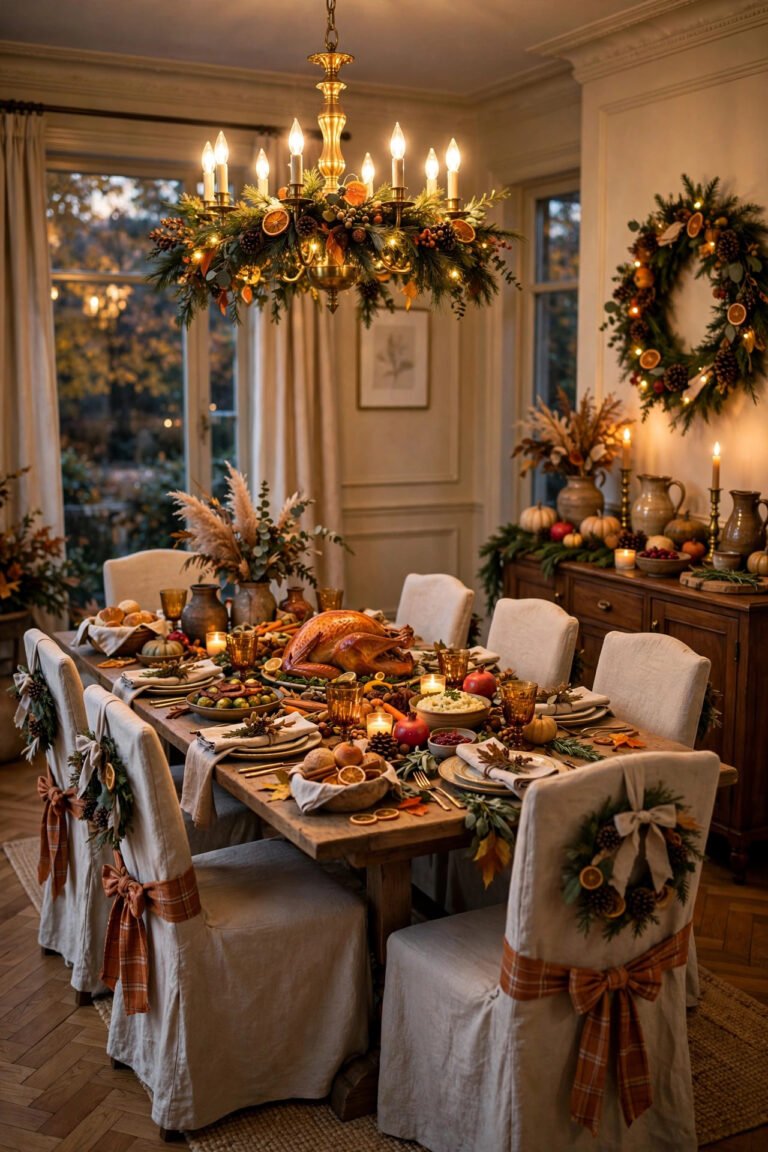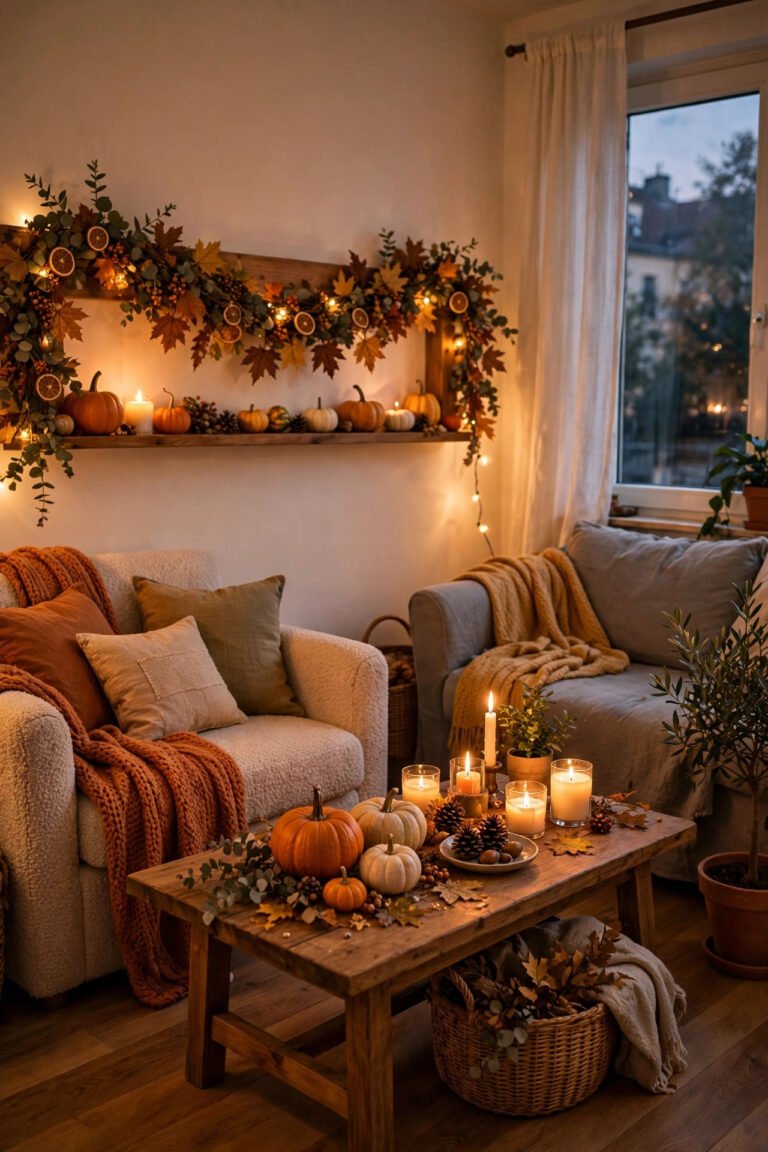
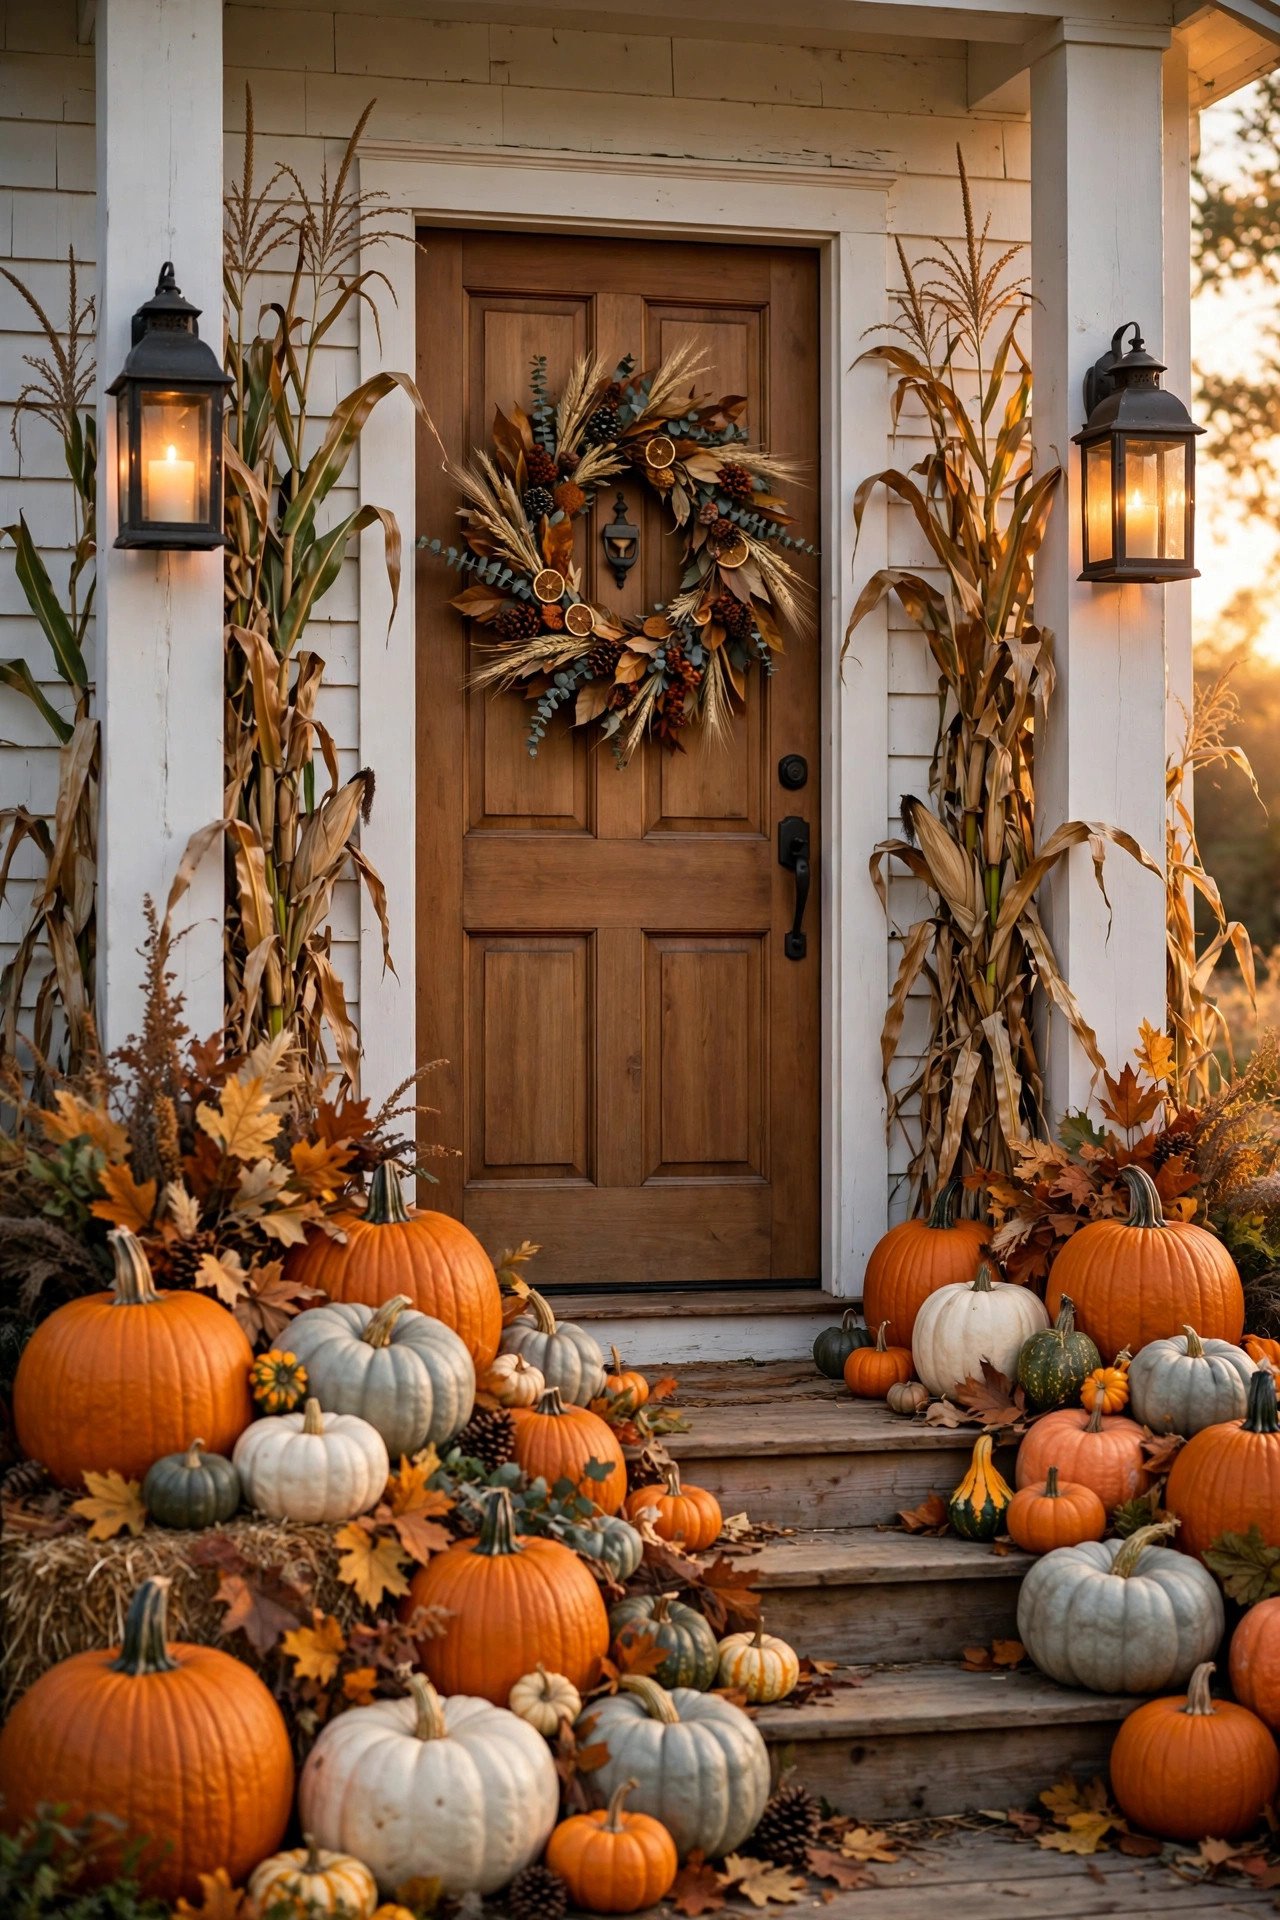
22 Thanksgiving Front Porch Decor Ideas for a Warm Welcome
Your front porch is the first sentence of your Thanksgiving story — the moment guests arrive, before the turkey, before the hugs, the porch tells them what kind of evening this will be. Thanksgiving front porch decor is the art of styling that entryway with harvest-season pieces: pumpkins and gourds, cornstalks, mums, wreaths, lanterns, and warm lighting, all arranged to say welcome.
This guide goes beyond scattering a few pumpkins by the door. You'll learn the layered harvest-vignette system — odd-numbered heirloom pumpkin groupings, height building with crates and stools, cornstalk framing, and wreath-to-porch color continuity — plus how to transition the same porch from Halloween to Thanksgiving without rebuying anything. Twenty-two ideas, each with exact how-tos, budgets, and what to avoid.
Looking for more inspiration? Our Nest Decorz homepage gathers the latest home decor ideas, seasonal decorating guides and room-by-room styling tips in one place — start there and explore.
Quick Answers
– The formula that works: odd-numbered pumpkin groupings (3, 5, or 7) in mixed heirloom varieties, built up in height with crates and stools, framed by cornstalks at the door. – Color continuity matters: your wreath, doormat, and vignette should share 2-3 harvest colors (think burnt orange, deep burgundy, warm gold) so the porch reads as one design, not a pile of decorations. – Halloween-to-Thanksgiving is free: remove the spooky pieces, keep pumpkins, mums, lanterns, and cornstalks — the base stays, only the theme label changes. – Evening lighting seals it: 2700K warm-white fairy lights and flickering lanterns make the porch glow for arriving guests, when first impressions count most. – Small stoops can do all of this: scale the same system down with mini pumpkins (Jack-Be-Little), one crate, and a slim wreath.
1. How Do You Arrange Pumpkins in Odd-Numbered Variety Groupings?

Cluster pumpkins in odd numbers — three, five, or seven — mixing heirloom varieties like blue-gray Jarrahdale, burnt-orange Cinderella, and white Lumina, with miniature Jack-Be-Littles tucked into the gaps. Odd groupings look organic and deliberate at once, and variety mixing adds the color depth a single-variety pile never achieves.
Here's the exact method. Start with your anchor: the largest pumpkin (a Cinderella or a classic field pumpkin) placed slightly off-center of your vignette zone. Add a medium pumpkin — a Jarrahdale or Lumina — beside it, close enough that they nearly touch. Then fill gaps with two or three Jack-Be-Littles and small gourds at different angles, so no two pieces share the same sight line. Vary the heights: one pumpkin sits on the step, one on the crate, one directly on the porch floor. The classic mistake is lining pumpkins in a neat row like bowling pins — it reads as grocery display, not design. Instead, think of it as a triangle viewed from above: wide at the front, narrowing toward the back. If a pumpkin has a bruise or soft spot, rotate it inward so only its best face shows. Real pumpkins in good condition last 4-6 weeks on a shaded porch in cool weather; check weekly and retire any that soften.
2. What's the Best Way to Build Height with Crates and Stools?

Build height by stacking wooden crates, vintage stools, or sturdy bushel baskets in a stair-step arrangement, placing your tallest decor at the back and shortest at the front. This tiered structure gives the porch the three-dimensional depth of a designed display, preventing the flat "everything on the floor" look.
The math is simple: aim for three levels — low (porch floor, 0-8 inches), mid (crate top or stool seat, 12-20 inches), and high (stacked crate or tall basket, 24-36 inches). Place your tallest pieces — cornstalks, tall lanterns — at the back level, medium pumpkins and mums at mid, and small gourds and pinecones spilling forward at the low level. The eye should travel in a gentle diagonal, never climb a wall. Secure stacked crates with a screw or heavy-duty zip tie if your porch gets wind gusts; a toppling crate of pumpkins is a safety hazard and an expensive mess. Weathered wood crates ($8-15 at craft stores) work beautifully, but avoid particle-board crates that disintegrate in rain. If you only own one crate, tip it on its side so pumpkins nestle inside the opening — instant rustic depth with zero stacking. Our thanksgiving mantel decor ideas use the same tiering principle indoors.
3. How Do You Frame a Porch with Cornstalks?
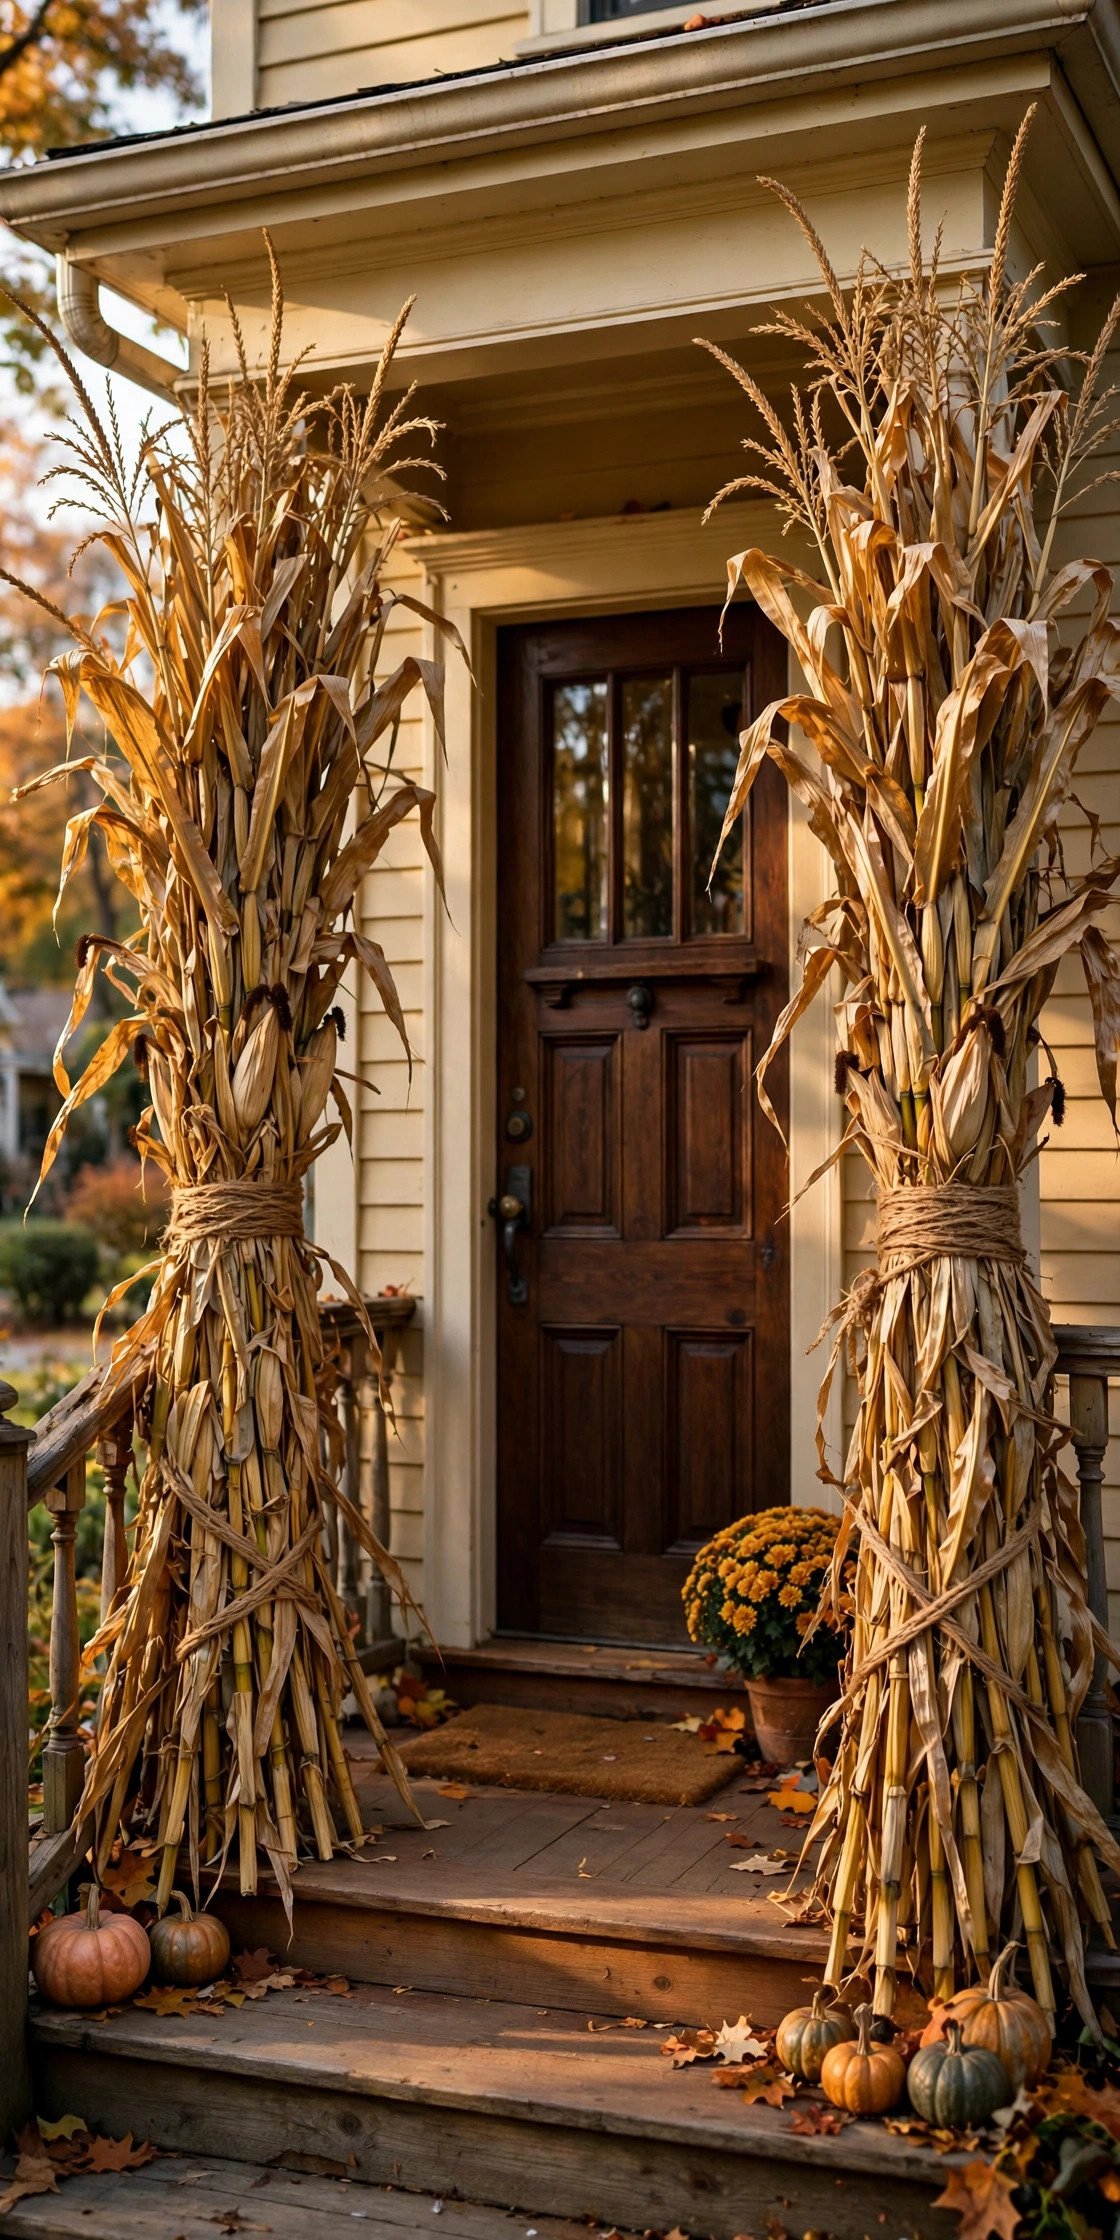
Tie cornstalks in bundles of five to seven and lash them to your porch columns, door frame, or railing posts with natural jute twine, so they create a living frame around your entry. Bundles of five read full without looking bulky; fewer than four looks sparse, more than eight hides your architecture.
Measure first: most cornstalks stand 6-7 feet tall, which suits a standard 8-foot porch overhang — if yours are taller, cut from the bottom (never the tassel end) before tying. Position the bundles just inside the door frame or on the outer columns so they don't block the walkway; a 36-inch door needs at least 28 inches of clear passage for guests carrying dishes. To keep them upright in wind, drive a hidden garden stake behind each bundle and wire the bundle to it — twine alone will slip. Fresh stalks turn a gorgeous wheat-gold and last about a month outdoors; if they start shedding leaves heavily, that's your cue to refresh or retire them. One bundle per side is classic; two per side (inner frame at the door plus outer frame at the columns) creates a deeper, magazine-worthy entryway on wide porches.
4. How Do You Match Your Wreath Colors to Your Porch Decor?

Choose a wreath that repeats two of the three dominant colors already on your porch — burnt orange, deep burgundy, warm gold, olive green, or cream — so the door and the vignette read as one continuous design. The wreath is the visual anchor of the entry, and color continuity is what separates a styled porch from a random collection.
Build your palette before you buy: photograph your porch in daylight, identify the two strongest colors in your pumpkins and mums, and match the wreath's berries, leaves, or ribbon to them. A wreath of dried wheat, faux maple leaves, and burgundy berries bridges orange pumpkins and cream Lumina squash effortlessly. Hang it at true eye level (center of the wreath about 57-60 inches from the floor), and use a wreath hanger in a matching metal finish rather than a suction hook, which fails in November cold. For a cohesive finish, tie a ribbon on the wreath that matches your lantern handles or doormat trim. Avoid introducing a fourth or fifth color — a wreath with red, purple, and teal accents will fight your harvest palette instead of completing it.
5. How Can You Transition from Halloween to Thanksgiving Without Rebuying?

Strip out only the spooky pieces — jack-o'-lantern faces, skeletons, witches, orange-black color stories — and keep everything harvest-neutral: pumpkins, cornstalks, mums, lanterns, and wooden crates. The base vignette you built for October becomes your November porch with zero new purchases; you simply re-style what remains.
Do it in this order the morning after Halloween. First, remove carved pumpkins (they'll rot fast now) and any black or purple accents. Second, shift your color balance warmer: move your white Lumina and green Jarrahdale pumpkins to the edges and bring orange, gold, and burgundy pieces to the center. Third, swap spooky signage for a harvest-toned wooden sign ("Gather," "Grateful") or nothing at all — plain is better than off-theme. Fourth, refresh anything wilting: replace spent mums with fresh ones in harvest colors and add a new layer of pinecones or dried corn. If you followed our halloween porch decor ideas with a neutral base, this takes under an hour. The trick is buying October decor in harvest colors (orange, cream, gold) rather than Halloween colors (black, purple, neon green) — harvest pieces serve both holidays.
6. What Decor Works Best for a Small Stoop or Landing?

On a tiny stoop, choose one slim vignette: a tall narrow crate or basket holding three mini pumpkins and a single lantern, plus a harvest wreath on the door. Small spaces fail when every inch is decorated — restraint with one vertical accent reads elegant, while clutter reads cramped.
Work vertically, not horizontally. A slim wooden crate (roughly 12x12x18 inches) standing upright beside the door holds a stack of two Jack-Be-Littles plus trailing faux ivy, occupying under two square feet. Choose a wreath no wider than 20 inches so it doesn't overwhelm the door. If you have steps, place ONE pumpkin on every other step in descending size — never every step, which looks like a pumpkin obstacle course. Wall-mounted lanterns or a single strand of fairy lights around the door frame add glow without floor space. Skip cornstalks entirely on stoops under four feet wide; they'll block the door swing. For interiors with the same footprint problem, our small entryway decor ideas apply the identical vertical-first approach indoors.
7. How Do You Use Lanterns and Fairy Lights for Evening Glow?

Place two to three lanterns at different heights around your vignette and weave 2700K warm-white fairy lights through cornstalks, crates, and greenery so the porch glows amber after dark. Thanksgiving guests arrive at dusk, and warm 2700K light flatters both people and pumpkins — cool white light makes harvest colors look washed out and clinical.
Use flameless LED candles inside the lanterns (safer than real flame around dried cornstalks, which are extremely flammable). Drape one 33-foot strand of fairy lights per six feet of railing or garland, spacing loops six inches apart for even coverage — clumps of lights with dark gaps look unfinished. Battery-operated strands with built-in timers are worth the small premium; set them to switch on at 4:30 PM so the porch is glowing before the first guest arrives. Tuck the battery packs inside a crate or behind a pumpkin where they're invisible but reachable. Avoid multicolor or flashing modes entirely — the goal is candlelight warmth, not a holiday light show. For the walkway, add two solar path lights per side so guests see the steps clearly.
8. What Makes a Harvest-Vignette Focal Point by the Door?

A strong focal point is one tall anchor piece — an oversized lantern, a stacked crate tower, or a large urn overflowing with pumpkins and mums — flanked by lower symmetrical accents, so the eye lands in one place instead of wandering. Every great porch has a "hero": without one, even beautiful pieces dissolve into visual noise.
Pick your hero by what you already own: a 24-inch lantern, a galvanized milk can, or a whiskey barrel planter all work. Set it two feet from the door on the handle side (the side guests approach first), then build outward in decreasing height — medium mums behind it, trailing pumpkins in front. The focal point should occupy roughly the middle third of your porch width; on a six-foot porch, that's a two-foot-wide arrangement. Keep the far third simple: one cornstalk bundle or a slim stack of pumpkins balances the hero without competing. Never place two equally tall heroes side by side — they cancel each other out and the porch looks like it's arguing with itself. Step back to the curb after styling: if your eye lands on one spot immediately, the focal point is working.
9. Should You Use Real or Faux Pumpkins Outdoors?

Use real pumpkins if your porch is shaded and temperatures stay below 65°F — they'll last four to six weeks and look unbeatable — and faux pumpkins on sun-baked, rain-exposed porches where real ones rot in two weeks. The honest answer depends on your microclimate, not your budget.
Real pumpkins develop soft spots fastest where they touch wet surfaces, so set them on crates, doormats, or straw rather than directly on concrete that pools water. Faux pumpkins (foam or resin) have improved dramatically; the best ones have matte finishes and realistic stem shapes — avoid glossy plastic, which screams fake from ten feet away. A smart hybrid: real heirloom pumpkins as the visible heroes, faux mini pumpkins filling gaps and tight spots where real ones would bruise. If you buy faux, choose them in odd, natural shapes rather than perfect spheres. Cost-wise, real field pumpkins run $4-8 each at farm stands, while quality faux pumpkins cost $10-20 but last for years. For carved jack-o'-lanterns transitioning out of Halloween, retire them by early November — they're compost at that point.
10. How Do You Style a Cornucopia on a Porch?

Set a wicker cornucopia on its side atop a crate or bench, spilling heirloom pumpkins, gourds, dried corn, and pinecones outward in a fan shape so the bounty appears to pour onto the porch. The cornucopia — the traditional horn of plenty — is Thanksgiving's oldest symbol, and it works because the spilling motion draws the eye along the display.
Anchor the horn's wide opening toward the front-left (the direction guests approach from) and arrange the spill in a crescent, largest pieces nearest the horn, smallest at the crescent's tips. Weave in dried wheat stalks and eucalyptus sprigs between the produce to fill air gaps — bare gaps make the spill look deflated. Secure the cornucopia itself with a hidden brick or sandbag inside so wind can't roll it; a rolling horn of plenty is a comedy no one wants. Size matters: a 20-24 inch horn suits most porches, while anything under 14 inches disappears against the architecture. After Thanksgiving, the wicker horn stores flat and the produce composts or becomes soup — nothing wasted.
11. What's the Right Way to Hang a Fall Garland on Railings?

Drape the garland along the top rail in loose swags — securing it every 18 inches with floral wire or zip ties — so it dips 6-8 inches between attachment points in a relaxed curve. Tight, flat garland looks like trim; swagged garland looks like celebration.
Start in the middle of the railing and work outward so the swags are symmetrical, adding a wired pinecone or mini pumpkin at the bottom of each dip for weight and interest. If your garland is thin, double it: twist two strands together for a fuller look, mixing textures (maple leaves + eucalyptus + berries reads richer than leaves alone). For porches without railings, run the same swag across the top of the door frame or along a porch swing chain. Weatherproofing matters: faux garlands with UV-resistant leaves survive November rain, while dried-leaf garlands disintegrate in one storm — save the real dried materials for covered porches only. End each garland run with a wired bow in burlap or rust-colored ribbon; bare cut ends look unfinished from the street.
12. How Do You Add a Cozy Seating Nook to a Porch?
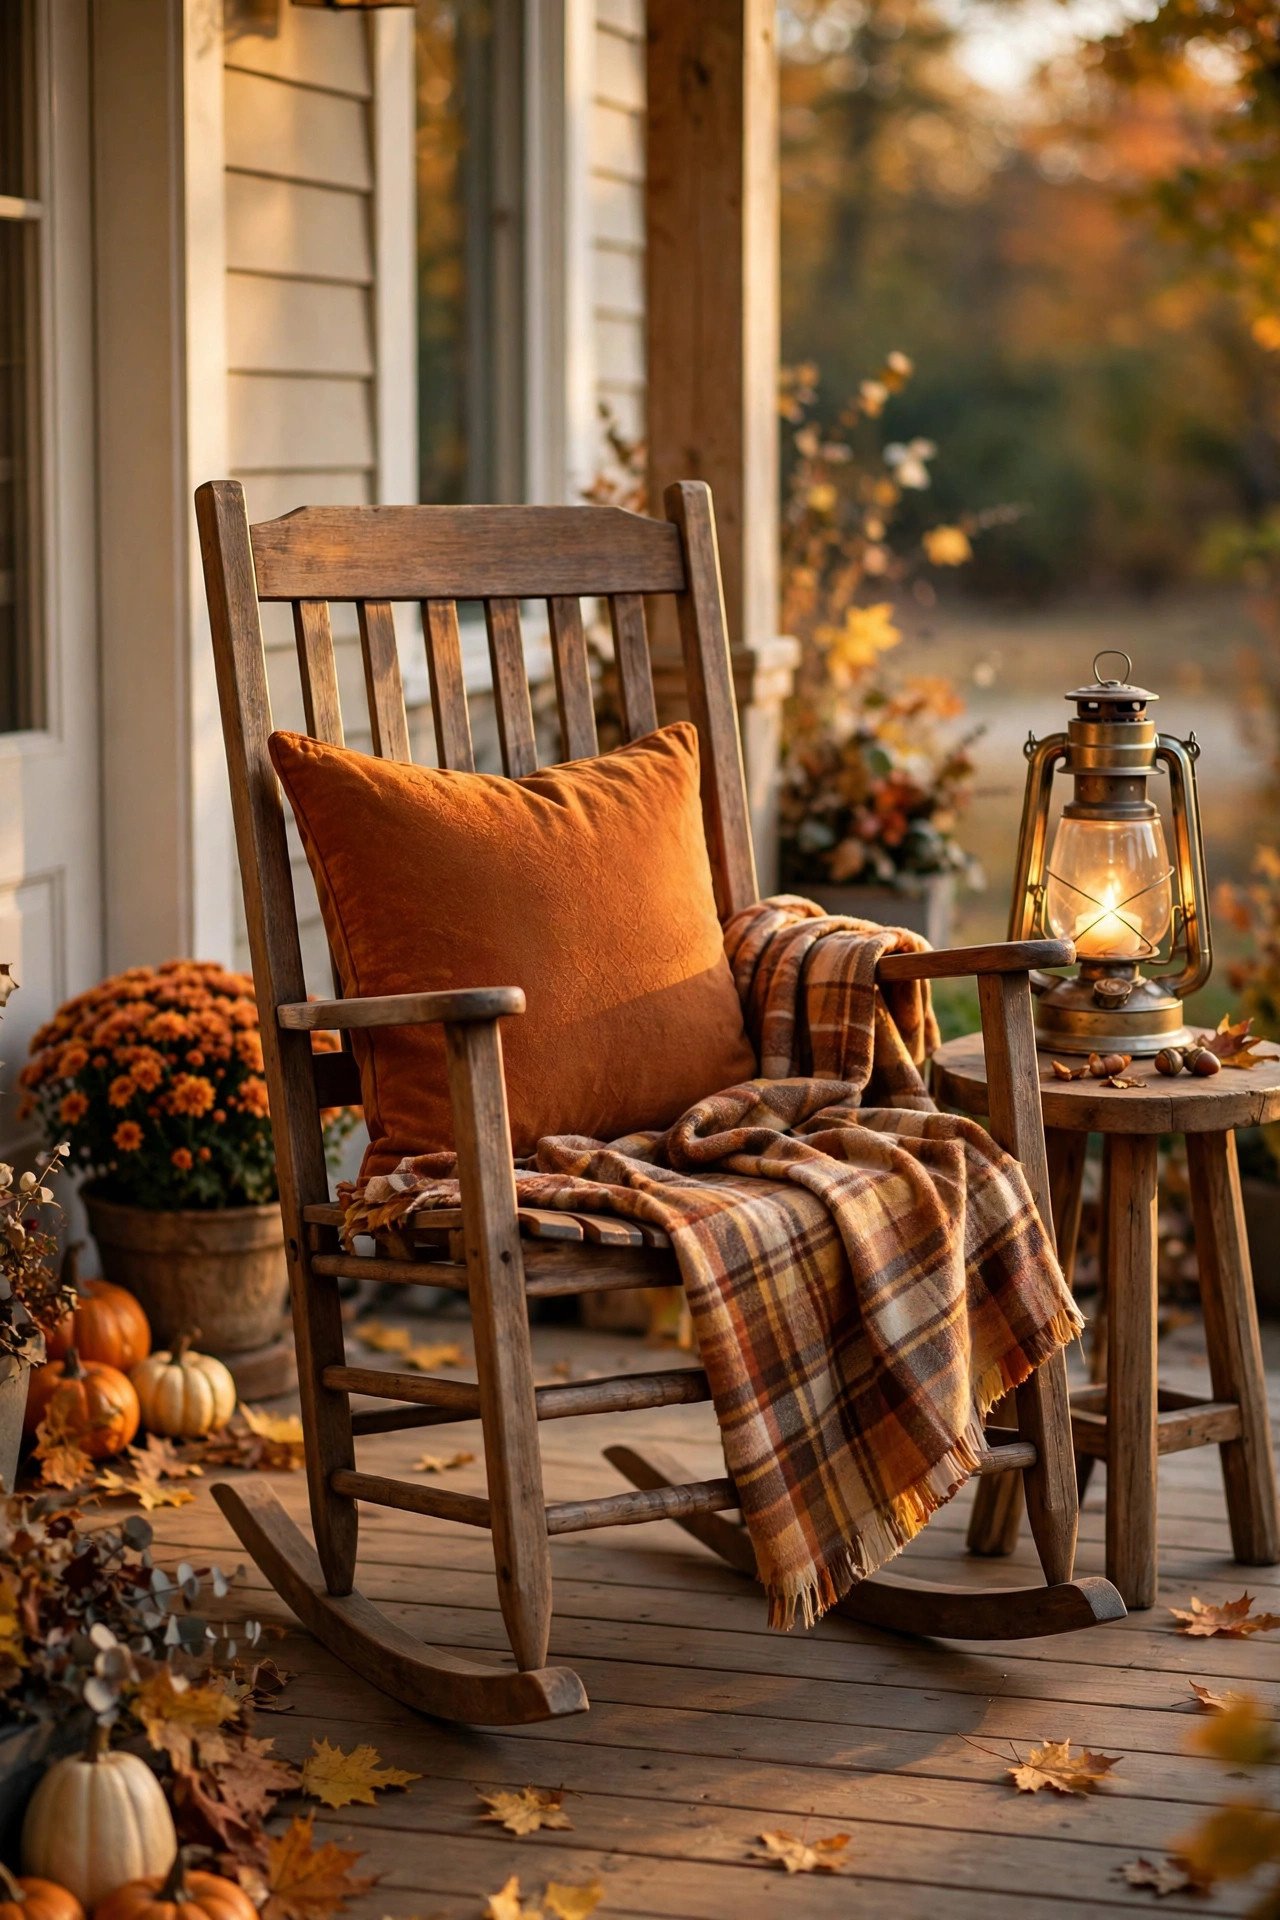
Place a rocking chair or wooden bench angled toward the vignette, dressed with a plaid throw blanket and a harvest-toned pillow, plus a small side table holding a lantern and a mug-ready tray. A seat on the porch signals hospitality — it says someone lives here and lingers here, which is exactly the warmth Thanksgiving guests feel.
Angle the chair at 45 degrees to the door rather than facing straight out; this creates conversation geometry instead of a waiting-room feel. Choose outdoor-rated fabrics or bring the textiles inside during rain — a soggy throw ruins the effect and mildews fast. A small round side table (16-20 inches) holds a lantern at hand height, which doubles as your evening light source. If space is tight, a single rocking chair with a folded throw over the arm delivers 80% of the coziness with one piece of furniture. Keep the seating clear of the main walkway — guests carrying casserole dishes need a straight, unobstructed path to the door, and a chair jutting into it is a tripping hazard.
13. How Do You Use Mums for Maximum Color Impact?
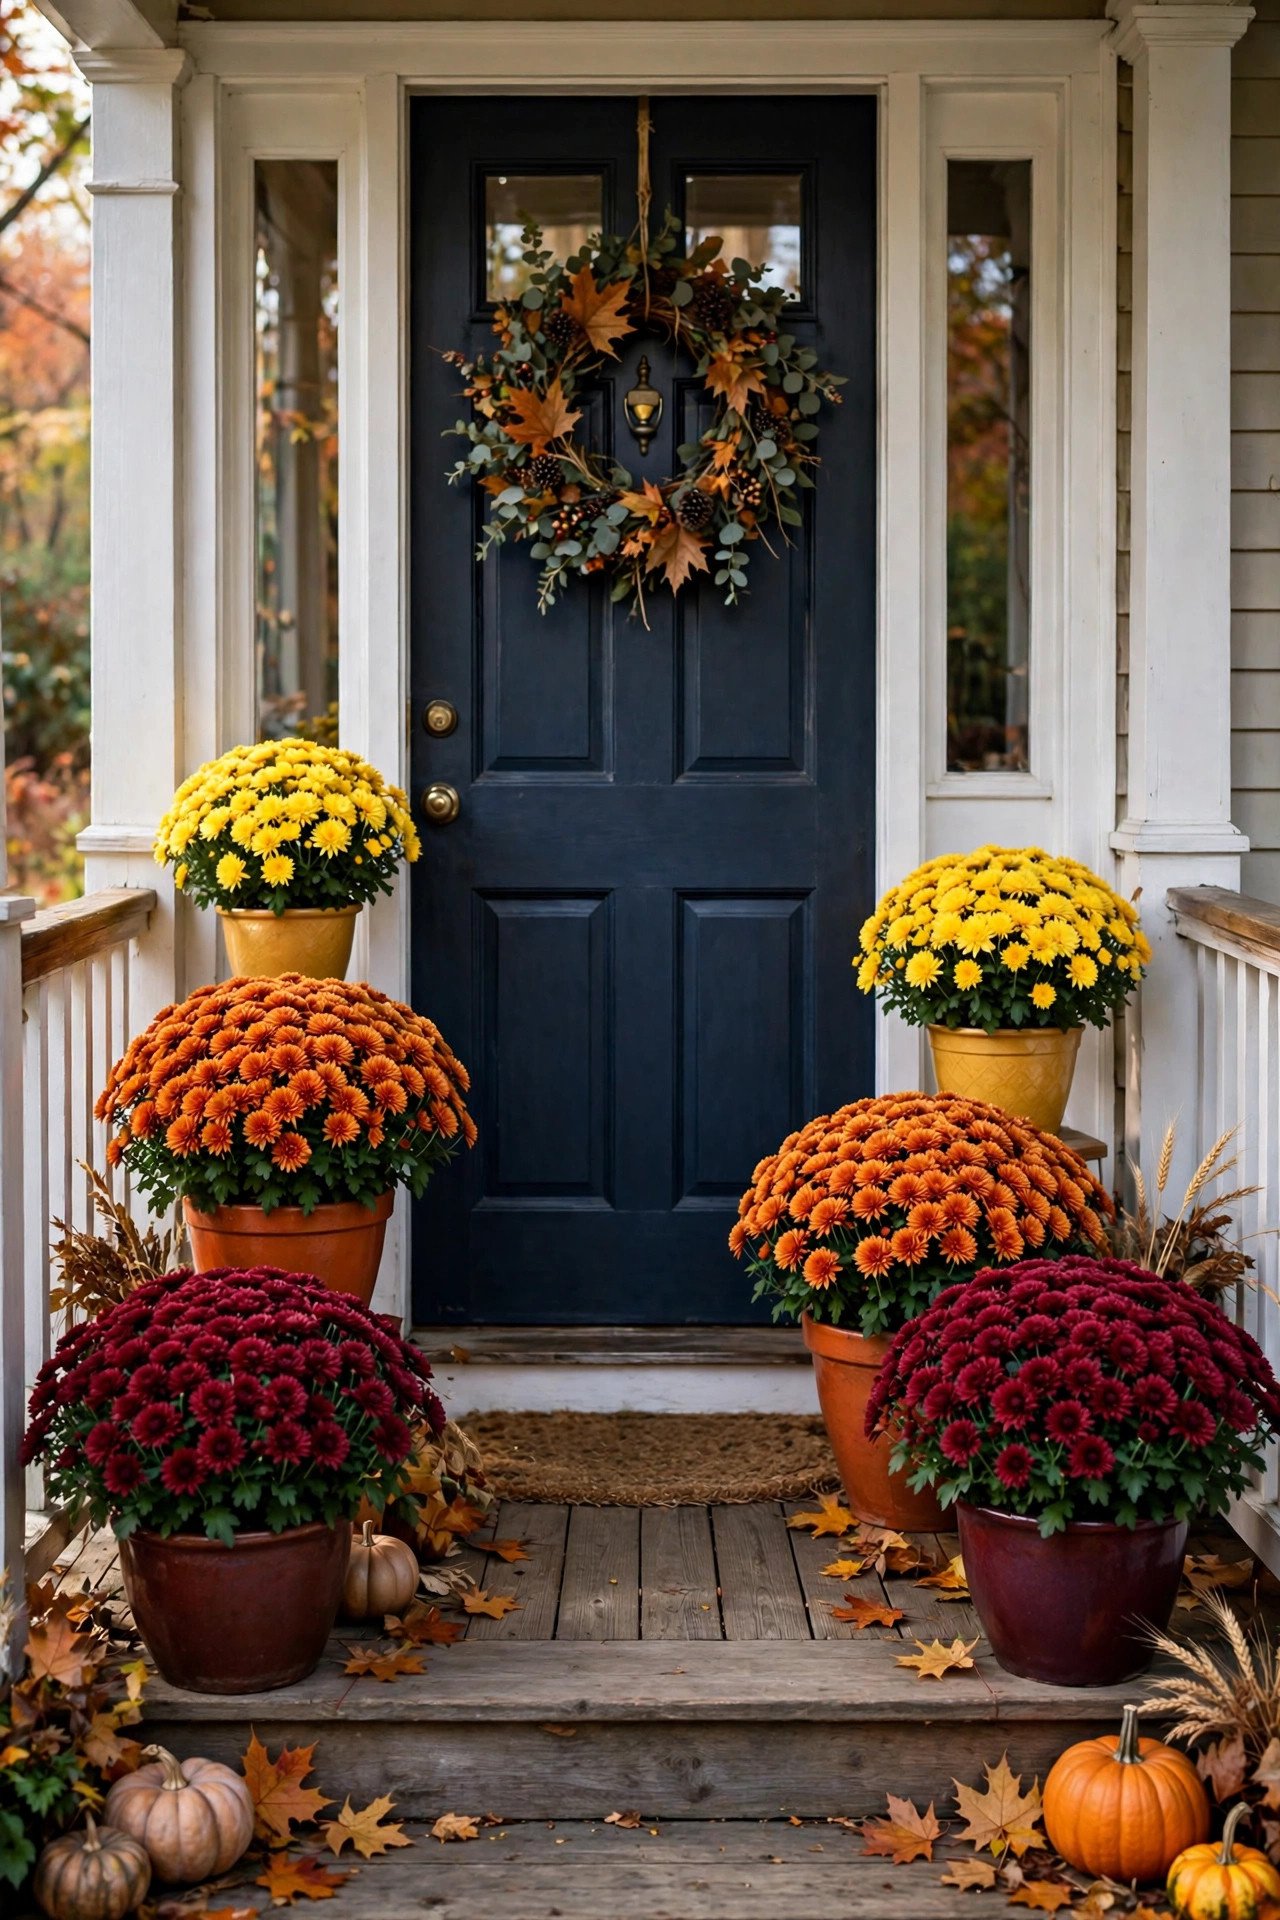
Plant mums in odd-numbered groupings of three or five, in graduated pot sizes, using harvest colors — burnt orange, deep burgundy, golden yellow — and place the tallest pots at the back of the vignette. Mums are the workhorse of fall porches because they bloom exactly when you need them, but scattered singles look like an afterthought.
Buy mums still in tight bud (not fully open) so they peak during Thanksgiving week, not before it. Water them from the base, not overhead — wet blooms brown within days. A nursery trick: sink the plastic nursery pot inside a decorative basket or urn so you can swap in fresh mums without replanting. For color strategy, repeat one mum color in at least two spots on the porch (two burgundy pots flanking the door, for example) — repetition reads as design, a single pot reads as an accident. Deadhead spent blooms weekly to extend the show. Hardy mums planted in the ground can return next year, but porch mums in pots rarely survive a hard freeze — treat them as seasonal color and compost them after Thanksgiving.
14. What's the Best Fall Doormat Layering Technique?
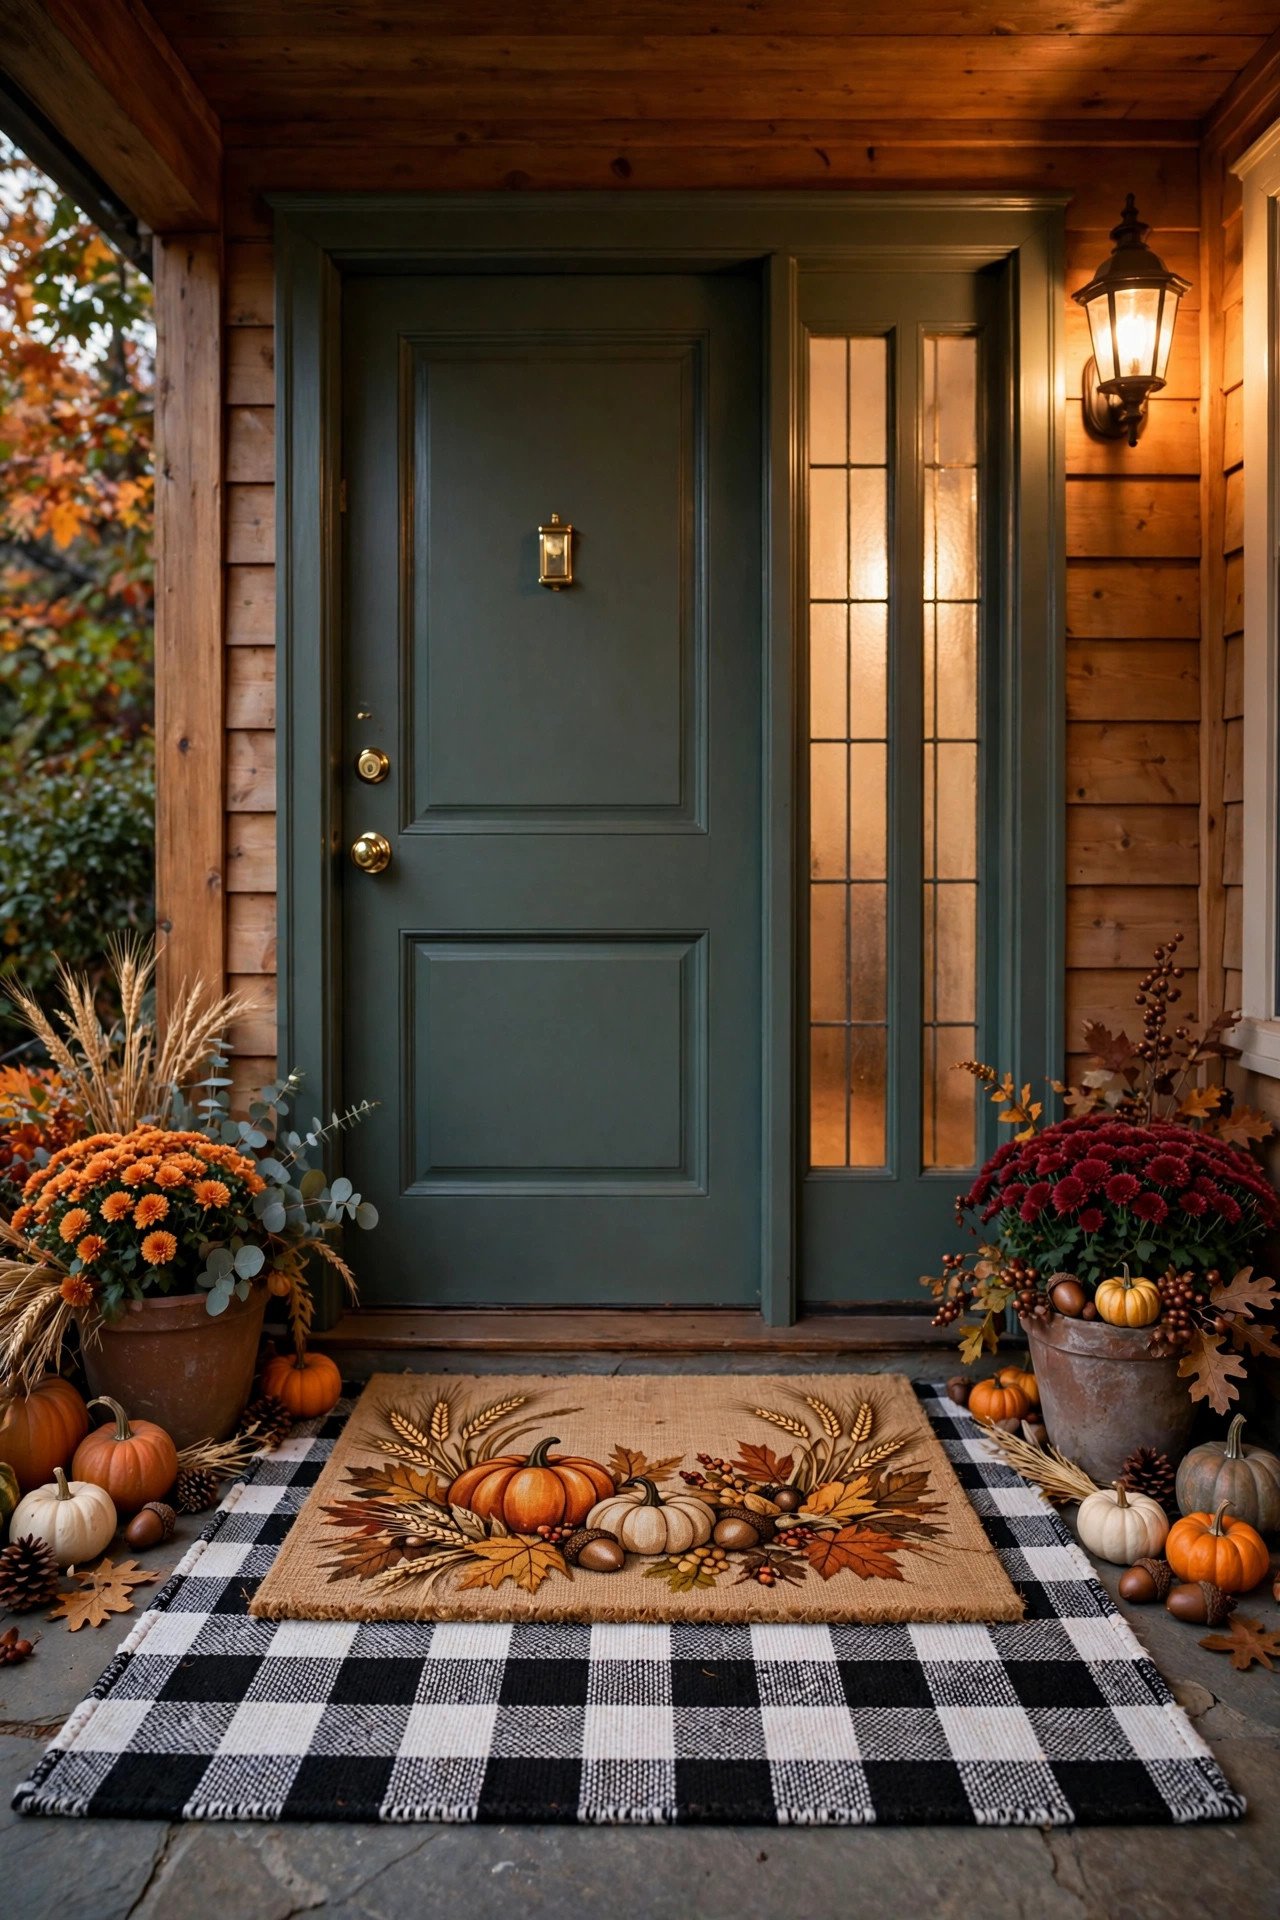
Layer a larger flat rug (4×6 feet or a 2×3 coir mat underneath) beneath your statement doormat so a contrasting border of buffalo check, jute, or harvest plaid peeks out on all sides. Layered doormats are the porch equivalent of a picture frame — they define the entry zone and make even a plain door look styled.
The base layer should extend 4-6 inches beyond the top mat on every side; too little border looks accidental, too much swallows the top mat. Choose a base in a neutral texture (natural coir, jute, or a simple buffalo-check outdoor rug) and let the top mat carry the message — "Gather," "Thankful," or a simple pumpkin motif. Keep the top mat's palette inside your porch's 2-3 color story so it doesn't introduce a rogue color. Outdoor-rated rugs with rubber backing won't slide on wet steps; indoor rugs will, and that's a genuine safety issue for guests. Shake both layers out weekly — layered mats trap leaves and grit between them, which grinds dirt into the fibers.
15. How Do You Decorate Porch Columns for Fall?

Wrap each column with a spiral of faux fall garland or string lights from top to bottom, then anchor the base with a pumpkin cluster or a mum pot so the column feels rooted rather than floating. Columns are vertical exclamation points on a porch — decorated, they frame the whole scene; bare, they divide it.
For the spiral, start at the top and work down, securing the garland with discreet clear zip ties every 12 inches — the spiral should make one full turn every 18-24 inches of column height for a relaxed, not barber-pole, effect. If your columns are square, run the garland up one corner edge instead; spirals look awkward on square posts. An alternative for wide porches: hang a slim wreath on each column at the same height as the door wreath, creating rhythm across the facade. Keep decorations off the bottom 12 inches if your porch floods or splashes in rain — waterlogged garland rots fast. On brick columns, use removable adhesive hooks rated for outdoor use rather than nails; most landlords and HOAs prohibit drilling into masonry.
16. What Weatherproofing Do Outdoor Fall Decorations Need?

Elevate everything off wet surfaces, seal porous decor with outdoor clear coat, and bring textiles inside during storms — because November weather destroys unprotected fall decor in days. Weatherproofing isn't glamorous, but it's the difference between a porch that looks great on Thanksgiving and one that looks tired by mid-November.
The three enemies are standing water, wind, and freeze-thaw cycles. Set pumpkins on straw, crates, or mats rather than bare concrete; constant wet contact rots the bottom in under two weeks. Spray wooden signs and crates with two coats of outdoor polyurethane before the season — raw wood absorbs rain and warps. Secure anything lighter than five pounds (small gourds, pinecones, garland ends) with museum putty or hidden wire; a November gust will redecorate your yard otherwise. Bring throw blankets and pillows inside every night if rain is forecast — outdoor fabrics resist sun, not soaking. Real cornstalks and dried wreaths last longest under a covered porch; on fully exposed porches, switch to their faux equivalents. Check the forecast the week of Thanksgiving and do a ten-minute "storm prep" walk: tuck, tie, and elevate.
17. How Do You Add a Farmhouse Touch with Wooden Signs?
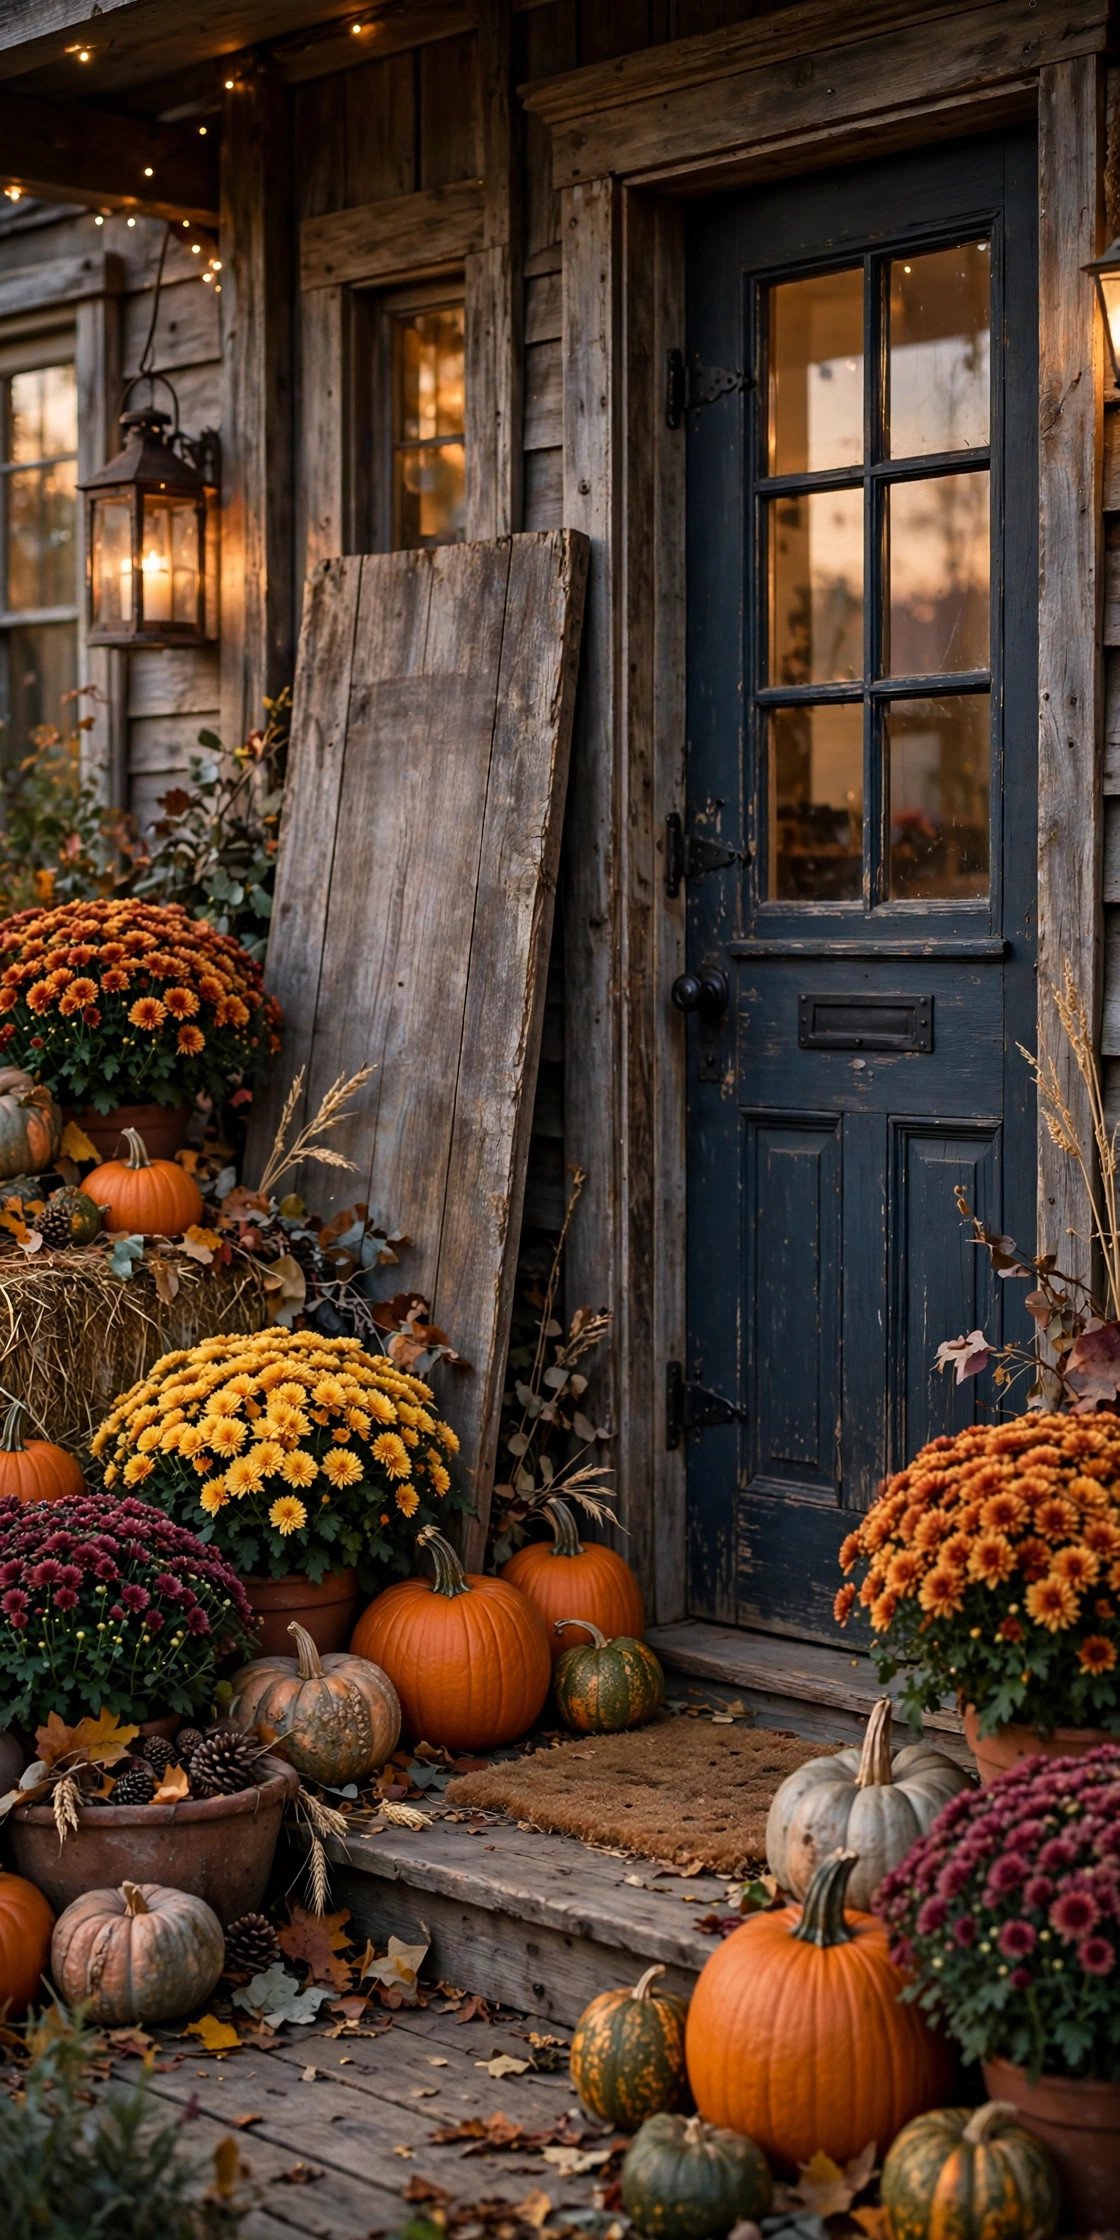
Hang or lean one wooden sign with a harvest word — "Gather," "Grateful," "Give Thanks" — in a weathered finish, placed where it reads from the curb but doesn't compete with the wreath. One sign is a statement; three signs are a gift shop.
Scale the sign to the porch: a 24-36 inch sign suits a standard entry, while anything smaller vanishes against the house. Lean large signs against the wall beside the door rather than hanging them — leaning reads casual-farmhouse and avoids putting holes in siding. Choose hand-painted or distressed finishes over vinyl-lettered perfection; slight imperfection is the whole farmhouse aesthetic. Keep the sign's palette inside your porch colors — a white "GATHER" sign with greenery works against almost any harvest scheme. Position it on the opposite side from your focal point to balance the composition. Avoid signs with dates ("Fall 2026") — they expire instantly and look stale by December. And never place a sign where it blocks the doorbell or door swing; guests shouldn't have to navigate around your decor to announce themselves.
18. How Do You Style a Vintage Wheelbarrow or Wagon as a Planter?
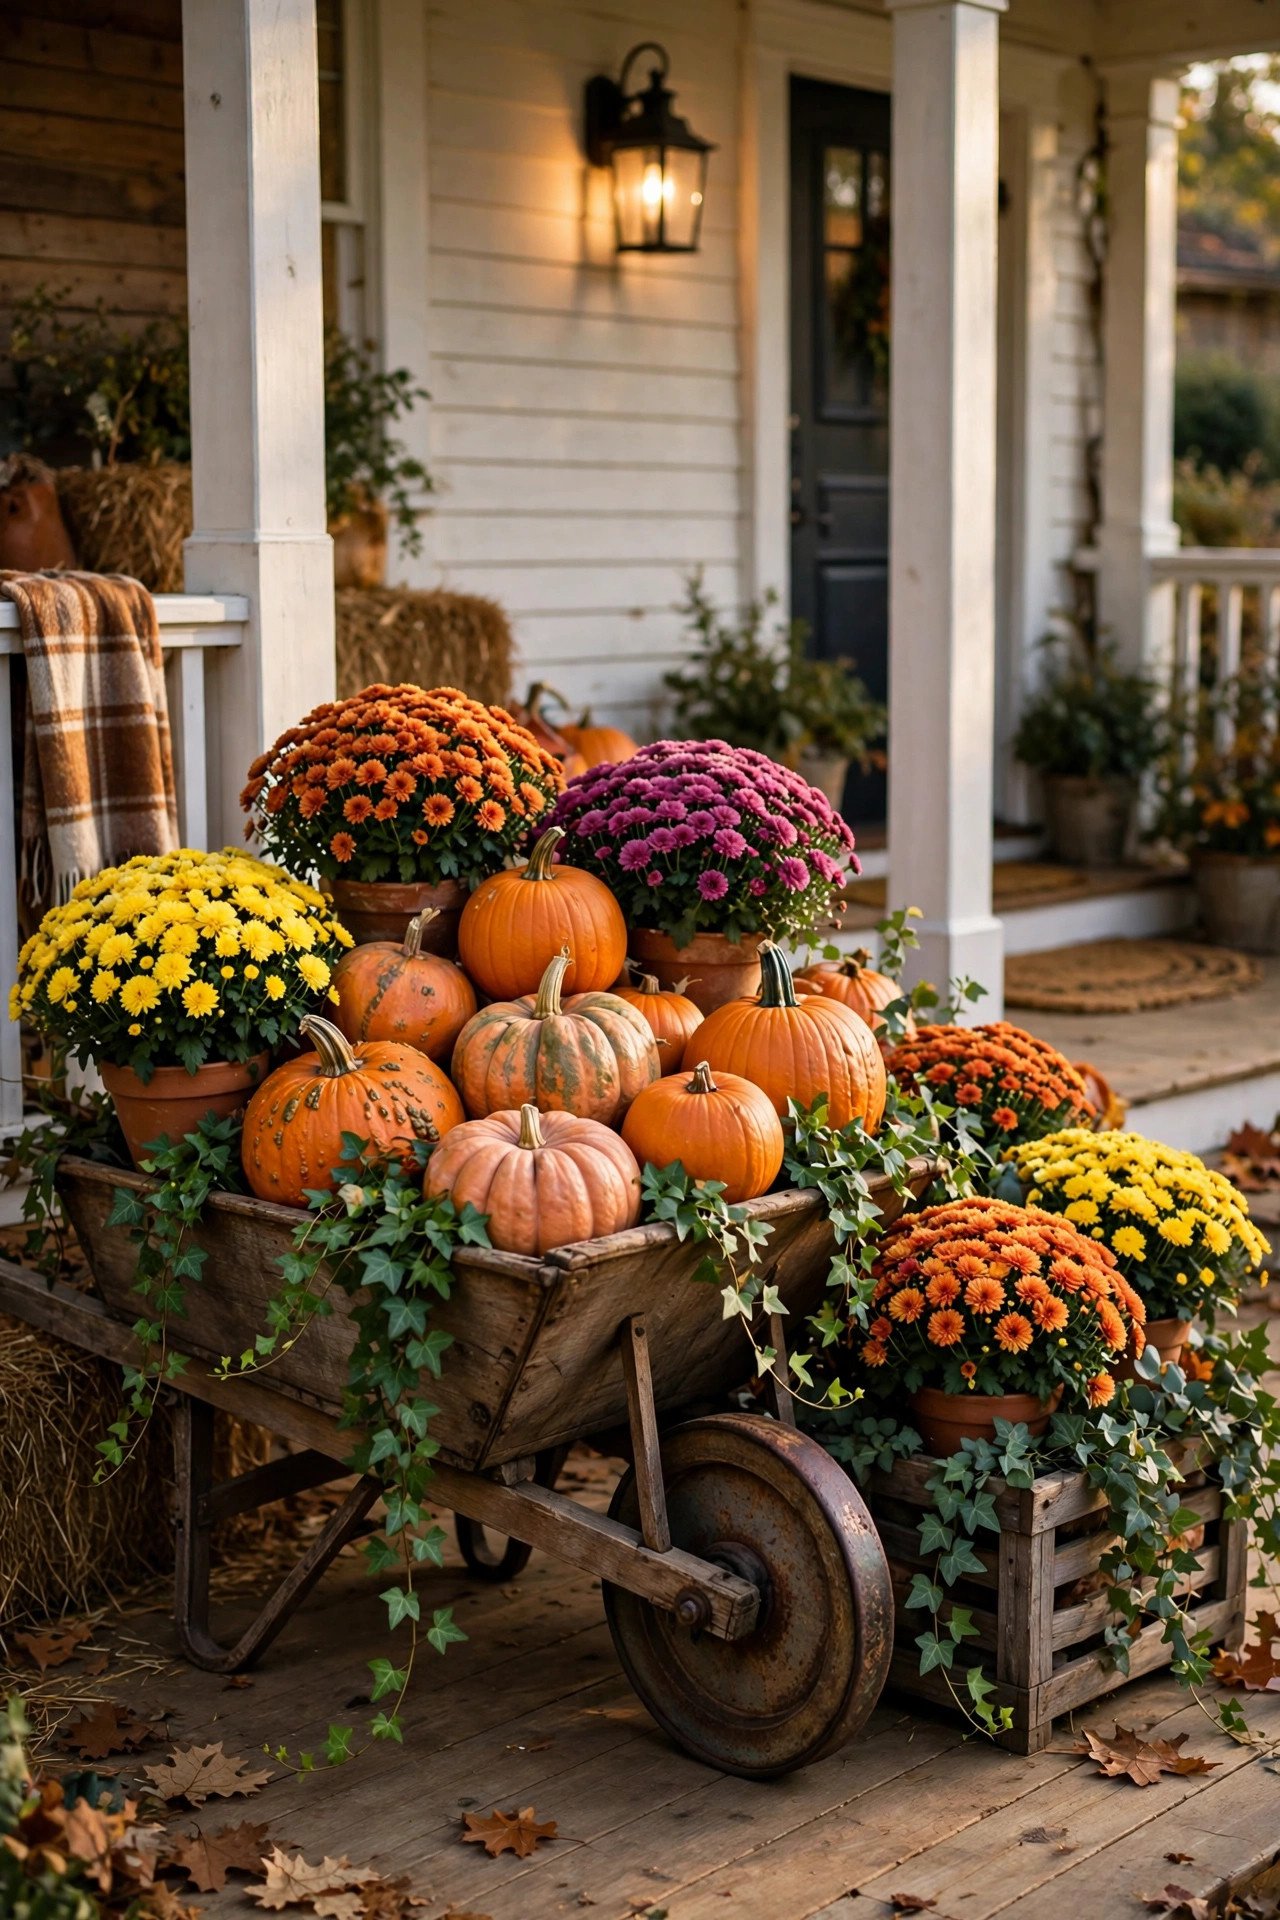
Fill a vintage wheelbarrow or child's red wagon with a base of straw, then arrange pumpkins, mums in their pots, and trailing faux ivy so the arrangement overflows the edges. A wheelbarrow planter is instant farmhouse theater — it tells a harvest story no crate arrangement can match.
Line the barrow with a plastic sheet first if it's a genuine antique; soil and water will rust through vintage metal in one season. Arrange tallest at the back (cornstalks or tall mums), medium pumpkins in the middle, and let small gourds and trailing greenery spill over the front lip — the spill is the whole point. Position it at a 45-degree angle to the walkway rather than straight-on; angled placement looks styled, straight-on looks parked. A child's red wagon painted harvest-orange works beautifully too, and its small size suits modest porches. After the season, the wheelbarrow empties in minutes and the pumpkins go to compost or the soup pot — but keep it under cover for winter, because vintage metal left in snow becomes a rust sculpture.
19. How Do You Decorate a Porch with a Budget Under $50?

Spend the $50 on three things: a bag of small field pumpkins and gourds ($12-15 at a farm stand), one large mum in bud ($8-10), and a spool of jute twine plus a bundle of free gathered cornstalks — then arrange them using the odd-grouping and height rules in this guide. Great porch design is arrangement skill, not spending; the system matters more than the shopping.
Source free materials aggressively: ask local farms for broken or "ugly" cornstalks after harvest (many give them away), gather pinecones and interesting branches from parks, and raid your own yard for ornamental grasses to cut. One $5 can of matte spray paint in burnt orange or cream transforms last year's faded faux pumpkins. Borrow height instead of buying it: flip a sturdy storage bin upside down and drape it with a burlap sack to fake a crate. Skip the wreath at this budget — a $3 bundle of dried wheat tied with twine and hung on the door reads just as seasonal. The most expensive-looking $50 porch is one where everything shares two colors; the cheapest-looking $200 porch is a rainbow of unrelated sale items.
20. What's the Best Way to Light the Path to Your Door?

Line the walkway with pairs of solar path lights or lantern stakes every 4-6 feet, keeping them low (under 18 inches) so they wash the path in a warm pool of light without blinding approaching guests. Path lighting is part hospitality, part safety — Thanksgiving guests arrive after dark carrying dishes, and a dark walkway is a genuine fall risk.
Solar lights need 6-8 hours of direct sun to charge fully, so place them where they get afternoon sun, not under the porch overhang's shadow. For a harvest look, choose lantern-style path lights or wrap plain solar stakes with small faux pumpkin toppers — function dressed as decor. Keep the fixtures 12-18 inches back from the path edge so they don't get kicked or hit by the snow shovel. If your walkway is short, two well-placed lanterns flanking the bottom step do the job. Test the whole path at dusk before Thanksgiving: walk it carrying something, and anywhere you hesitate or squint needs another light. Battery tea lights inside mason jars (a dozen for a few dollars) are the budget backup — charming, but bring them in if wind is forecast.
21. How Do You Add Harvest Texture with Gourds, Wheat, and Pinecones?

Tuck small gourds, bundles of dried wheat, and pinecones into every gap of your vignette — between pumpkins, at crate bases, along step edges — so no flat empty surface breaks the harvest abundance. Texture is what makes a porch feel abundant rather than arranged; the big pieces give structure, the small pieces give richness.
Work in clusters of three to five: three pinecones wired together with twine, five wheat stalks bound into a sheaf, a trio of warty gourds nesting in a hollow. Scatter with intention — texture pieces should trail the eye from one major element to the next, like stepping stones. Spray pinecones with a light matte clear coat to keep them from crumbling in rain, and never place real wheat where it stays wet; it molds. Dried Indian corn (multicolored flint corn) hung in pairs by its husks on the door or columns adds vertical texture for pennies. The rule: if you can see bare porch floor inside your vignette zone, you need more texture there. But stop before it looks like a craft store exploded — every texture piece should touch or nearly touch a larger element, never float alone.
22. How Do You Create a Grand Symmetrical Entrance for Thanksgiving Day?

Build mirror-image arrangements on both sides of the door — matching cornstalk bundles, identical pumpkin stacks, twin lanterns, paired mums — so the entry reads formal and celebratory, like a restaurant hosting a special evening. Symmetry signals occasion; it's the visual equivalent of setting the good china.
True symmetry needs matched pairs: buy mums, pumpkins, and lanterns in twos, and measure placement so each side sits the same distance from the door center. Start with the tallest elements (cornstalks) at the outer edges, step down through mums and crates, and end with the smallest gourds nearest the door — a mirrored staircase of harvest. Keep the center clear: the door and wreath are the axis, and anything crowding them breaks the formal effect. Light both sides identically — mismatched lighting ruins symmetry after dark. This is the one arrangement where even numbers win; the odd-number rule applies inside each side's cluster, while the two sides mirror each other. Photograph it from the curb at dusk with the lights on — that's the image your guests will remember, and it's the shot that earns the Pinterest save. When the holiday passes, the same matched pairs make your christmas front porch decor ideas effortless — just swap harvest for evergreen.
Practical Tips for a Thanksgiving Porch
Weatherproof first. November is wet and windy. Elevate pumpkins off concrete, seal wood with outdoor polyurethane, secure light decor against gusts, and bring textiles inside during storms. A ten-minute storm-prep walk the week of Thanksgiving saves the whole display.
Buy harvest colors, not holiday colors. Orange, cream, gold, burgundy, and olive serve Halloween, Thanksgiving, and fall generally. Black, purple, and neon green serve only Halloween — and force you to rebuy in November.
Transition, don't restart. After Halloween, remove spooky pieces and carved pumpkins, rebalance toward warm colors, refresh wilting mums, and you're done. The base vignette — crates, cornstalks, lanterns, uncarved pumpkins — carries straight through.
Light for dusk arrivals. Thanksgiving dinner guests arrive as daylight fades. Put fairy lights and lanterns on timers set for 4:30 PM, and walk your path at dusk carrying something to find the dark spots.
Scale to your space. The same system works on a grand porch and a two-foot stoop — wide porches get the full layered vignette, small stoops get one vertical crate arrangement and a wreath. For the entryway just inside the door, carry the palette inward with our halloween entryway decor ideas approach adapted to harvest tones.
Photograph from the curb. Step back to the street after styling and look at the whole composition. If your eye lands on one focal point, the color story holds together, and the path is lit, the porch is ready for guests.
Frequently Asked Questions
When should I decorate my front porch for Thanksgiving?
Start the base vignette in early October with harvest-neutral pieces that also serve Halloween, then do the Halloween-to-Thanksgiving transition the first week of November by removing spooky items and refreshing mums. This two-phase approach means you decorate once and simply edit, rather than building two separate displays.
How do I keep real pumpkins from rotting on the porch?
Keep them dry underneath and cool. Set pumpkins on straw, crates, or mats instead of wet concrete, choose unblemished pumpkins with intact stems, and bring them under cover during heavy rain. In shade below 65°F, healthy pumpkins last four to six weeks; check weekly and remove any that soften before they affect their neighbors.
Can I reuse my Halloween porch decor for Thanksgiving?
Yes — if you bought harvest colors. Uncarved pumpkins, cornstalks, mums, lanterns, crates, and neutral wreaths all transition seamlessly. Only the explicitly spooky pieces (carved jack-o'-lanterns, skeletons, witches, black-and-purple accents) need to come down. Replace them with a harvest sign or extra texture pieces like pinecones and wheat.
What colors work best for a Thanksgiving porch?
Burnt orange, deep burgundy, warm gold, olive green, and cream form the classic harvest palette. Pick two or three and repeat them across your wreath, pumpkins, mums, and textiles. White Lumina pumpkins and blue-gray Jarrahdale squash add sophisticated contrast without leaving the harvest family. Avoid introducing unrelated brights like teal or red — they break the warm, abundant mood.
How do I decorate a porch with no roof or overhang?
Choose weatherproof everything: faux pumpkins and garlands rated for outdoor use, sealed wood, and no textiles left out overnight. Skip dried cornstalks and real wheat, which disintegrate in rain — use faux stalks or tall ornamental grasses in weighted planters instead. Anchor every lightweight piece, and favor lanterns with enclosed LED candles over anything open.
What is the cheapest way to make a porch look expensive for Thanksgiving?
Master the arrangement, not the shopping. Odd-numbered pumpkin groupings in two coordinated colors, one height-building crate, a swagged garland, and warm fairy lights cost under $50 at farm stands and craft stores but look designed because the composition follows professional rules. Color discipline — everything in the same two or three harvest tones — is the single biggest luxury signal.
Should my Thanksgiving porch match my Thanksgiving table?
They should share a color palette but not duplicate each other. If your porch leads with burnt orange and cream, echo those tones in your tablescape's napkins or centerpiece pumpkins so guests feel a continuous design story from curb to table. For the full indoor plan, see our thanksgiving table decor ideas.
How do I keep decor from blowing away in November wind?
Weight, wire, and wedge. Put sandbags or bricks inside hollow decor like cornucopias and large lanterns, wire garlands and cornstalk bundles to railings or hidden stakes, and wedge small pieces (gourds, pinecones) into clusters where larger pieces shelter them. Anything under five pounds that sits loose on an exposed porch will eventually become your neighbor's decor.
Final Thoughts
A Thanksgiving porch isn't about owning the most decorations — it's about arranging what you have with intention. Odd-numbered groupings, built height, a disciplined harvest palette, and warm evening light turn even a modest stoop into a welcome guests feel before they knock. Build the base once in October, transition it in November, and let the same harvest system carry you straight toward December.
You May Also Like:
– 22 Thanksgiving table decor ideas for a warm gathering – 22 Thanksgiving mantel decor ideas for a cozy fireplace – 22 Halloween porch decor ideas for a spooky stylish entry – 22 Christmas front porch decor ideas for a festive welcome