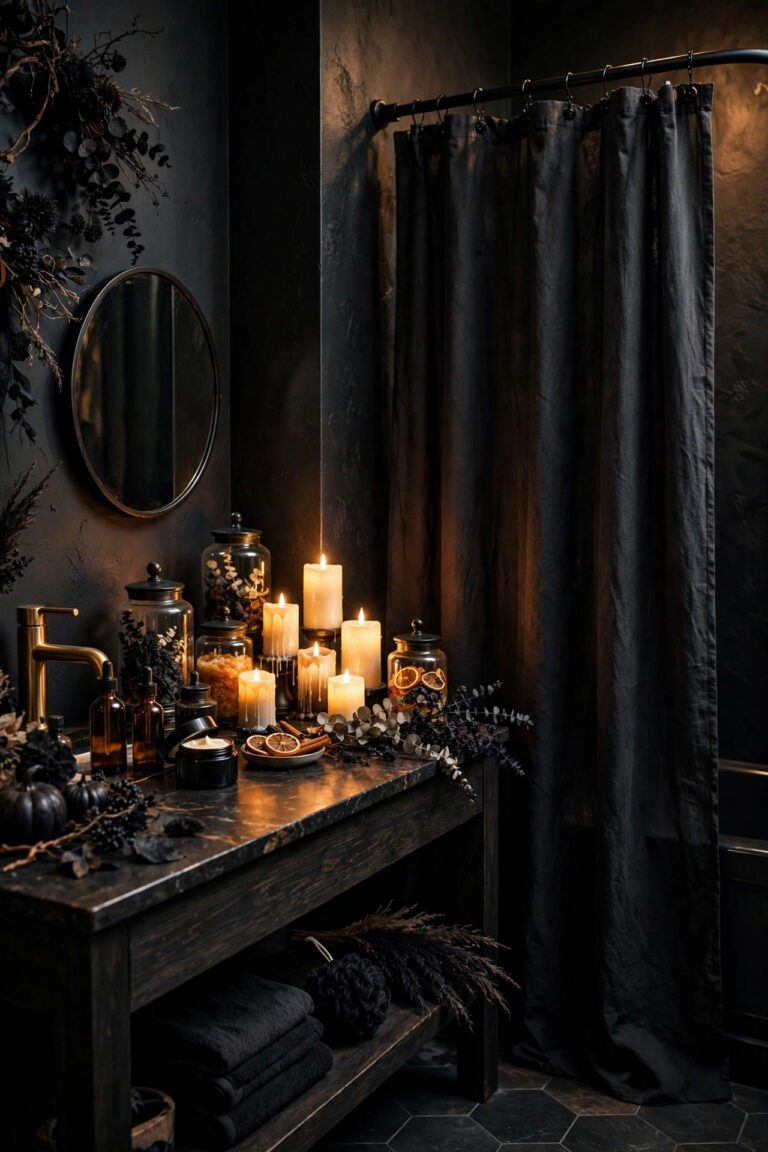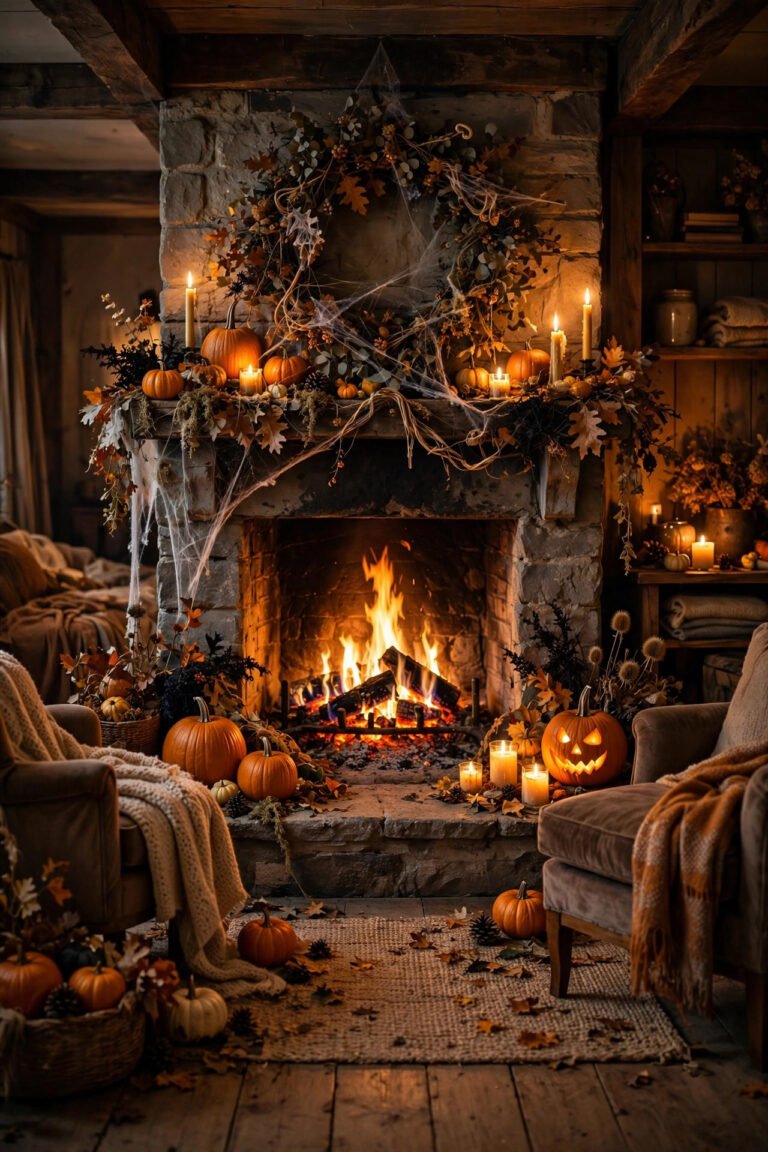
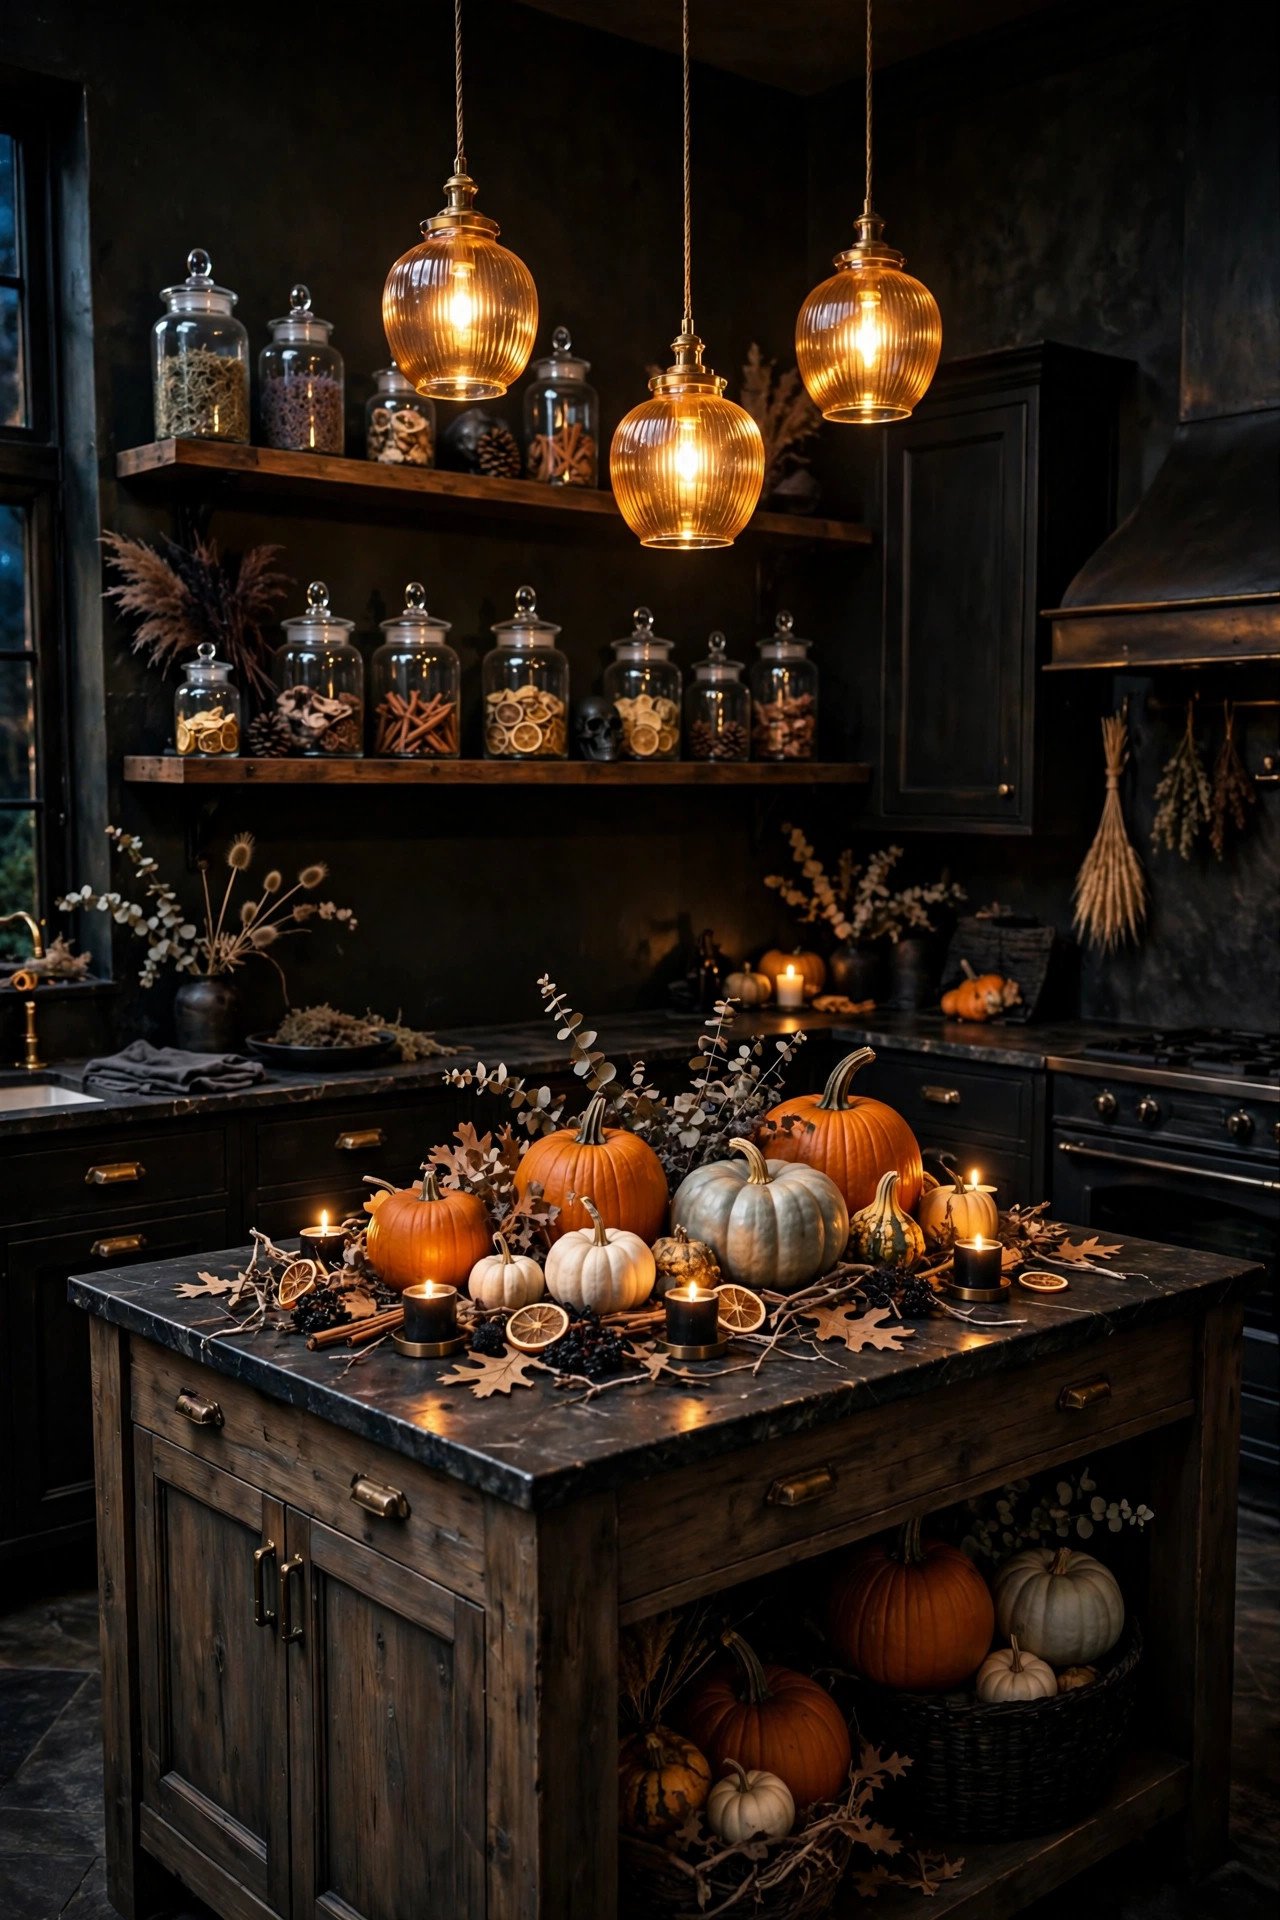
22 Halloween Kitchen Decor Ideas for a Spooky-Chic Kitchen
Halloween kitchen decor means styling the hardest-working room in your home for the season without breaking it. Unlike the porch or mantel, the kitchen has to keep functioning — meals get cooked, dishes get washed, coffee gets made. The trick is a zone-by-zone approach: treat the sink, open shelves, island, coffee station, stove, and breakfast nook as separate little vignettes instead of scattering random spooky objects across every counter.
This guide gives you 22 genuinely different ideas organized exactly that way, with food-safety rules built in. You'll get apothecary-jar styling that looks straight out of a potion lab, washable textiles that survive real cooking, and lighting tricks that make everything glow — all while keeping your prep zones clear and your kitchen fully usable through October.
Looking for more inspiration? Our Nest Decorz homepage gathers the latest home decor ideas, seasonal decorating guides and room-by-room styling tips in one place — start there and explore.
Quick Answers
– Decorate the kitchen zone by zone — sink, shelves, island, coffee station, stove area, and breakfast nook each get their own vignette, which looks intentional instead of cluttered. – Keep every food-prep surface clear — no open flames near fabric or dried florals, no decor within splatter range of the stove, and one full counter section always stays empty for actual cooking. – Apothecary jars are the signature Halloween kitchen piece — labeled glass jars filled with candy corn, dried beans, or black lentils read "potion lab" instantly and cost almost nothing. – Swap, don't add — replace everyday items with seasonal versions (black soap dispenser, amber bulbs, charcoal hand towels) so the kitchen stays functional and clutter-free.
1. How Can I Style the Kitchen Sink Area for Halloween?
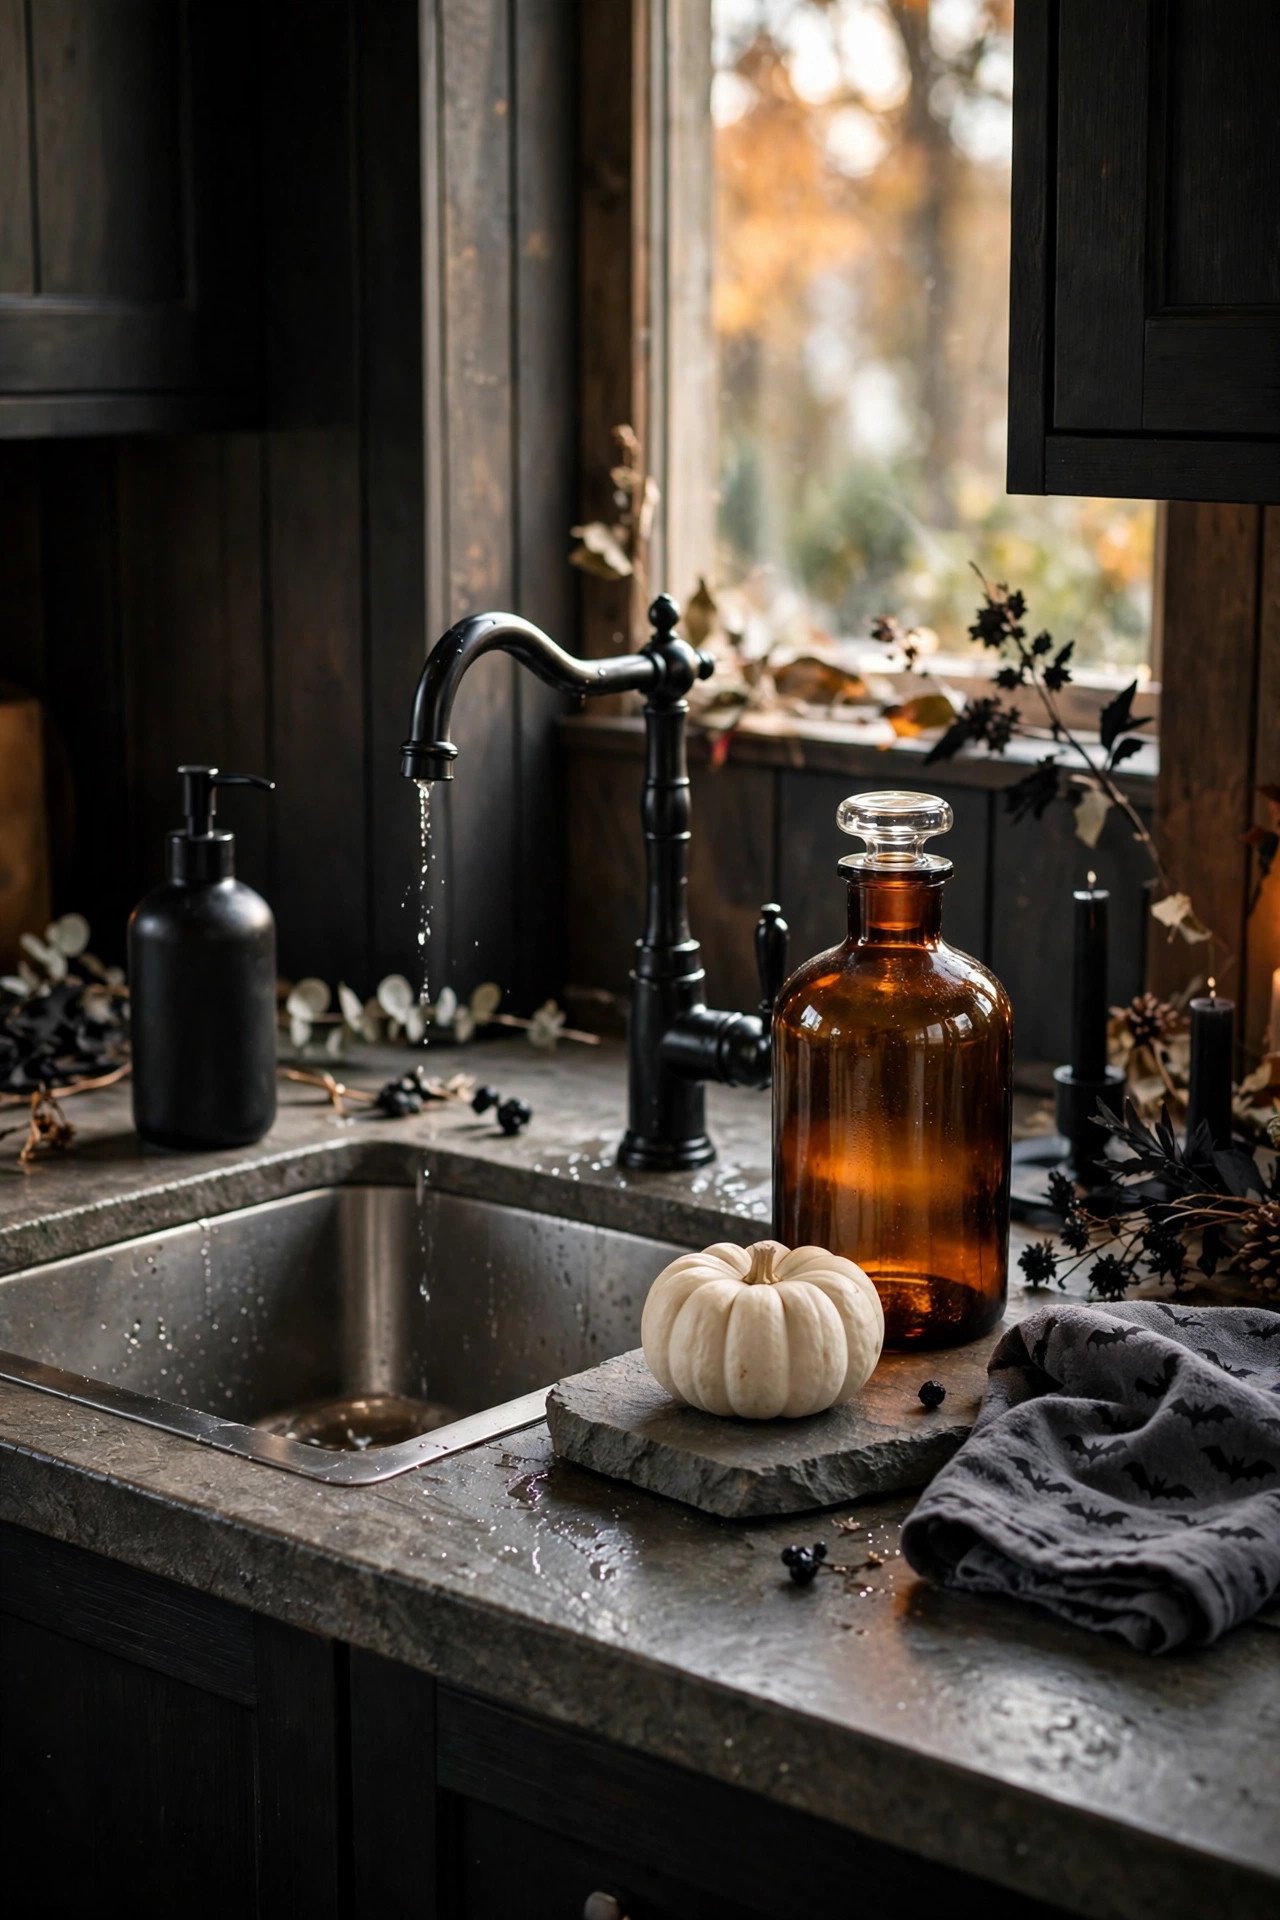
Style the sink with a matte black soap dispenser, amber dish soap decanted into an apothecary-style bottle, and a small heirloom pumpkin on a stone tray. Swap in a Halloween hand towel in charcoal with a subtle bat print. Keep the faucet and drying rack fully clear — this is still the busiest washing zone in the kitchen.
The sink is where most Halloween kitchen attempts fail, because people crowd the faucet with candles and clutter. Instead, work only at the edges. A matte black or amber glass soap dispenser instantly shifts the mood, and decanting dish soap into a vintage-style apothecary bottle with a handwritten-style label (use a removable chalk pen) costs under five dollars. Place one small heirloom pumpkin — a white Lumina or a blue-grey Jarrahdale — on a stone or slate tray at the far corner of the sink deck, far from splashing water. Real pumpkins rot faster in constant moisture, so a faux one works better here and can be reused for years. Hang a charcoal or deep-plum hand towel with a tone-on-tone bat or spiderweb print on the oven handle nearby, and choose a washable cotton towel rather than a decorative-only one — it will get used. What to avoid: scented candles within two feet of the sink (the fragrance clashes with dish soap and food), loose dried florals that shed into the basin, and anything that blocks the sprayer. If your sink sits under a window, add a single bare branch in a bud vase on the sill — it frames the view without crowding the workspace.
2. How Do You Decorate Open Kitchen Shelves for Halloween?
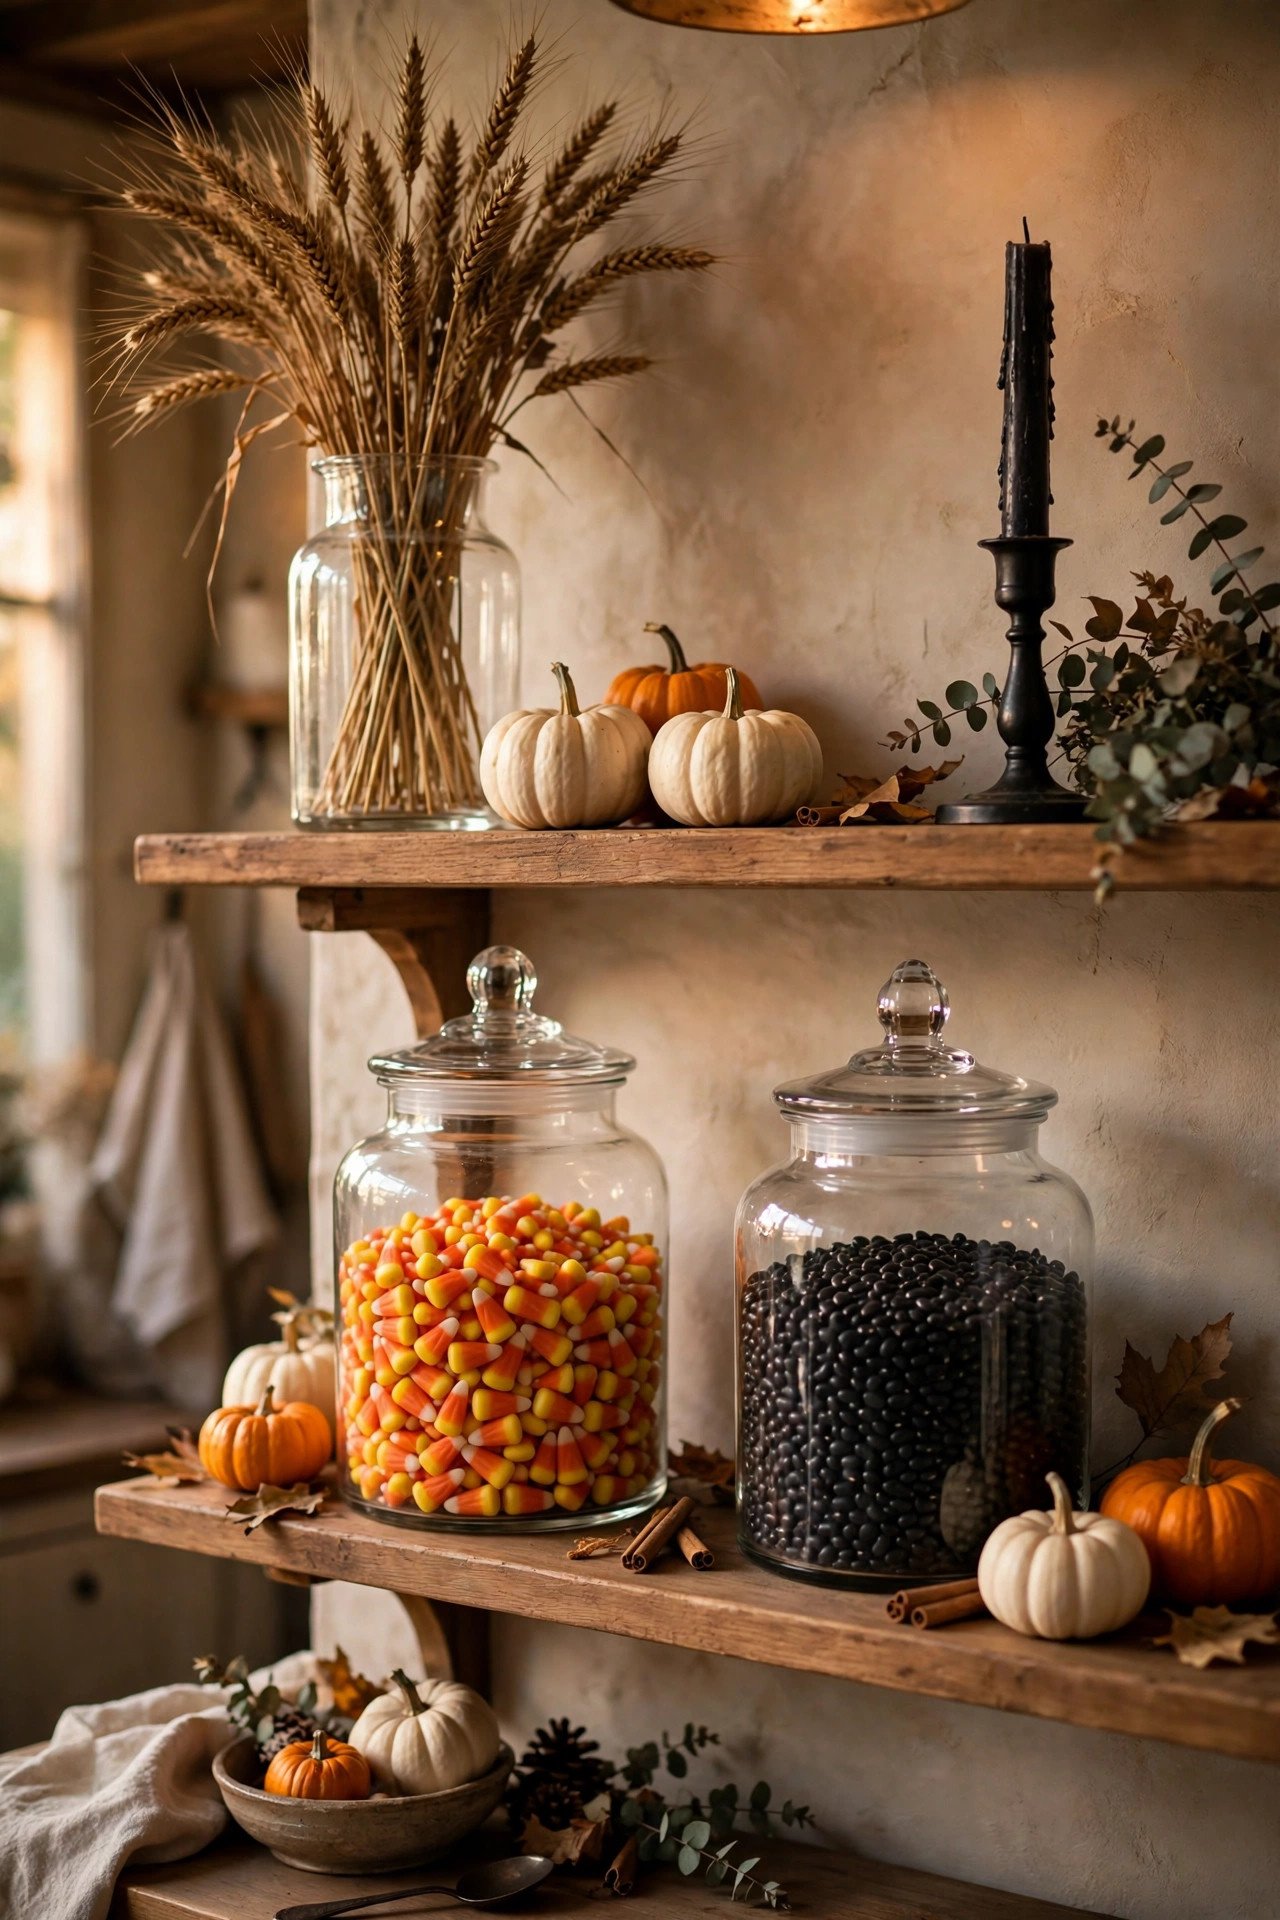
Style open shelves in odd-numbered groupings: apothecary jars filled with candy corn and dried black beans, two or three mini pumpkins in varied sizes, and one dark accent like a black candlestick or iron lantern. Leave generous negative space between groupings so the shelves read styled, not stuffed.
Open shelving is the Halloween kitchen's best display real estate, but restraint is what separates chic from cluttered. Start by clearing one shelf per section to act as your "gallery" shelf. The anchor pieces are apothecary jars — glass canisters with lids, labeled with kraft-paper tags reading things like "Bat Wings," "Eye of Newt," or "Pumpkin Spice." Fill them with candy corn, black lentils, dried kidney beans, or striped gourds. Pair each jar grouping with matte black dinnerware or a stack of charcoal linen napkins to ground the palette. Tuck in two or three mini pumpkins (real ones last 3–4 weeks indoors on a shelf, away from heat) in mixed varieties — white Baby Boo, orange Jack Be Little, and green-speckled ones for contrast. Add height with a single bare branch or a bundle of dried wheat in a tall vase at one end. The rule that saves this look: never fill more than 60 percent of any shelf. Pull everyday items you don't love looking at into closed cabinets for the month, and let the seasonal pieces breathe. Avoid anything with glitter or flocking near shelves that hold food or dishes — the shedding gets into everything. For a budget version, thrift glass jars and spray-paint the lids matte black; the transformation is dramatic for the price of one can of paint.
3. What Should I Put on My Kitchen Island for Halloween?
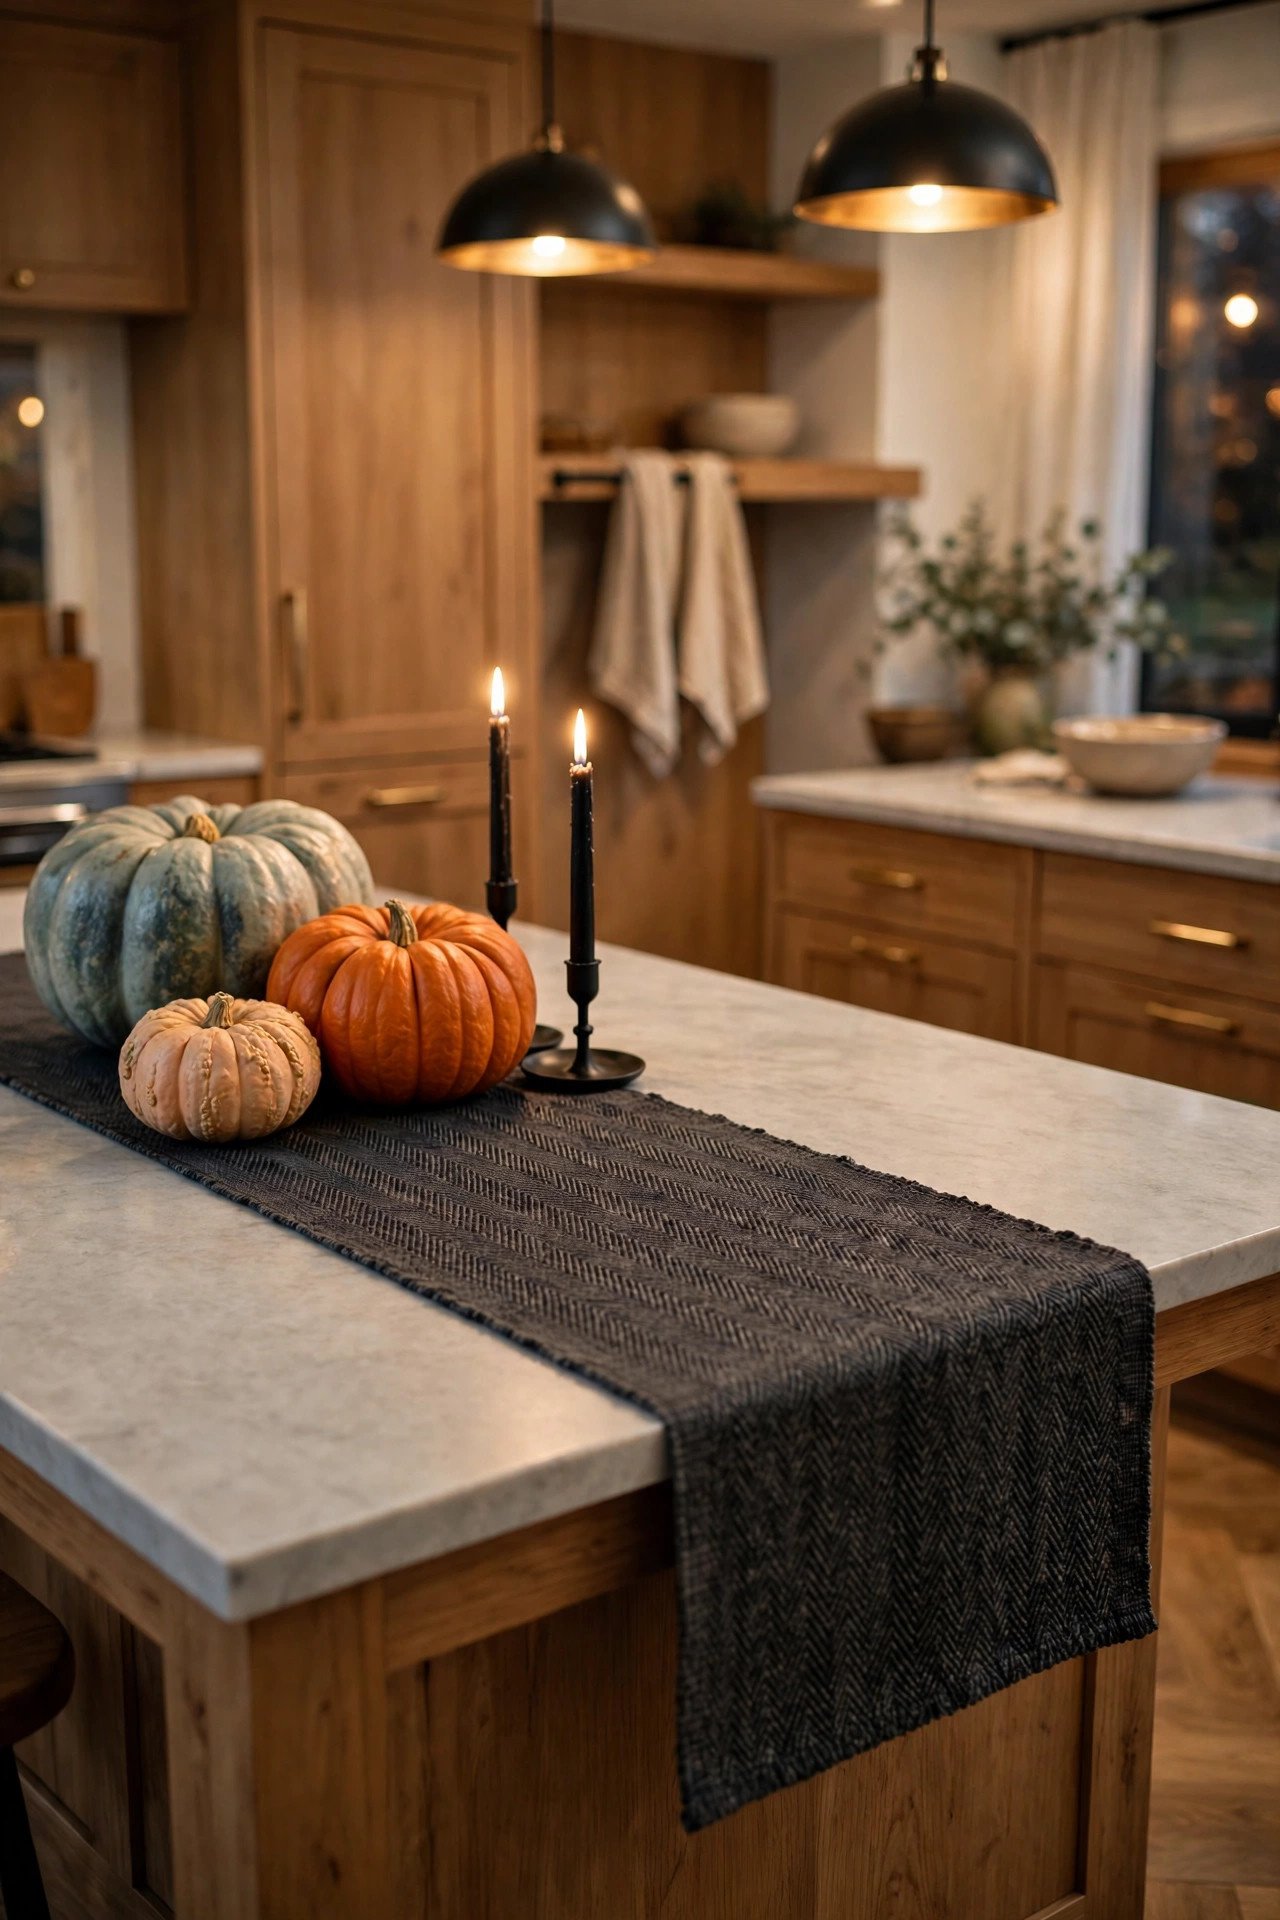
Dedicate one end of the island to a contained vignette: a washable runner, a cluster of three heirloom pumpkins in mixed sizes, and two black taper candlesticks with flameless candles. Keep the other two-thirds of the island completely clear for chopping, serving, and homework.
The island is prime real estate and the fastest place for Halloween decor to become an obstacle. The zone system solves it: choose the end farthest from the cooktop and sink, and contain everything on a runner or tray so it reads as one intentional arrangement. A washable cotton or indoor-outdoor runner in charcoal, deep plum, or a subtle buffalo check anchors the vignette and protects the countertop from pumpkin stems and candle wax. On it, cluster three heirloom pumpkins — a large Cinderella (the flattened French variety with deep ribbing), a medium white Lumina, and a small black-prince type — in an odd-numbered triangle for visual balance. Add two matte black taper holders with warm-white flameless candles; real tapers near a food-prep zone are a fire and wax-drip risk. A small wooden cutting board leaned against the cluster with a piece of aged cheese and figs can make the vignette feel lived-in rather than staged — just keep it on the runner. What to avoid: sprawling garlands that trail into the work zone, tall arrangements that block sightlines across the island, and anything within 18 inches of the cooktop edge. When you need the whole island for a big cooking session, the entire vignette lifts off as one unit on its tray — that's the point of containing it. If you're planning a full Halloween dinner, pair this with proper halloween tablescape ideas for the dining room so the kitchen island stays the casual zone.
4. How Do I Make a Spooky Coffee Bar for Halloween?
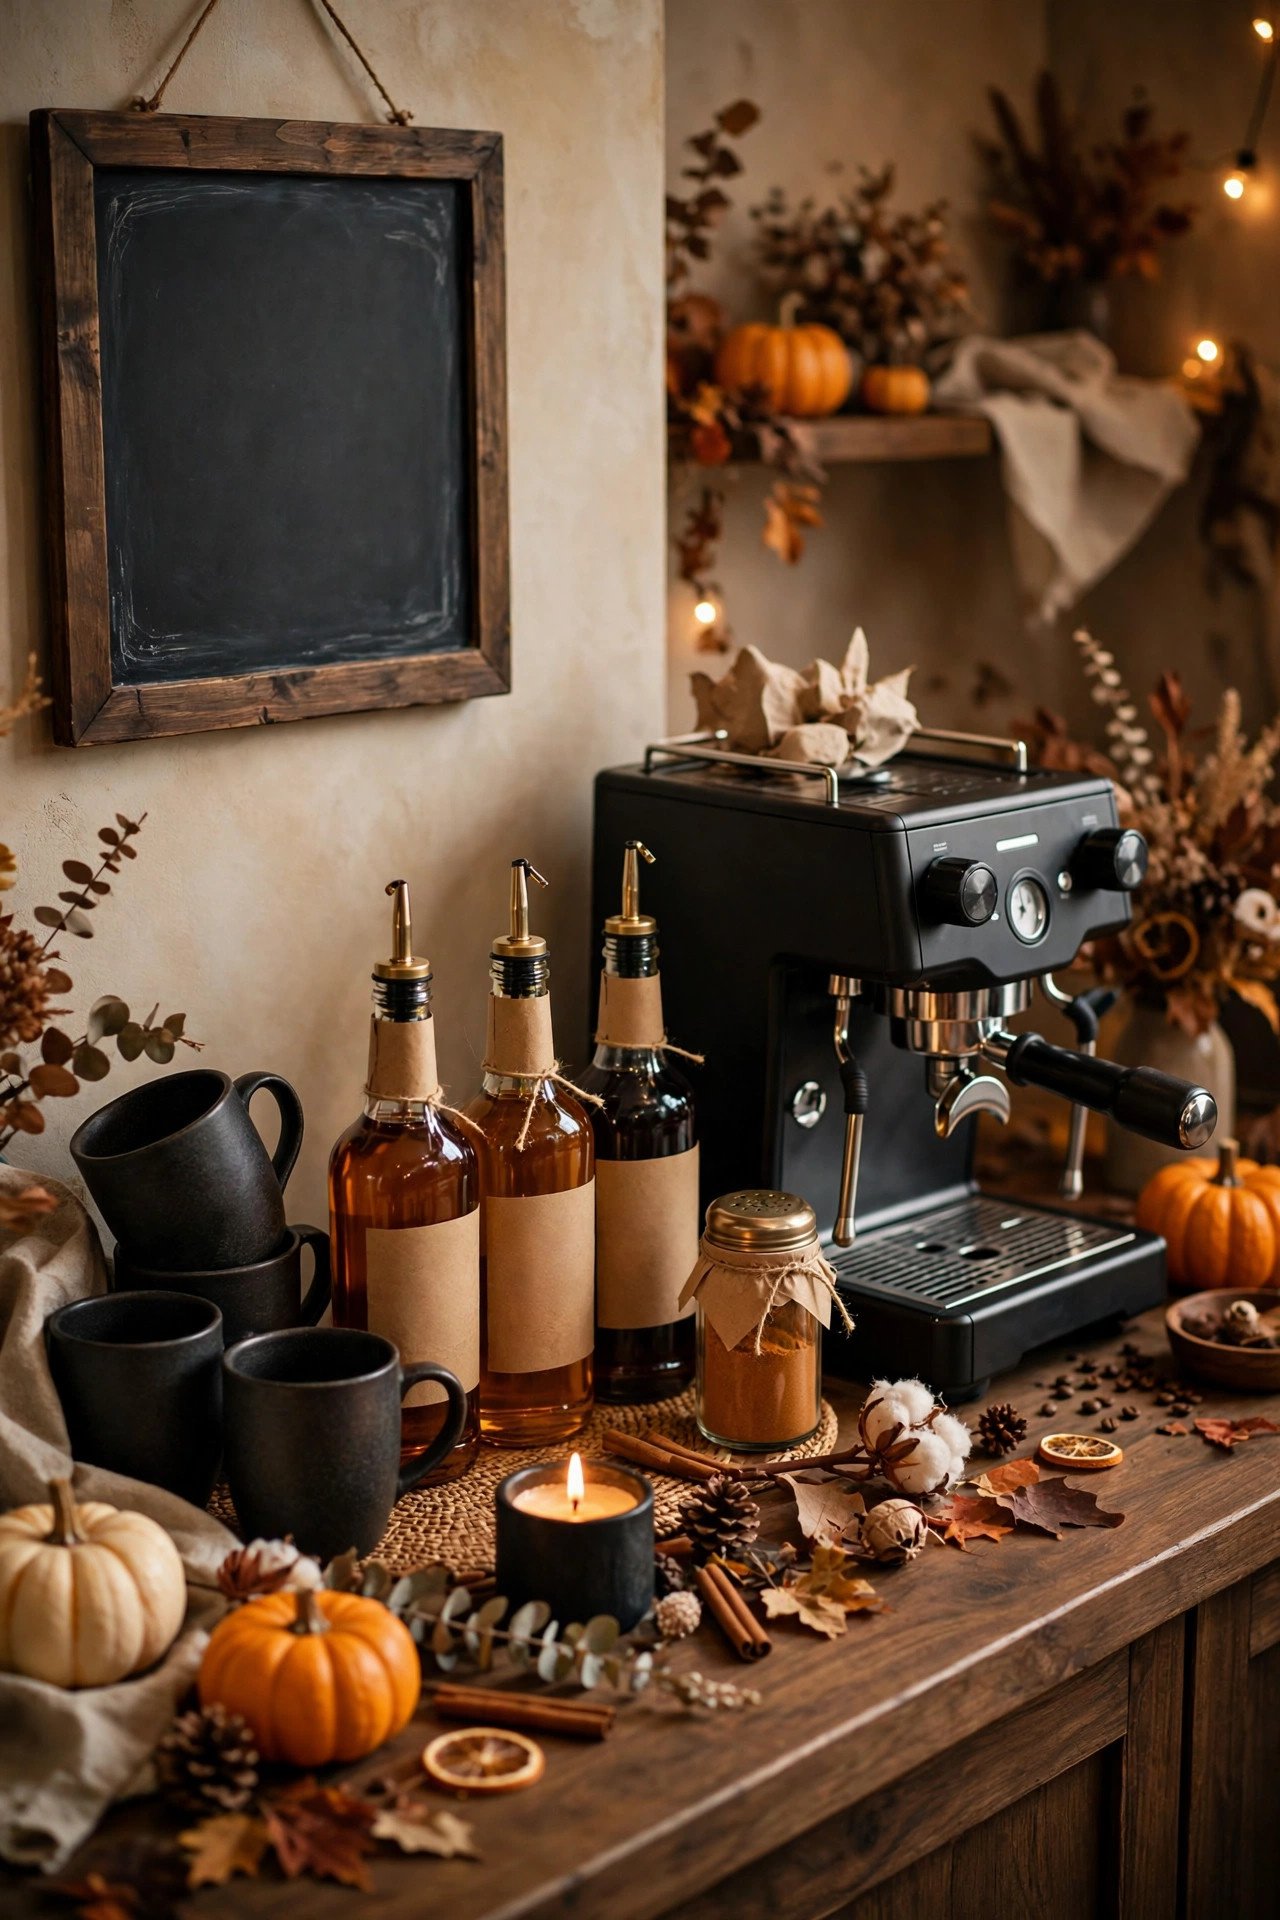
Turn the coffee station into a "potion bar" with a small chalkboard menu, black stoneware mugs, amber syrup bottles with kraft labels, and a pumpkin-spice shaker. Keep the machine itself clear and wipeable — all decor sits behind or beside it, never in front of the brew zone.
The coffee bar is the easiest Halloween win in the kitchen because it's already a styled station — you're just swapping the mood. Start with a small framed chalkboard (8×10 inches is plenty) propped behind the machine with a hand-lettered menu: "Witch's Brew — Pumpkin Spice Latte," "Black Magic — Espresso," "Ghost Milk — Steamer." Use a chalk marker for crisp lines that wipe off in November. Replace your everyday mugs with matte black or speckled stoneware ones; a set of four costs little and changes the whole station. Decant vanilla and caramel syrups into amber glass bottles with kraft-paper labels tied with twine — the apothecary look again, and it hides clashing commercial packaging. Add a pumpkin-shaped spice shaker or a small lidded jar of cinnamon sticks and star anise for scent and texture. A folded charcoal linen runner under the machine catches drips and adds the dark base the look needs. What to avoid: anything that blocks the water reservoir lid or the mug clearance under the brewer, loose cinnamon or cocoa powder near the machine's vents, and candles with open flames this close to paper filters and wooden cabinets. Keep one mug tree or hook rail for the black mugs so the counter stays clear. This little station photographs beautifully, and guests will gravitate to it at any October gathering.
5. How Can I Decorate Around the Stove Safely at Halloween?

Keep all decor at least 12 inches from any burner and never place fabric, dried florals, paper, or open flames near the cooktop. Safe stove-zone decor means heat-proof items only: a black kettle, a cast-iron pumpkin trivet, and a garland on the range hood — never on the stove itself.
This is the idea where safety matters most, and it's the one thin competitor posts skip entirely. The National Fire Protection Association's basic rule applies year-round but especially at Halloween: nothing combustible within three feet of an open flame, and in a kitchen that means the gas burner or even a hot electric coil. So the stove surface itself stays decoration-free — full stop. Instead, decorate the vertical space: drape a dried-floral and eucalyptus garland across the front of the range hood (heat rises, but the hood's exterior front edge stays cool; still, keep garlands to the front face, never underneath near the filters). Swap your everyday kettle for a matte black one for the month. Use a cast-iron pumpkin-shaped trivet as a functional accent that can actually hold a hot pot. On the counter beside the stove — at least a foot from the burners — a cluster of small gourds on a stone trivet is safe and seasonal. Never use real candles anywhere near the cooking zone; if you want glow here, a flameless LED candle inside a glass hurricane on the far counter is the safe substitute. And skip the cute oven-mitt ghosts or fabric garlands draped over the oven handle — one forgotten preheat cycle turns them into a hazard. Chic Halloween kitchens respect the fire triangle.
6. How Do I Style a Breakfast Nook for Halloween?
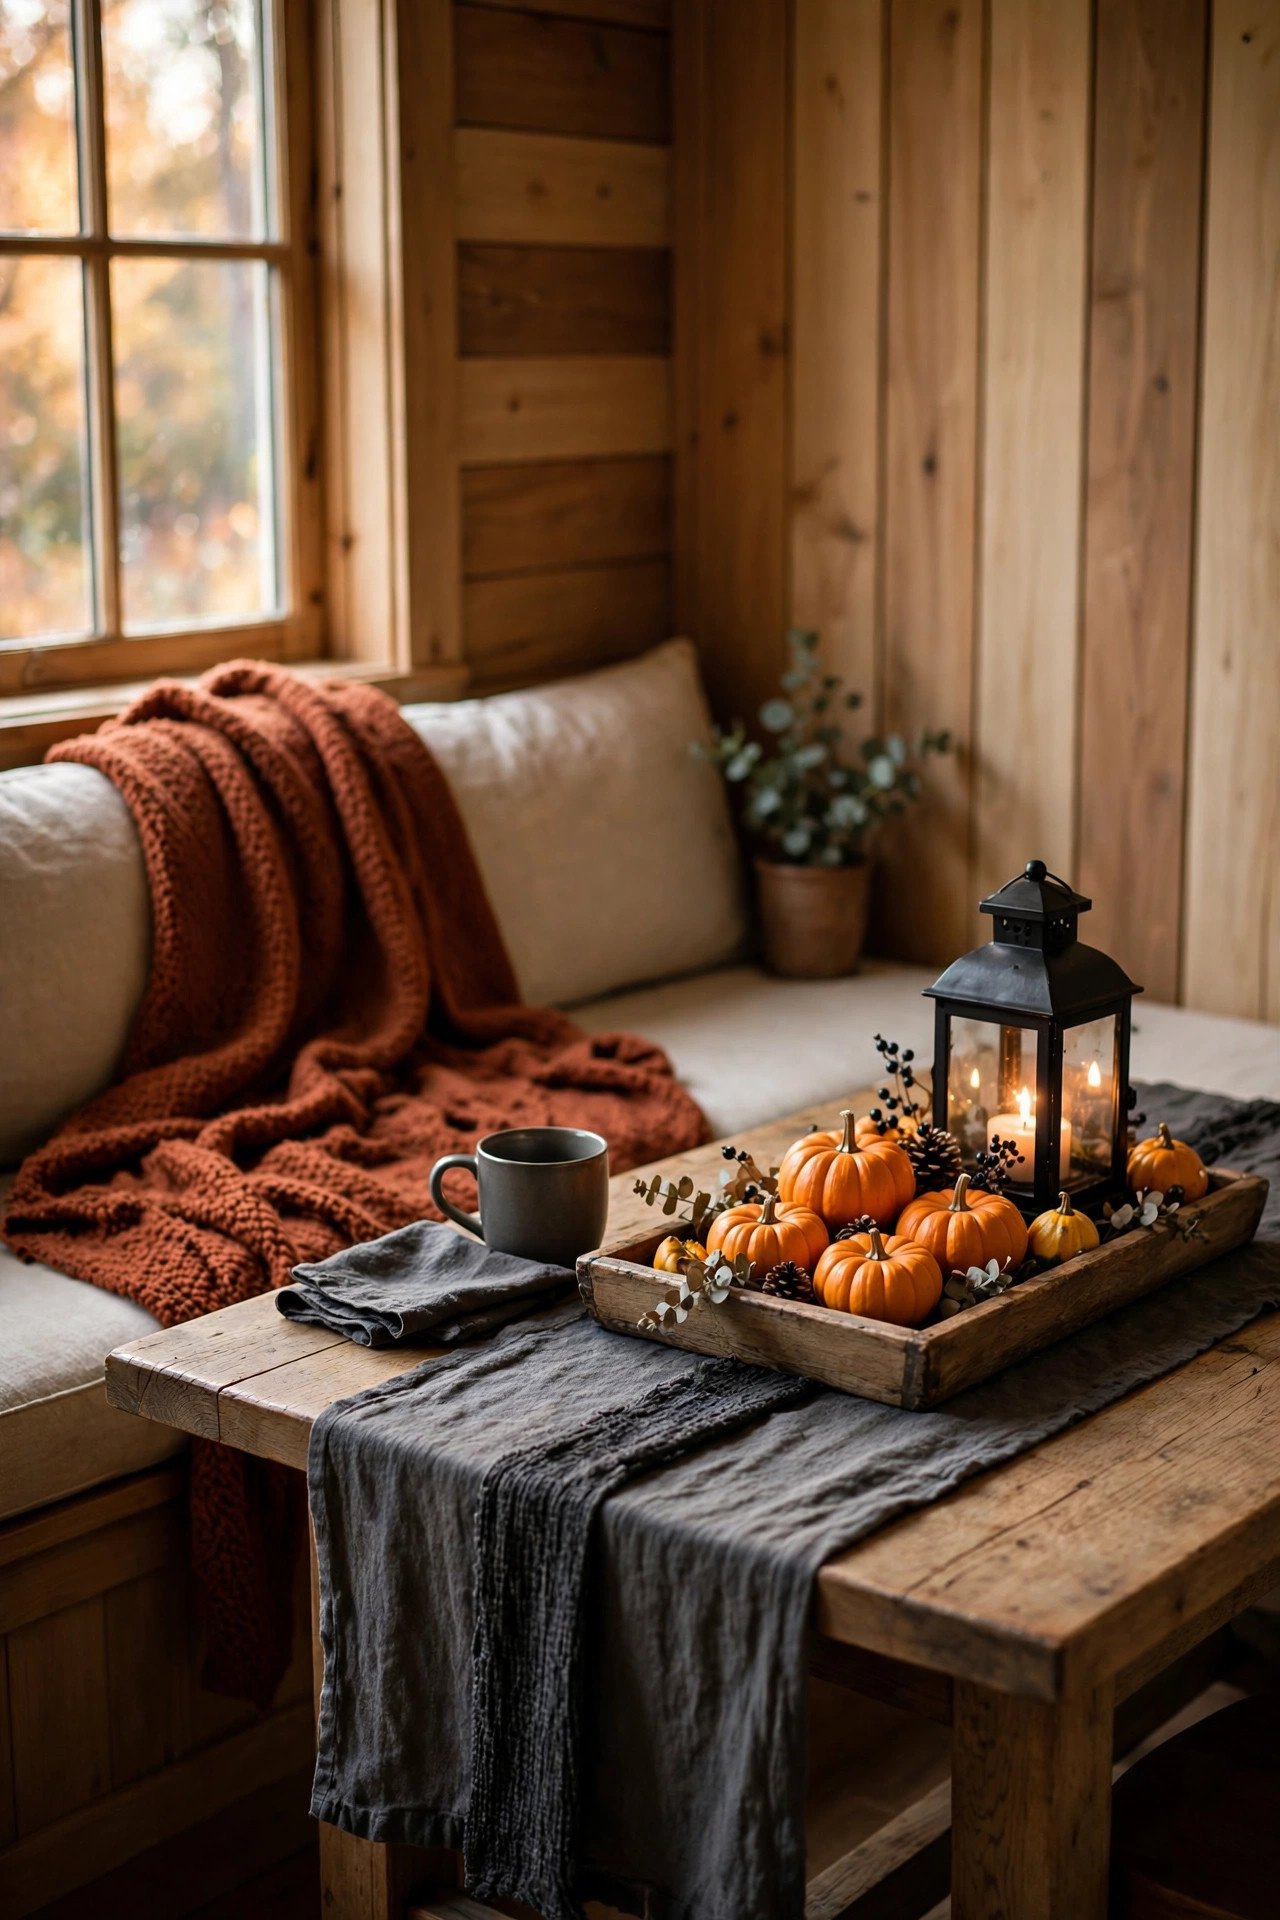
Layer a charcoal runner down the nook table, add a low centerpiece of mini pumpkins and a black lantern with a flameless candle, and drape a washable throw over one bench. Keep the centerpiece under 12 inches tall so conversation flows across the table.
The breakfast nook is where the kitchen's Halloween mood gets to be cozy rather than spooky. Because it's a sitting zone, you can go softer and more layered than at the work counters. Start with a table runner in charcoal, deep aubergine, or a muted plaid — washable cotton, because this table still hosts breakfast. The centerpiece should be low and narrow: a wooden dough bowl or low tray filled with mini pumpkins, pinecones, and a black metal lantern holding a warm-white flameless candle. Under 12 inches tall is the rule — anything taller blocks eye contact and gets moved the first time someone sits down. Add one washable throw blanket in a rust or burnt-orange tone draped over a bench or chair back; it adds the autumn color the dark palette needs and it's practical on chilly October mornings. Swap chair cushions for charcoal or black covers if you have them — cushion covers are a five-minute change with big impact. A small bud vase with a single dark stem (dried black-eyed Susan or a bare branch) at one end finishes the table. What to avoid: tall candlesticks on a nook table (they get knocked), loose candy as table scatter (it ends up on the floor), and anything that can't survive being wiped down after sticky pancake mornings. For the full dining-room version of this look, see these halloween tablescape ideas built for dinner parties.
7. What Are the Best Halloween Window Treatments for a Kitchen?
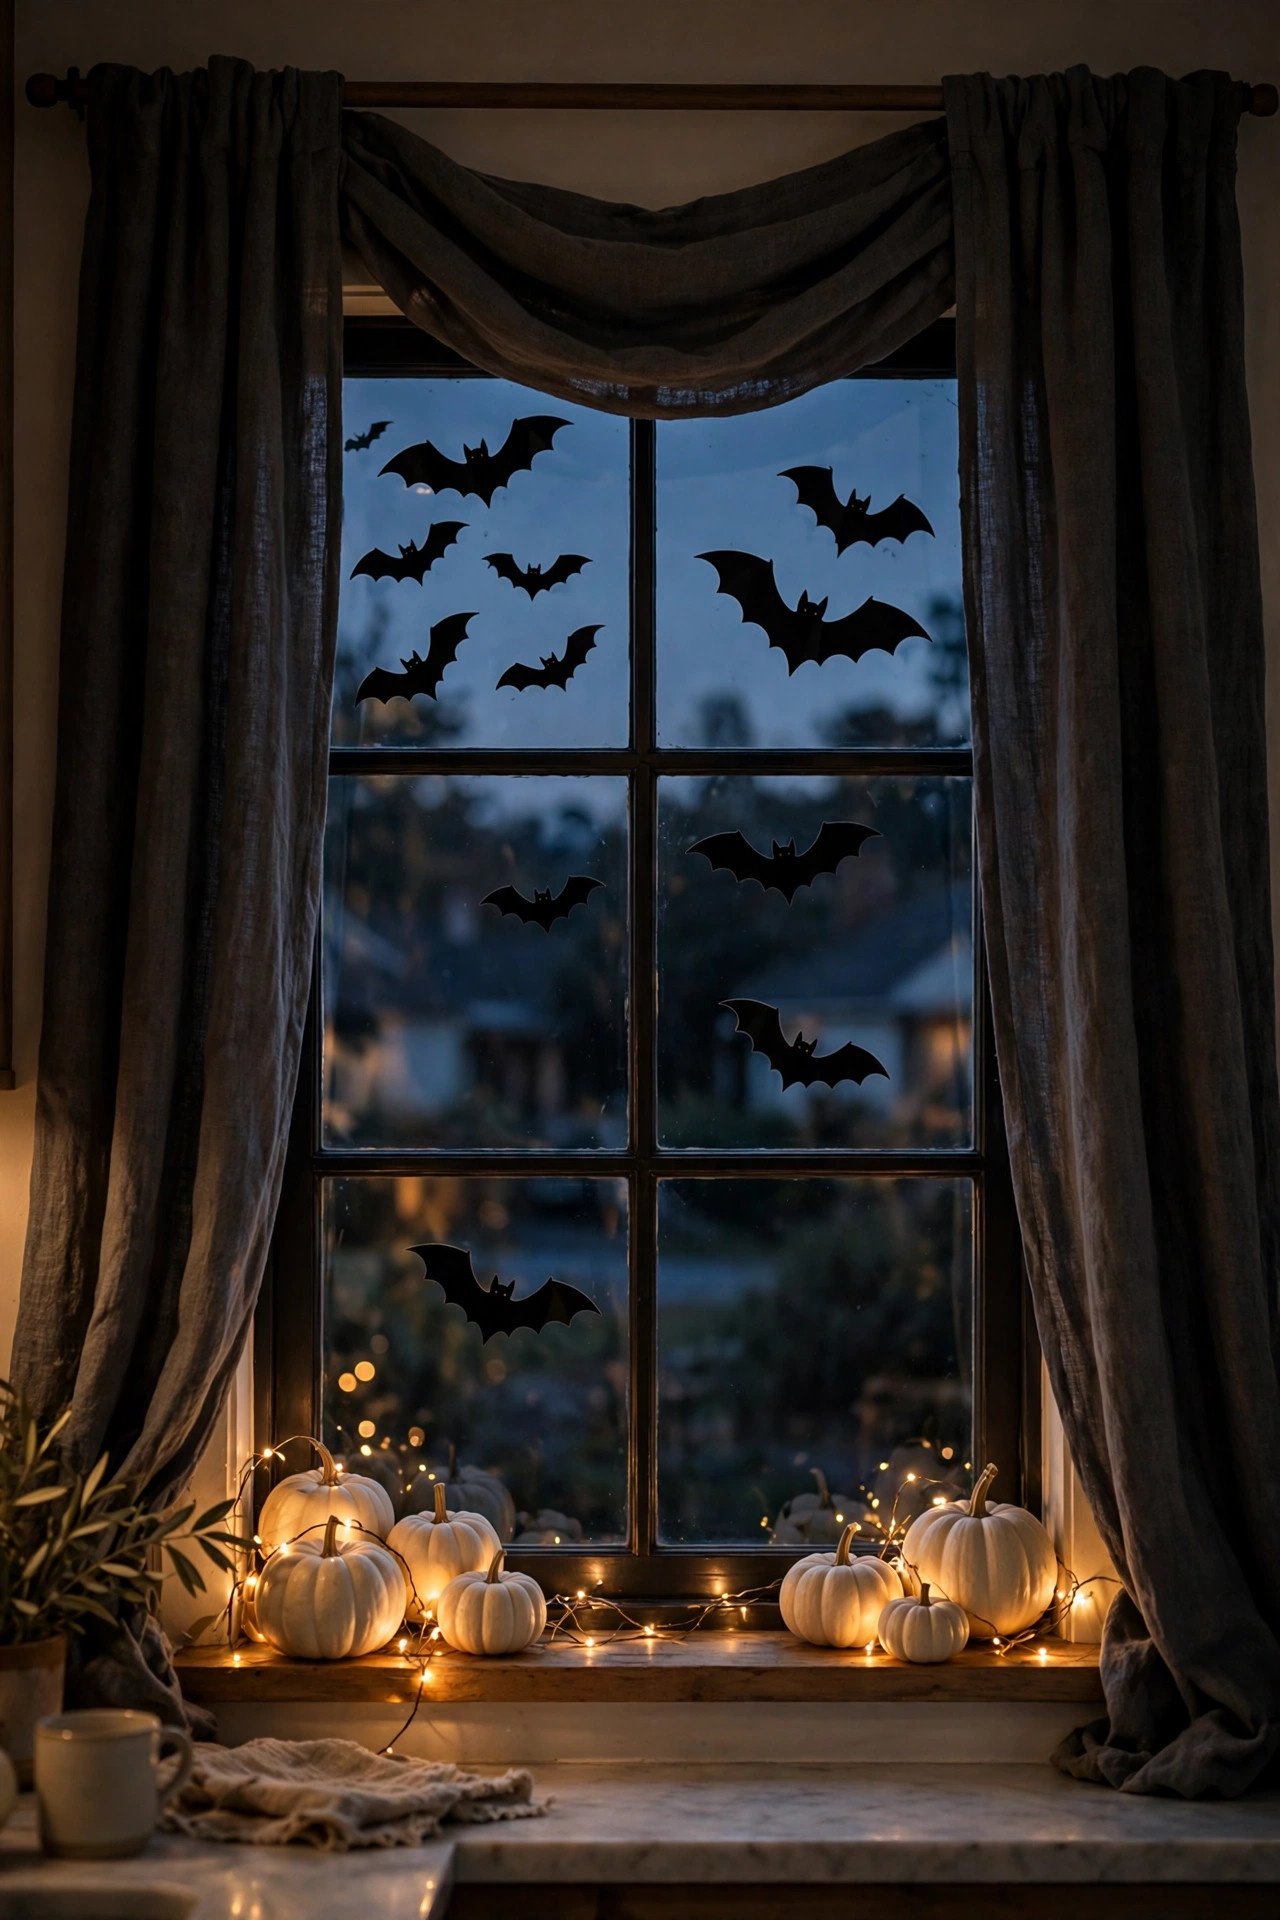
Use matte black window film silhouettes (bats, bare trees, a witch on a broomstick) on the glass, and swap light curtains for charcoal linen panels. The silhouettes read beautifully from both inside and outside, especially backlit at night.
Kitchen windows are the one spot where Halloween decor works double duty — you see it from the sink, and trick-or-treaters see it from the street. Static-cling window silhouettes are the renter-friendly hero here: matte black bat flocks, bare-branch trees, or a classic witch silhouette press onto clean glass with water, peel off without residue, and cost a few dollars per sheet. Apply them to the upper half of the window so they don't block your view of the yard or the light over the sink. From outside at night, with the kitchen lights on, they glow like a shadow-puppet show — genuinely striking. For the curtain side, swap whatever's there for simple charcoal or deep-olive linen panels; linen's texture keeps the look chic rather than costume-y, and panels are easy to wash after the season. If you have a garden window or a deep sill, line it with a row of small white pumpkins interspersed with a string of warm-white fairy lights (battery-operated, on a timer). What to avoid: orange plastic window clings from the party aisle — they fade and look cheap within a week; real candles on a window sill above a radiator or near curtains; and anything that blocks more than a third of the natural light, because October days are already short and a dark kitchen feels gloomy rather than moody.
8. Can I Decorate Kitchen Cabinet Doors for Halloween?
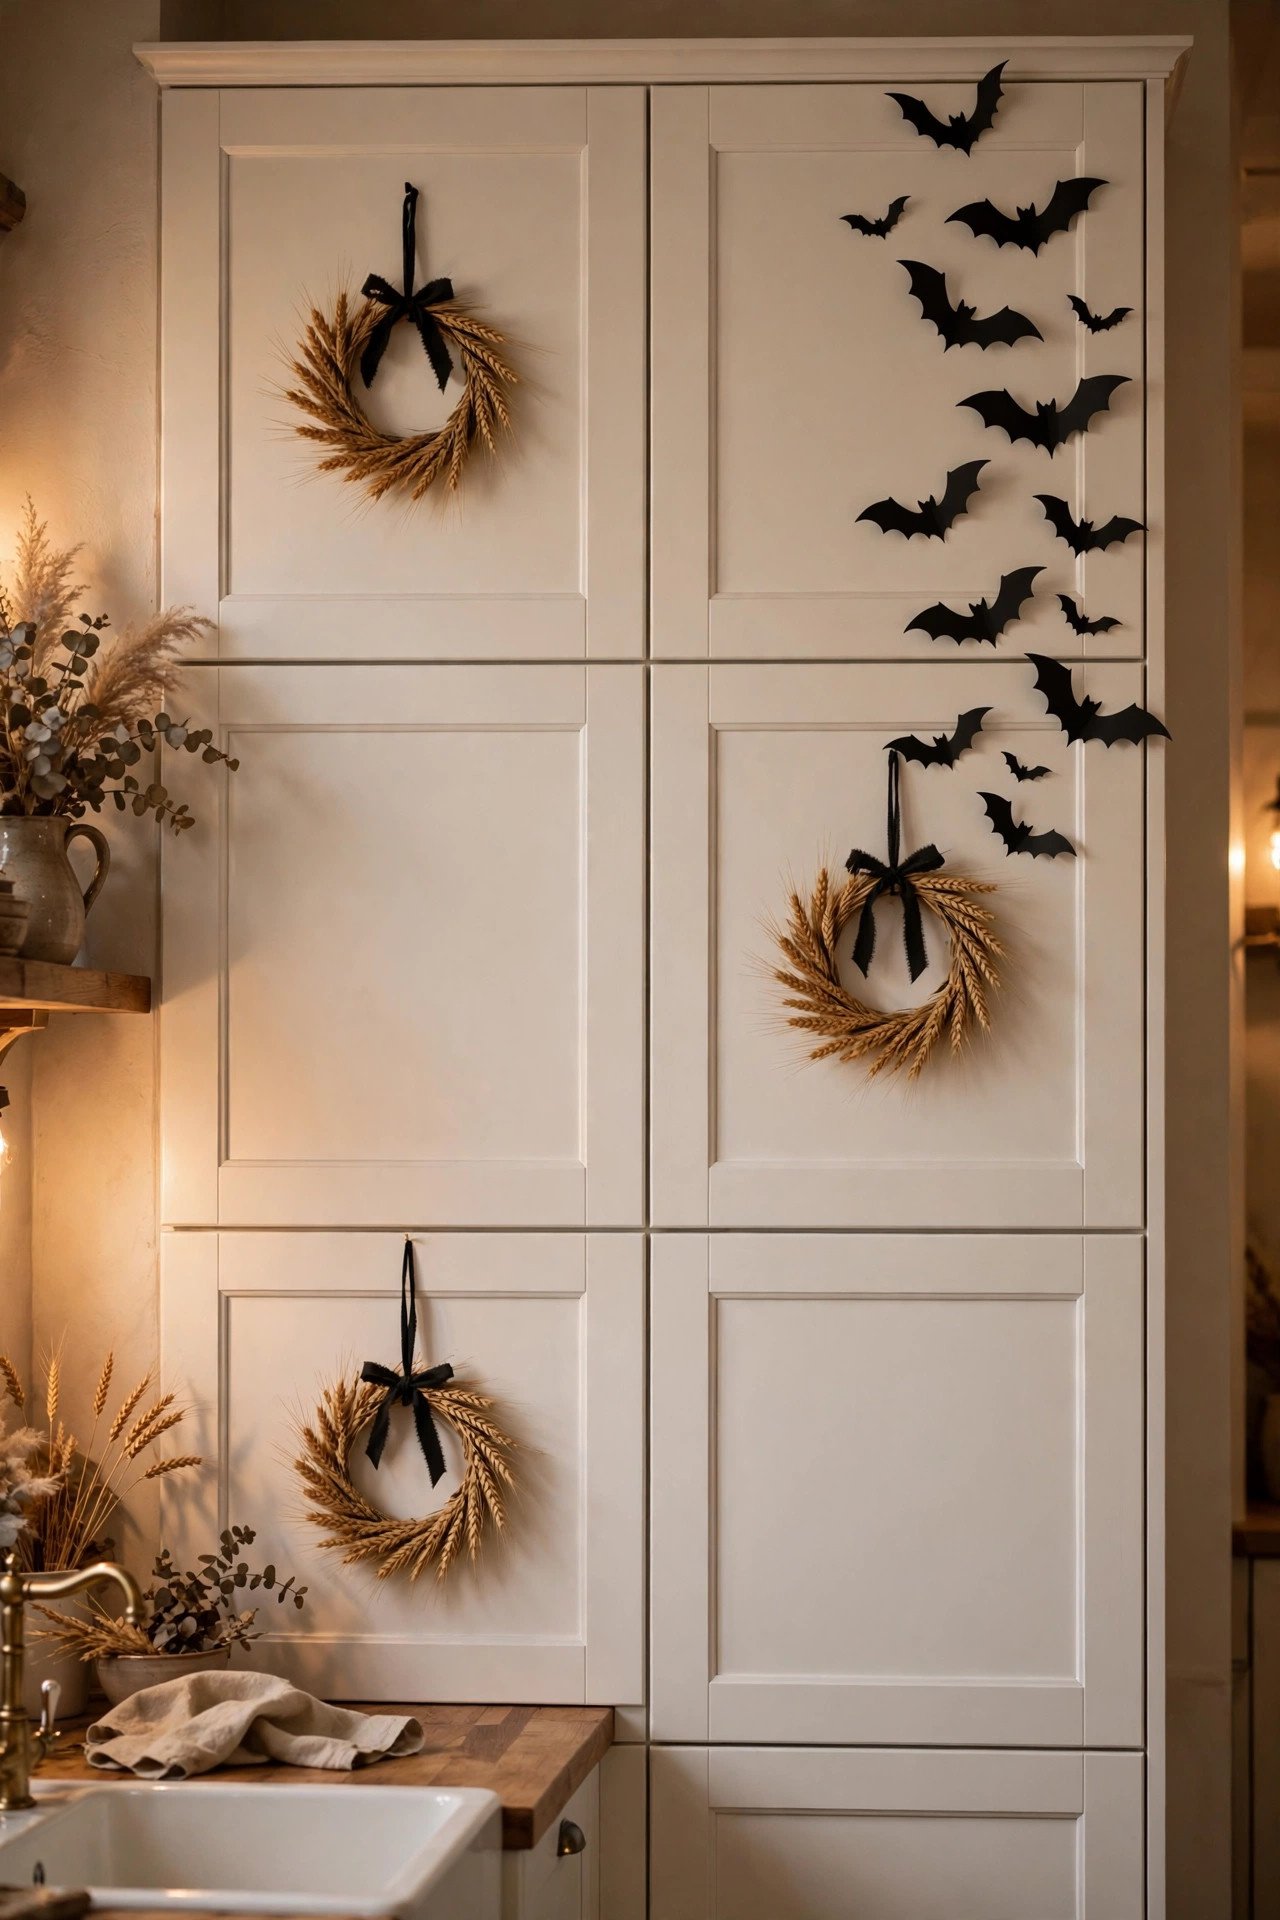
Yes — hang one small wreath per every second or third cabinet door using removable adhesive hooks, or press black bat silhouettes onto the door fronts. Keep it to a rhythm (every other door) so it reads as design, not clutter.
Cabinet doors are flat, vertical, and everywhere in a kitchen, which makes them tempting to cover — and easy to overdo. The trick is rhythm: decorate every second or third door, not all of them. Mini wreaths (6–8 inches) in dried wheat, black berries, or preserved eucalyptus with a dark ribbon hang beautifully from removable adhesive hooks rated for the wreath's weight — test one hook for 24 hours before hanging the rest, and never hang wreaths on doors you open fifty times a day; choose the least-used uppers. Alternatively, cut or buy matte black bat or cat silhouettes in two sizes and press them onto door fronts in a rising flock pattern, as if they're flying up toward the ceiling. They peel off cleanly from sealed cabinet finishes. For painted or Shaker-style cabinets, the silhouettes add graphic punch without damaging anything; for natural wood, stick to the wreaths so you don't fight the wood grain. What to avoid: anything with adhesive that isn't explicitly removable (test in a hidden spot), heavy wreaths on doors with soft-close hinges (the weight throws off the mechanism), and decorating the doors around the stove — heat and grease will ruin natural materials fast. This is a great renter-friendly project, and most of the pieces pack flat for next year. If you love this kind of low-cost seasonal swap, these DIY halloween decorations on a budget that look expensive cover the whole house with the same philosophy.
9. How Do You Decorate a Fridge for Halloween?

Apply a scattered flock of magnetic bats in varied sizes rising up one side of the fridge, and use the door as a Halloween menu board with magnetic chalk labels. Keep magnets off the water/ice dispenser and never block the door seals.
The fridge is the kitchen's biggest flat surface, and a bat flock is the classic for a reason — it takes five minutes and looks great. Buy or cut matte black magnetic bats in three sizes and arrange them rising diagonally from the bottom corner toward the top, spacing them wider as they "fly" upward; the graduated spacing is what makes it look designed rather than random. Then put the fridge to work as the household's October command center: magnetic chalkboard labels (or a magnetic dry-erase board) listing the week's Halloween countdown, the party date, or the pumpkin-carving schedule. Corral the usual clutter — school papers, takeout menus — into one magnetic pocket or move them to a side panel for the month; a clean fridge door makes the bats pop. What to avoid: covering the water and ice dispenser (you'll regret it the first time you need water mid-cooking), magnets near the door seals (they can break the seal and waste energy), and heavy magnetic frames on French-door models where the weight strains the door over time. One more chic option: swap your usual fridge magnets for a matching set of matte black or brass ones — a tiny change that makes even the remaining clutter look intentional. The whole project should cost under fifteen dollars and reverse in minutes on November first.
10. How Can Pendant Lights Become Part of Halloween Kitchen Decor?

Drape faux spiderwebbing loosely over pendant cords (never the bulbs), hang two or three lightweight paper bats from the cords with fishing line, and swap the bulbs for amber-tinted LEDs. The amber light alone transforms the kitchen's October mood.
Pendant lights over the island are a focal point, so they're high-leverage for Halloween — but they're also electrical fixtures, which means rules. Faux spiderwebbing (the stretchy polyester kind) can be draped loosely over the cords and the ceiling canopy, but never over or touching the bulbs or shades — it melts, and it's a fire risk near hot bulbs. Use LED bulbs, which run cool, and still keep webbing a few inches from any bulb. Hang two or three lightweight paper or foam bats from the cords with clear fishing line at staggered heights; keep them above head height and away from the cooktop's heat column. The single biggest mood change costs almost nothing: swap the pendant bulbs for amber-tinted or vintage Edison-style LEDs (2200K color temperature). Amber light flatters food, flatters skin, and makes every pumpkin on the island glow — it's the difference between "decorated kitchen" and "Halloween kitchen." Put them on a dimmer or smart plug if you can; dimmed amber pendants over the island vignette at night is the money shot. What to avoid: real candles in hanging lanterns over a food zone, heavy ornaments that strain the cord, and anything dangling low enough to hit a tall person's head. When November comes, the bats and webbing come down in minutes but keep the amber bulbs — they're lovely through the holidays.
11. What's a Chic Way to Decorate the Range Hood for Halloween?
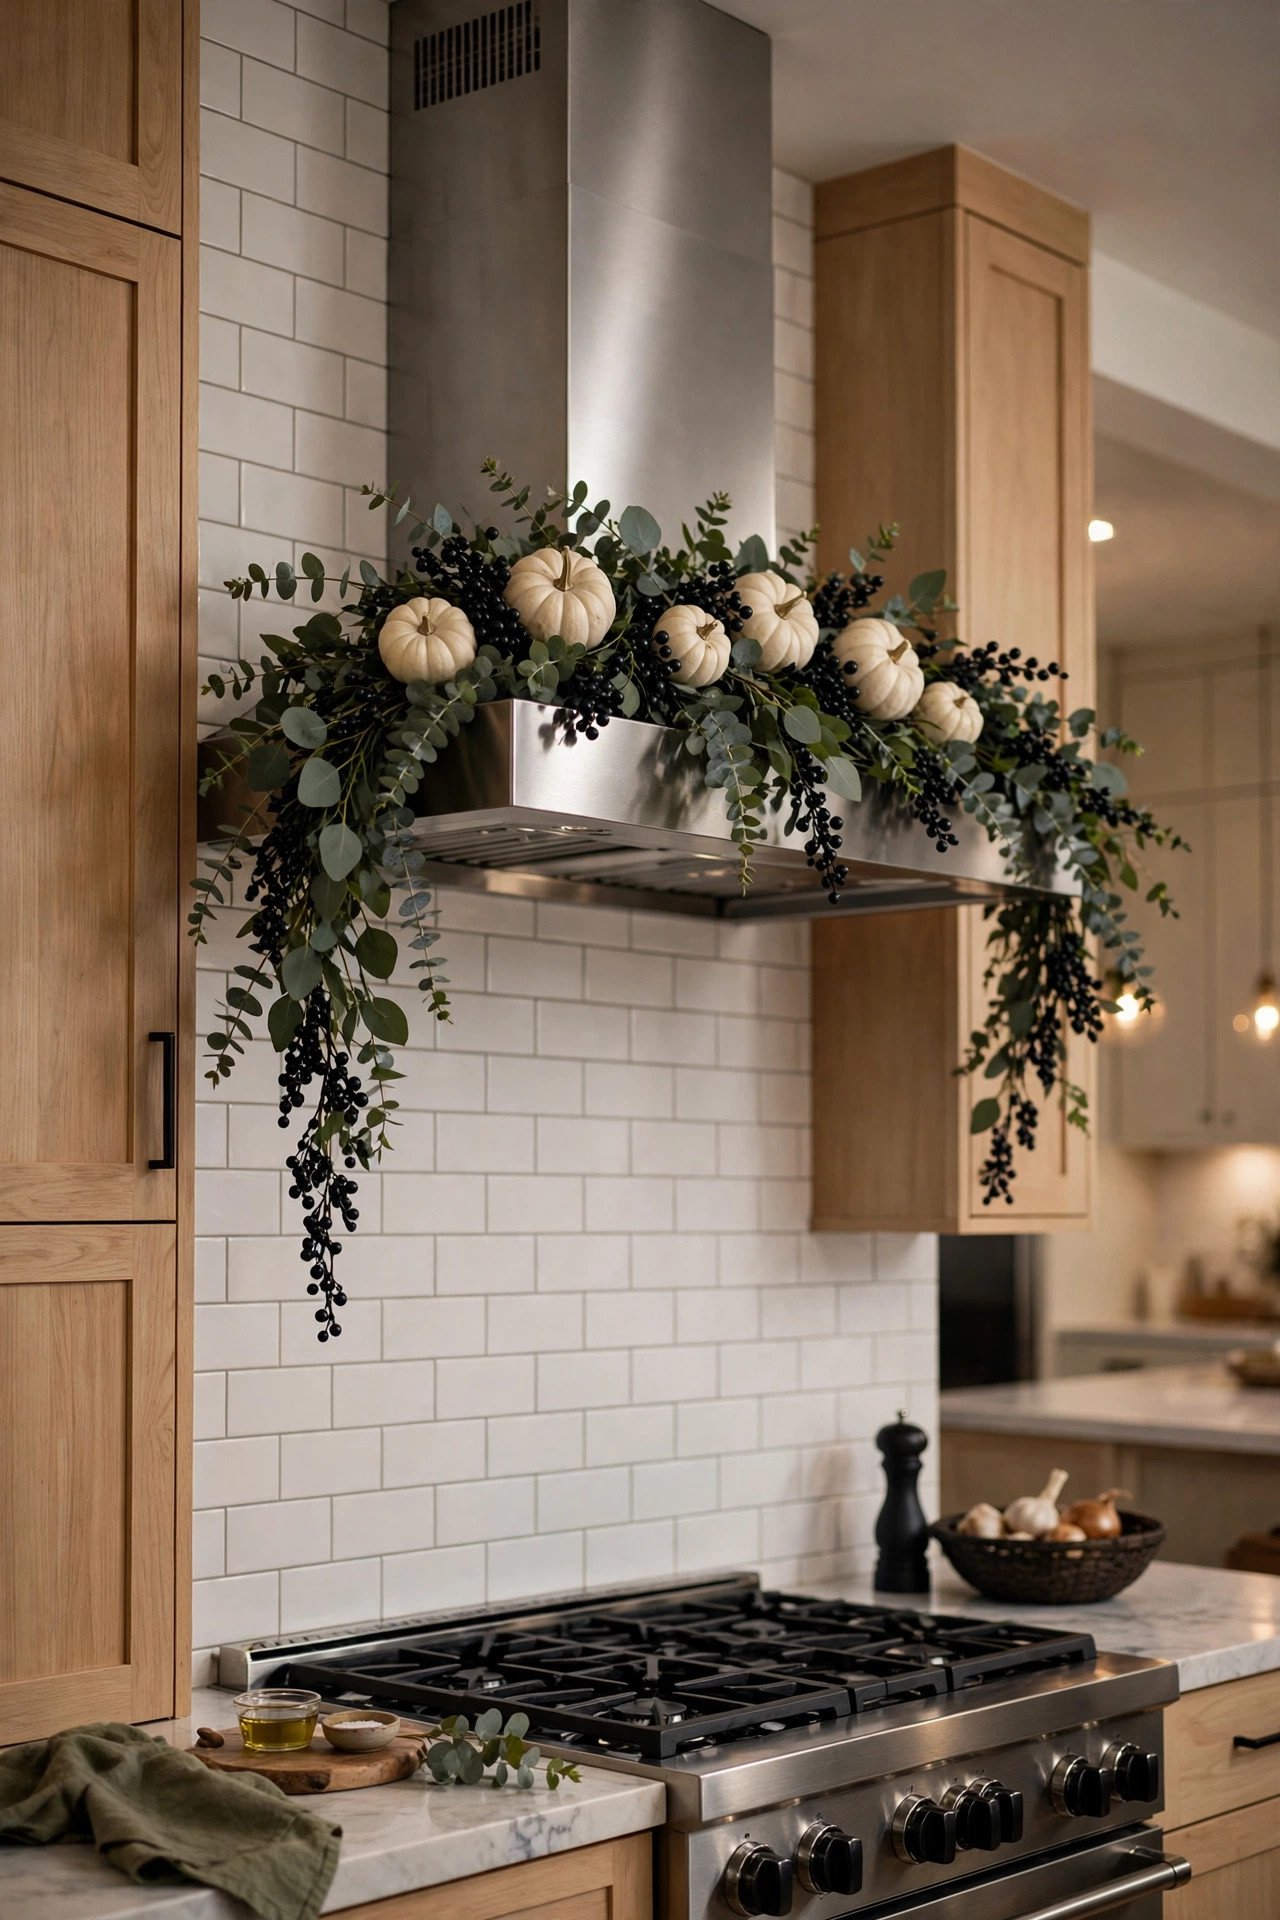
Drape a eucalyptus-and-black-berry garland across the front face of the range hood, secured with removable hooks. Keep all materials on the cool front exterior — never underneath near the filters, fans, or heat.
The range hood is the kitchen's architectural anchor, and a garland across its front face draws the eye up in exactly the way designers intend. Build or buy a garland of preserved eucalyptus (the silvery-blue kind), dried black berries, and a few dark dried blooms like black scabiosa pods or dried hydrangea in deep plum. Preserved and dried materials are key — fresh greenery wilts within days above a working stove. Secure it with small removable adhesive hooks on the hood's front face, swagging it gently rather than pulling it taut; a soft drape looks organic and expensive. Tuck in three or four miniature white pumpkins wired into the garland for the Halloween read. The critical safety line: everything stays on the front exterior face, which stays cool. Nothing goes underneath the hood near the grease filters or the fan intake, nothing drapes down the sides toward the burners, and the garland comes down entirely if you're doing heavy frying — grease aerosol will coat dried materials and they're nearly impossible to clean. For a modern black kitchen this look is seamless; if your kitchen leans dark already, these black kitchen ideas show how to carry the moody palette year-round. Budget version: one eucalyptus garland from a craft store plus a bag of faux black berries, wired together in twenty minutes.
12. How Do I Set Up a Halloween Drinks Station in the Kitchen?

Style a bar cart or one counter section as a "potion bar": a glass punch bowl or beverage dispenser, amber bottles with kraft-paper labels ("Poison," "Witch's Brew"), black cocktail napkins, and a bowl of dried orange slices. Keep it away from the main prep zone.
A Halloween drinks station gives party guests a destination and keeps them out of your cooking zone — functional and festive. A bar cart is ideal because it rolls wherever the party is, but a cleared 24-inch counter section works too. The centerpiece is a glass beverage dispenser or apothecary-style punch bowl; fill it with apple cider and a few dried orange slices and cinnamon sticks so it looks styled even before the party starts. Behind it, line up three or four amber glass bottles (decanter sets are cheap secondhand) with kraft-paper labels tied in twine: "Poison," "Witch's Brew," "Black Magic." Fill them with iced tea, cranberry juice, and cola — the labels are the joke, the contents are the drinks. Add a stack of black cocktail napkins, a small bowl of black-and-orange wrapped candies, and one dramatic element: a cauldron-style ice bucket or a black taper in a brass holder (flameless if it's near foot traffic). What to avoid: glass dispensers with fiddly spigots that drip — test before the party; open-flame candles at drink height where sleeves pass; and placing the station in the triangle between sink, stove, and fridge, which is the cook's workspace. For the matching dinner-party spread, pair this with proper halloween tablescape ideas so the whole evening feels coordinated.
13. Can You Decorate a Kitchen Backsplash for Halloween?
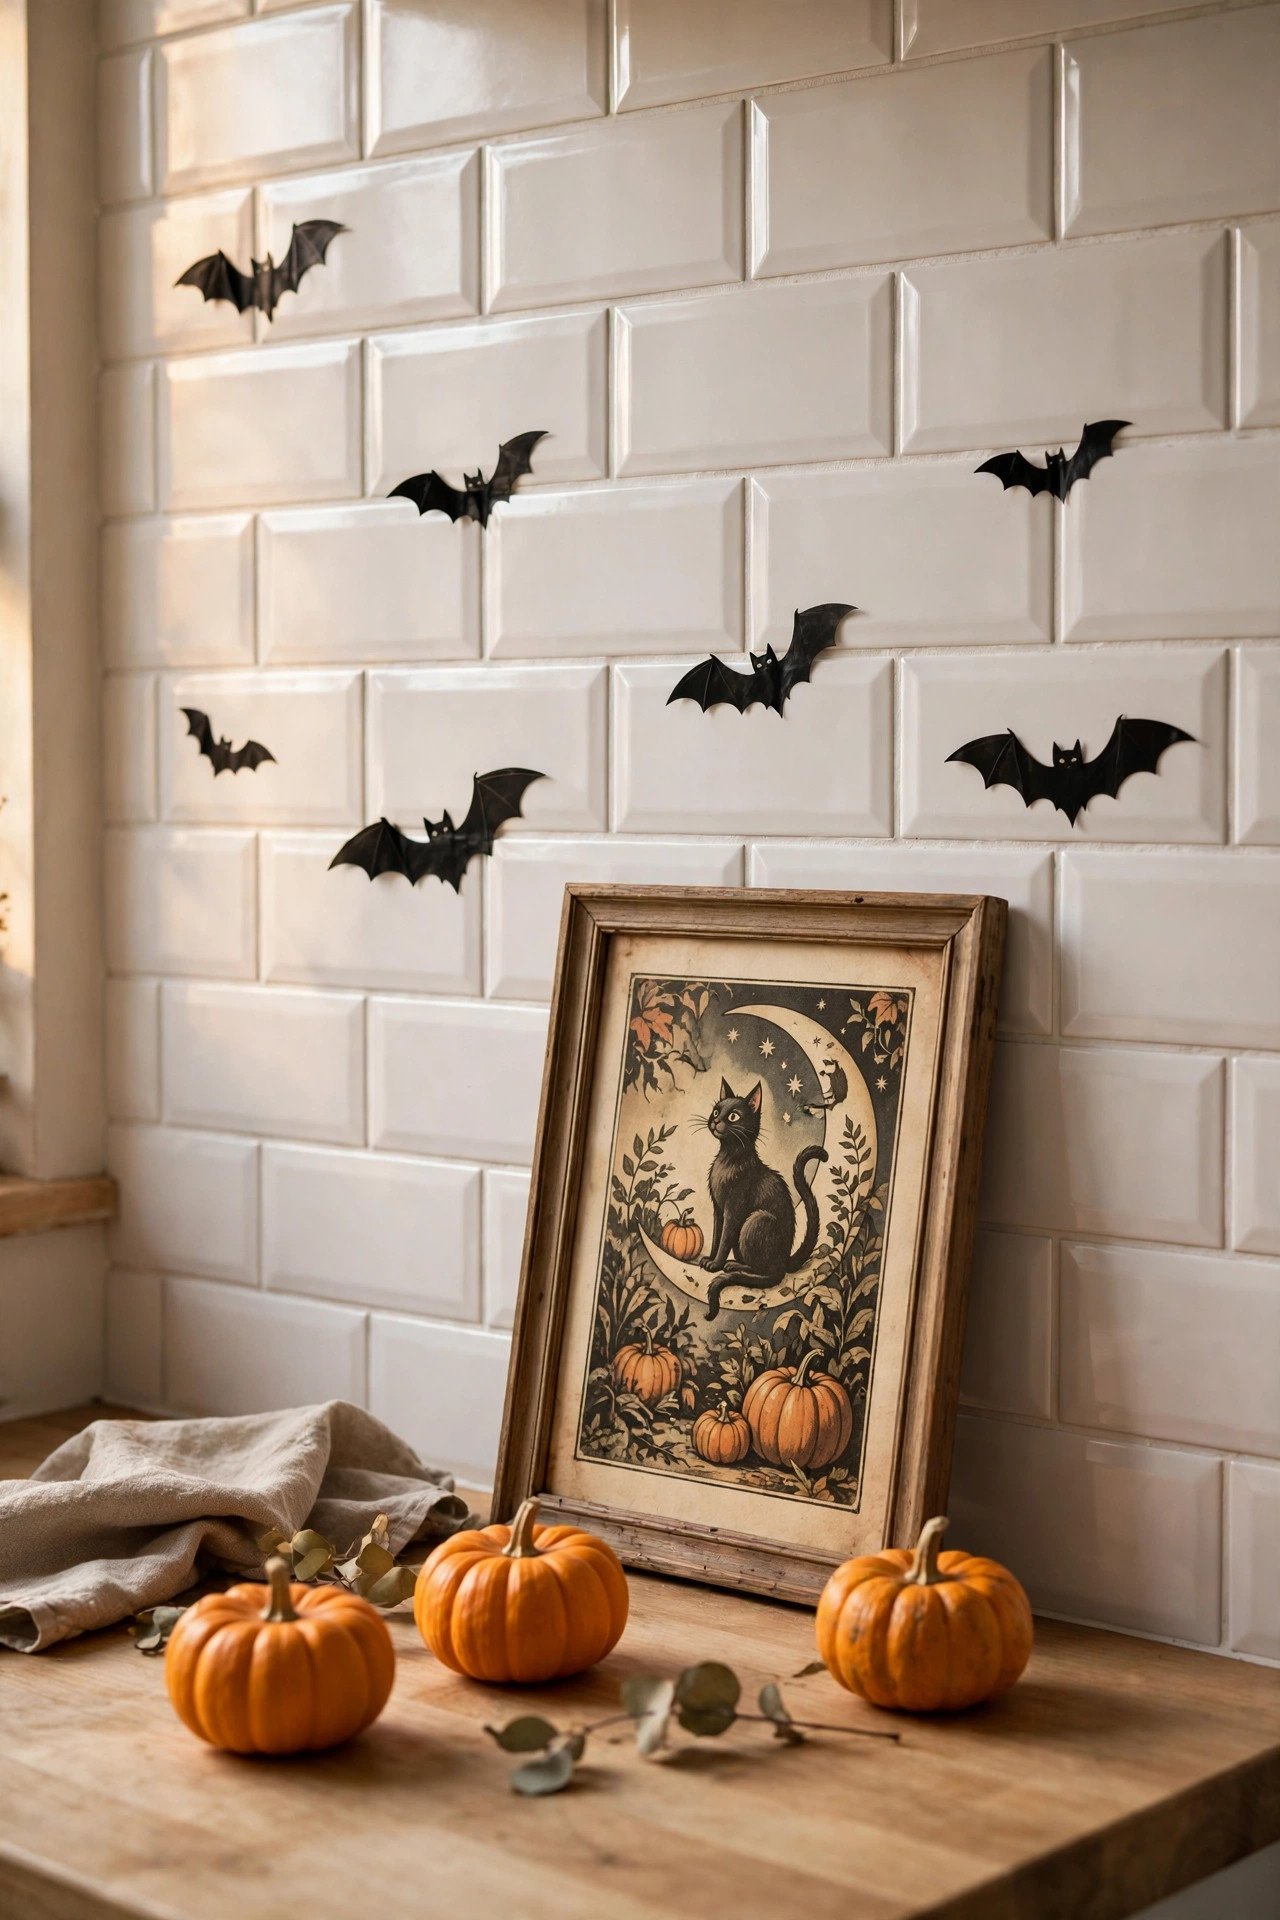
Yes — lean a small framed Halloween art print against the backsplash, or apply removable vinyl decals to plain tile. Never use real adhesive on natural stone, and keep everything wipeable since backsplashes take cooking splatter.
The backsplash is a vertical display ledge hiding in plain sight, but it lives in the splatter zone — so everything here must be wipeable or disposable. The safest move is leaning: a small framed print (5×7 or 8×10) with vintage Halloween imagery — an old apothecary illustration, a botanical bat print, a muted pumpkin still life — propped against the backsplash on the counter. Framed glass wipes clean in seconds. For plain white or subway-tile backsplashes, removable vinyl decals (bats, spiderwebs, damask patterns in black) press on and peel off; they're the same product as wall decals, cut smaller. Only use them on glazed ceramic or glass tile — never on natural stone, marble, or unsealed grout, where adhesive can stain permanently. A third option: a narrow floating ledge shelf mounted (or leaned) against the backsplash holding three mini pumpkins and a bud vase — it creates a display layer without touching the tile at all. What to avoid: paper or fabric items in the splatter zone (one spaghetti night ruins them), decals within six inches of a gas burner, and anything that blocks outlet access. Keep the decorated section to 18–24 inches wide; the rest of the backsplash stays clean and functional. This is also where the kitchen's color story shows — if you're working with warm whites and brass, the kitchen color ideas guide helps the Halloween palette sit naturally in your existing scheme.
14. What Goes in Empty Kitchen Corners at Halloween?
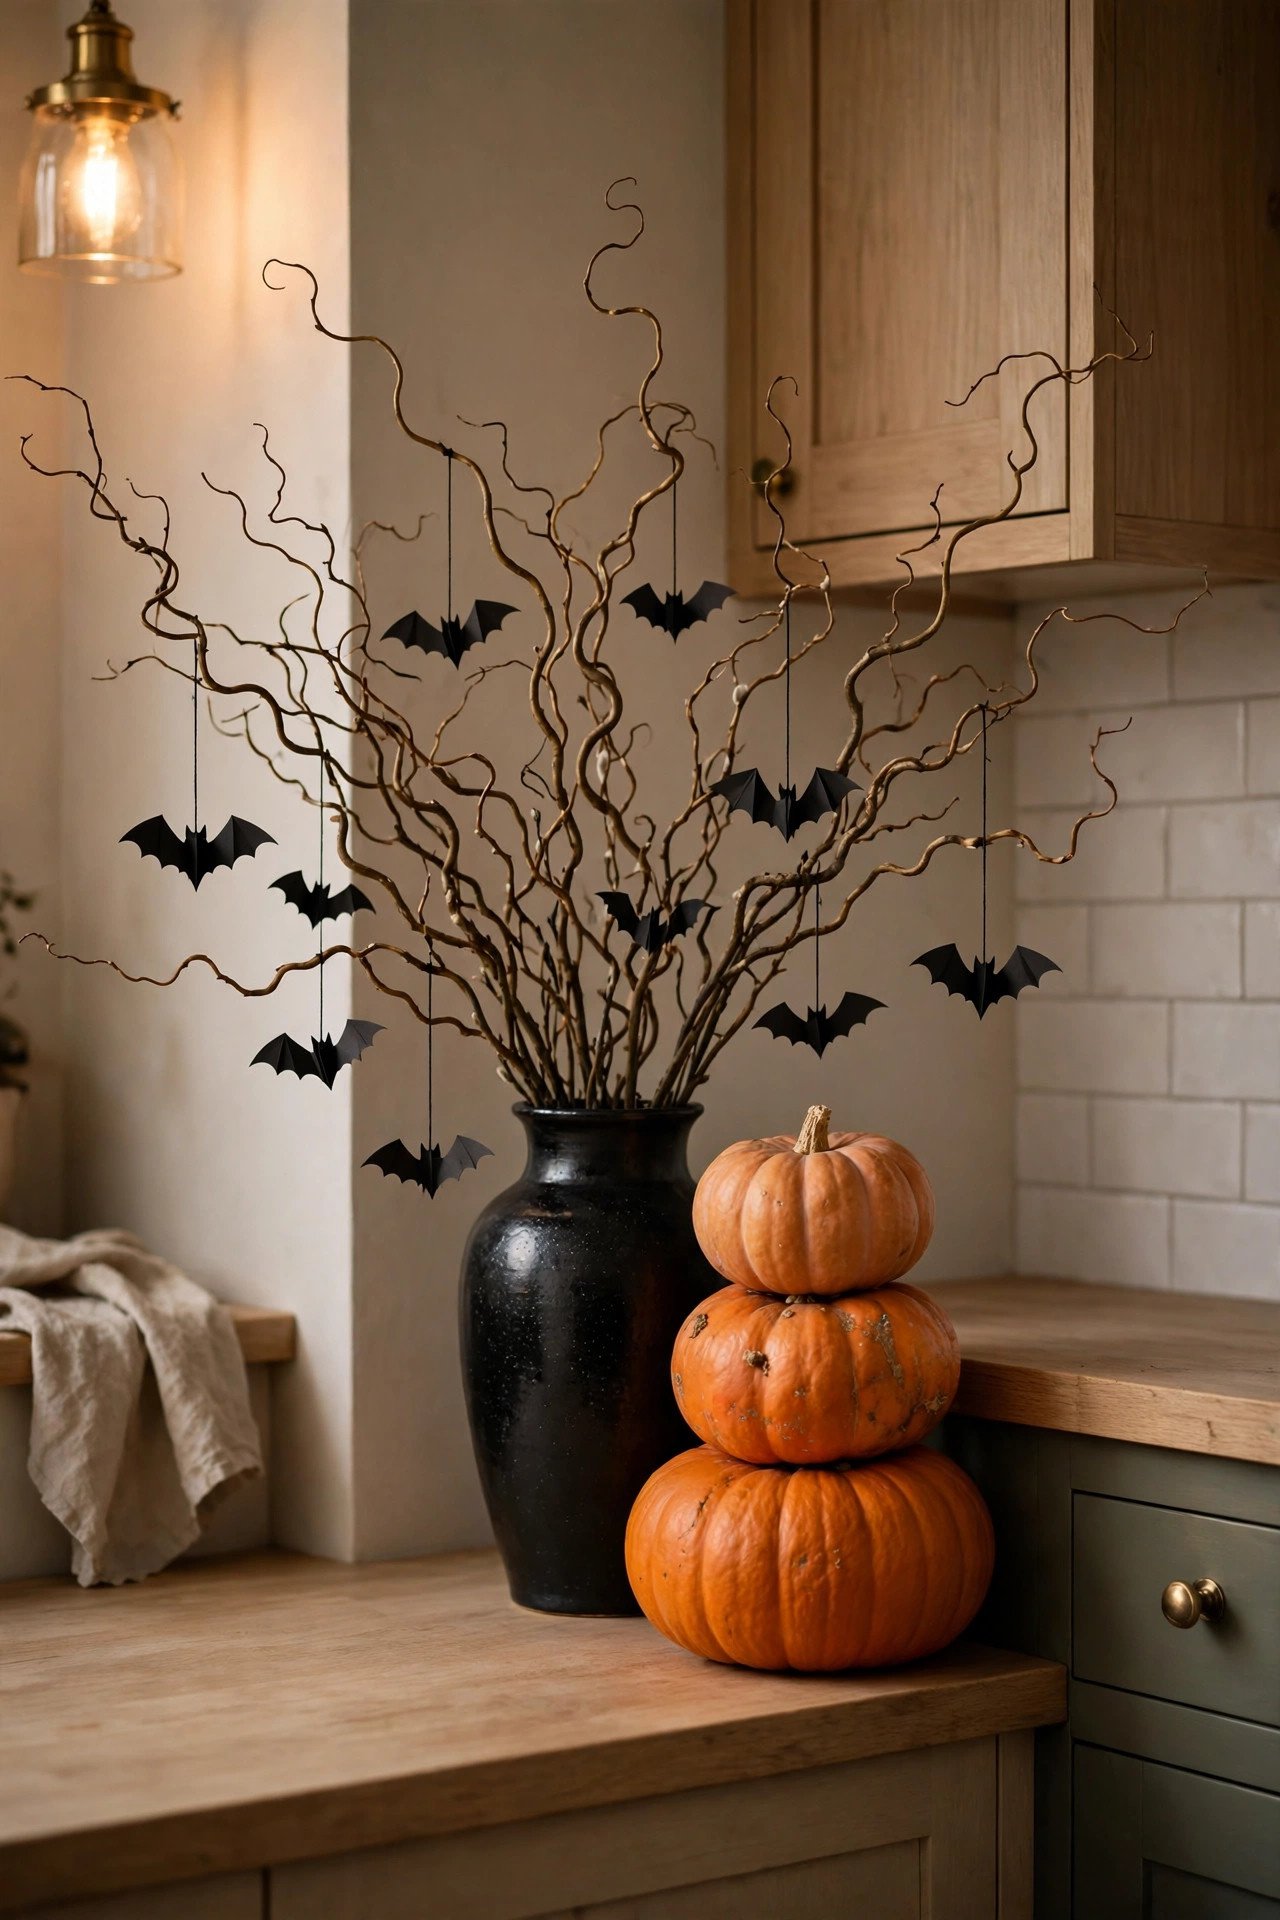
Fill dead corners with height: a tall vase of bare branches, a stack of three pumpkins in descending sizes, or a cluster of black lanterns with flameless candles at varied heights. Corners need vertical drama, not small clutter.
Every kitchen has that one dead corner — the end of a counter run, the space beside the fridge — where small decor just looks lost. Corners need one tall, confident gesture. The most reliable is a floor or counter-height vase of bare branches: curly willow, contorted filbert, or simple birch branches in a matte black or stoneware vase. Hang three or four small paper bats or black ornaments from the branches with fishing line and you have a Halloween "tree" that costs almost nothing. Alternative: a pumpkin totem — three pumpkins stacked largest to smallest (a Cinderella base, a Lumina middle, a Jack Be Little top), secured with a wooden dowel through the center so the stack can't topple. Or cluster three black metal lanterns in graduated heights, each holding a warm-white flameless candle on a timer so they glow every evening without you touching them. The timer detail matters — it's what makes the corner feel alive rather than staged. What to avoid: filling the corner with five small unrelated objects (it reads as clutter, not design), anything top-heavy that a pet or toddler could pull down, and real candles in a corner where you can't see them from the main room. One strong vertical piece per corner, maximum — then stop.
15. How Do I Decorate a Pantry Door for Halloween?
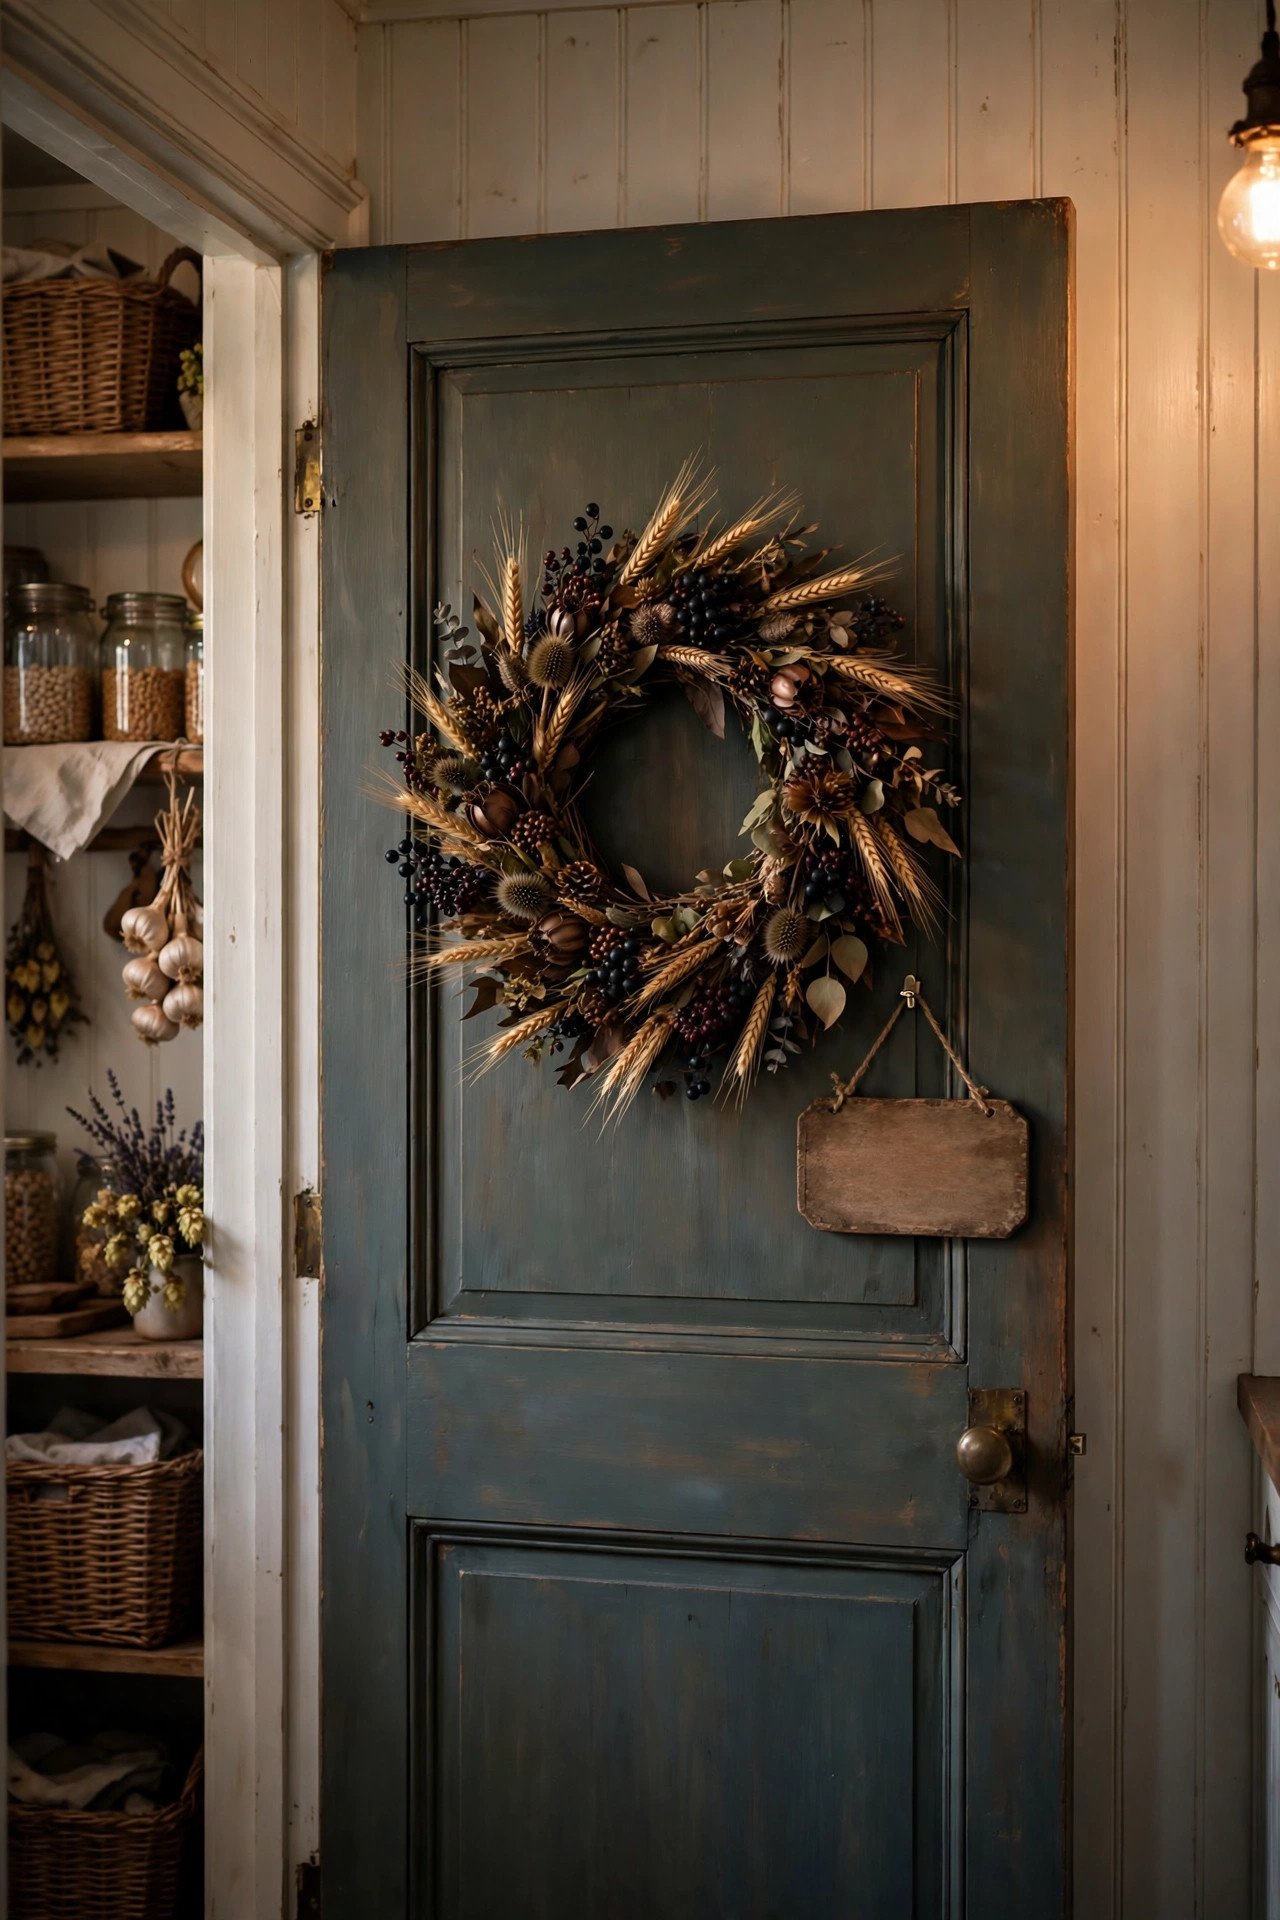
Hang a preserved-fall wreath at eye level and add a vintage-style "Pantry" sign or a skeleton-key hook beside it. If the door is flat, a row of magnetic chalk labels down one side turns it into an October inventory board.
The pantry door is often the kitchen's most visible door, and it takes decor beautifully because it's opened less frantically than cabinet doors. A 14–18 inch wreath in preserved fall materials — dried wheat, lotus pods, dark berries — hung at eye level on a removable hook is the whole look; the Halloween read comes from the dark, moody materials rather than plastic spiders. Beside it (or on the door itself if it's flat), hang a small vintage-style sign reading "Pantry," "Provisions," or "Witch's Larder" — the apothecary vocabulary ties the whole kitchen together. If your pantry door is metal or you have a magnetic primer, run a vertical row of magnetic chalkboard labels down one stile: "Pumpkin Puree," "Cider," "Candy Corn," "Spare Batteries" — an October inventory that's genuinely useful and charming. For a farmhouse kitchen, this door is the style anchor; these cozy farmhouse kitchen designs show how seasonal touches layer onto that look year after year. What to avoid: wreaths on pantry doors that swing into walls (measure the clearance), anything that rattles when the door opens and closes, and blocking a chalkboard-painted door's writing surface if you actually use it for grocery lists. Keep the decor to the upper two-thirds so kids and dogs don't destroy it by week two.
16. Which Rugs Work for a Halloween Kitchen?

Choose a washable low-pile runner in charcoal, black-and-cream pattern, or deep plum — sized to fit the main walkway without curling underfoot. Washable matters more than pattern; kitchen rugs take real abuse.
The kitchen rug is the largest single color field you can change for Halloween, and it's the piece most people forget. A washable runner (the low-pile, machine-washable kind) in charcoal, a black-and-cream vintage-look pattern, or deep plum lays the dark foundation the whole seasonal palette needs. Size it to the main walkway — in front of the sink or along a galley — leaving at least a few inches of floor visible on each side so it looks intentional, and make sure it lies perfectly flat with no curled edges, which are a trip hazard you'll curse daily. Pattern choice matters: a subtle Persian-style pattern in dark tones reads chic and hides crumbs; a bold Halloween print (giant spiders, "BOO" lettering) reads costume-y and fights with everything else in the room. Let the rug be the quiet dark base and put the Halloween motifs up at eye level instead. What to avoid: high-pile or shag rugs in a kitchen (they trap food and can't be cleaned), non-washable rugs anywhere near the stove or sink, and layering a small Halloween mat over your good rug — it slides, bunches, and looks temporary. Wash the runner before storing it in November; pumpkin residue and kitchen grease set into fibers if left. One good dark washable runner works for Halloween, Thanksgiving, and straight through winter.
17. What Makes a Good Halloween Kitchen Table Centerpiece?
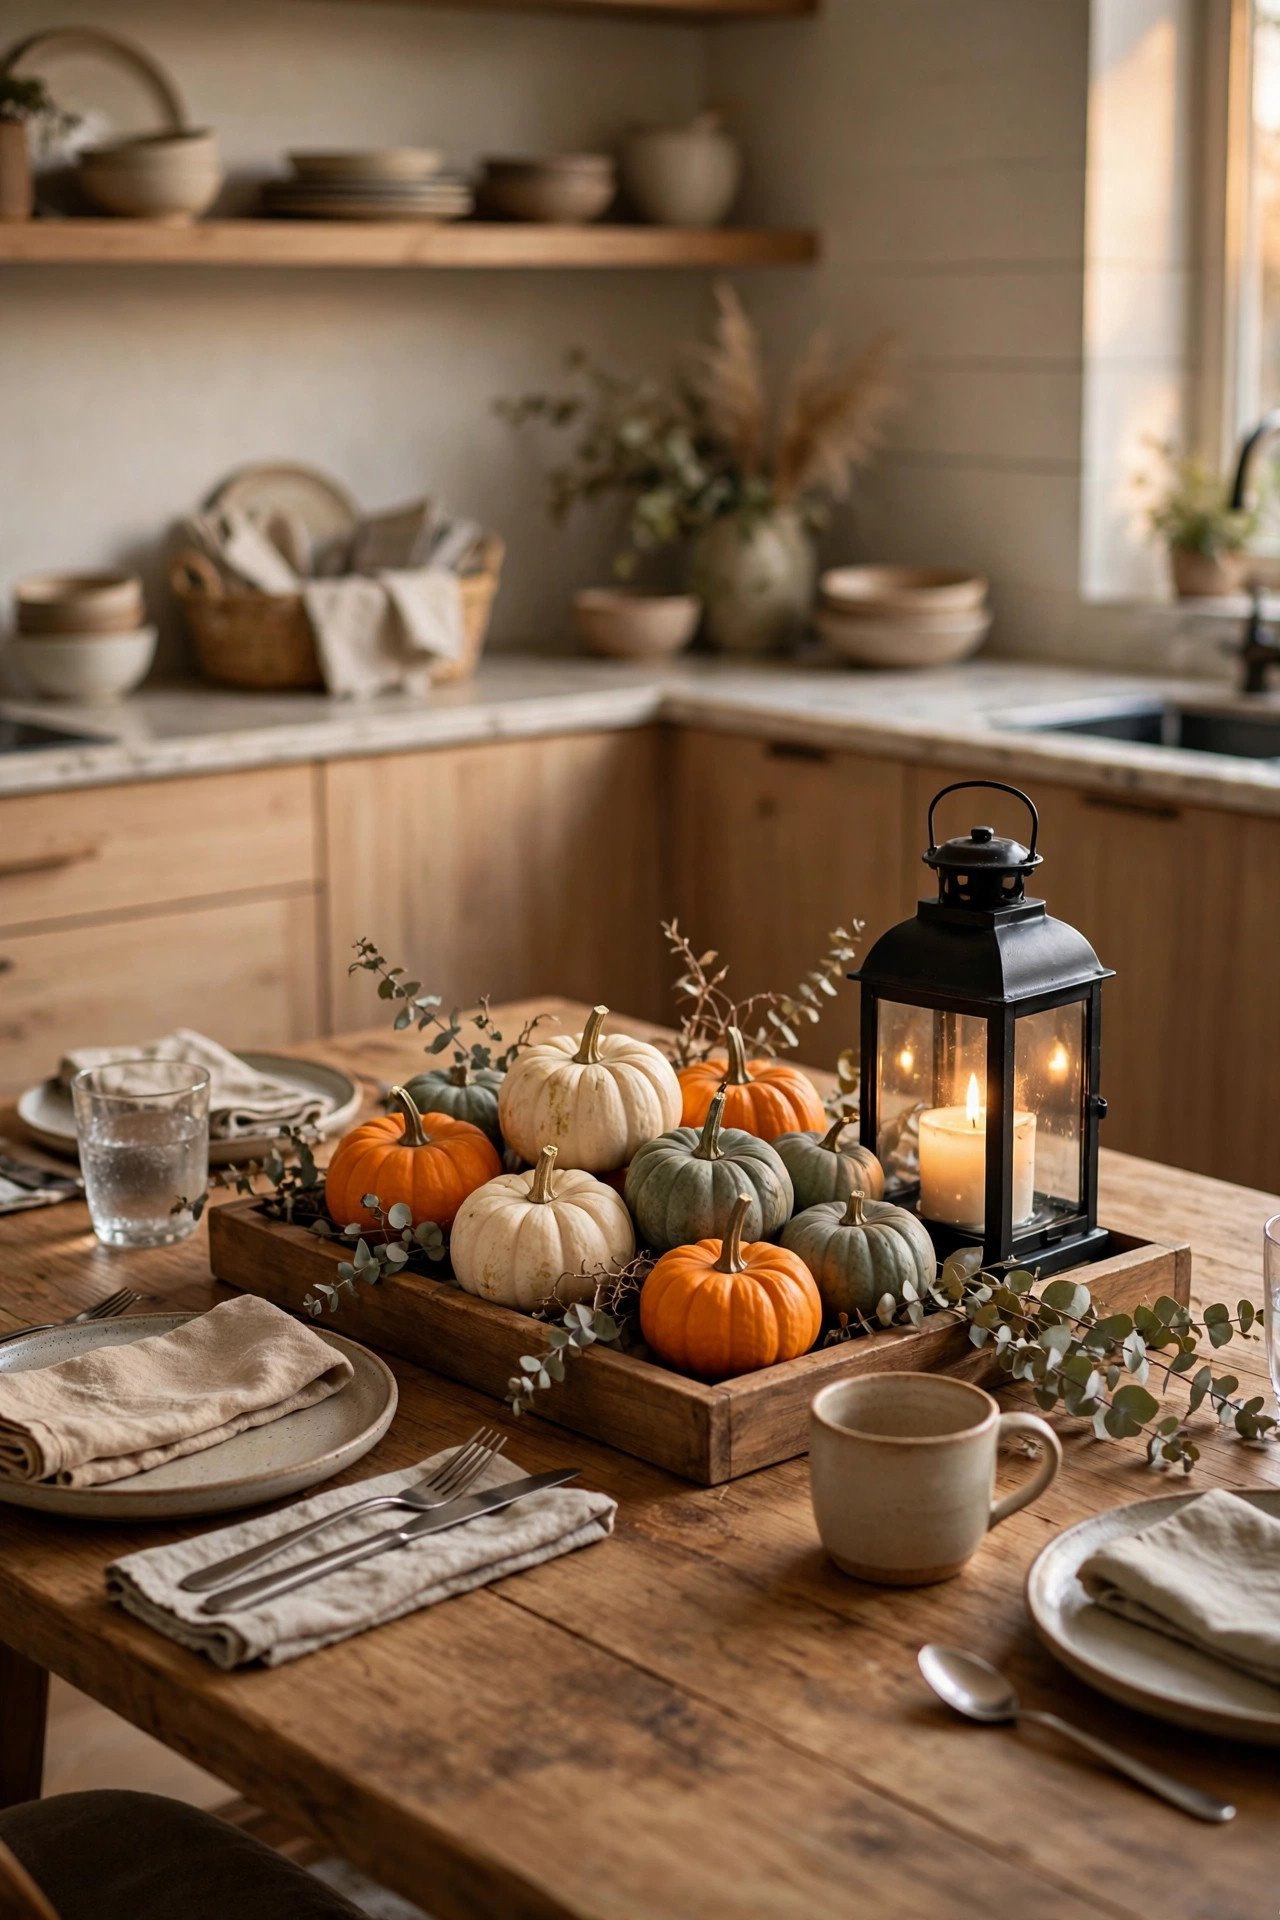
Build it low, narrow, and wipeable: a wooden tray holding mini pumpkins, a black lantern with a flameless candle, and a sprig of dried eucalyptus. It must survive daily meals, so everything lifts off in one piece.
The kitchen table centerpiece has a harder job than a dining-room one — it has to survive breakfast, homework, and bill-paying, not just one dinner party. Containment is the answer: everything lives on a single wooden tray, dough bowl, or low basket, 24 inches or shorter, so the whole arrangement lifts off in one motion when you need the table. Inside the tray: five to seven mini pumpkins in mixed varieties and colors (white, orange, green-warty), one black metal lantern with a warm-white flameless candle, and texture from dried eucalyptus sprigs, pinecones, or dried lotus pods tucked between the pumpkins. The palette stays in the spooky-chic range — no neon orange plastic, no glitter. Height stays under 10 inches so it never blocks conversation or gets knocked by an elbow. Because it's a daily-use table, every material must be wipeable or cheap to replace: sealed wood tray, faux or real mini pumpkins (real ones last weeks and compost after), flameless candle. What to avoid: loose candy or potpourri scattered on the table (it migrates everywhere), tall candlesticks, and fabric runners that aren't washable under a centerpiece that gets moved daily. When Halloween night itself arrives and you want the full dramatic spread, graduate to these halloween tablescape ideas — but for the other thirty days of October, the lift-off tray is the right call.
18. How Do You Hang Halloween Decor From a Kitchen Ceiling Safely?
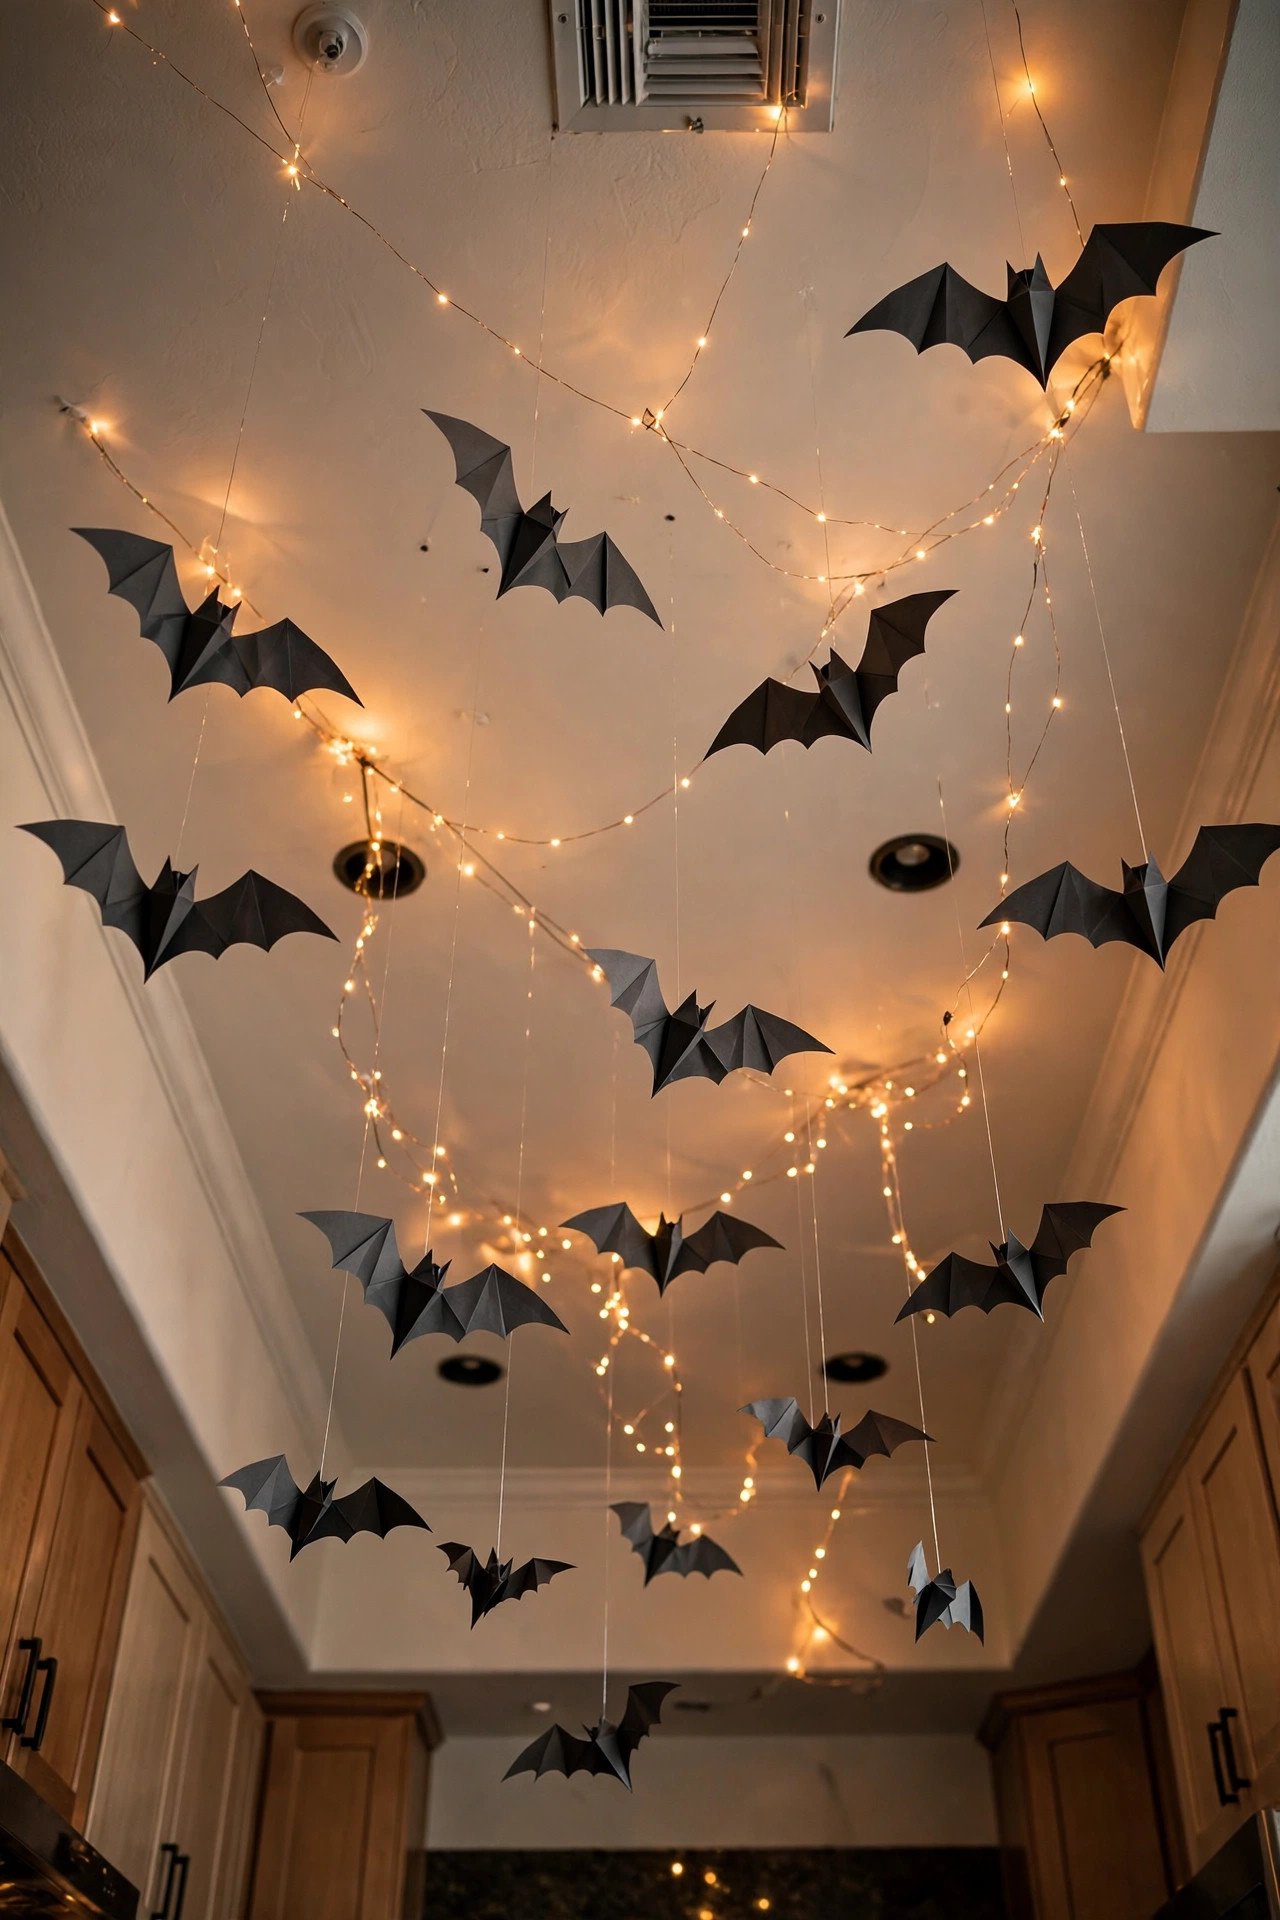
Hang lightweight items only — paper bats, faux leaves, small lanterns — from removable ceiling hooks on fishing line, keeping everything at least 7 feet high and well away from the stove's heat column. Nothing heavy, nothing flammable, nothing over the cooktop.
Ceiling decor gives the kitchen genuine drama, but gravity and heat make it the riskiest zone to get wrong. The rules are non-negotiable: only lightweight items (paper bats, tissue ghosts, faux autumn leaves, small paper lanterns), hung from removable adhesive ceiling hooks or existing light fixtures — never screws in a rental, never tape that peels paint. Use clear fishing line at varied lengths so bats appear to fly at different heights; the staggered heights are what make it look magical rather than flat. Keep every hanging item at least 7 feet off the floor (above head height for tall guests) and at least 3 feet horizontally from the stove — rising heat from the cooktop will warp paper and melt plastic, and anything dangling near a gas flame is a fire hazard. Battery-operated fairy lights woven through the hanging elements add glow without heat or cords. What to avoid: hanging anything over the island seating where tall people stand up into it, real candles in hanging holders, heavy gourds or lanterns on fishing line (it stretches and snaps), and adhesive hooks on textured or popcorn ceilings (they fail). Test one hook with the actual weight for 24 hours before committing to the whole installation. Done right, walking into the kitchen under a flock of paper bats is the single most memorable Halloween moment in the house.
19. Can Small Details Like Drawer Pulls Be Part of Halloween Decor?

Yes — swap two or three visible drawer pulls for matte black or bat-shaped knobs for October. It's a five-minute change with a screwdriver, and hardware swaps read as intentional design, not decoration.
Hardware is the jewelry of the kitchen, and a tiny Halloween swap has outsized impact because it's at touch height — everyone notices it. Choose the most visible drawers (the ones flanking the sink or the island) and swap their pulls for matte black cup pulls, small bat-shaped knobs, or antique-brass pumpkin knobs. Keep the originals in a labeled bag taped inside the cabinet so reinstallation in November takes minutes. This works best when the swap matches the kitchen's existing metal finishes — matte black knobs on a kitchen that already has black accents look like an upgrade, not a costume. Cost is minimal: a four-pack of cabinet knobs runs a few dollars at any hardware store. What to avoid: swapping every pull in the kitchen (it becomes visually noisy and the reinstallation is a chore), knobs with sharp points or rough casting that snag clothing or scratch hands, and adhesive "knob covers" — they look cheap up close and fail within days. Renters: this is fully reversible, and it's one of the few Halloween changes a landlord will never notice. Pair the hardware swap with the charcoal hand towels and black soap dispenser from the sink zone and the kitchen reads cohesive without a single plastic decoration.
20. How Do I Use a Chalkboard in Halloween Kitchen Decor?
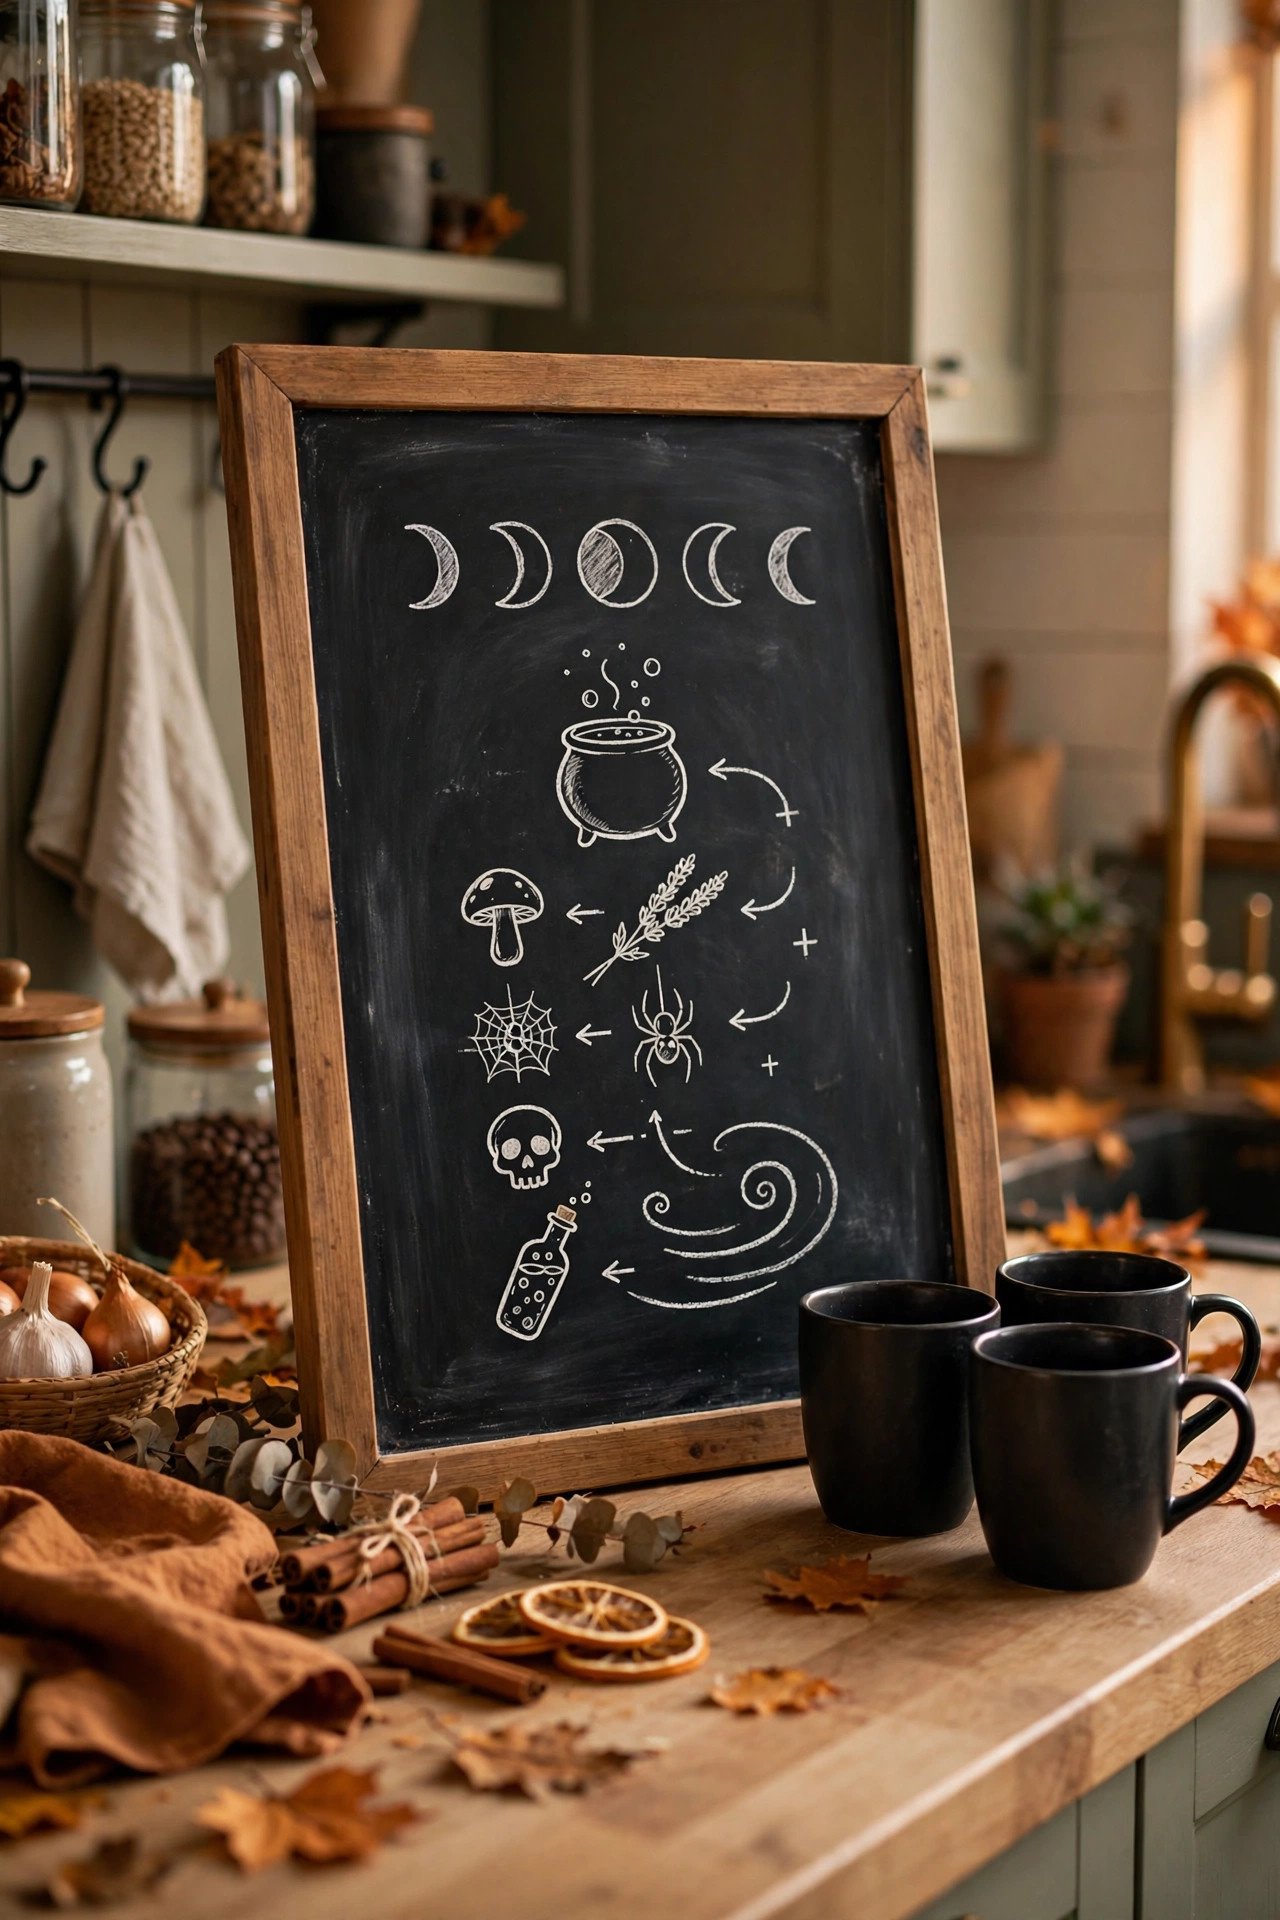
Prop a framed chalkboard near the coffee station or on the counter with an October menu, a Halloween countdown, or a family "potion recipe." Use chalk markers for crisp lines, and keep the board away from steam and splatter.
A chalkboard is the hardest-working Halloween decoration in the kitchen because it's also useful. A 12×16 inch framed chalkboard propped on the counter (on a plate stand or easel back) becomes the October message center: a hand-lettered Halloween countdown ("13 days until Halloween"), the week's dinner menu in spooky renaming ("Monday: Mummy Meatloaf"), or a family hot-chocolate "potion recipe" with ingredient doodles. Use chalk markers rather than real chalk — the lines are crisp, they don't smudge when brushed, and they erase with a damp cloth in November. Placement matters: near the coffee station or the breakfast nook, where people actually stand and read — and away from the stove's steam and the sink's splatter, which will blur the lettering within days. For a built-in look, a chalkboard-painted cabinet door or a section of wall beside the pantry works year-round and just gets Halloween content in October. What to avoid: unframed chalkboard contact paper (the edges peel in kitchen humidity), real chalk (dust gets into food-prep areas), and writing the menu in a color that clashes with the palette — white or cream chalk marker on black reads chic; neon colors read classroom. Change the message weekly through October to keep it feeling alive; a stale countdown stuck on "23 days" all month kills the effect.
21. How Can I Give My Kitchen Herb Garden a Halloween Twist?
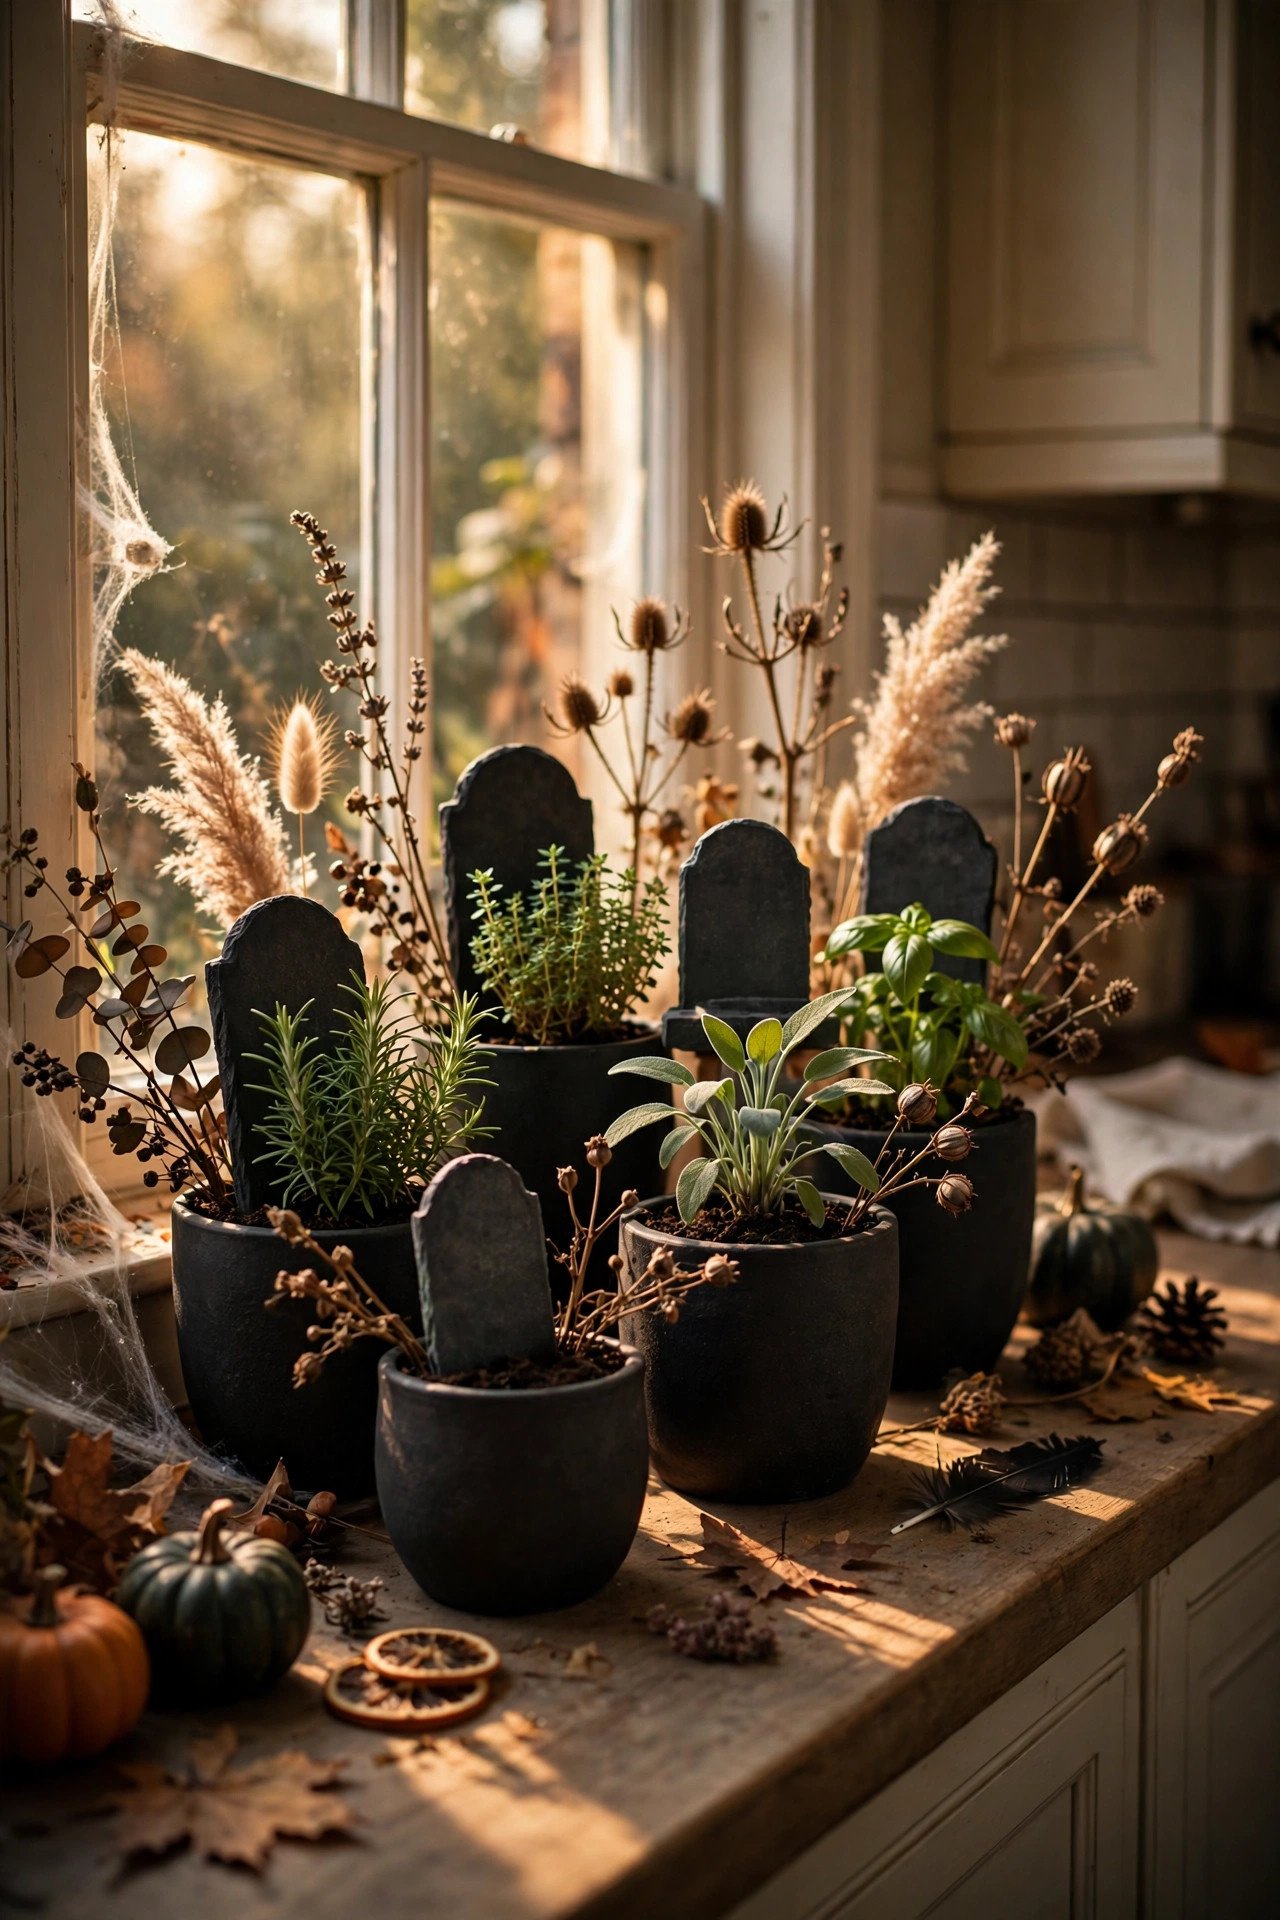
Swap herb pots for matte black ones, replace plant markers with mini tombstone stakes, and add dried accent stems. The herbs stay fully usable — only the presentation goes spooky.
The windowsill herb garden is already alive and green, which makes it the perfect foil for Halloween's dark palette — you don't replace it, you dress it. Move the herbs into matte black or dark-stone pots (terracotta painted matte black works too, sealed so it doesn't weep). Replace the plant markers with small tombstone-shaped stakes — wooden craft tombstones, a gray Sharpie, and the herb name in a spooky font ("Sage," "Thyme," "Rosemary") — pushed into each pot. The pun writes itself and guests love it. Tuck a few dried stems (black-eyed Susan, dried lavender, a wheat stalk) into the pots for height and autumn texture, keeping them clear of the actual leaves so the plants still get light and air. A black tray under the whole arrangement contains water drips and completes the look. The herbs stay 100 percent usable for cooking all month — this is decoration that doesn't cost you function. What to avoid: spray-painting pots with the plants still in them (repot first), markers with paint that isn't food-safe near edible leaves, and crowding the sill so the plants lose light — October sun is already weak. Water as normal; the black pots actually warm the soil slightly, which Mediterranean herbs like rosemary appreciate. If your kitchen style leans modern rather than rustic, the black kitchen ideas guide shows how dark accents like these sit naturally in a contemporary space.
22. How Do I Get Spooky Kitchen Lighting Without Rewiring Anything?
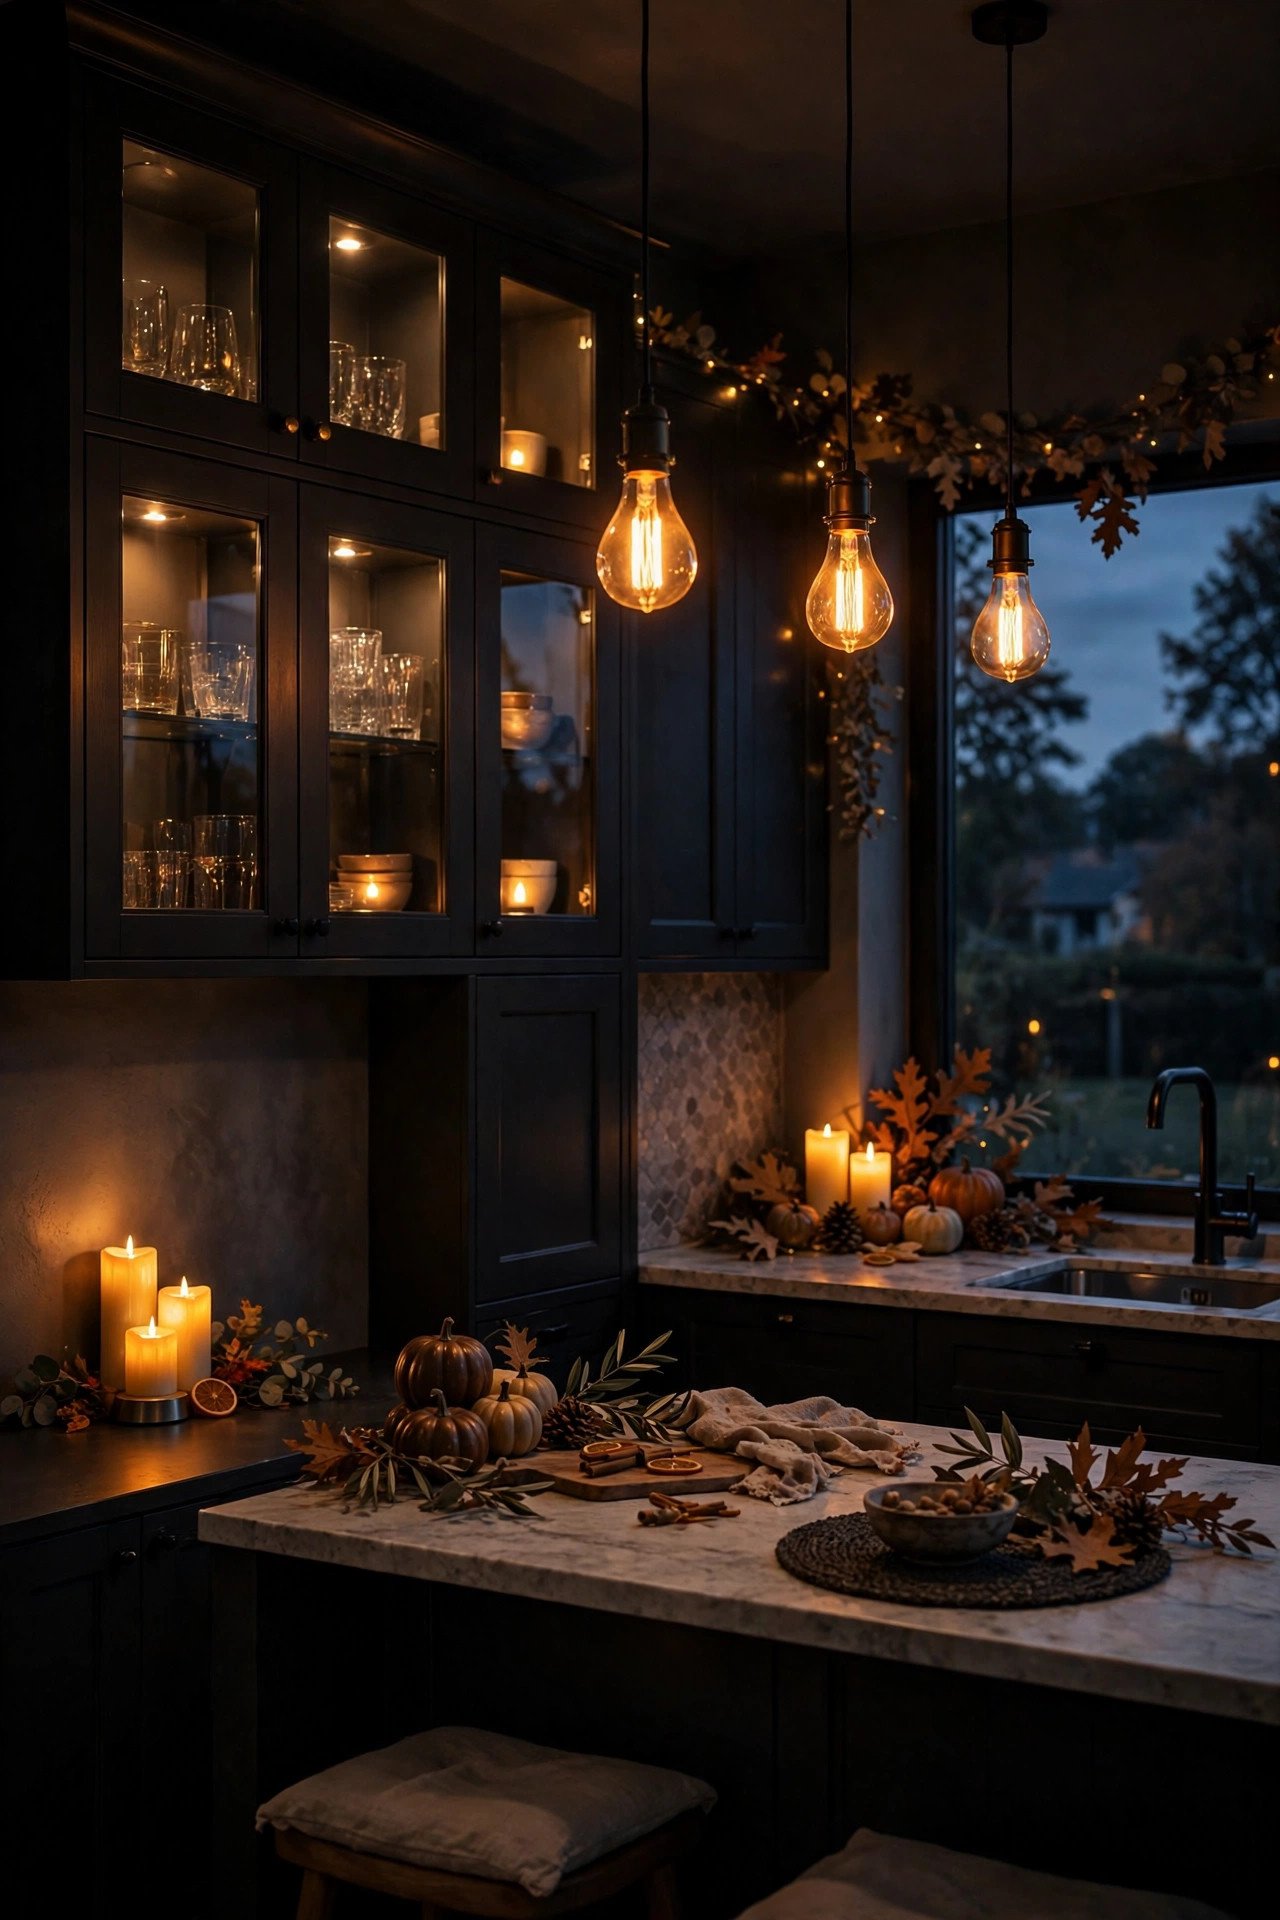
Layer three plug-and-play sources: amber LED bulbs in existing fixtures, battery puck lights inside glass cabinets, and flameless candles on timers. No electrician, no hardwiring — just warmer, dimmer, moodier light.
Lighting is what separates a kitchen with Halloween objects from a kitchen that feels like Halloween, and none of it requires an electrician. Start with the bulbs: swap the kitchen's daylight-white bulbs for warm amber LEDs (2200K) in pendants and any exposed-bulb fixtures. Amber light flatters wood, brass, and pumpkin orange while muting the clinical feel of white kitchen lighting. Second, stick battery-operated puck lights (the tap-on kind, or remote-controlled) inside glass-front cabinets or on top of wall cabinets aimed at the ceiling — they make glassware glow and give the upper kitchen a haunted depth. Third, place flameless pillar candles on timers inside the island vignette, the corner lanterns, and the breakfast-nook centerpiece; timers set for dusk mean the kitchen lights itself every evening. Add one string of warm-white fairy lights along the open shelves or the window, also on a timer. The combined effect at 7 p.m. — amber pendants, glowing cabinets, candlelit corners — is transformative, and the whole setup costs less than a single new light fixture. What to avoid: colored bulbs (purple/green) as the main light — they're fun for a party night but make food look unappetizing for daily use; real candles anywhere you can't see them; and overloading one outlet with timers, lights, and the coffee machine — spread plug-in lighting across two circuits. For party night specifically, dim everything to the lowest warm setting and let the candles do the work.
Practical Tips for a Halloween Kitchen
Keep one zone clear. No matter how enthusiastic the decorating gets, one full counter run — ideally between the sink and stove — stays completely empty. This is your landing zone for hot pans, chopping boards, and sheet trays. Decorate around the work triangle, never inside it.
Choose washable everything. Kitchen textiles take real abuse in October — pumpkin guts, cider spills, flour dust. Every runner, towel, throw, and cushion cover should be machine-washable cotton or indoor-outdoor fabric. If it can't survive the washing machine, it doesn't belong in a working kitchen.
Go flameless near food. Real candles have no place within three feet of food prep, fabric, dried florals, or paper decor. Modern flameless candles with timers look convincingly real inside lanterns and hurricanes — use them everywhere in the kitchen and save real candles for the dining room.
Contain every vignette. Put each decorative grouping on a tray, runner, or in a bowl. Contained vignettes read as intentional design, lift off as one unit when you need the counter, and keep small pieces from migrating into drawers and appliances.
Respect the heat column. Nothing hangs above the stove, nothing flammable goes within a foot of burners, and range-hood garlands stay on the cool front face only. Dried materials and grease aerosol are a bad combination — take hood garlands down for heavy frying sessions.
Buy for next year too. The best Halloween kitchen pieces — apothecary jars, black lanterns, amber bottles, quality faux pumpkins — are reusable for a decade. Spend the budget on those permanent anchors and go cheap on the consumables like mini pumpkins and kraft labels. Store everything in one labeled bin in November so next October takes an afternoon, not a week. For the pieces worth making yourself, these DIY halloween decorations on a budget that look expensive stretch the budget even further.
Photograph as you go. Take a phone photo of each finished zone before moving on. Photos reveal clutter and imbalance your eyes miss in person — if a shelf looks crowded in the photo, remove one item. This is also how you remember what worked next year.
Frequently Asked Questions
Is it safe to put candles in a Halloween kitchen?
Flameless LED candles are safe everywhere in the kitchen — use those for all decor. Real candles should never go within three feet of the stove, near fabric or dried florals, on crowded counters, or anywhere you can't see them. If you want real candlelight, keep it to the breakfast-nook table inside a glass hurricane, supervised, and never leave the room with it lit.
How do I decorate open kitchen shelves for Halloween without creating clutter?
Follow the 60-percent rule: never fill more than 60 percent of any shelf. Style in odd-numbered groupings — apothecary jars, mini pumpkins, one dark accent — with generous negative space between them. Move everyday items you don't love into closed cabinets for October. If a shelf looks crowded in a phone photo, remove one piece.
Can I keep my kitchen fully functional while it's decorated for Halloween?
Yes, if you follow the zone system. Keep one full counter run completely clear between sink and stove, contain every vignette on a tray so it lifts off as one unit, and swap everyday items for seasonal versions (black soap dispenser, amber bulbs) instead of adding clutter. Decorate the vertical spaces — hood, windows, shelves — and leave the work surfaces alone.
What colors work for a chic Halloween kitchen instead of cheesy orange-and-black?
Build the palette on charcoal, matte black, deep plum, and warm amber, with pumpkin orange used sparingly as the accent — not the base. White Lumina pumpkins, silvery eucalyptus, brass candlesticks, and natural wood keep it sophisticated. The rule: dark neutrals do the heavy lifting, and Halloween motifs appear in materials and shapes rather than bright colors.
Are real or faux pumpkins better in a warm kitchen?
Use faux pumpkins near heat and moisture — on the sink deck, near the stove, or in the drinks station — because real ones rot faster in warmth and humidity. Real mini pumpkins are fine on open shelves, the island, and the breakfast table, where they last three to four weeks indoors. Heirloom varieties like Cinderella and Lumina have thicker skins and outlast standard carving pumpkins as decor.
How do I decorate a small galley kitchen for Halloween?
In a galley kitchen, decorate vertically and skip the counters almost entirely. Use window silhouettes, a range-hood garland, magnetic bats on the fridge, pendant-light bats, and one small vignette at the far end of the single counter run. Swap the rug for a dark washable runner and change the bulbs to amber — those two moves transform a galley without taking a single inch of workspace.
How long before Halloween should I start decorating the kitchen?
Start the first weekend of October. That gives real mini pumpkins their full three-to-four-week indoor life, lets you enjoy the setup for the whole month, and spreads the work across two relaxed weekends instead of one frantic evening. Put timers on all flameless candles and fairy lights from day one so the kitchen glows every evening without effort.
What's the best way to store Halloween kitchen decor after the season?
Clean everything first — wash textiles, wipe jars, dust faux pumpkins — then pack it all in one clearly labeled bin: "Halloween Kitchen." Wrap glass apothecary jars in the seasonal hand towels for padding. Store the bin somewhere climate-stable, not a damp garage, so labels don't mold and faux pumpkins don't warp. Take a phone photo of each styled zone before packing; next October you'll recreate the whole kitchen in an afternoon.
Final Thoughts
A spooky-chic Halloween kitchen isn't about covering every surface — it's about choosing the right zones, respecting the work the room has to do, and letting dark, moody materials do the talking. Start with the swap-don't-add pieces (amber bulbs, black soap dispenser, washable runner), add one contained vignette per zone, and light it all warmly. You'll have a kitchen that feels like October and still cooks like a kitchen.
You May Also Like:
– 22 elegant Halloween decor ideas that are chic, not scary – 24 cozy farmhouse kitchen designs that feel like home – 27 kitchen color ideas that make your space look modern, warm, and expensive – 25 black kitchen ideas that look modern, elegant, and timeless