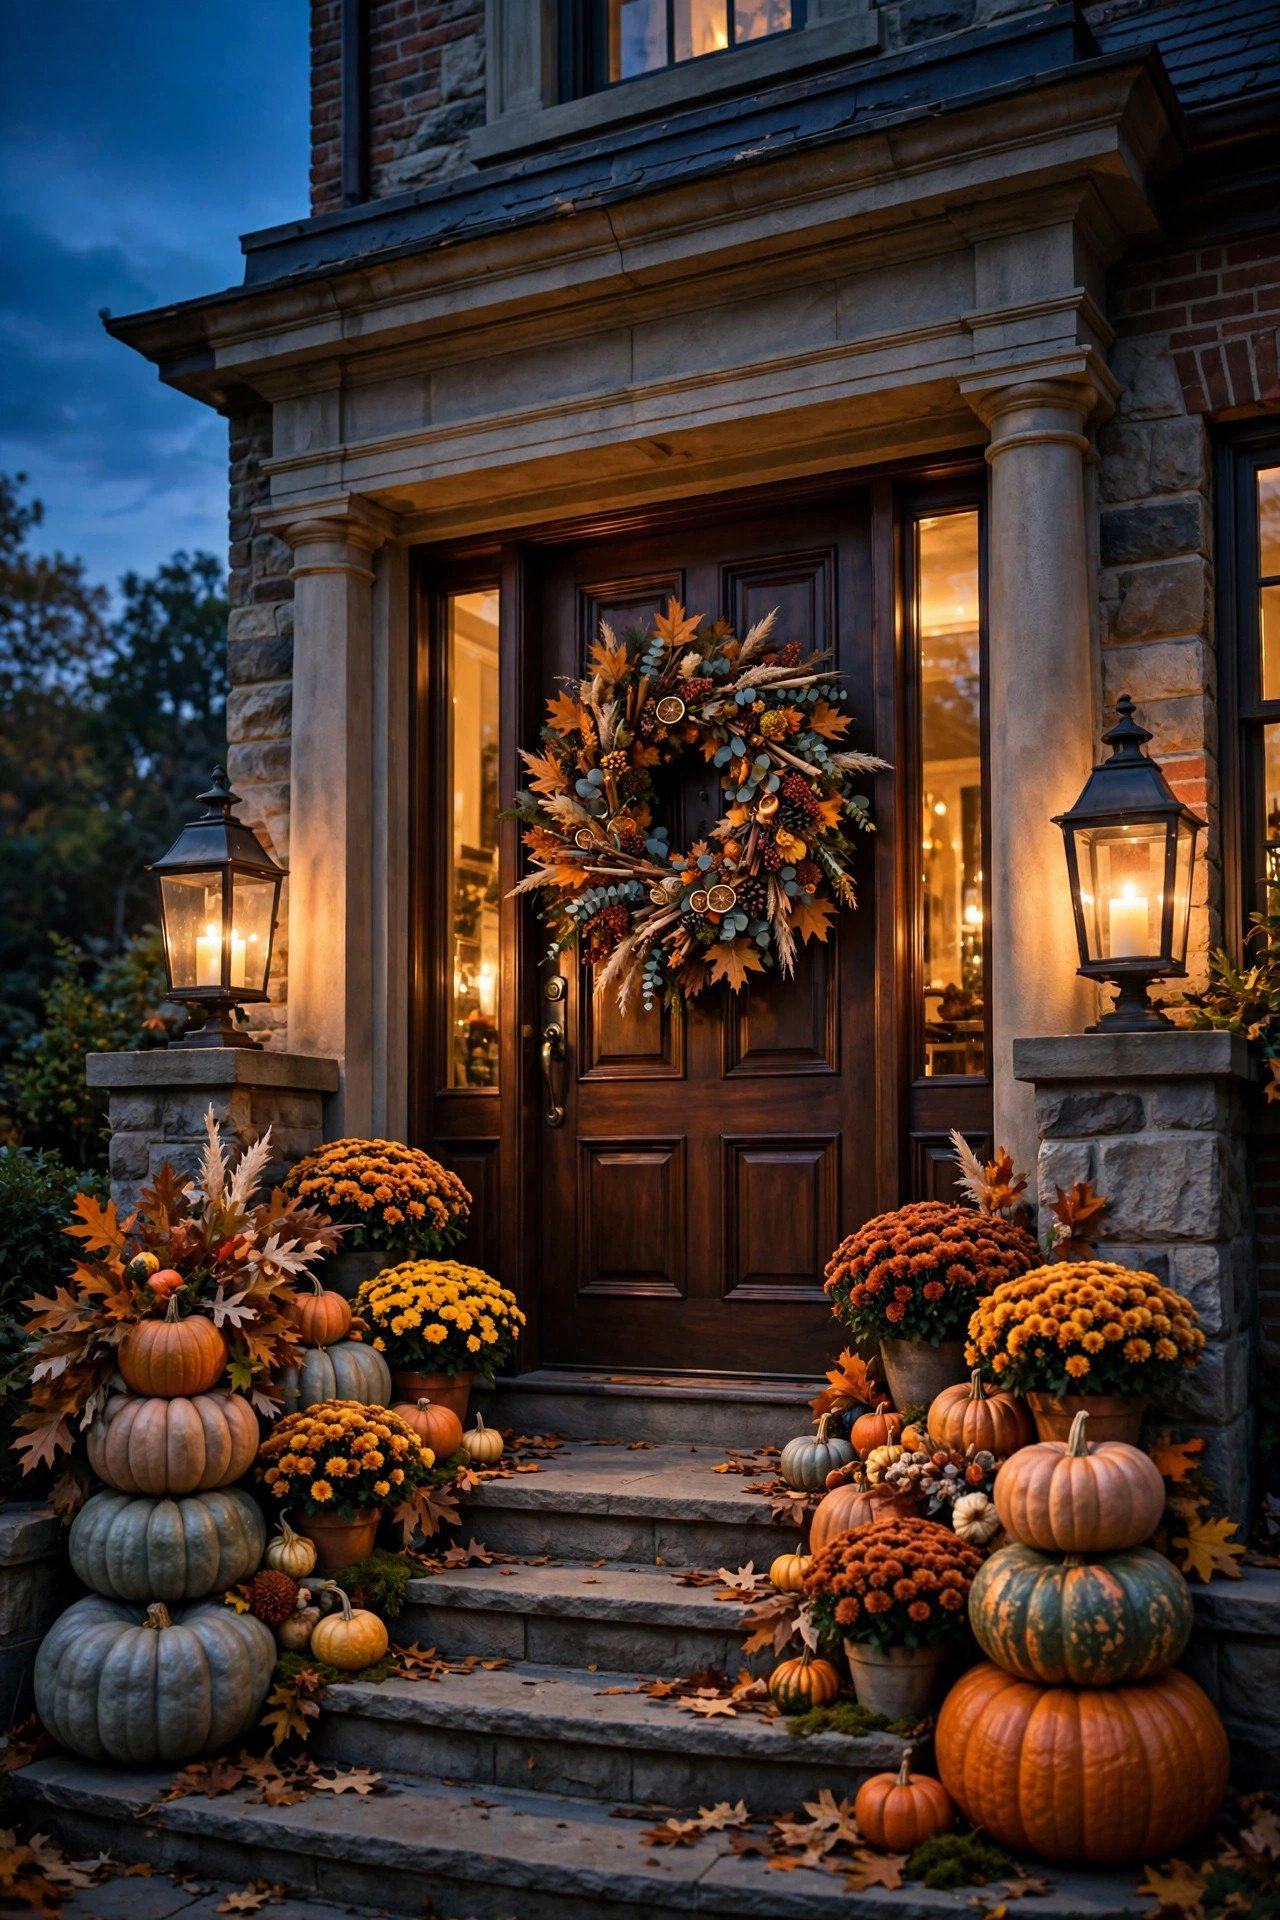
22 Halloween Front Door Decor Ideas for a Grand Entrance
# 22 Halloween Front Door Decor Ideas for a Grand Entrance
Your front door is the first thing trick-or-treaters actually touch on Halloween night, which makes it the hardest-working piece of your seasonal decorating. Visitors pause, knock, and stare here — so a few well-chosen details create an outsized impression.
This guide stays focused on the door slab, its frame, and the immediate doorstep: 22 door-first ideas with renter-friendly hanging, weatherproofing, and lighting know-how. Every idea earns its place — no rehash.
Looking for more inspiration? Our Nest Decorz homepage gathers the latest home decor ideas, seasonal decorating guides and room-by-room styling tips in one place — start there and explore.
Quick Answers
– Anchor the door first: one statement wreath or sign, one flanking light, and a layered doormat give a finished look in under an hour. – Hang it damage-free: over-door hangers, adhesive hooks, and removable vinyl decals protect paint — renter-approved. – Light it after dark: flameless LED candles and string lights keep the door readable at night, when trick-or-treaters arrive. – Match your door type: glass doors love static clings; solid doors suit hangers and wreaths; storm doors need magnetic or suction options. – Take it down cleanly: hang everything right now, and it all comes off by November 1 with no touch-ups.
1. How Do You Hang a Wreath Without Damaging the Door?

Use an over-door wreath hanger that slips between the door and the frame, or a large Command-style adhesive hook rated for 5+ pounds, and you can hang a full wreath with zero holes, nails, or paint damage. Both methods lift off cleanly after the season.
Over-door hangers (flat metal straps over the top edge) cost $8-15 and suit most standard doors, though tight weather seals can block a flat strap. A pair of outdoor-rated adhesive hooks on the door face holds a 20-24 inch wreath securely — a renter-safe fallback. Wipe the surface with rubbing alcohol, press 30 seconds, and wait an hour before hanging. Never screw a bracket in for a seasonal wreath: the patch-and-paint costs far more than a proper hanger, and landlords notice.
2. What Makes a Halloween Wreath the Star of Your Front Door?
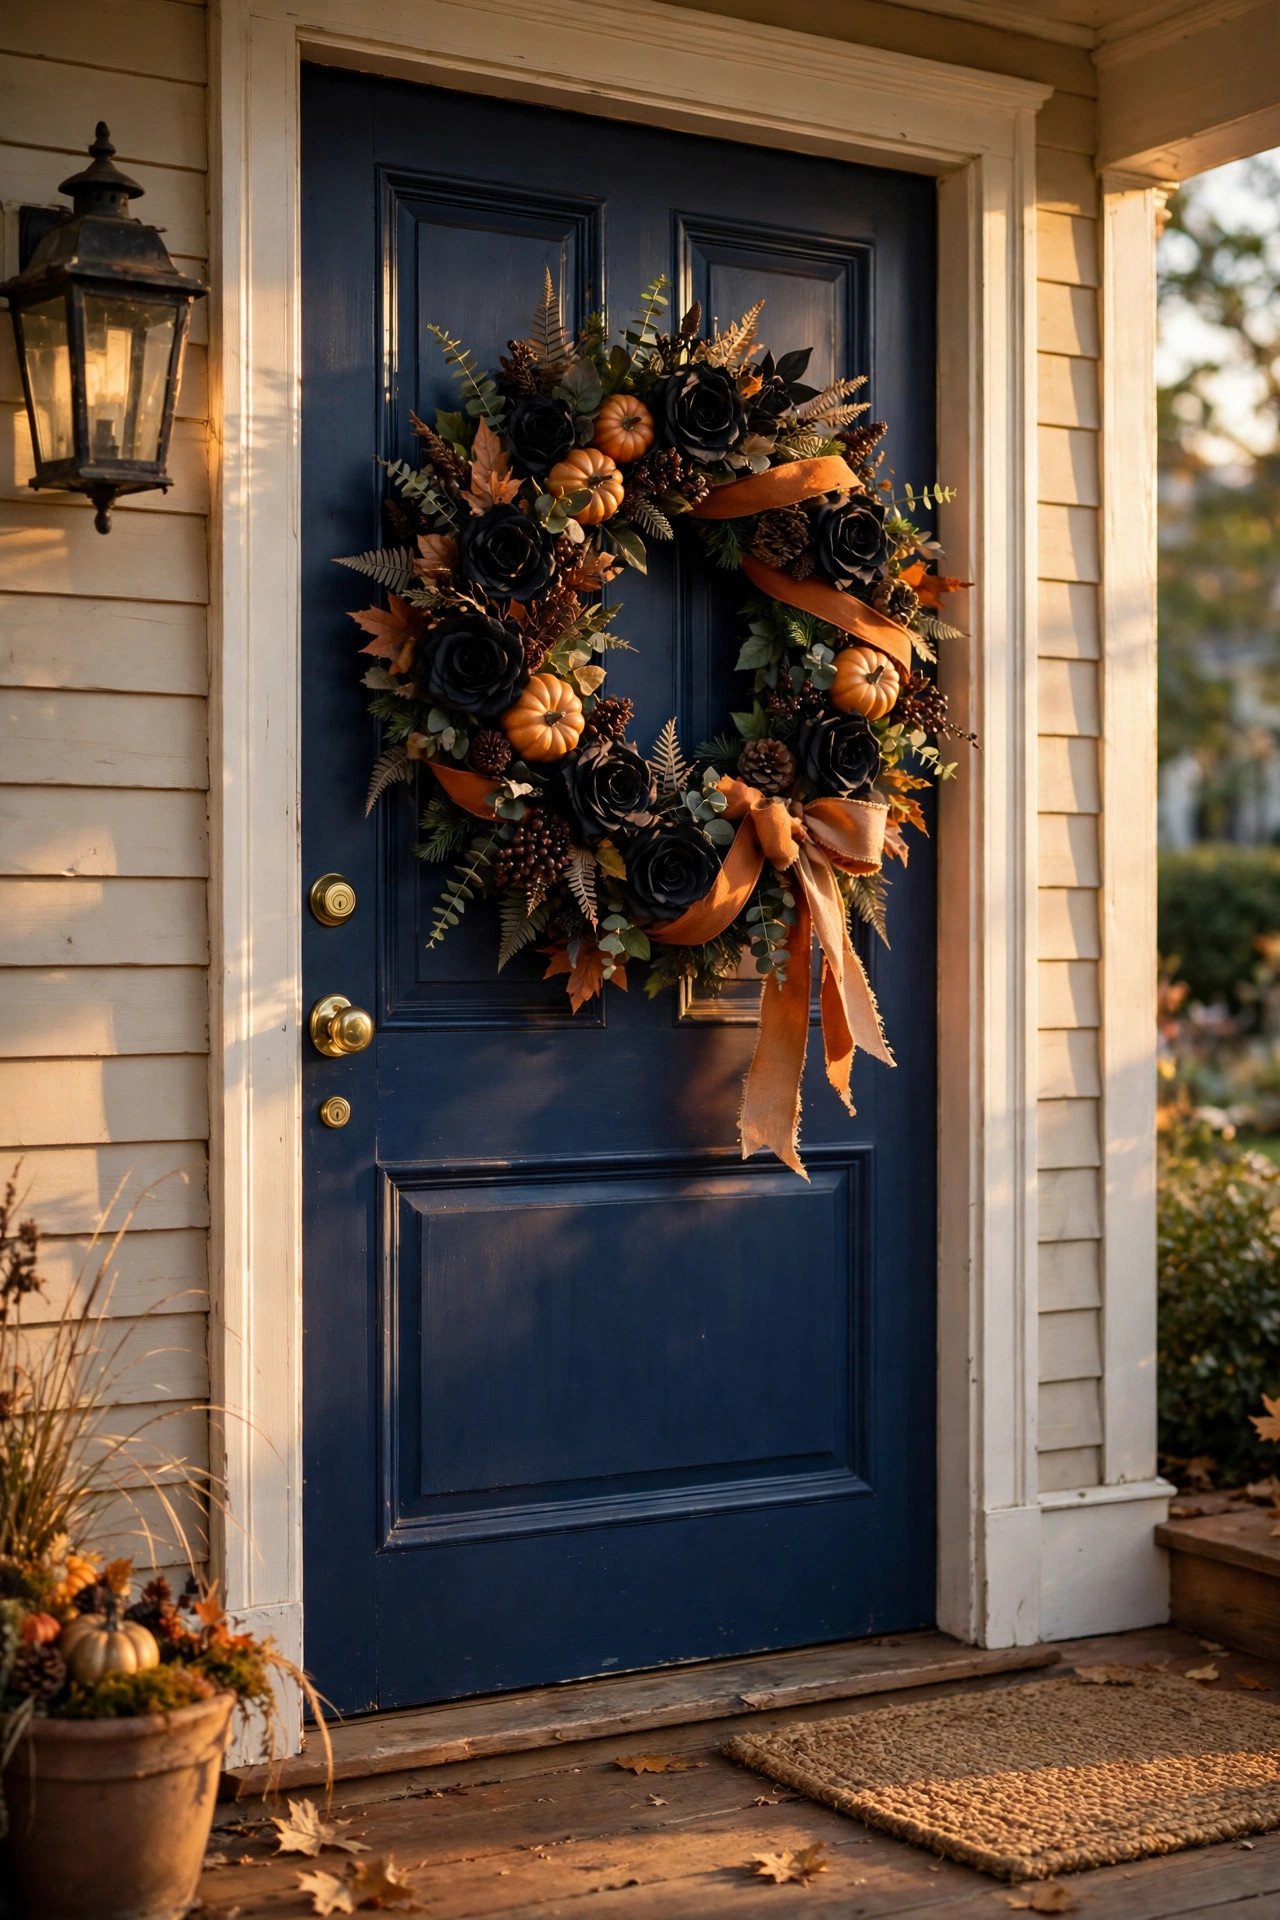
A statement Halloween wreath works as a door's focal point when it carries one clear theme — black roses and ravens, miniature pumpkins, or candy corn — at a generous 24-28 inch diameter, so it reads from the curb, not just the doorstep. Scale plus a single color story is what separates a focal point from clutter.
Build around a grapevine or foam base, then layer in the theme: dried fall foliage, small faux gourds, black feathers, or velvet ribbon in charcoal and burnt orange. Craft-store wreaths ($20-35) look surprisingly good once fluffed with one premium touch, like a metallic crow or burlap bow. Weatherproofing matters: spray natural pieces with clear matte sealer and favor faux materials for exposed doors. For 22 full wreath designs of every style, browse our dedicated Halloween wreath ideas for a spooktacular front door guide.
3. How Do You Get That Spooky Spiderweb Look on a Door?

Stretch cobweb (the bagged polyester kind) diagonally across a door corner, teasing it thin with a comb until the fibers go nearly transparent, and you get a convincing haunted-web effect for about $5. Anchor the edges with removable mounting putty or adhesive hooks.
The secret is restraint: one loose, airy web spanning the upper corner of the door or the door-to-frame junction looks intentional, while a thick blanket just reads as stuffing. Add one oversized faux spider — 6-10 inches — clipped near the center, with a few smaller ones scattered. Outdoors, anchor at least four points and mist it with hairspray to stiffen the fibers against wind. Avoid webbing a door in heavy direct sun — UV breaks down polyester fibers within a week, leaving a dusty film instead of a web.
4. Can Renters Use Removable Vinyl Decals on Their Front Door?
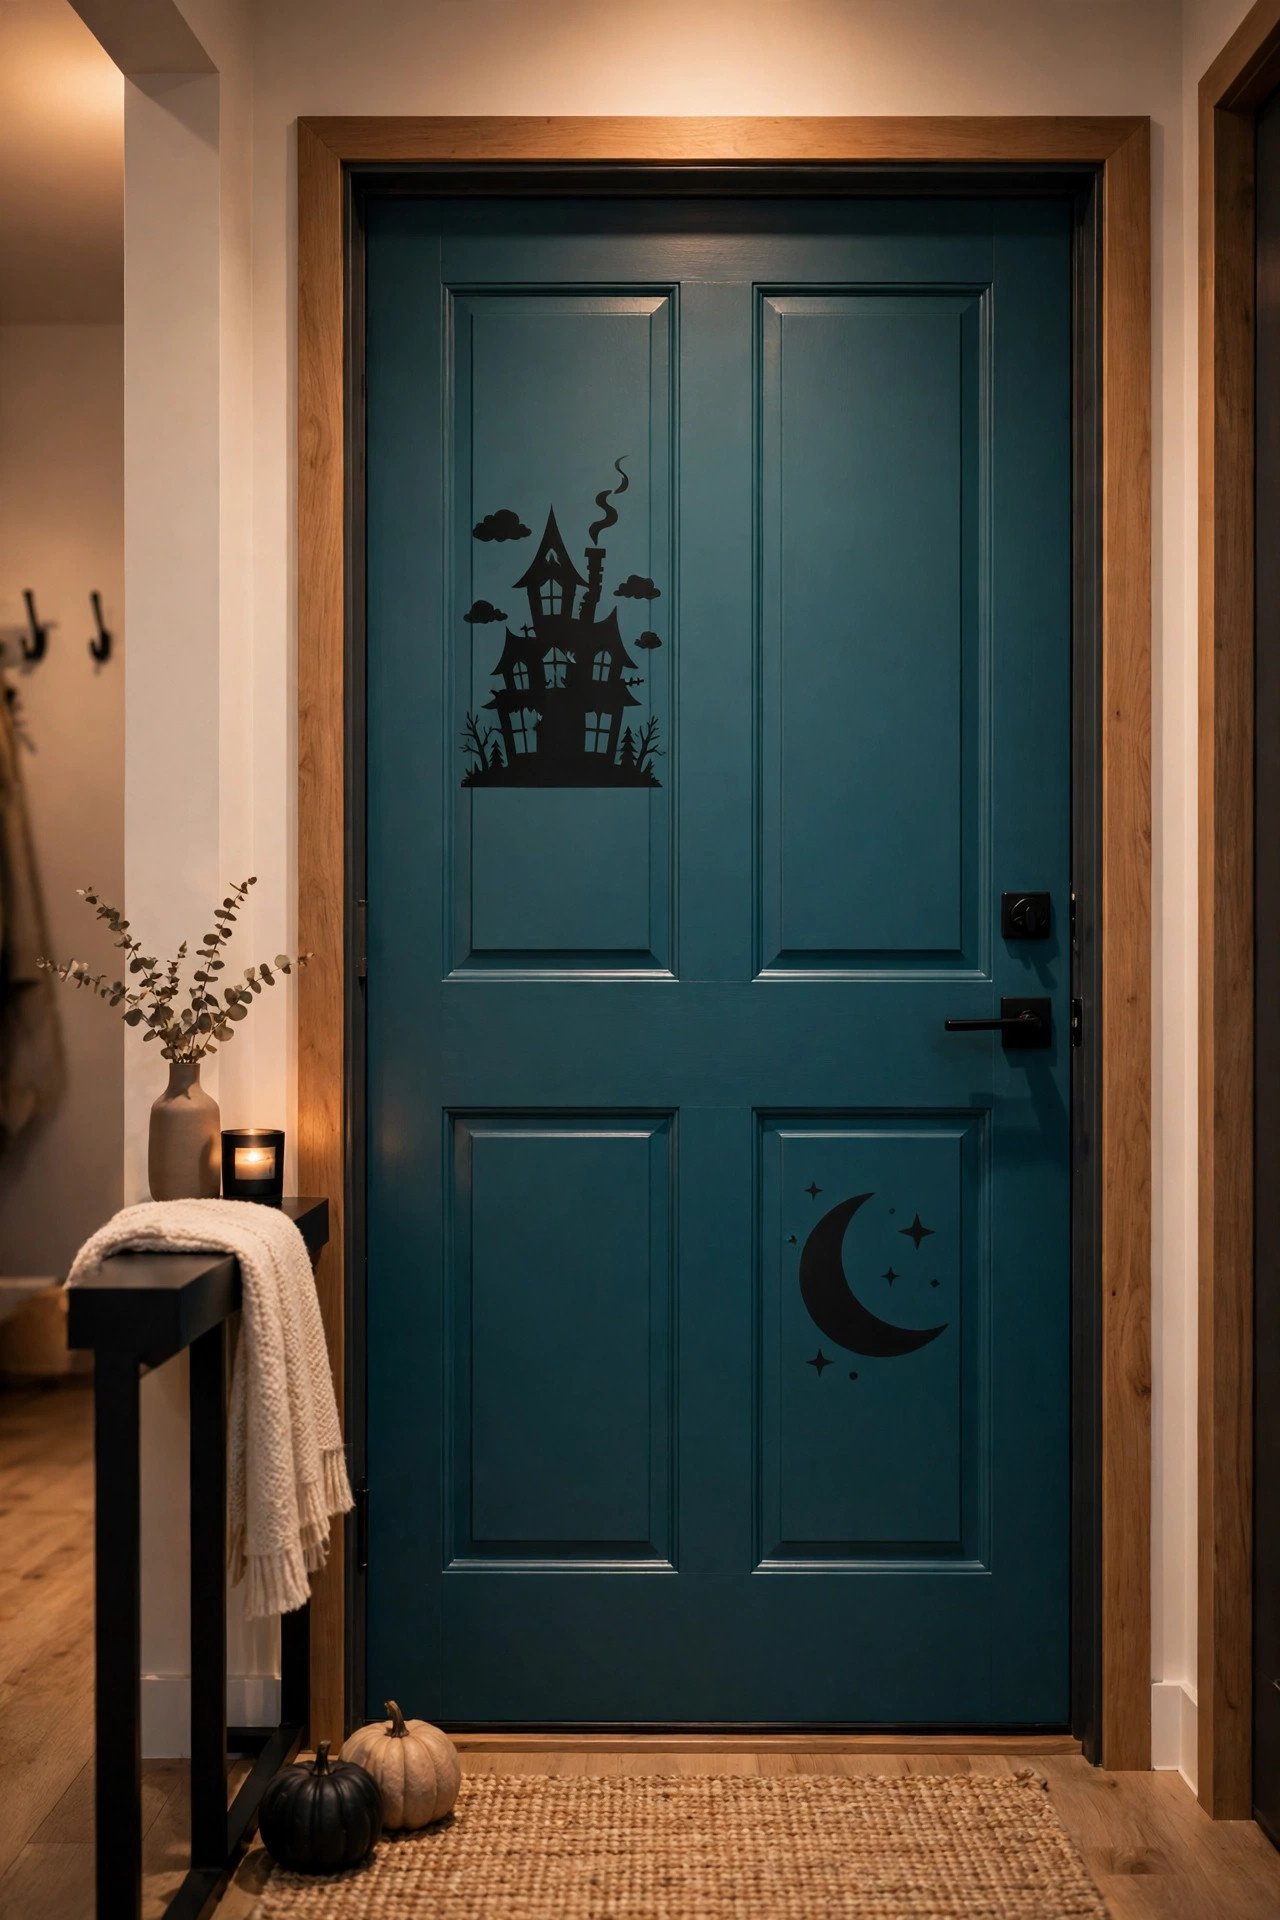
Yes — removable vinyl decals cling to smooth door paint with low-tack adhesive that peels away cleanly, making them one of the best renter-friendly Halloween door options available. Choose "removable" (not "permanent") vinyl, and test a corner on day one.
Decals suit the flat panels of a painted or fiberglass door: haunted-house silhouettes, moon-and-bat scenes, or spooky phrases like "Enter If You Dare." Full-door sheets (36×80 inches) run $15-30 and transform the whole door in ten minutes; smaller accent sets cost under $10. Smooth the film on with a credit card to push out bubbles, and keep the design off the door's moving edge so it doesn't peel when the door swings. Watch out for cheap permanent vinyl marketed as Halloween decor — it bonds over time and leaves residue, so read the listing twice.
5. What Should a Halloween Door Sign Say?
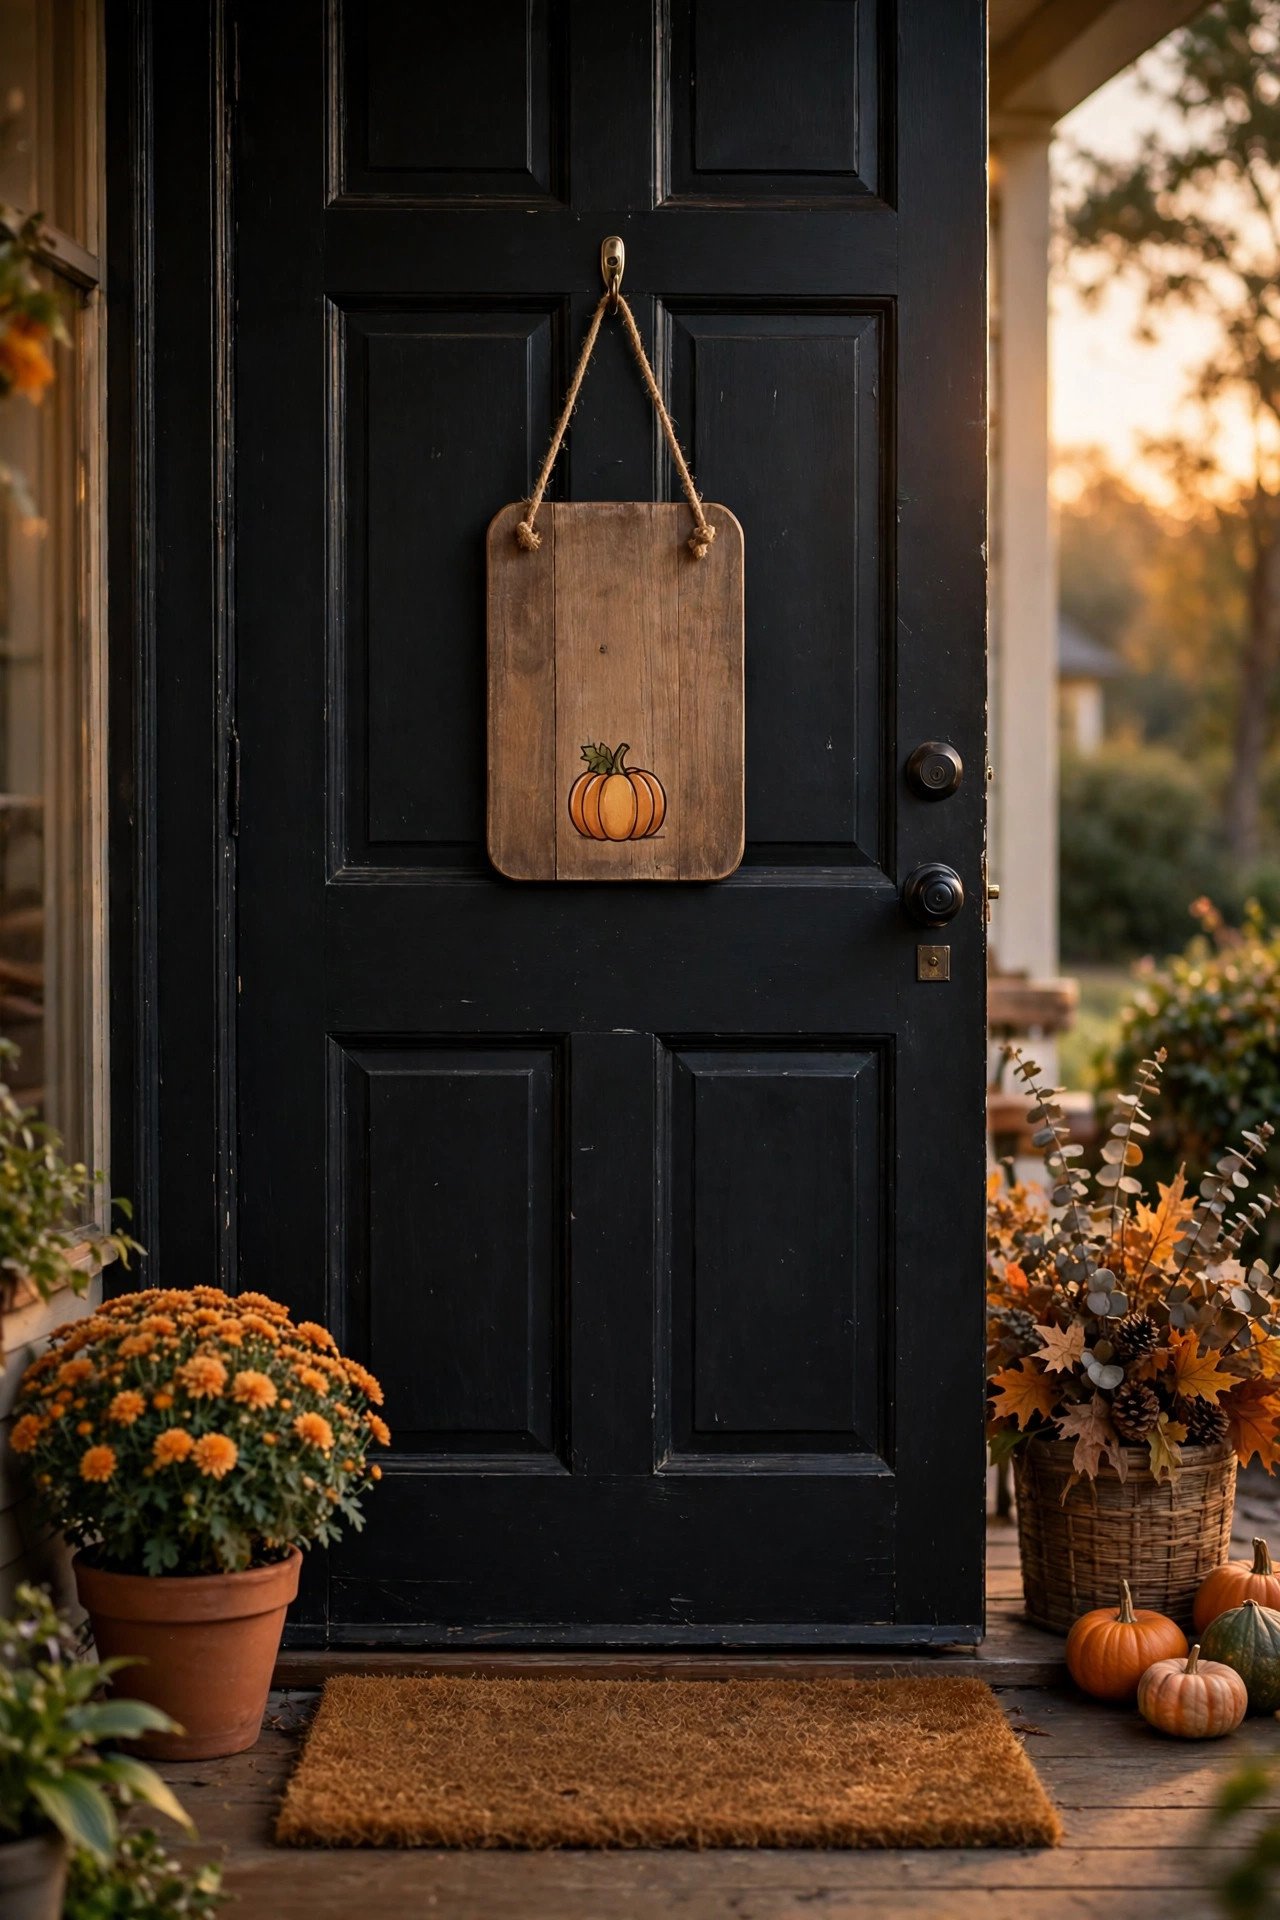
The best Halloween door signs pair a short, bold phrase — "Trick or Treat," "Happy Haunting," or "Witch Way" — with one graphic element, because door signs get read at walking speed from 6-10 feet away. One message, one image, high contrast.
Wooden signs with painted lettering ($15-40 at craft stores or on Etsy) are the workhorse — look for a hanger slot or pre-installed jute loop so mounting takes seconds. Chalkboard-style signs are the versatile runner-up: rewrite the message mid-season from "The Witch Is In" to a candy-bowl arrow on the 31st. Mount with an adhesive hook at the top-center, or lean a large sign on a stable stool beside the frame — no hanging needed. Avoid tiny script fonts and low-contrast pairs (purple on black) that disappear after dark unless you plan to light them.
6. How Do You Decorate a Glass Front Door for Halloween?

Glass front doors call for window-facing decor: static-cling decals on the interior glass, silhouette scenes that glow from inside light, and suction-cup hooks for light hanging pieces. Anything that reads through the glass from the street doubles your visual impact.
Static-cling window decals ($5-12 per sheet) are the hero product here — they stick with water, peel off with zero residue, and work on any smooth glass. Place silhouette decals (cats, bats, haunted houses) inside the glass so they're backlit by your entryway light after dark. For depth, layer: clings on the glass, then a small wreath or hanging sign on the solid rail below the window. Skip adhesive tape on the glass itself — the residue is stubborn, and clings give the same effect with none of the risk.
7. What Is the Easiest Way to Make a Door Look Mummified?

Wrap the door in wide white gauze strips — 3-inch crepe paper rolls or medical-style bandage rolls — crossing them at slight angles with gaps of exposed paint showing, and you get a classic mummy door for under $10. Secure the strips with painter's tape on the door edges.
Start at the top and work down in diagonal passes, overlapping each strip slightly so the white reads as layered wrapping rather than one sheet. Leave 2-3 inches of dark door paint visible between some passes — the contrast sells the effect far better than full coverage. Add two oversized googly eyes (6-8 inch, from the craft aisle) near the top to turn the door into a mummy face: that's the detail trick-or-treaters photograph. Painter's tape lifts cleanly within a few weeks, but test it on an edge first, and never substitute masking tape, which bakes on in sun. For apartments, this is an easy all-in-one transformation: no hangers, no holes.
8. How Can a Doormat Layer Double as Halloween Decor?

Layer a Halloween-themed coir doormat ($12-25) over a larger flat-weave outdoor rug ($20-40), and the doorstep reads as a styled vignette instead of a lone mat. The layered base frames everything flanking the front door and anchors the whole entrance.
Choose a coir mat with a bold, simple message — "Trick or Treat," "Hey Boo," or a jack-o'-lantern face — in black on natural coir, since fine detail gets lost underfoot within days. The base layer: a 2×3 or 3×5 foot flat rug in charcoal, buffalo check, or burnt orange — buffalo check reads Halloween without being costume-y and carries into November. Position the coir mat fully on the base rug with 4-6 inches of base visible on all sides. Coir sheds — sweep the base layer weekly, and store both flat or rolled after the season so they don't curl. Layering guides like those on The Spruce break down the technique step by step.
9. How Do You Frame a Door with a Halloween Garland?
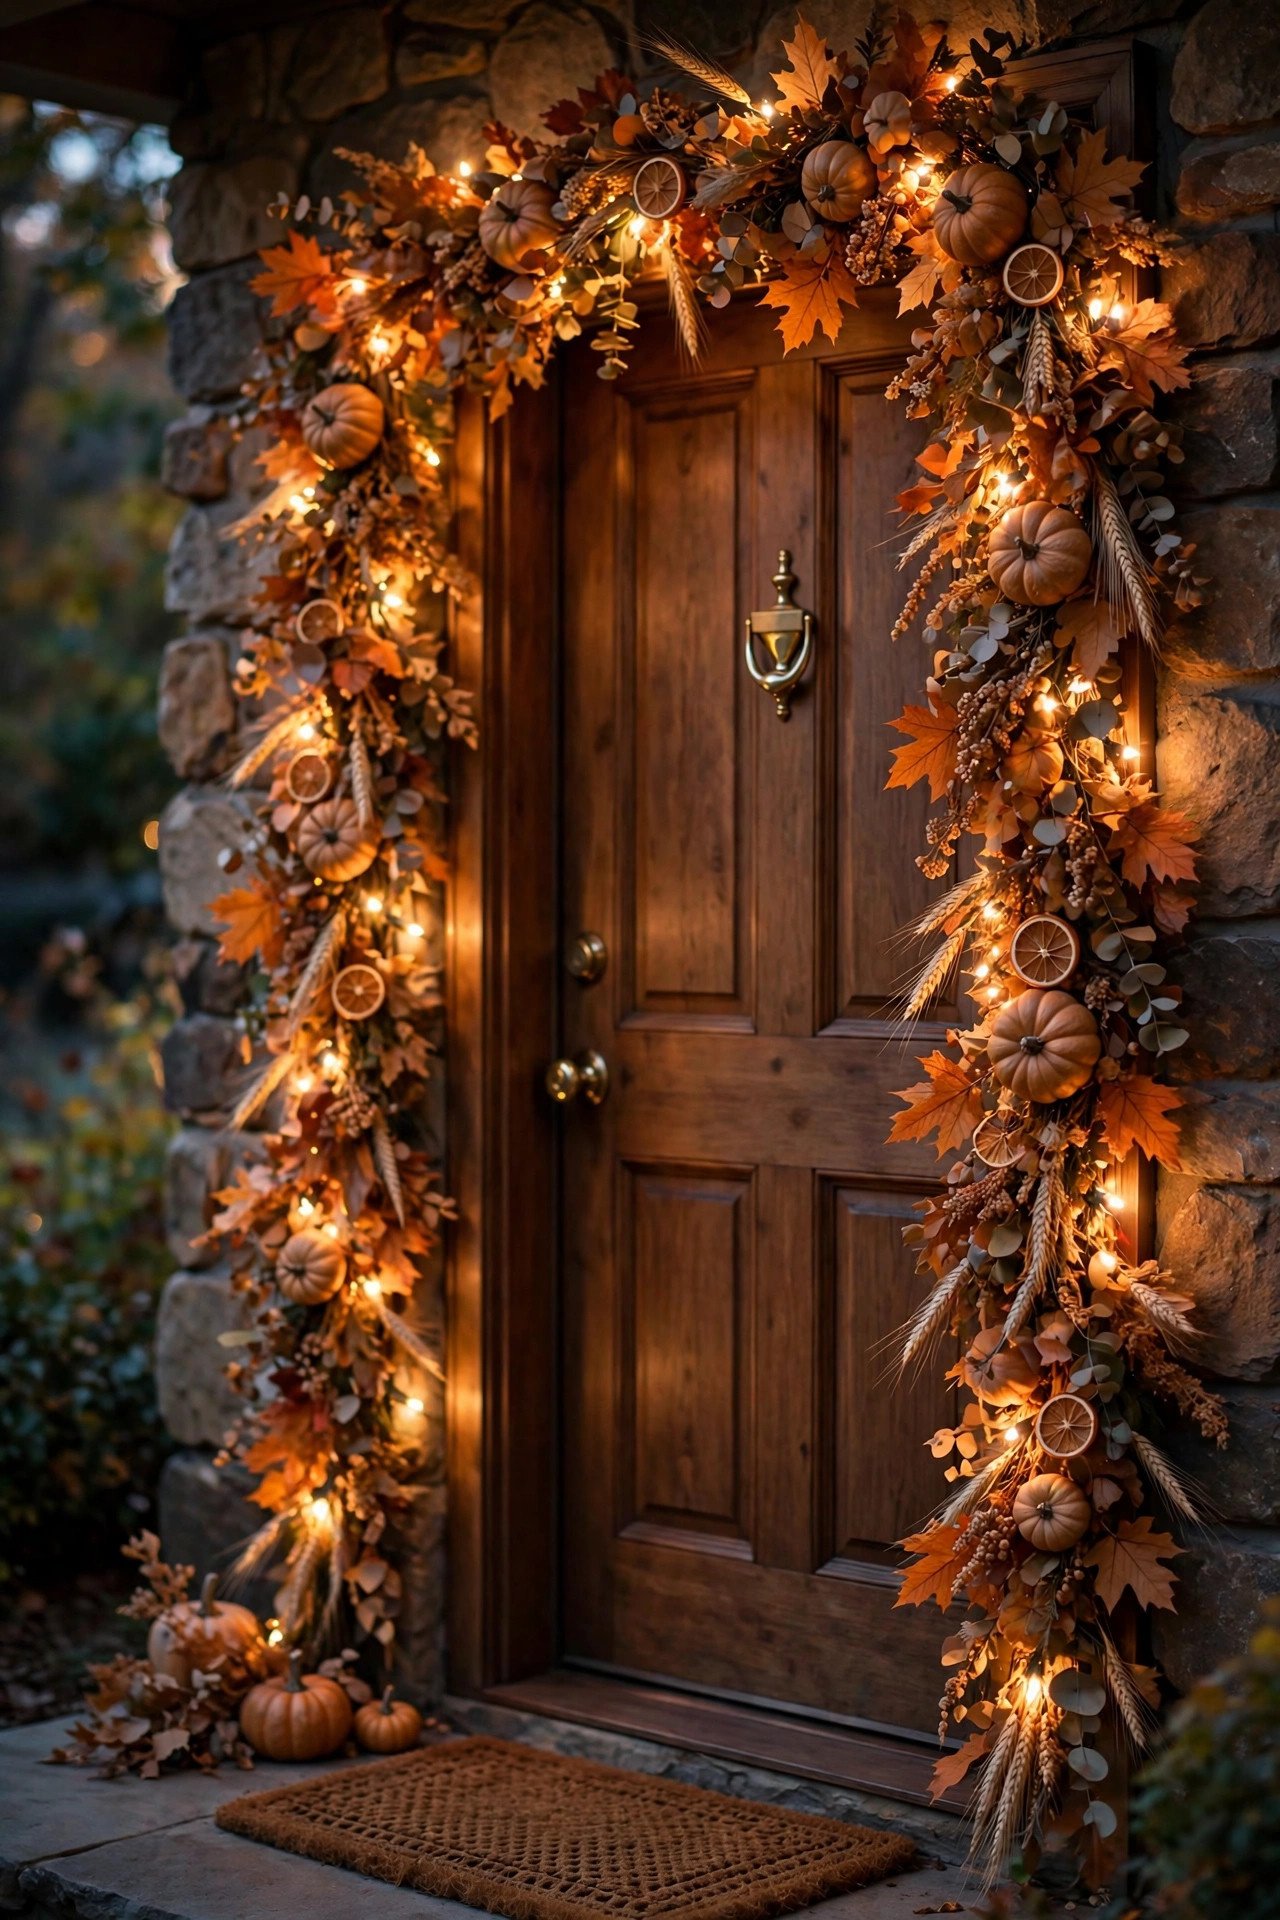
Drape a fall garland along the top of the door frame and let it cascade down both jambs, securing it with Command hooks every 12-18 inches, and the door instantly gains a finished, intentional frame. A 6-foot garland covers a standard door with enough left to pool slightly at the base.
Choose garlands with the right textures: dried fall foliage in burnt orange and ochre, mini pumpkins or acorns woven in, or black eucalyptus for a moodier look. Real dried foliage is gorgeous but brittle — reserve it for covered doorways, and use quality faux garland on exposed doors where rain would shred it. Weave in 50-100 count warm-white fairy lights (battery-operated, $8-12), hiding the pack behind the top corner. Mount on the trim, not the slab, and keep it off the door's swing path.
10. Why Do Lanterns Flanking a Door Work So Well?
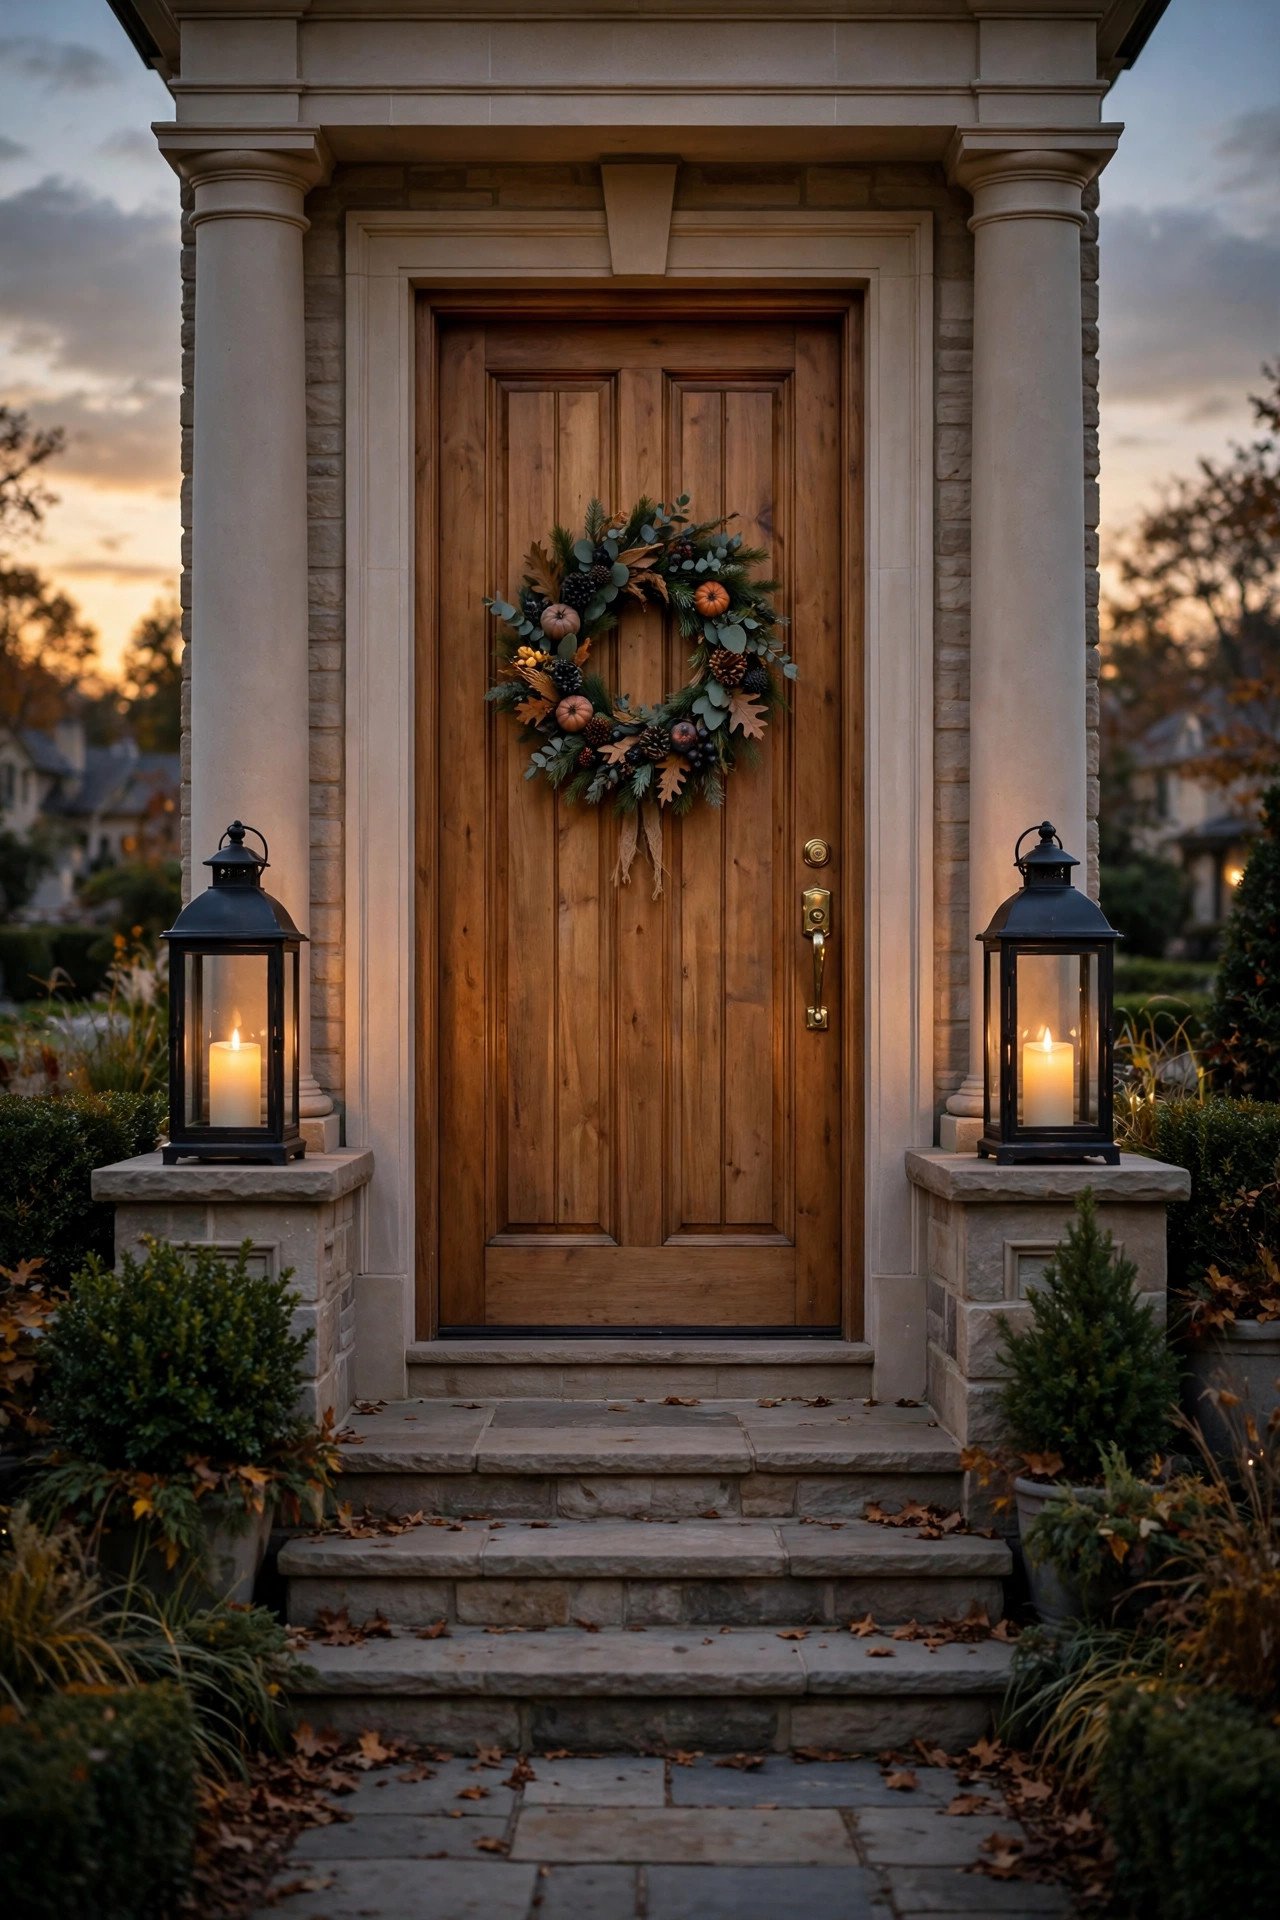
Paired lanterns at the door create symmetrical visual weight that grounds the whole entrance, and once lit with flameless LED candles after dark, they become beacons that draw trick-or-treaters straight to your door. Symmetry plus light is the fastest route to a grand entrance.
Use weatherproof metal or resin lanterns ($15-35 each) with glass or acrylic panels, placed 12-18 inches to each side of the door on the step or stoop. Inside, drop in flameless LED pillar candles — the flickering warm-amber versions read as real flame from the street with zero fire risk around children and costumes. Size lanterns to your door: a 36-inch door wants 14-18 inch lanterns; bigger doors can carry 20+ inches. Place them back from the swing radius and the walking path — tip-overs are the number-one outdoor decor casualty on Halloween night.
11. How Do You Make the "Gift-Wrapped Door" Halloween Trick?

Divide the door into panels with wide black ribbon ($6-10 per roll) taped at the edges with removable mounting tape, add an oversized bow at the top-center, and your door reads as a wrapped present with a spooky color twist. The geometry of the ribbon lines is what makes it work.
Map the ribbon first with painter's tape to plan straight lines — crooked ribbon ruins the illusion. Run two vertical and two horizontal strips to echo the door's panel structure, securing each with clear removable mounting squares at the intersections. Finish with a big bow ($10-20 pre-made, or from 2.5-inch wired ribbon) hung at the center top on an adhesive hook. For Halloween, pair black ribbon on a dark door with orange or blood-red accents, or black ribbon on a white door for high contrast. Avoid wired ribbon outdoors in rain — the wire rusts and can stain the door.
12. What Door-Safe Adhesive Should You Actually Trust?

Trust outdoor-rated Command strips and hooks, removable mounting putty, and clear removable mounting squares — all three release with a pull tab or gentle peel and are tested for paint-safe removal. Match the product to your decor's weight and the door's surface.
Outdoor-rated Command strips handle up to 4 pounds each in heat and humidity — the default for signs, bats, and lightweight garlands; standard indoor strips can fail on a sun-warmed door. Removable mounting putty suits small items under a few ounces (paper bats, small spiders) but softens in direct heat, so reserve it for shaded doors. Whatever you use, the rules are the same: clean the surface with rubbing alcohol, press firmly for 30 seconds, wait the package's full cure time, and remove slowly on November 1st. Never improvise with hot glue, super glue, or duct tape on a door — all three can pull paint on removal.
13. How Do You Create a Hanging Bat Swarm Above the Door?
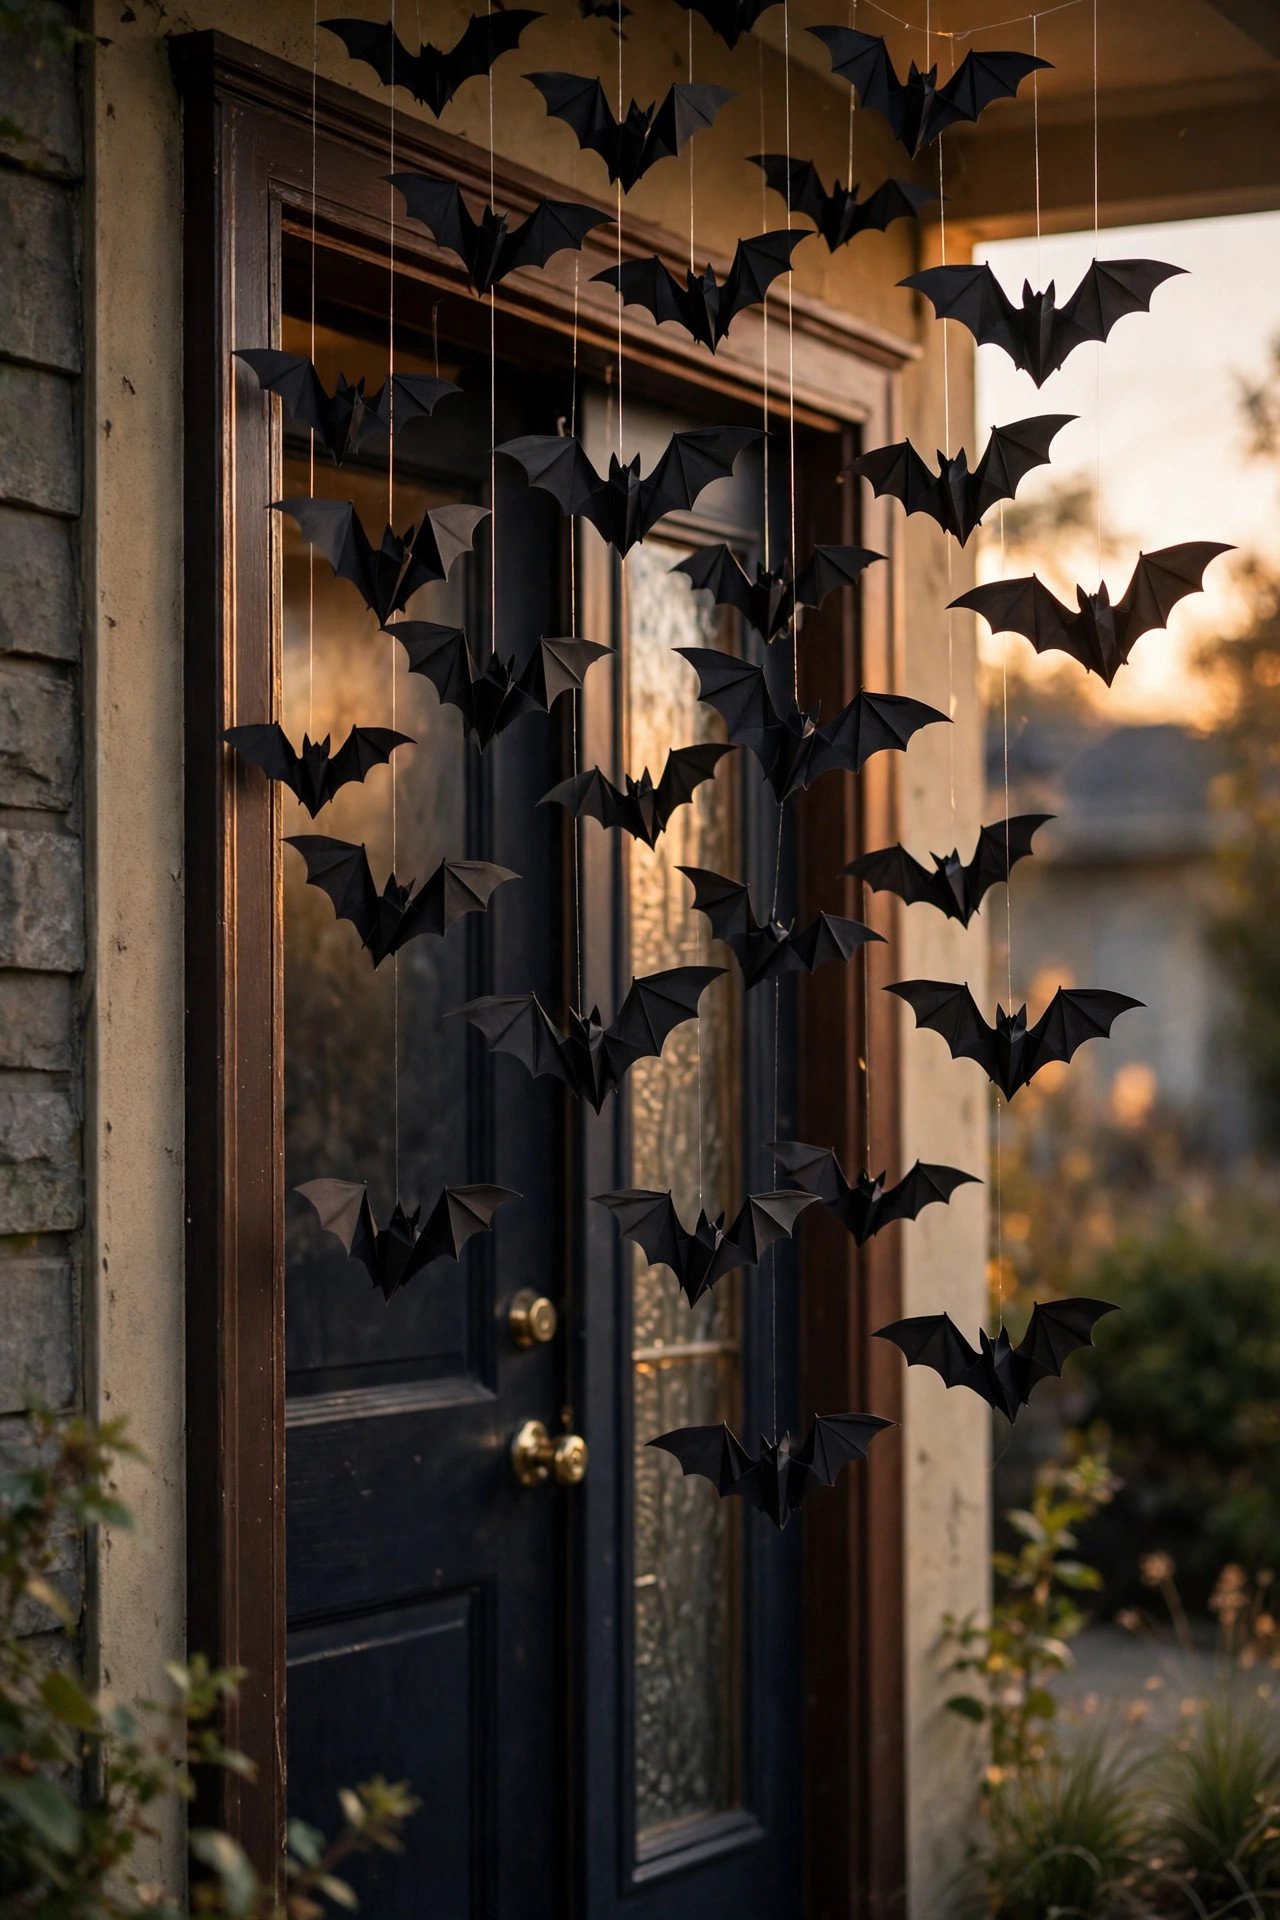
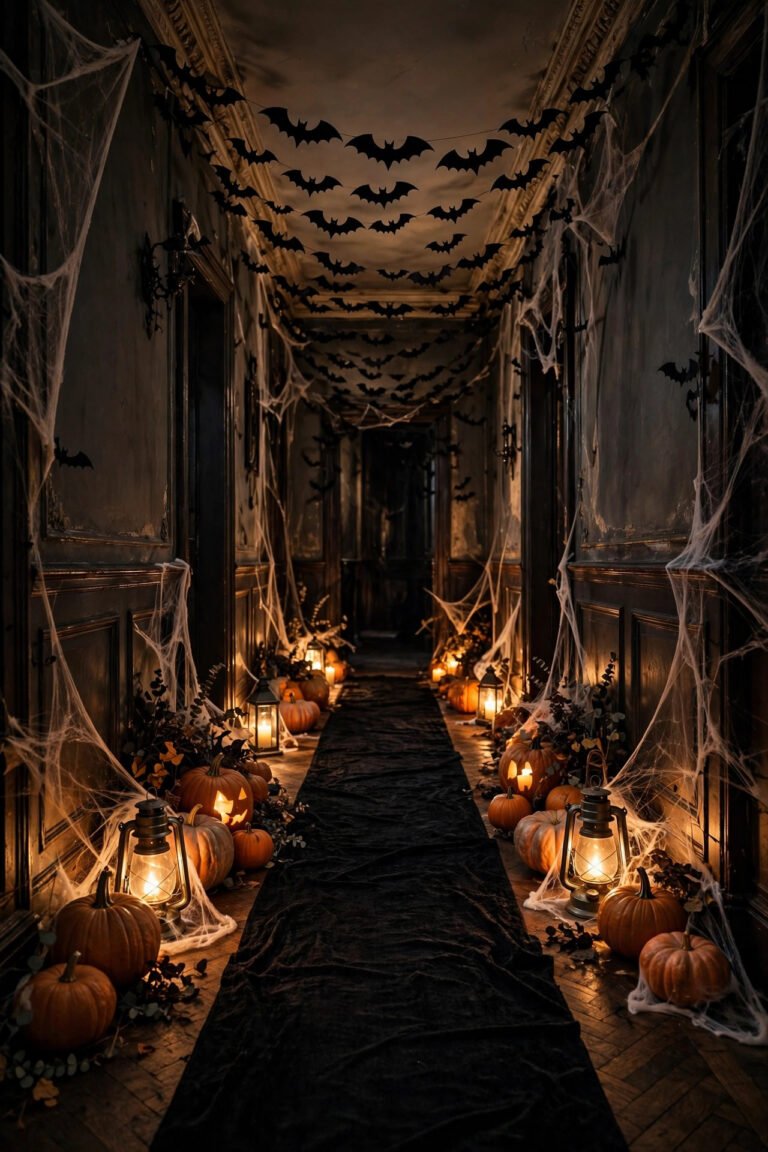
Suspend 12-20 paper or plastic bats at staggered heights from the door frame's top trim with clear fishing line and adhesive hooks, and you get a three-dimensional swarm that seems to fly out of the doorway. Height variation is the whole trick — bats at one level look like a mobile, not a swarm.
Cut bats from black cardstock (free templates abound) or buy pre-cut plastic bat packs ($8-12 for 50+). Fold each bat's wings upward along the body crease so they hold a flying shape instead of hanging flat. String them on fishing line with 4-10 inches of drop difference between neighbors, from 3-4 small hooks along the top of the frame. Keep the lowest bats at 6-foot-6 clearance so tall visitors don't walk through them. Outdoors, plastic bats beat paper — one rain shower ends a cardstock swarm. A renter favorite: everything hangs from hooks and line, and nothing touches the paint.
14. Can a Skeleton Door Knocker Really Greet Guests?
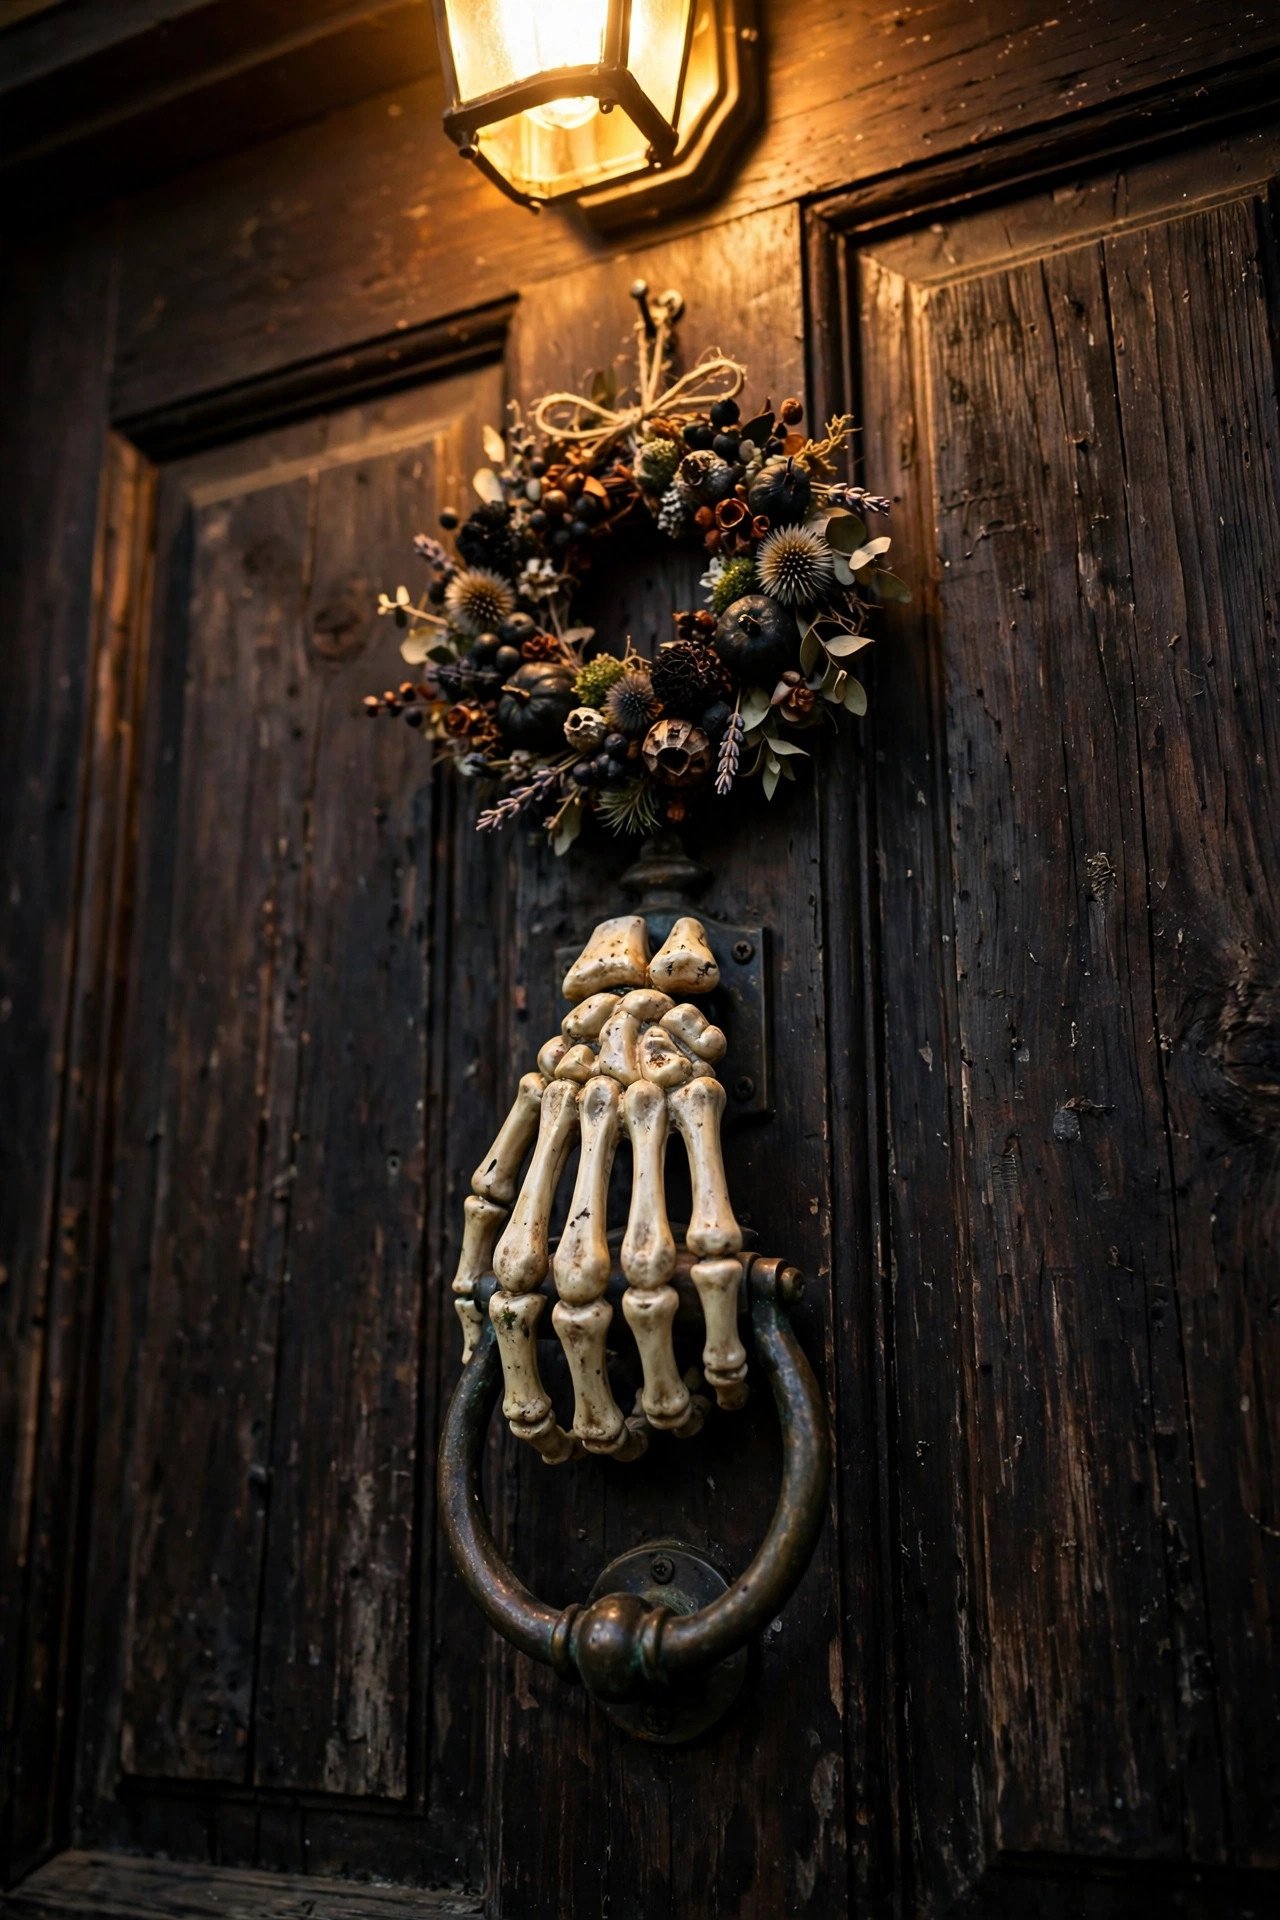
A resin skeleton-hand or skull door knocker ($15-30) replaces your usual door knocker as the single most tactile Halloween detail — guests literally touch it to announce themselves, which makes it the most memorable element of your door. It works because it's interactive.
Most Halloween knockers mount with the same two screws as a standard knocker or, for the renter version, hang from the existing knocker with a ribbon loop or adhesive hook. Look for cold-cast resin rather than hollow plastic: the weight and finish read as quality, and resin survives door-slamming vibrations that crack thin plastic within a week. Pair it with a wreath or sign above — knocker at hand level, statement piece at eye level. Skip this one if a video doorbell mounts on the door itself; a swinging knocker can rattle the camera housing. A small "Knock If You Dare" sign at eye level completes the effect.
15. How Do You Light a Front Door After Dark?

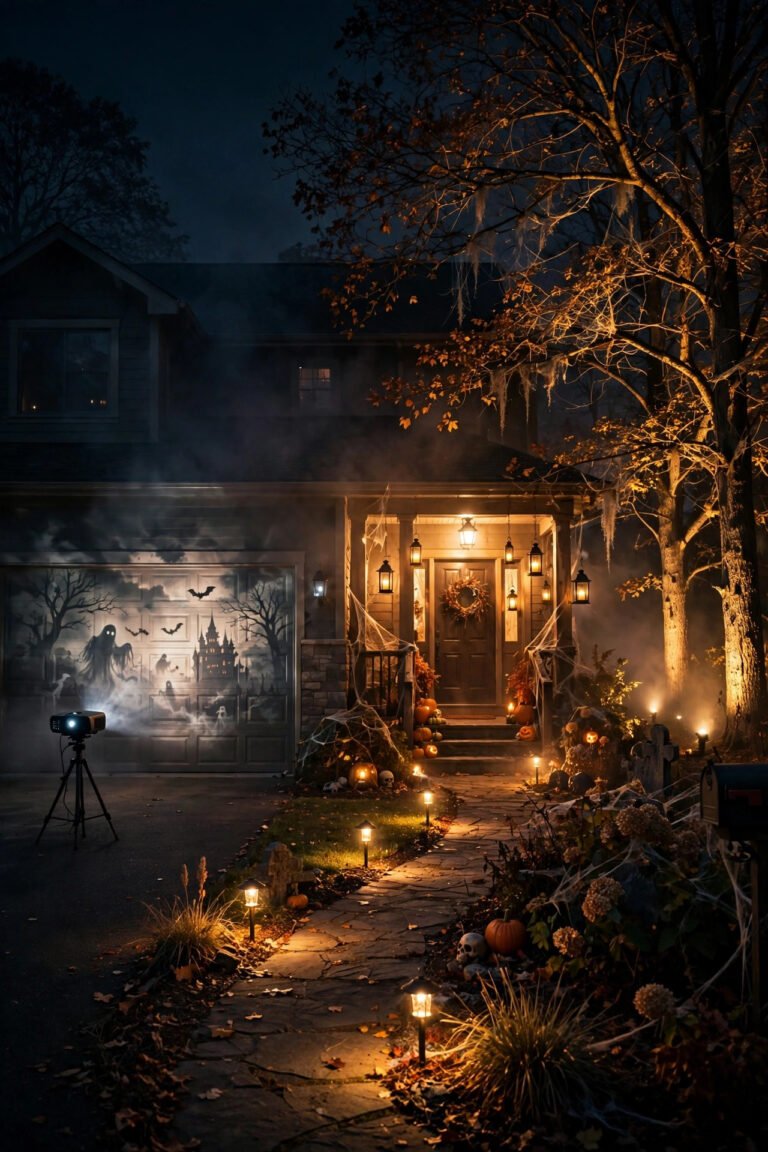
Combine one warm-white spotlight washing the door from a ground position with small light sources on the door itself — fairy lights, LED candles — and the door stays readable and welcoming after sunset, which is exactly when trick-or-treaters arrive. Two light layers beat one bright bulb.
A solar or battery-operated LED spotlight ($15-25) aimed up at the door from 6-8 feet out creates dramatic uplighting that makes colors pop. On the door, battery fairy lights woven through a garland or wreath add sparkle at eye level. Keep the porch light on too — visitors need to see where to step. Choose warm white (2700-3000K) over cool white or colored light for the door itself; colored lights belong on the lawn decor, while the door should feel inviting. Avoid real candles near the door on Halloween night — costumes are flammable, and flameless LEDs give the same glow with none of the risk.
16. What Is the Chalkboard Door Sign Approach?

A large chalkboard or chalk-style sign hung at eye level on the door lets you write, erase, and rewrite your Halloween message all season — "The Witch Is In" in early October, "Candy This Way" on the 31st — making it the most flexible door sign option. One sign, infinite messages.
Buy a pre-made chalkboard sign with a jute hanger ($12-25) or a chalkboard vinyl decal for a flat panel; both mount with adhesive hooks. Use chalk markers rather than real chalk — markers survive drizzle and stay legible, while real chalk streaks at the first hint of moisture. Keep the message to 3-5 words in large block letters; door signs get read from several feet away, and small script vanishes in the dark. At season's end, a damp cloth erases chalk markers completely, and the sign stores flat. Pair the sign with a wreath above or garland around it so the door doesn't read as empty except for the board.
17. How Do You Build a Pumpkin Topiary for the Doorstep?
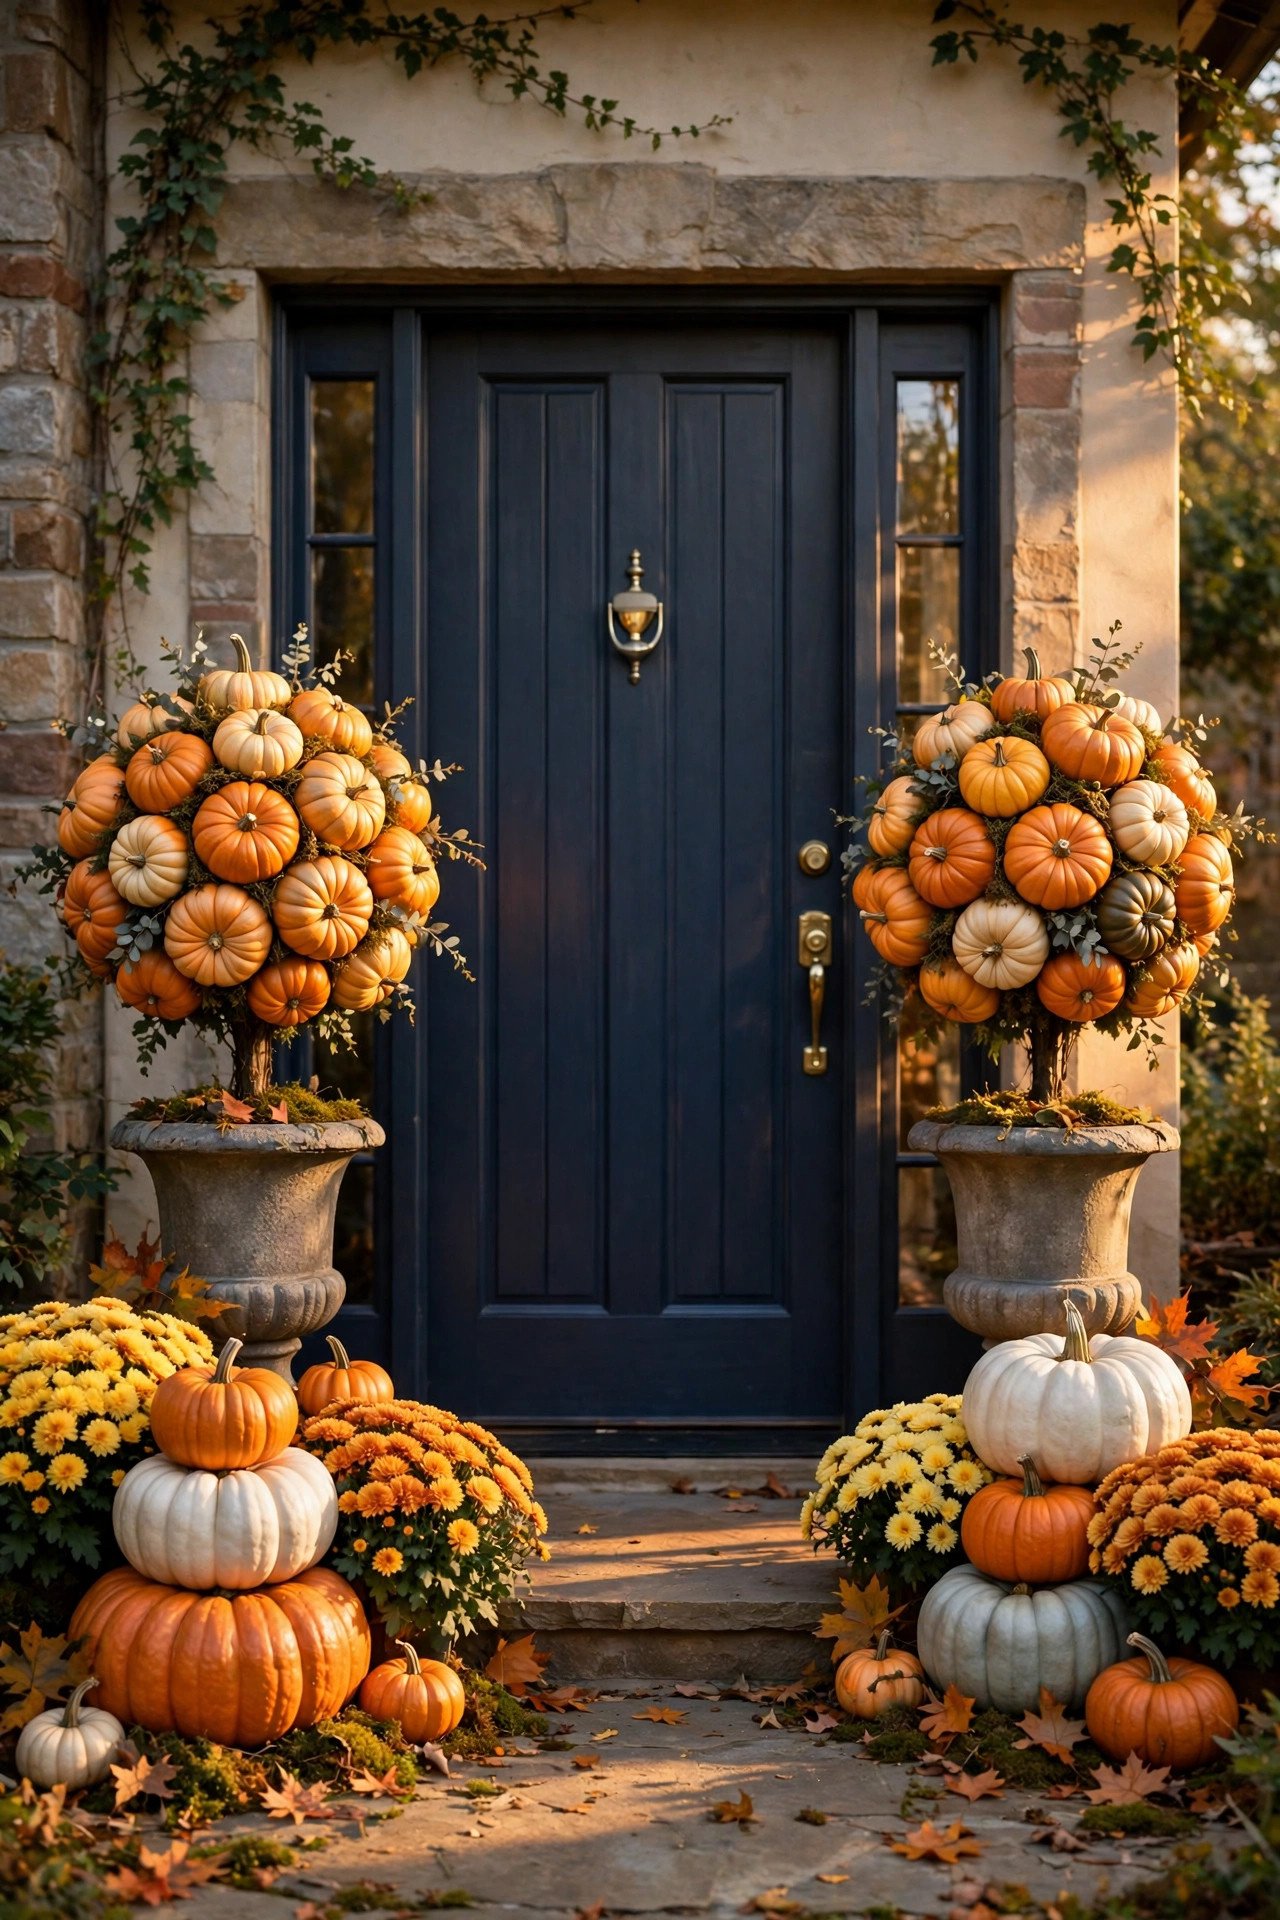
Stack three pumpkins — real or faux, largest on the bottom — in a sturdy urn or on a stackable stand, tucking moss and mums into the gaps, and you get a classic pumpkin topiary that anchors the immediate doorstep without leaving the door zone. Height plus symmetry equals instant polish.
Place matching topiaries on both sides of the door, each in a weighted urn so wind can't tip them. Faux pumpkins (foam or resin from the craft store) are the practical choice for a display that sits out all month — real pumpkins soften and collapse after two weeks, especially stacked. Mix in heirloom varieties like Cinderella (flat, ribbed, orange-red) and Lumina (white) for an elevated look beyond generic orange. Tuck mums or ornamental kale around the base for fall texture that outlasts October. For embellishment, our no-carve pumpkin decorating ideas show mess-free techniques — and the glowing tradition is older than you think (see the jack-o'-lantern's history on Wikipedia).
18. Why Should You Match Your Decor to Your Door Color?

Because the same decoration reads completely differently against black, white, and wood — black wreaths vanish on black doors while orange garlands glow, and the wrong contrast level can make expensive decor invisible. Contrast planning takes two minutes and doubles your impact.
On dark doors (black, charcoal, navy), lean into warm tones — burnt orange, gold, copper — and add metallic or lit elements so the decor separates from the background. On white or light doors, black, deep purple, and blood red create the classic high-contrast look. Natural wood doors are easiest: almost any palette works, though warm autumn tones harmonize best with the grain. Test your main pieces in place at dusk, then view from the curb: what reads as "too much" in daylight often reads as "just right" after dark. When in doubt, add one light source — lighting fixes more contrast problems than color swaps.
19. How Do You Do an Elegant Gothic Door Without Going Campy?

Restrict the palette to black, antique gold, and deep plum, use real materials — velvet ribbon, dried black roses, brass-finished lanterns — and skip the plastic skeletons, and the door reads as gothic elegance rather than a costume party. Restraint is the difference between chic and campy.
Start with a black or near-black wreath (dried foliage sprayed matte black, $25-45) on a simple over-door hanger. Flank the door with two matching lanterns in antique brass or matte black, lit with warm flameless candles. Add a black velvet bow or a gothic sign in a serif font — "Haunted Manor," not "Spooky!" — and finish with a black-and-gold doormat. Keep the count low: wreath, lanterns, one sign, one mat — anything more tips into cluttered. Keep the big rule in mind: if it looks like it came from a costume shop, it doesn't belong on a gothic door.
20. What Makes Candy-Corn Door Panels So Effective?

Candy-corn door panels work because they turn the door's own panel structure into a giant, unmistakable graphic — three foam boards (white, orange, yellow) cut to fit each recessed panel, mounted with removable squares — and the result reads from half a block away. Scale is the whole strategy.
Cut 1/4-inch foam boards to fit inside each raised panel frame, painted in candy-corn bands (white top, orange middle, yellow base — the authentic order), and press them into place with removable mounting squares. A standard 6-panel door costs under $20 and takes about an hour. Measure each panel individually — panels vary slightly — and trim with a sharp craft knife for clean edges. A great family craft: kids paint while an adult cuts. Paint the boards in the garage or driveway to avoid overspray, and let them cure fully before mounting.
21. How Do You Decorate Around a Smart Doorbell or Camera?
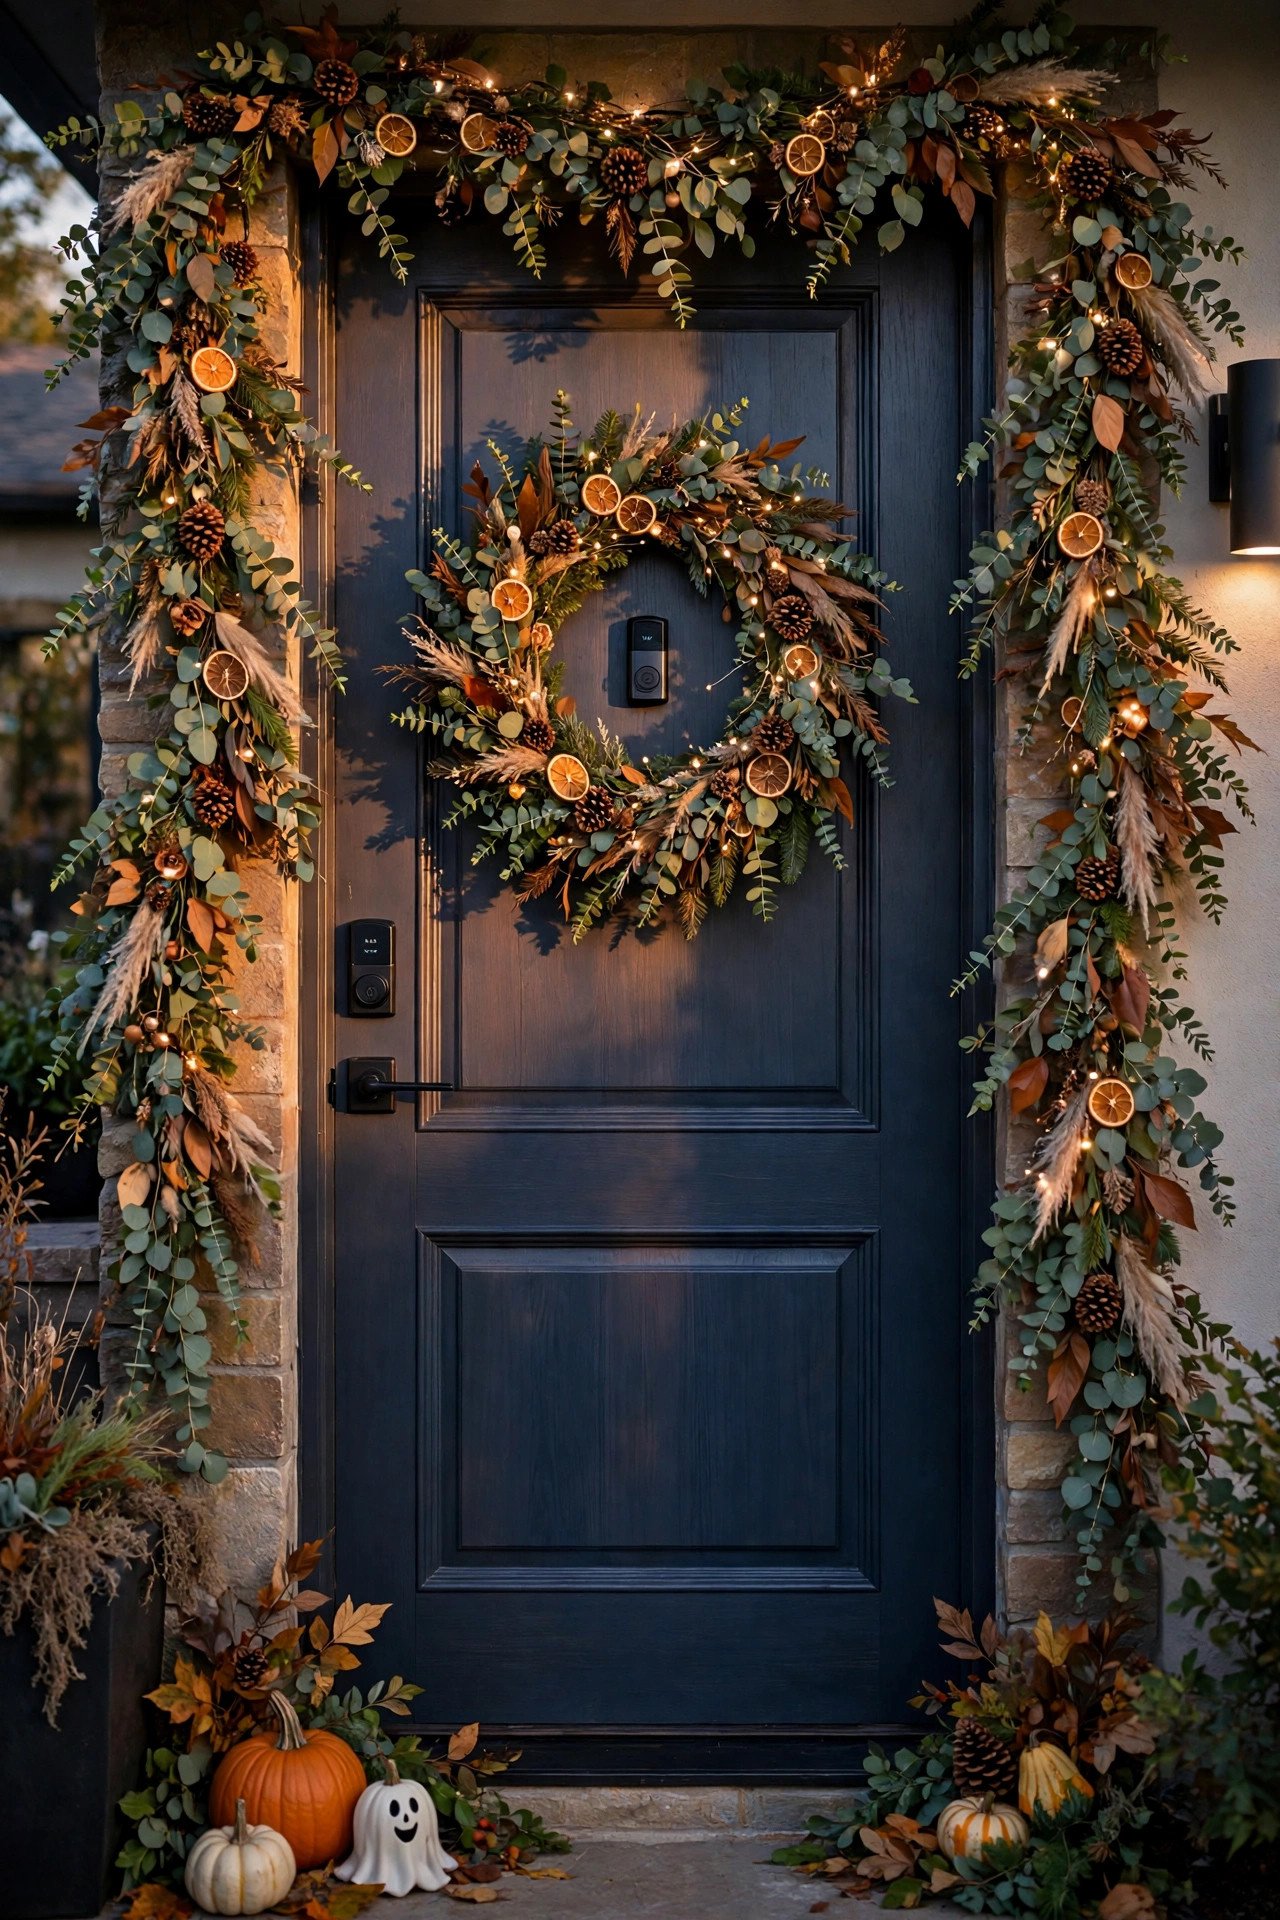
Keep decorations at least 12 inches clear of any video doorbell or camera lens, use non-metallic materials near the unit, and never cover the motion sensor — your doorbell still needs to see and record on Halloween night, when you arguably need it most. Decorate around the tech, not over it.
Plan the layout with the device as a fixed obstacle: hang the wreath higher or off-center, route garlands around the camera-side jamb, and keep bats and webs out of the lens's field of view. Avoid metal decorations within a foot of the unit — they weaken Wi-Fi and trigger false motion alerts in wind. Test motion detection by walking the path yourself after decorating; reposition anything that causes constant alerts. The payoff: a security record of the busiest night of the year, with a door that still looks fantastic.
22. How Do You Make a Ghost Door That Looks Friendly, Not Cheap?
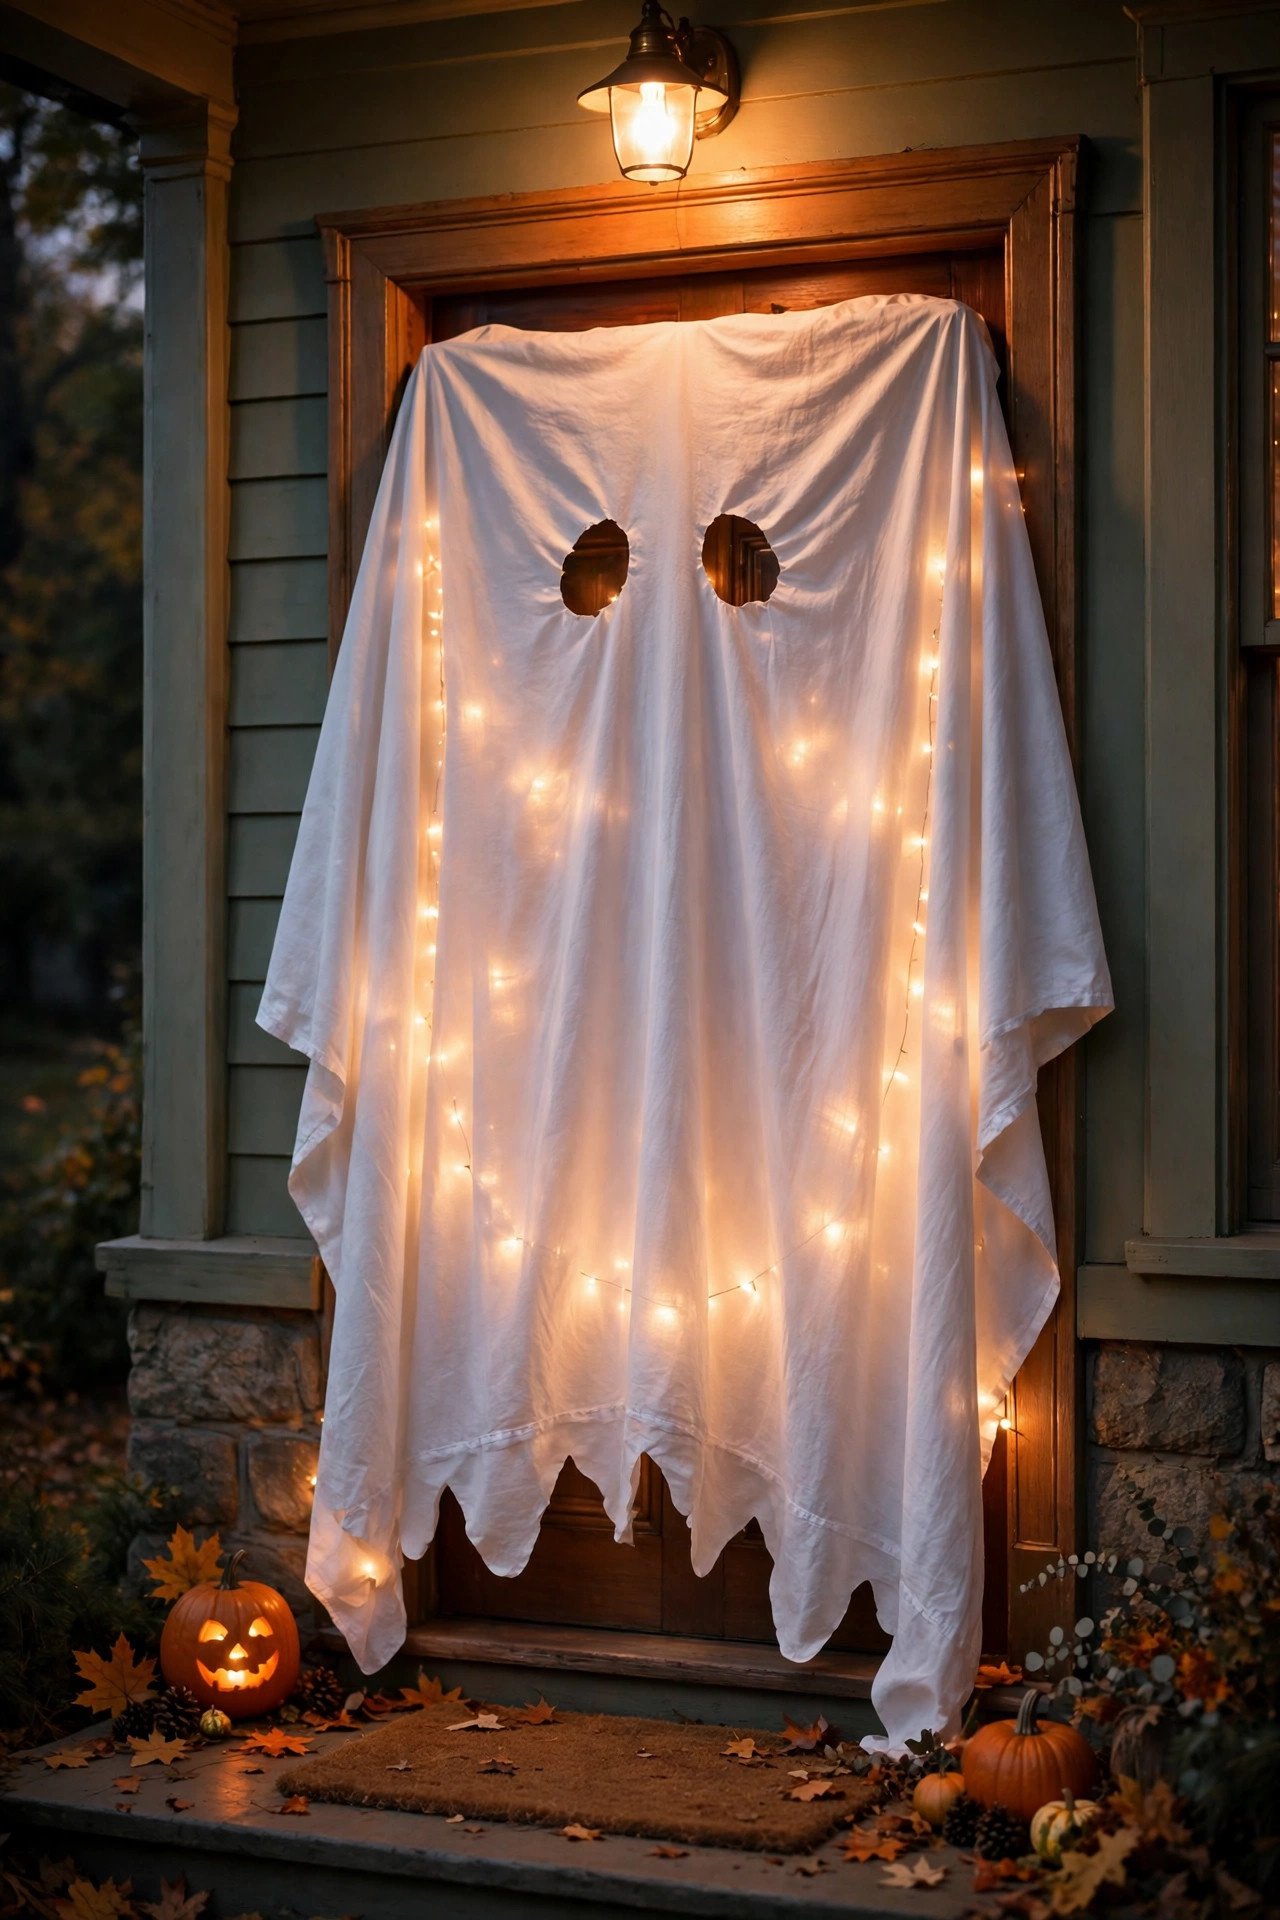
Drape a white flat sheet over the door like a ghost costume — eye holes cut at the top third, the bottom hem trimmed into gentle waves — and secure it behind the door edges with painter's tape, and you get an instant friendly-ghost door for about $8. The cut of the hem is what separates "ghost" from "laundry."
Use a white flat sheet (twin or full, $6-12) rather than plastic — fabric folds read as ghostly, while plastic looks like a drop cloth. Cut two oval eye holes and one oval mouth, then outline them with black fabric paint or marker so they read from the street. Trim the bottom into soft scallops rather than a straight edge. For a lit version, string warm-white fairy lights behind the sheet's top so the ghost glows softly after dark. The ultimate last-minute door: 20 minutes, one sheet, done. On windy exposures, tape the sheet's sides down so it can't blow into the walking path.
Practical Tips for a Flawless Halloween Front Door
Weatherproof from the start. Favor faux materials on exposed doors, seal natural pieces with clear matte spray, and use battery lights — outdoor extension cords on a doorstep are a tripping hazard. Check the Halloween-week forecast and bring in anything that can't take rain.
Mind the door swing. The door must open fully without catching garlands or signs. Mount frame decor on the trim face (not the jamb edge) and keep the slab's outer 2 inches free on the swing side — a door that snags decor every opening destroys your work within days.
Light for after dark. Trick-or-treaters arrive between 5:30 and 8:30 PM, when it's already dark. Porch light on, lanterns lit with flameless LEDs, one accent light washing the door. Walk to the curb at dusk and check what visitors actually see — adjust from there.
Keep it safe for little ones. No real candles near the door on Halloween night — costumes brush against everything. Keep small decorations above toddler reach, tape down cords and rug edges, and keep the candy zone well lit.
Plan the takedown. Everything here comes down cleanly if hung right — pull adhesive tabs slowly, peel decals from a corner, and store wreaths in bags, not crushed in boxes. Photograph your finished door; next year's setup takes half the time with a reference. For extending the look beyond the door, Better Homes & Gardens' Halloween hub covers outdoor setups and seasonal projects.
Frequently Asked Questions
Can I decorate a glass door or a door with a large window?
Yes — glass doors suit static-cling decals on the interior side, which glow when backlit by your entryway light after dark. Use suction-cup hooks for lightweight hanging pieces, and keep wreaths on the solid rail below the window. Never use adhesive tape on glass — the residue is stubborn, and clings give the same effect with none of the risk.
What are the rules for decorating a shared or apartment entrance?
Keep decor to your own door slab and threshold, never block common walkways or stairwells, and skip loud sound effects that could alarm neighbors. Check your lease or building rules first — many allow seasonal door decor but prohibit adhesives or nails. Removable hooks, static clings, and over-door hangers keep you compliant.
How do I keep lightweight decor from blowing away?
Anchor every piece at a minimum of two points, use outdoor-rated adhesive hooks rather than indoor ones, and add discreet clear fishing-line tethers from light items to the frame. Foam and paper pieces get a clear matte sealer coat for stiffness and water resistance. If your door faces prevailing winds, favor heavier pieces like lanterns over paper bats.
Will decorations interfere with my video doorbell?
Only if you let them. Keep a 12-inch clear zone around the lens and motion sensor, avoid metallic materials within a foot of the unit (they trigger false alerts and weaken Wi-Fi), and test motion detection by walking the path after decorating. One quick test saves a night of phantom notifications.
Can I leave Halloween door decor up through rain?
Faux materials, sealed natural pieces, and outdoor-rated adhesives handle rain fine — check labels for "outdoor" or "weatherproof." Unsealed paper, cardstock, and indoor-rated hooks fail in the first storm. If a downpour is forecast for the 31st, bring paper bats and chalkboard signs inside and rehang after; the rest can ride it out.
How do I coordinate my door with the rest of the porch?
Pick one palette and one theme, then let the door be the star and the porch the supporting cast. If the door carries a black-and-orange candy-corn theme, echo those two colors in porch pumpkins and lanterns rather than introducing a third. One palette, one story — from the curb to the door.
Final Thoughts
A grand Halloween entrance takes focus, not a big budget: pick a statement piece for the door, add light, keep the swing clear, and hang everything so it comes down clean on November 1st. Walk to the curb at dusk to check your work, and adjust. Your door is the handshake of your Halloween — make it a good one.
You May Also Like:
– 22 Halloween Porch Decor Ideas for a Spooky Stylish Entry – 22 Halloween Window Decor Ideas That Glow After Dark – 22 Outdoor Halloween Decor Ideas for a Spooktacular Yard – 22 Halloween Entryway Decor Ideas for a Spooky Welcome